How to Change Account Username on Windows 10

Your Windows account username is your identity with which you sign in to Windows. Sometimes, one may need to change their account username on Windows 10, displayed on the sign-in screen. Whether you are using a local account or using the one linked with your Microsoft account, there might arise a need to do so and in both the cases, and Windows provides you with an option to change your account username. This article will take you through different methods to do so.
How to Change Account Username on Windows 10
Make sure to create a restore point just in case something goes wrong.
Method 1: Change Account Username Via Control Panel
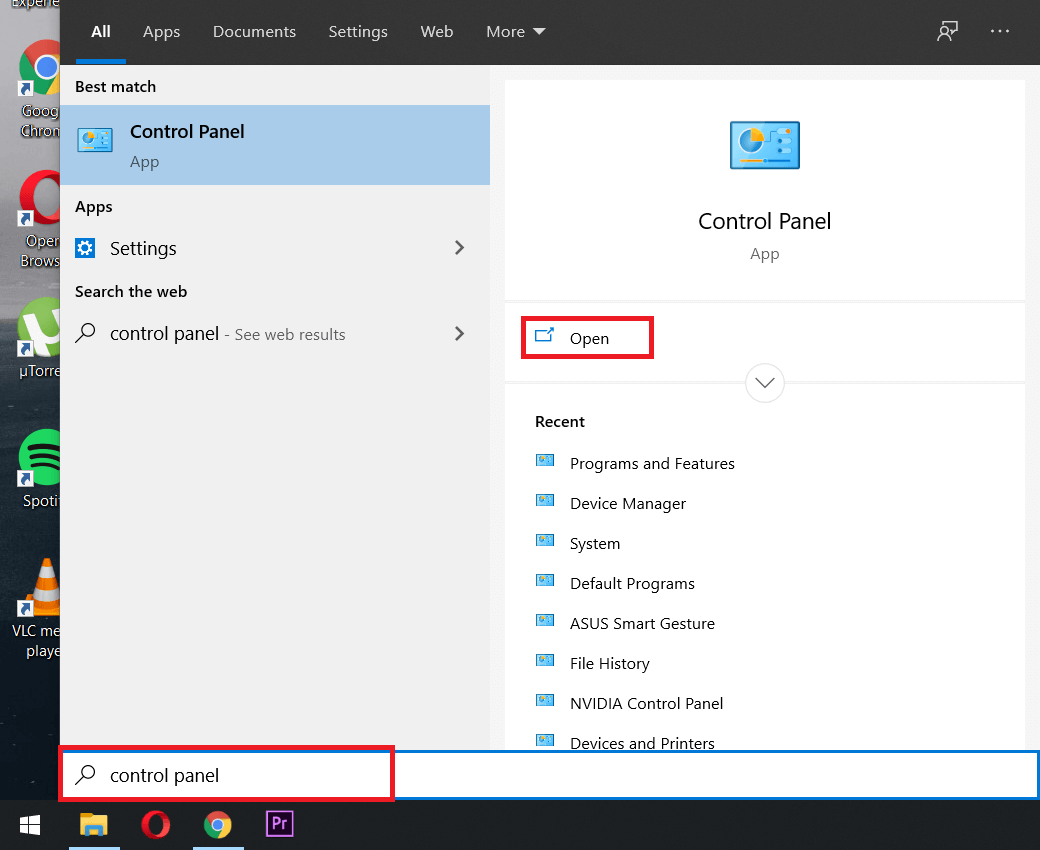
1. In the search field provided on the taskbar, type control panel.
2. Search for the control panel from the Start Menu search bar and click on it to open the Control Panel.
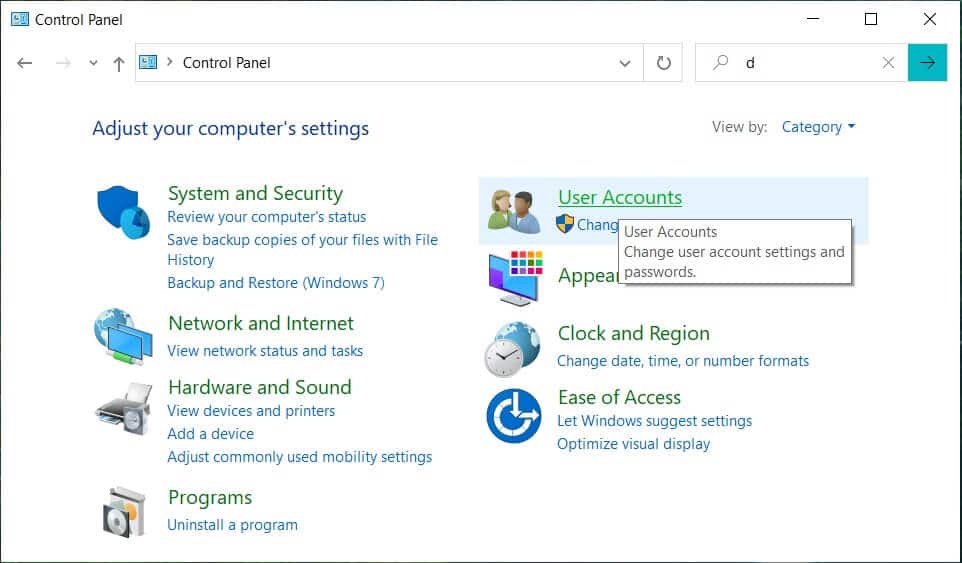
3. Click on ‘User Accounts’.
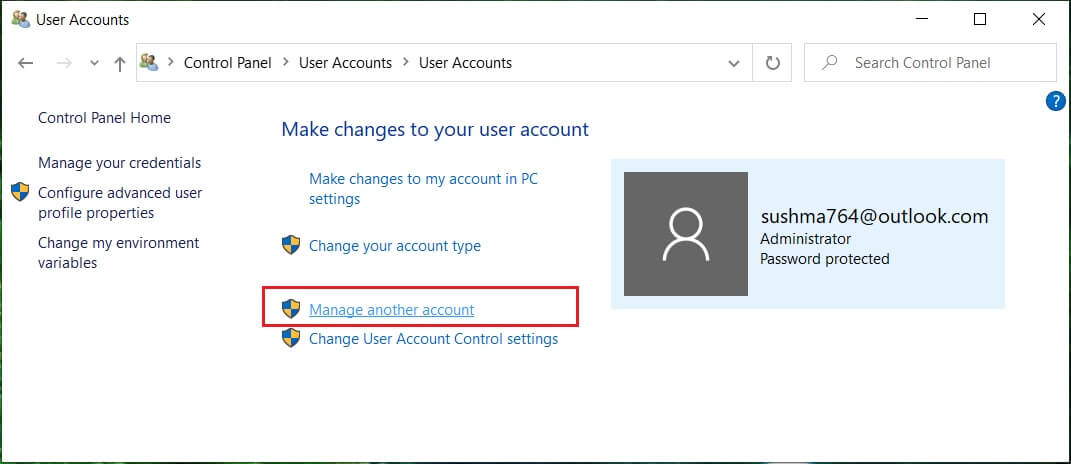
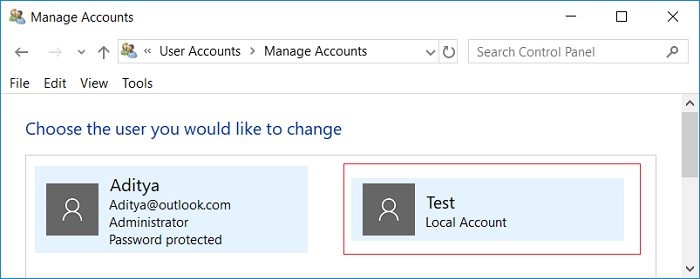
4. Click on ‘User Accounts’ again and then click on ‘Manage another account’.
5. Click on the account you want to edit.
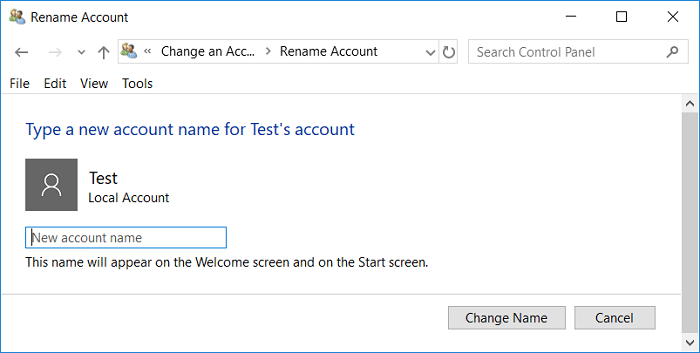
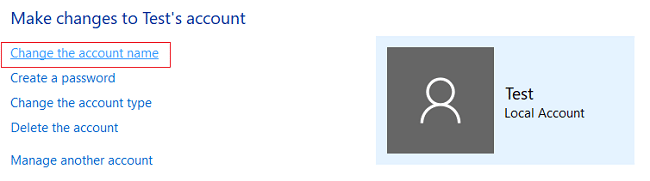
6.Click on ‘Change the account name’.
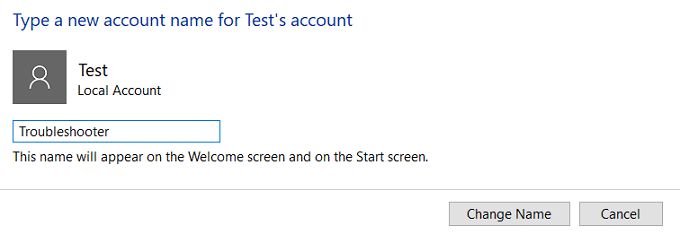
7. Type the new account username you want to use for your account and click on ‘Change name’ to apply the changes.
8. You will notice that your account username has been updated.
Method 2: Change Account Username Via Settings
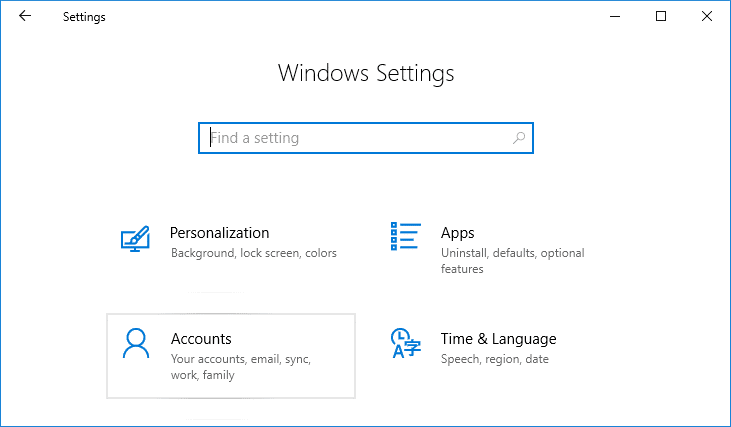
1. Press Windows Key + I to open Settings then click on Accounts.
2. Click on ‘Manage my Microsoft account’ located below your username.

3. You will be redirected to a Microsoft account window.
Note: Here, you also get an option to choose whether you want to use your Microsoft account for sign in or if you want to use a local account)
4. log in to your Microsoft account if you need to by clicking on the Sign-in icon on the top right corner of the window.
![]()
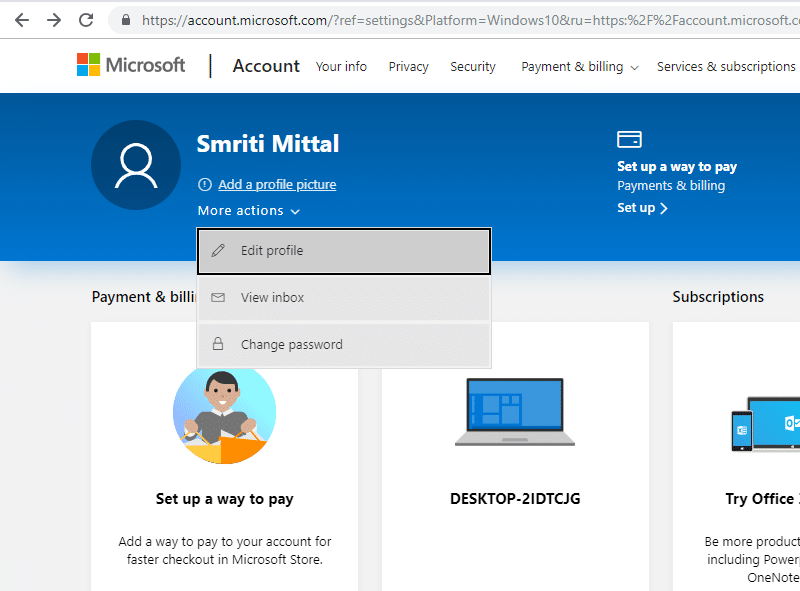
5. Once you are logged in, under your username on the top left corner of the window, click on ‘More Options’.
6. Select ‘Edit Profile’ from the drop-down list.
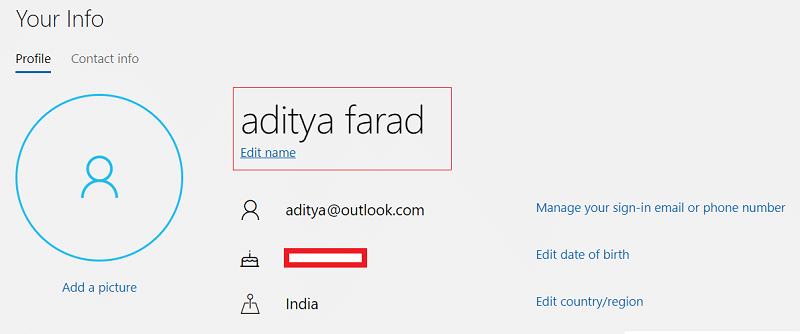
7. Your info page will open. Under your profile name, click on ‘Edit name’.
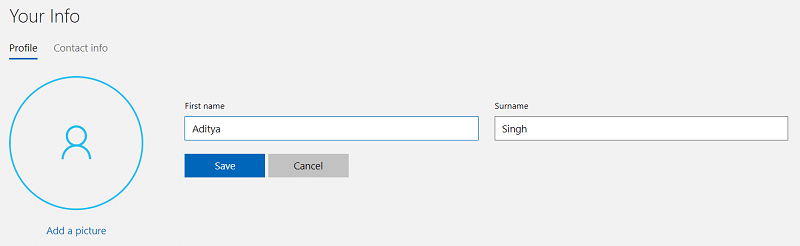
8. Type your new first name and last name. Enter Captcha if asked and click on Save.
9. Restart your computer to see the changes.
Note that this will not just change the Windows account username linked with this Microsoft account, but also your username with email and other services will be changed.
Method 3: Change Account Username Via User Account Manager
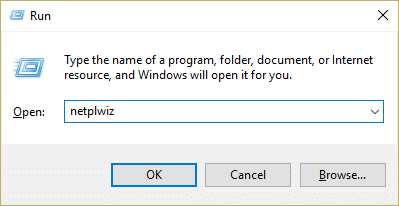
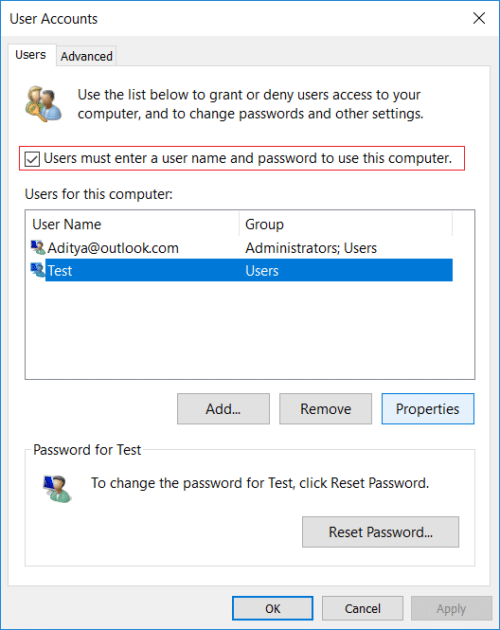
1. Press Windows Key + R then type netplwiz and hit Enter to open User Accounts.
2. Make sure to checkmark “Users must enter a username and password to use this computer” box.
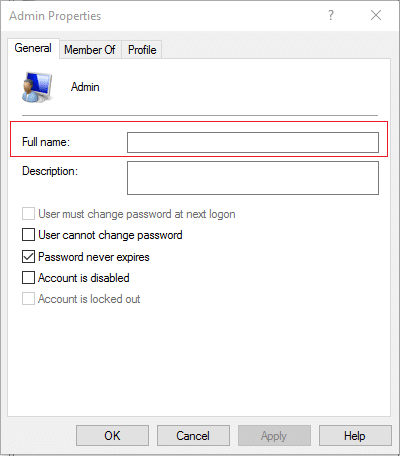
3. Now select the local account for which you want to change the username and click Properties.
4. In the General tab, type the Full name of the user account according to your preferences.
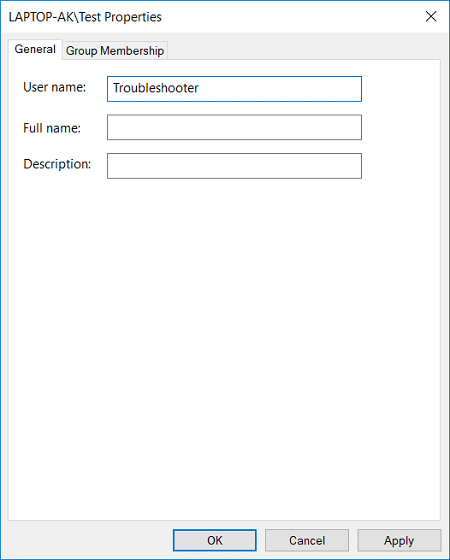
5. Click Apply, followed by OK.
6. Reboot your PC to save changes, and you have successfully Change Account Username on Windows 10.
Method 4: Change Account Username using Local Users and Groups
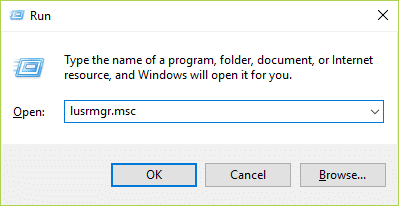
1. Press Windows Key + R then type lusrmgr.msc and hit Enter.
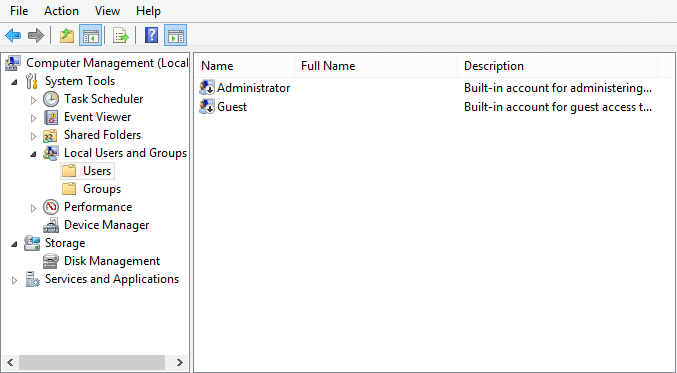
2. Expand Local User and Groups (Local) then select Users.
3. Make sure you have selected Users, then in the right window pane double-click on the Local Account for which you want to change the username.
4. In the General tab, type the Full name of the user account according to your choice.
5. Click Apply, followed by OK.
6. The name of the local account will now be changed.
This is How to Change Account Username on Windows 10 but if you still have a problem, continue with the next method.
Method 5: Change User Account Name in Windows 10 using Group Policy Editor
Note: Windows 10 Home Users won’t follow this method, as this method is only available to Windows 10 Pro, Education and Enterprise Edition.
1. Press Windows Key + R then type gpedit.msc and hit Enter.

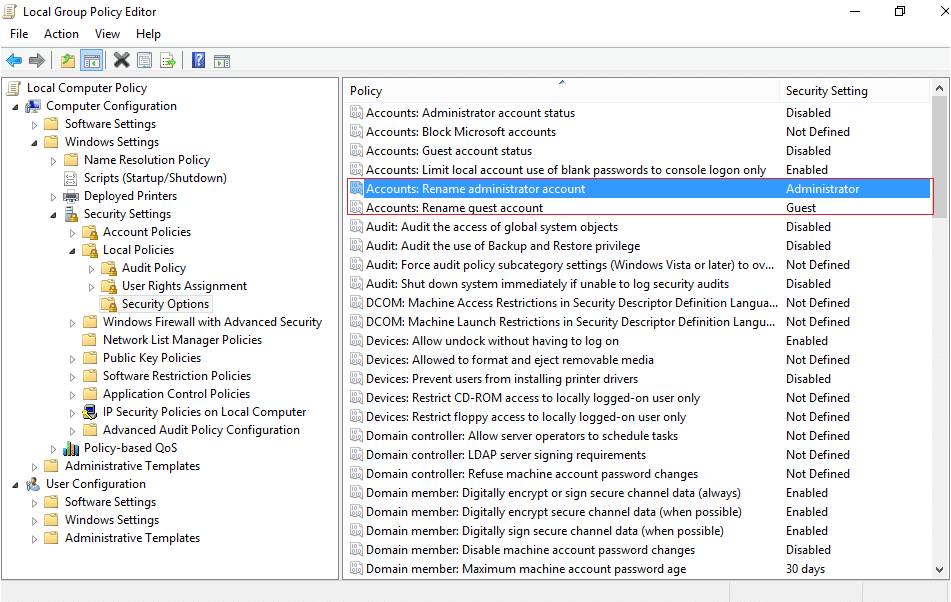
2. Navigate to the following path:
Computer Configuration > Windows Settings > Security Settings > Local Policies > Security Options
3. Select Security Options then in the right window pane double-click on “Accounts: Rename administrator account” or “Accounts: Rename guest account“.
4. Under Local Security Settings tab type in the new name you want to set, click OK.
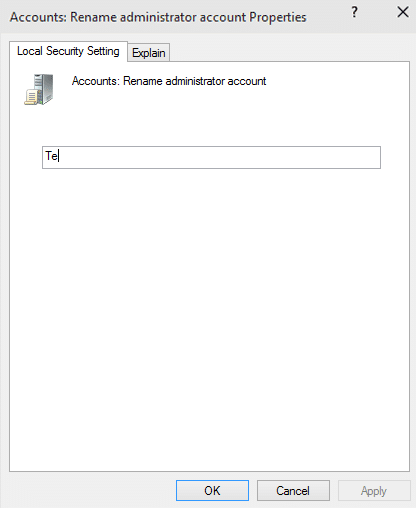
5. Reboot your PC to save changes.
How to rename the User folder in Windows 10?
Go to C:Users to see your user folder name. You will see that the name of your user folder has not been changed. Only your account username has been updated. As confirmed by Microsoft, renaming a User Account Does Not Automatically Change the Profile Path. Changing the name of your user folder has to be done separately, which might be very risky for unskilled users as it would require certain changes to be made in the Registry. However, if you still want your user folder name to be the same as your account username, you should create a new user account and move all your files to that account. Doing so is a little time consuming, but it will prevent you from corrupting your user profile.
If you still have to edit your user folder name for some reason, you will have to make the necessary changes in the registry paths along with renaming the user folder, for which you will need to access Registry Editor. You might want to create a system restore point to save yourself from any trouble before following the given steps.
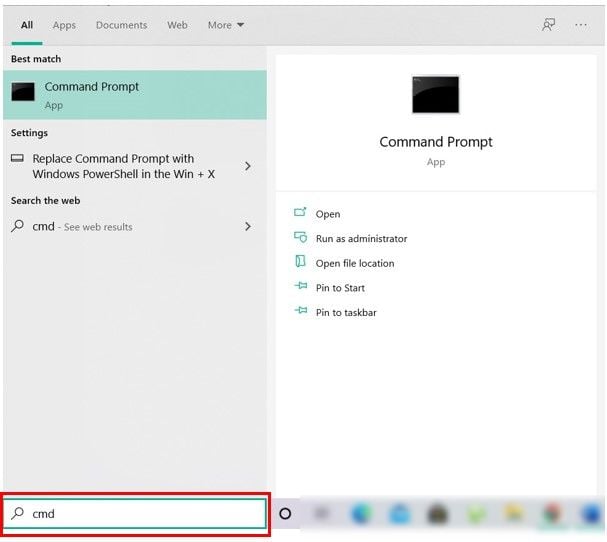
1. Open Command Prompt. The user can perform this step by searching for ‘cmd’ and then press Enter.
2. Type the following command and hit enter:
net user administrator /active:yes
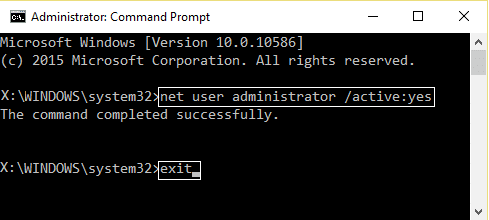
3. Close the command prompt.
4. Now sign out of your current account on Windows and sign in to the newly activated ‘Administrator’ account. We are doing this because we need an administrator account other than the current account whose user folder name must be changed to carry out the necessary steps.
5. Browse to ‘C:Users’ in your file explorer and right-click on your old user folder and select rename.
6. Type the new folder name and hit enter.
7. Press Windows Key + R then type regedit and click OK.

8. In the Registry Editor, navigate to the following folder:
HKEY_LOCAL_MACHINESOFTWAREMicrosoftWindows NTCurrentVersionProfileList
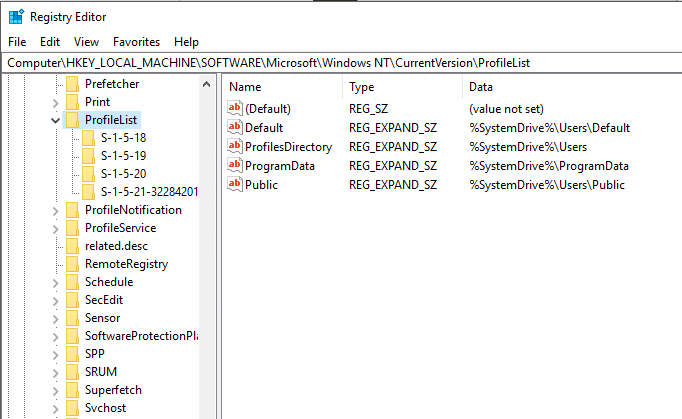
9. From the left pane, under Profile List, you will find multiple ‘S-1-5-‘ type folders. You have to find the one which contains the path to your current user folder.
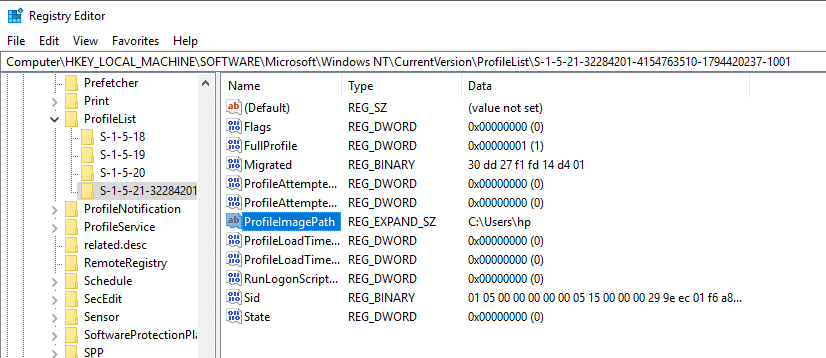
10. Double click on ‘ProfileImagePath’ and enter a new name. For example, ‘C:Usershp’ to ‘C:Usersmyprofile’.
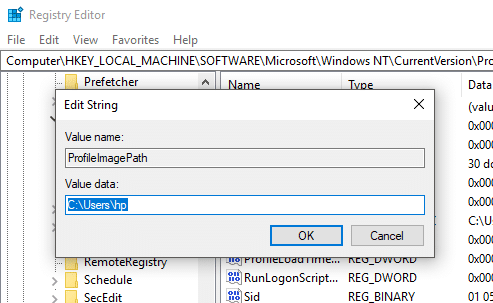
11. Click on OK and restart your computer.
12. Now log into your user account, and your user folder should have been renamed.
Your account username has now been successfully changed.
Recommended:
I hope the above steps were helpful and now you can easily Change Account Username on Windows 10, but if you still have any questions regarding this tutorial then feel free to ask them in the comment’s section.