Help! Upside Down or Sideways Screen Issue [SOLVED]

Fix Upside Down or Sideways Screen: You may encounter situations where your computer screen has gone sideways or upside down that too all of a sudden and there is no apparent reason or you might have pressed some shortcut keys inadvertently that you might not know. Do not panic! You don’t need to scratch your head thinking what to do or physically toss your monitor to fit your need. Such a situation is more common than you think & can be resolved very easily. You don’t need to call a technician in this regard. There are different ways to fix this issue. In this article, you will learn about how to fix this sideways or upside down screen issues.
Help! Upside Down or Sideways Screen Issue [SOLVED]
Make sure to create a restore point just in case something goes wrong.
Method 1: Using Hotkeys
The interface might be different on different systems but the overall procedure is same, the steps are:
1.Right-click in an empty area on your Desktop then choose “Graphics Options” & select Hot Keys.
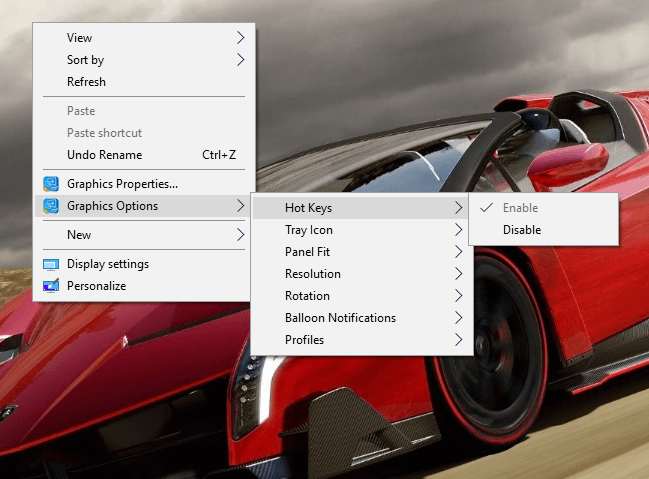
2.Now under Hot Keys make sure that “Enable” is chosen.
3.Next, use the key combination: Ctrl + Alt + Up arrow keys to fix Upside Down or Sideways Screen in Windows 10.
Ctrl + Alt + Up arrow will return back your screen to its normal condition while Ctrl + Alt + Right arrow rotates your screen 90 degrees, Ctrl + Alt +Down arrow rotates your screen 180 degrees, Ctrl + Alt + Left arrow rotates the screen 270 degrees.
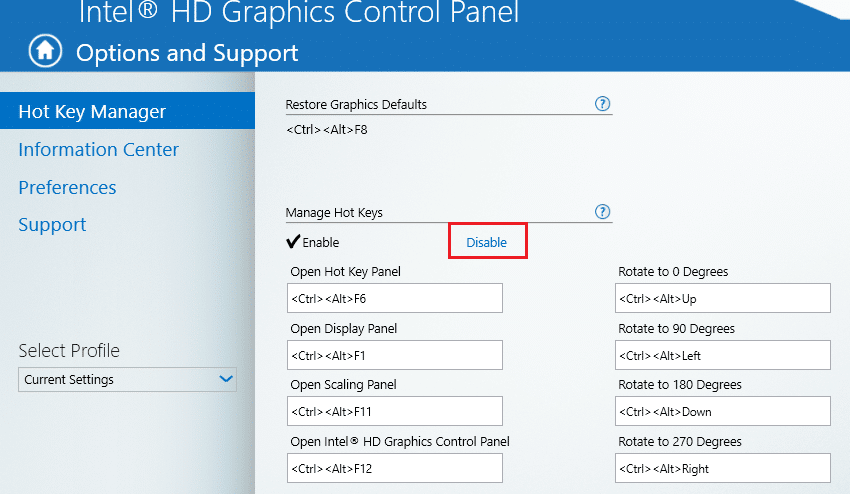
Another way to enable or disable these hotkeys, just navigate to Intel Graphics control panel: Graphics Options > Options & Support where you will see Hotkey Manager option. Here you can easily enable or disable these hotkeys.
4.These are hotkeys using which you can flip your screen orientation and make it rotate according to your preference.
Method 2: Using Graphics Properties
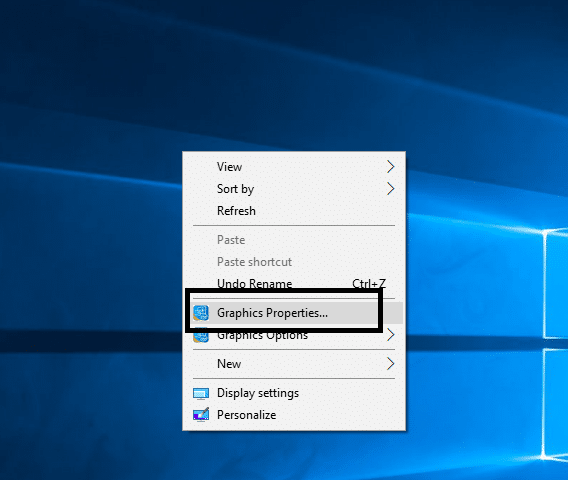
1.Right-click in an empty area on your desktop then click on “Graphics Properties” from the context menu.
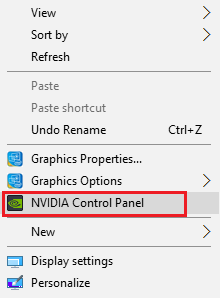
2.In case you don’t have an Intel Graphics Card then select the Graphics Card Control Panel or Setting which lets you regulate your system display settings. For example, in case of the NVIDIA graphics card, it will be NVIDIA Control Panel.
3.Once Intel Graphics Properties window opens, select “Display” option from there.
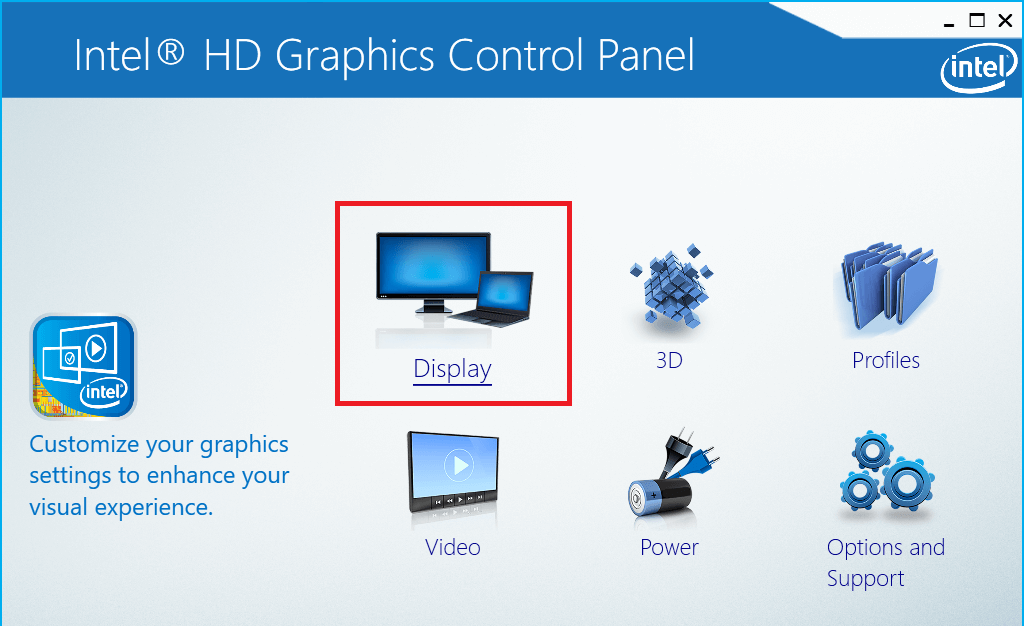
4.Make sure to select “General Settings” from the left window pane.
5.Now under Rotation, toggle between all values in order to rotate your screen according to your preferences.
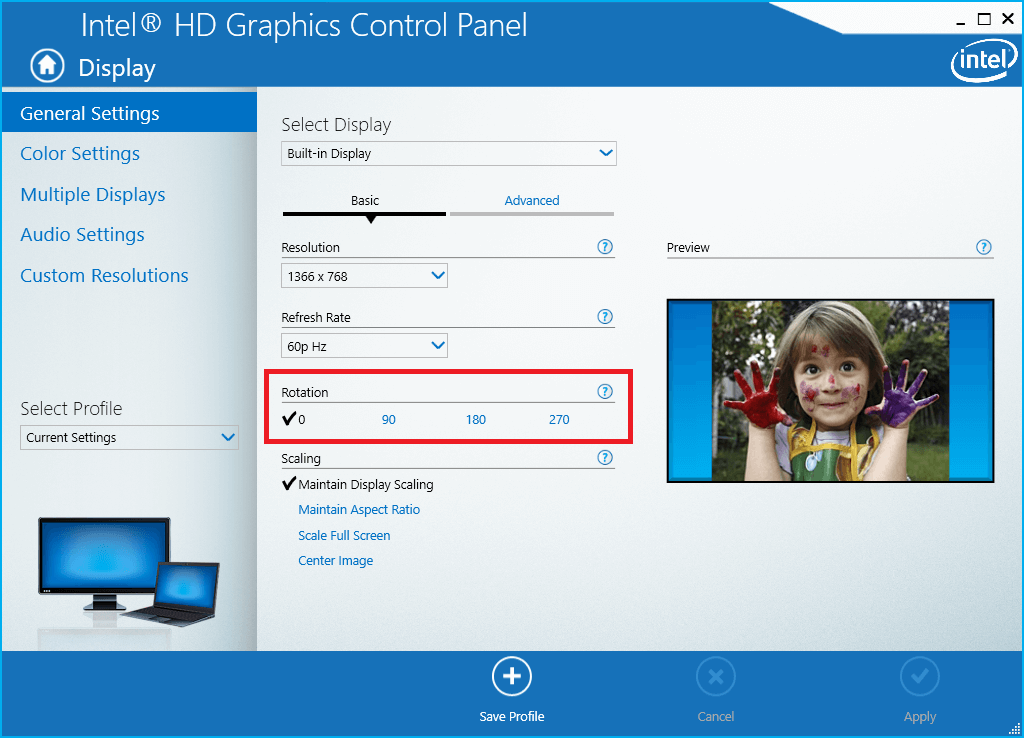
6.If you’re facing Upside Down or Sideways Screen then you will see that the value of rotation is set to 180 or some other value, to fix this make sure to set it to 0.
7.Click Apply to see the changes to your display screen.
In case the hotkeys (shortcut keys) don’t work or you can’t find any Graphics Card options because you don’t have a dedicated Graphics Card then don’t worry as there is another alternative way to fix Upside Down or Sideways Screen issue.
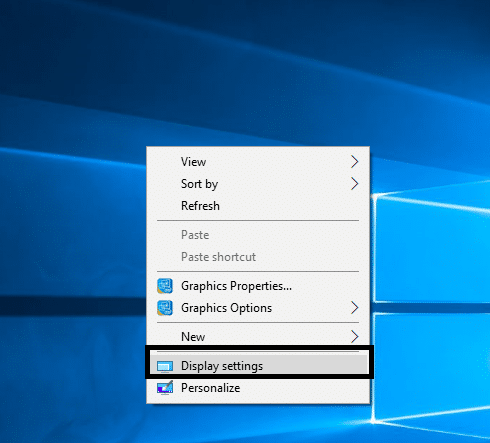
1.Right-click in an empty area on your desktop then click on “Display settings” from the context menu.
2.If you are using multiple screens then make sure to choose the one for which you want to fix the Upside Down or Sideways Screen issue. If you only have one monitor attached then you can skip this step.
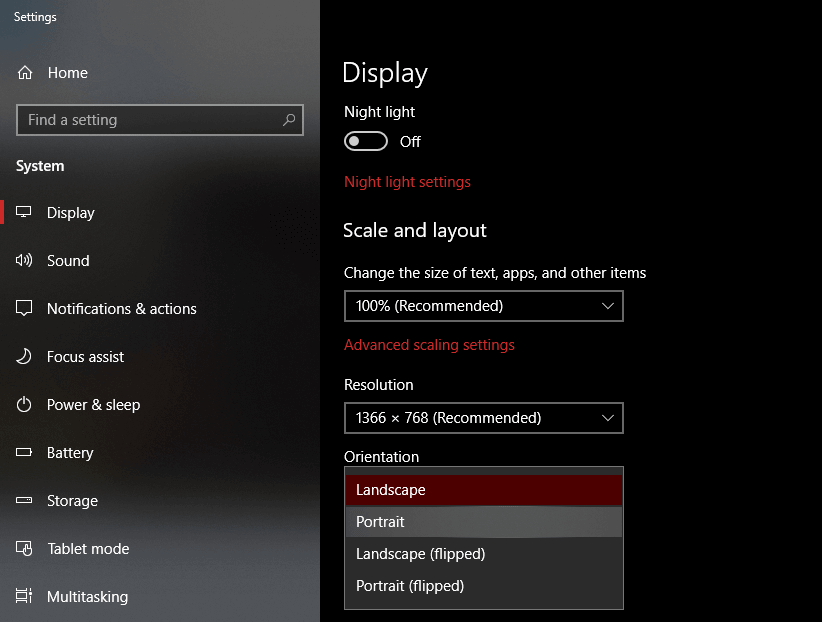
3.Now under the Display Settings window, make sure to select “Landscape” from the Orientation drop-down menu.
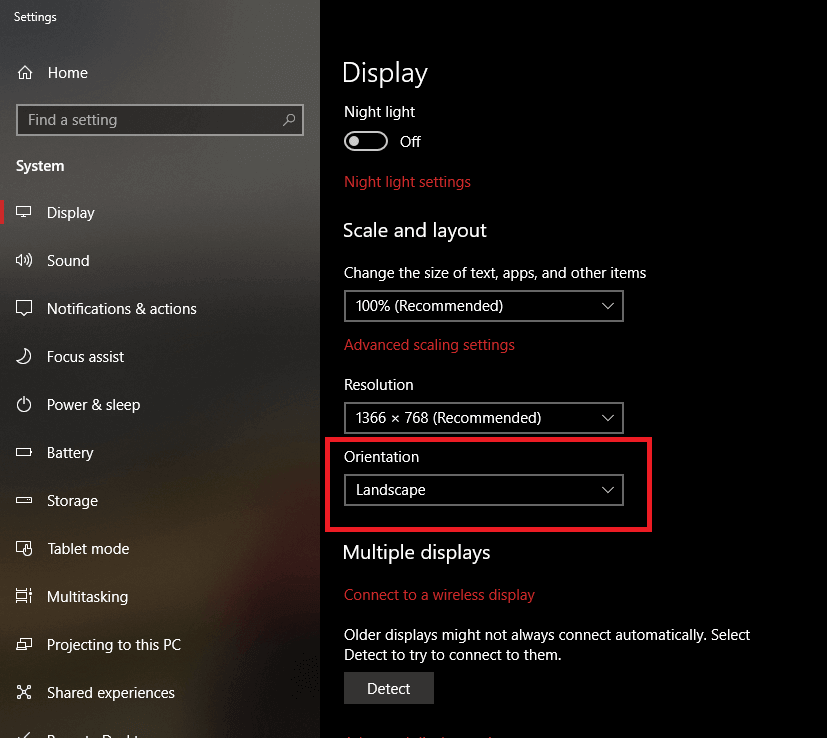
4.Click Apply followed by OK to save changes.
5.Windows will confirm if you want to save changes, so click on “Keep Changes” button.
Method 4: From Control Panel (For Windows 8)
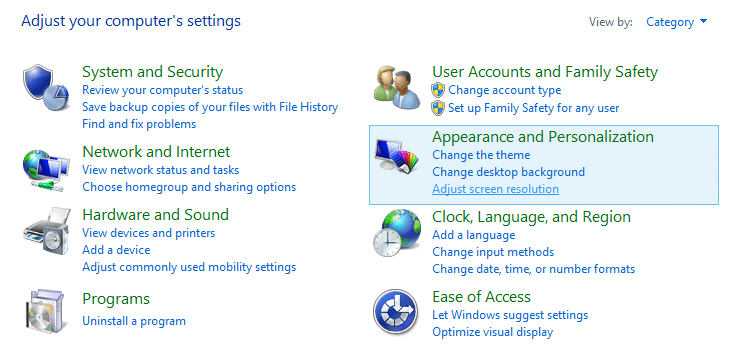
1.From Windows Search type control then click on “Control Panel” from the search result.
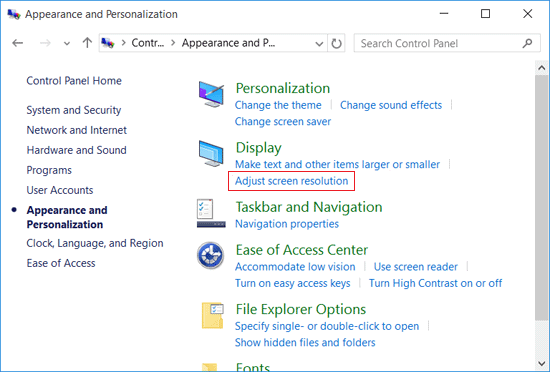
2.Now click on Appearance and Personalization then click “Adjust screen resolution“.
3.From the Orientation drop-down select “Landscape” to fix Upside Down or Sideways Screen in Windows 10.
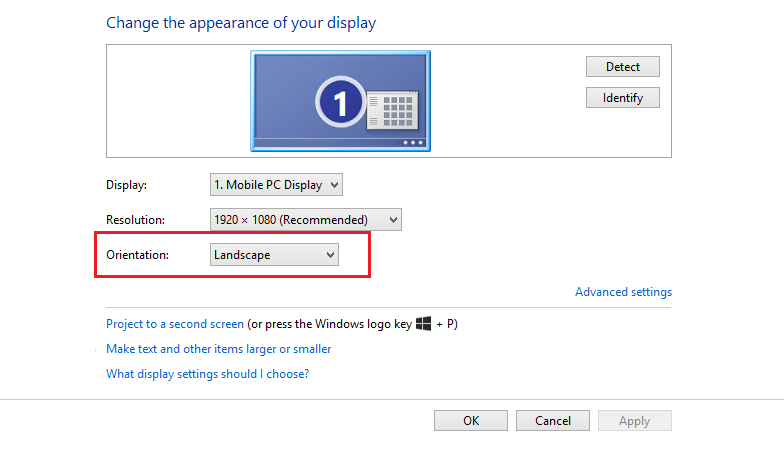
4.Click Apply to save the changes.
5.Windows will confirm if you want to save changes, so click on “Keep Changes” button.
Method 5: How to Disable Automatic Screen Rotation on Windows 10
Most PC’s, tablets, and laptops running Windows 10 can rotate the screen automatically if the orientation of the device changes. So to stop this automatic screen rotation, you can easily enable the “Rotation Lock” feature on your device. The steps for doing this in Windows 10 is –
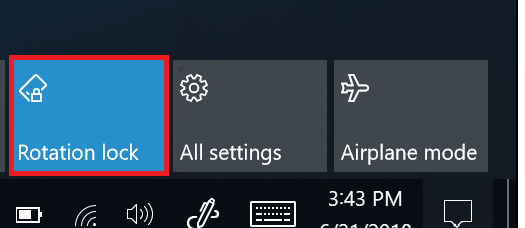
1.Click on the Action Center icon (the icon on the bottom-right corner on the taskbar) or press the shortcut key: Windows key + A.
![]()
2.Now click on the “Rotation Lock” button to lock the screen with its current orientation. You can always click on it again to disable the Rotation Lock.
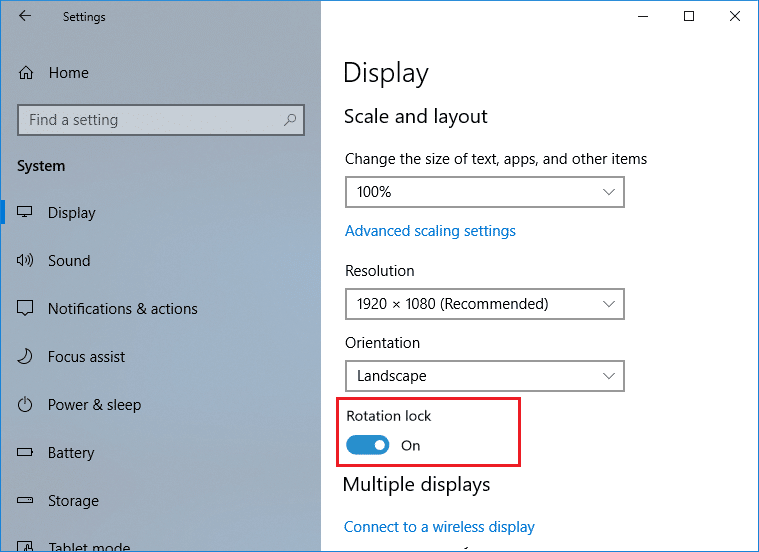
3.For more options related to Rotation Lock, you can navigate to Settings > System > Display.
Recommended:
I hope this article was helpful and now you can easily Fix Upside Down or Sideways Screen in Windows 10, but if you still have any questions regarding this tutorial then feel free to ask them in the comment’s section.