How to set up a VPN on Windows 10

Are you looking to set up a VPN on Windows 10? But are you confused about how to proceed? Don’t worry in this article we will guide you step-by-step on how to configure VPN on Windows 10 PC.
VPN stands for Virtual Private Network which gives the user privacy online. Whenever someone browses the internet then some useful information is sent from the computer to the server in the form of packets. The hackers can access these packets by trespassing the network and can get hold of these packets and some private information can be leaked. To prevent this, many organizations and users prefer a VPN. A VPN creates a tunnel in which your data is encrypted and then sent to the server. So if a hacker hacks into the network then also your information is protected as it is encrypted. VPN also allows changing your system location so that you can access the internet privately and also you can view content that is blocked in your region. So let’s begin with the process of setting up the VPN in Windows 10.
How to set up a VPN on Windows 10
Find Your IP Address
In order to set up the VPN, you need to find your IP address. With the knowledge of the IP address, only you will be able to connect to the VPN. To find the IP address and proceed forward follow these steps.
1.Open the web browser on your computer.
2.Visit com or any other search engine.
3.Type What is My IP address.
4.Your public IP address will be displayed.
There can be a problem with dynamic public IP-address which can change with time. To deal with this problem you have to configure the DDNS settings in your router so that when the public IP-address of your system changes you don’t have to change your VPN settings. To configure the DDNS settings in your router follow these steps.
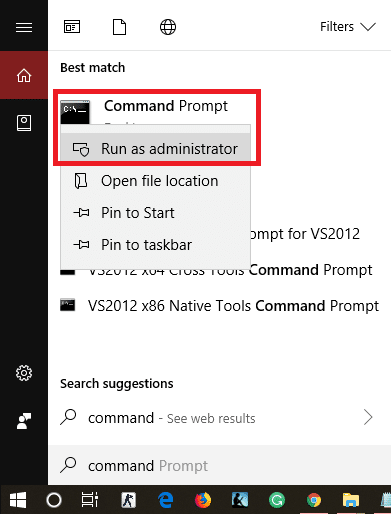
1.Click on the Start menu or press on the Windows key.
2.Type CMD, right-click on Command Prompt and select Run as Administrator.
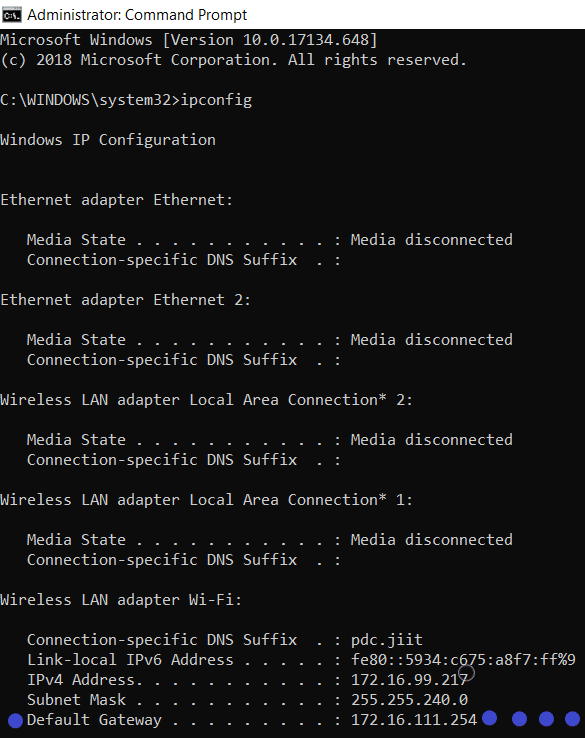
3.Type ipconfig, scroll down and find the default gateway.
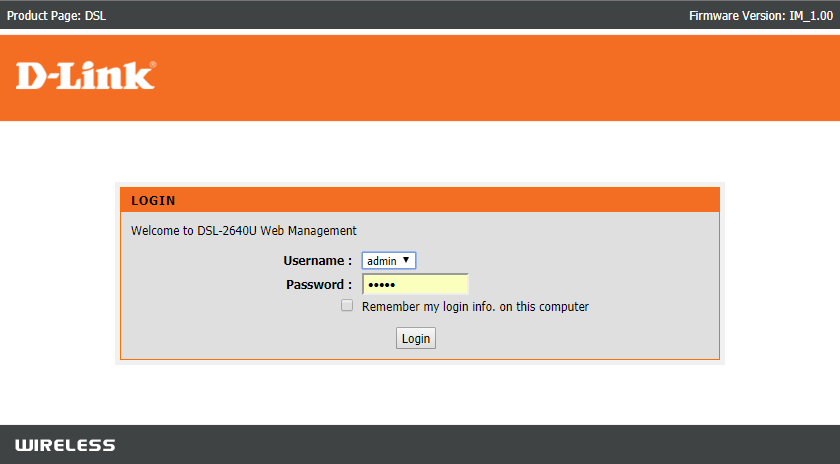
4.Open the default gateway IP-address in the browser and log in to your router by providing username and password.
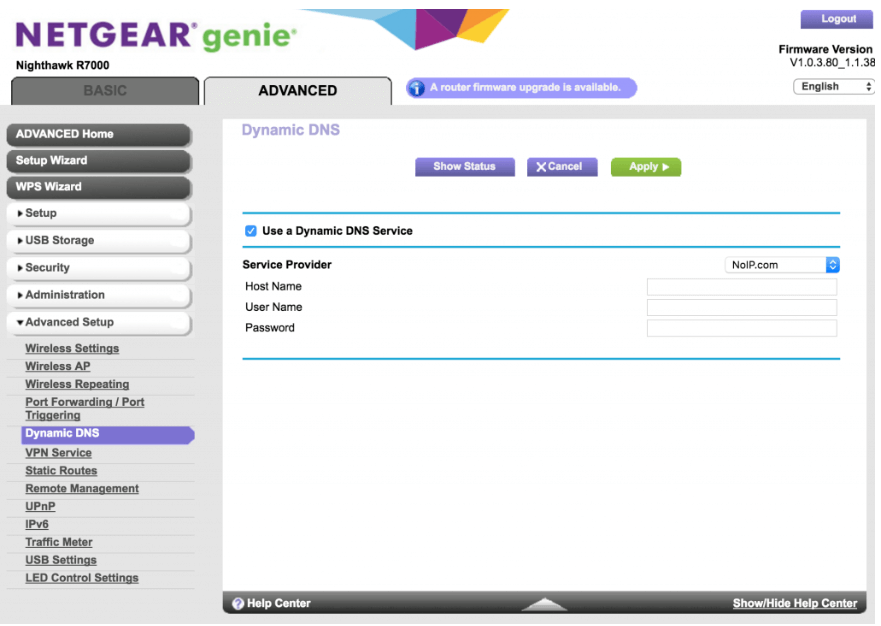
5.Find the DDNS settings under the Advanced tab and click on the DDNS setting.
6.A new page of DDNS settings will open up. Select No-IP as a service provider. In the username enter your email address and then enter the password, in the hostname enter myddns.net.
7.Now you need to ensure that your hostname can receive timely updates or not. To check this login to your No-IP.com account and then open the DDNS settings which will probably on the left side of the window.
8.Select Modify and then select the hostname IP-address and set it to 1.1.1.1, then click on Update Hostname.
9.To save the settings you need to restart your router.
10.Your DDNS settings is now configured and you can proceed forward.
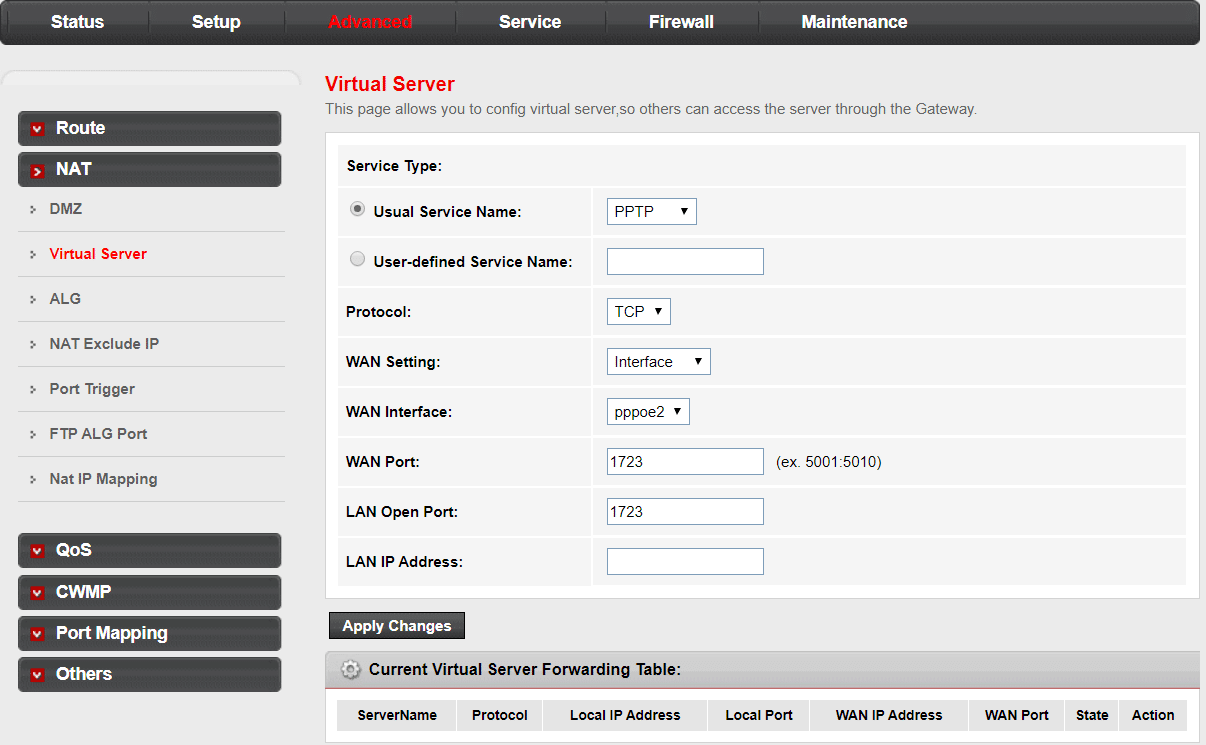
Set up Port forwarding
To connect the internet to the VPN server of your system you have to forward port 1723 so that VPN connection can be made. To forward port 1723 follow these steps.
1.Login into the router as described above.
2.Find the Network and Web.
3.Go to Port forwarding or Virtual Server or NAT server.
4.In the Port forwarding window, set the local port to 1723 and protocol to TCP and also set the Port Range to 47.
Make a VPN Server on Windows 10
Now, when you have completed the DDNS configuration and also the port forwarding process then you are ready to set up the VPN server for Windows 10 pc.
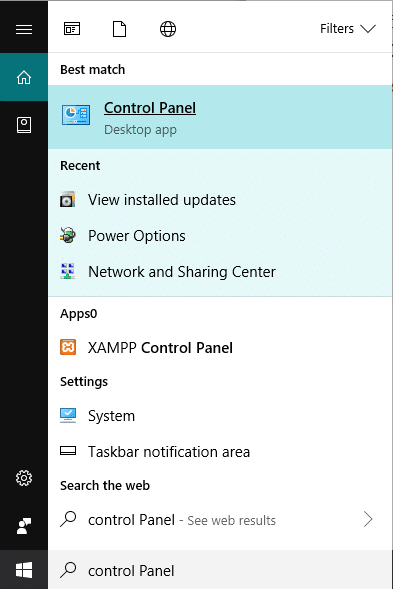
1.Click on the Start menu or press the Windows key.
2.Type Control panel and click on Control Panel from the search result.
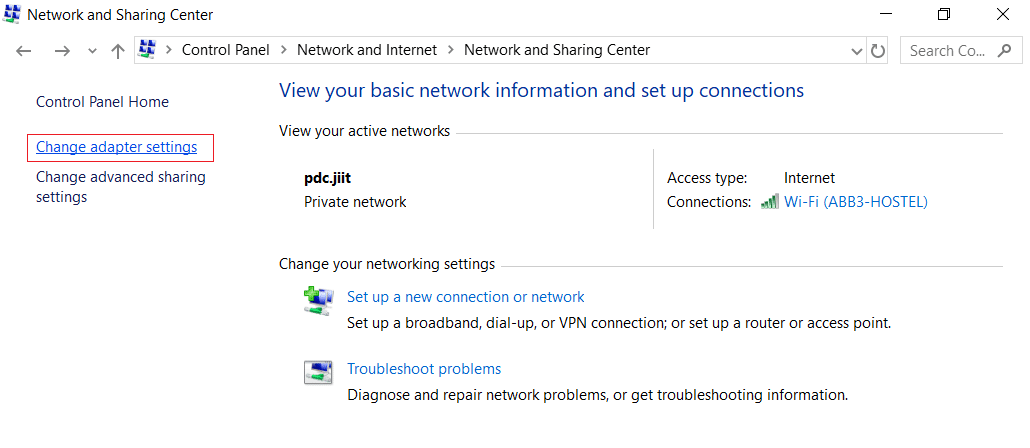
3.Click on Network and Internet then click on Network and Sharing Center.

4.In the left side pane, select the Change adapter settings.
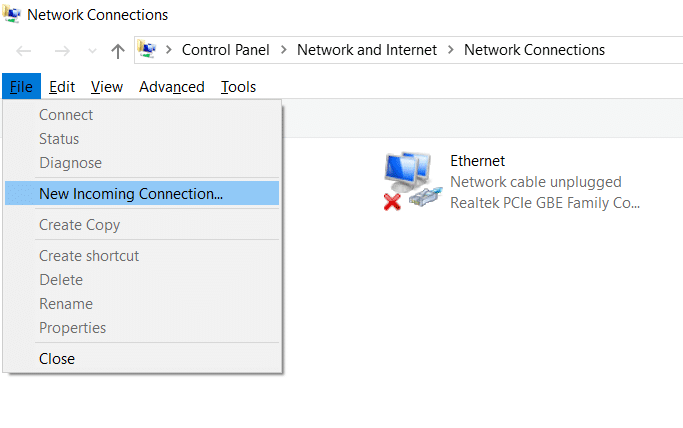
5.Press the ALT key, click on File and select New Incoming Connection.
6.Select the users who can access the VPN on the computer, select Next.
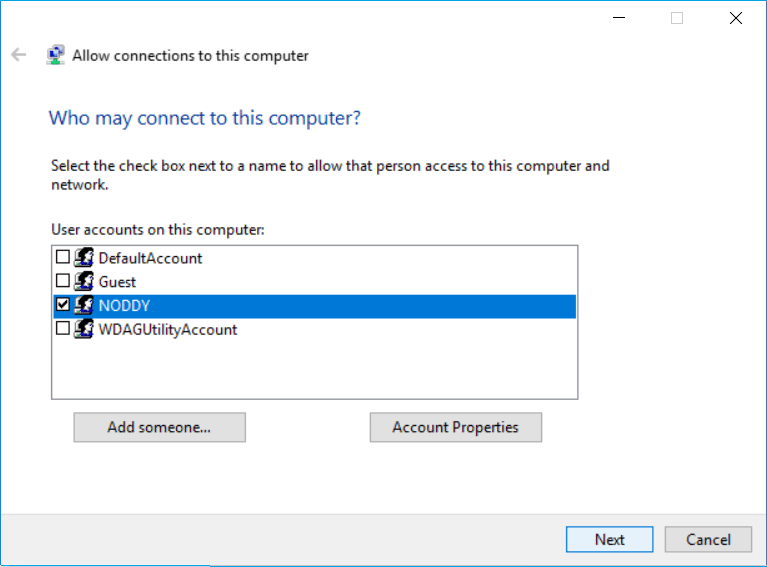
7.If you want to add someone click on the Add Someone button and fills the details.

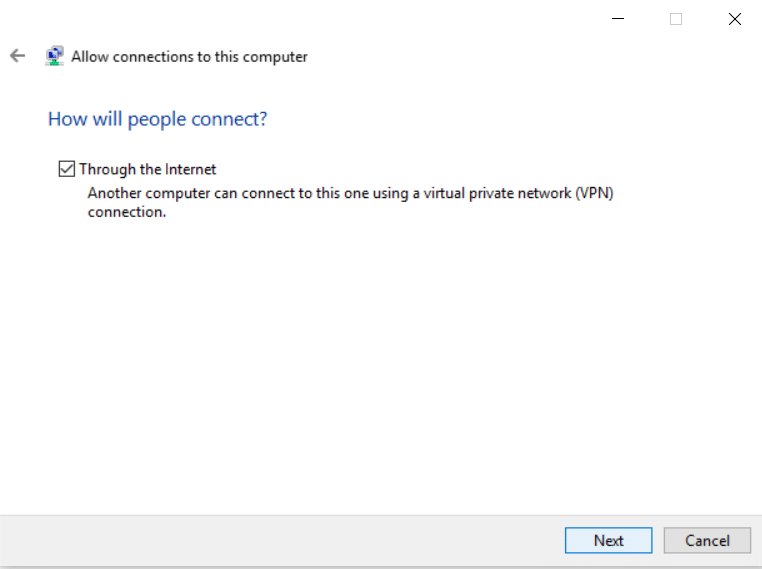
8.Mark the Internet through checkbox and click on Next.
9.Select Internet Protocol Version 4 (TCP).
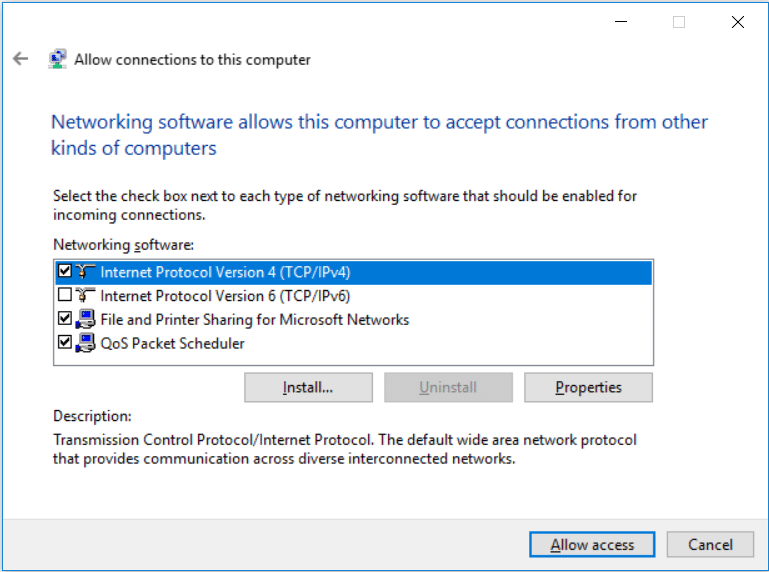
10.Select the Properties button.
11.Under Incoming IP Properties, checkmark “Allow callers to access my local area network” box and then click on Specify IP addresses and fill out as provided in the image.
12.Select OK and then click on allow access.
13.Click on close.
Make a VPN connection to go through the Firewall
To let the VPN server work properly you need to configure the windows firewall settings properly. If these settings are not configured properly then the VPN server might not work properly. To configure the windows firewall follow these steps.
1.Click the Start menu or press the Windows key.
2.Type allow an app through windows firewall in Start menu search.
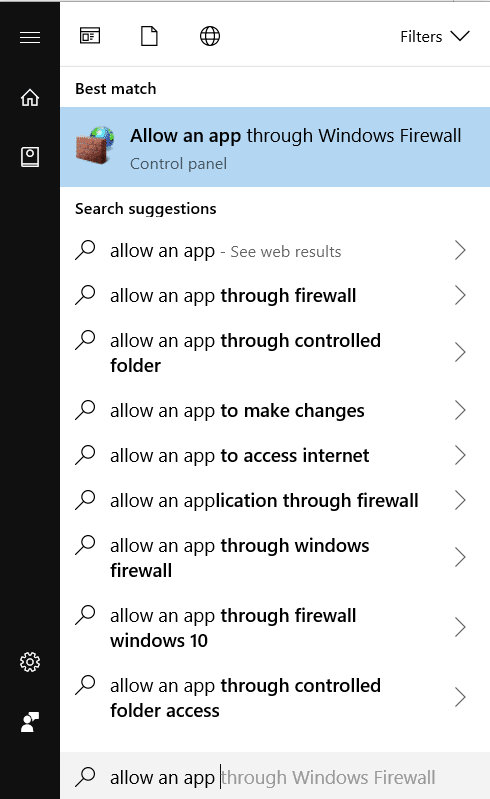
3.Click on Change Settings.
4.Look for Routing and Remote Access and allow Private and Public.
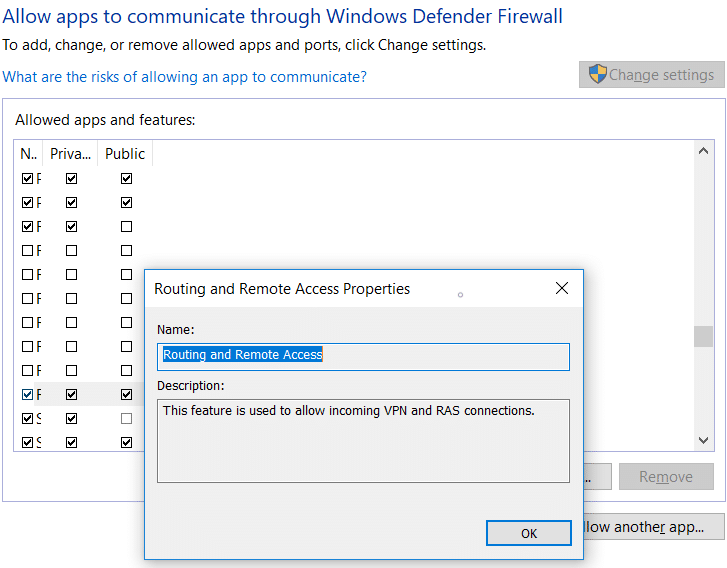
5.Click on OK to save changes.
Make a VPN connection in Windows 10
After creating the VPN server you need to configure the devices which include your laptop, mobile, tablet or any other device you want to give access to your local VPN server remotely. Follow these steps to make the desired VPN connection.
1.Press Windows Key + R then type control and hit Enter to open Control Panel.

2.Select Network and Sharing Center.
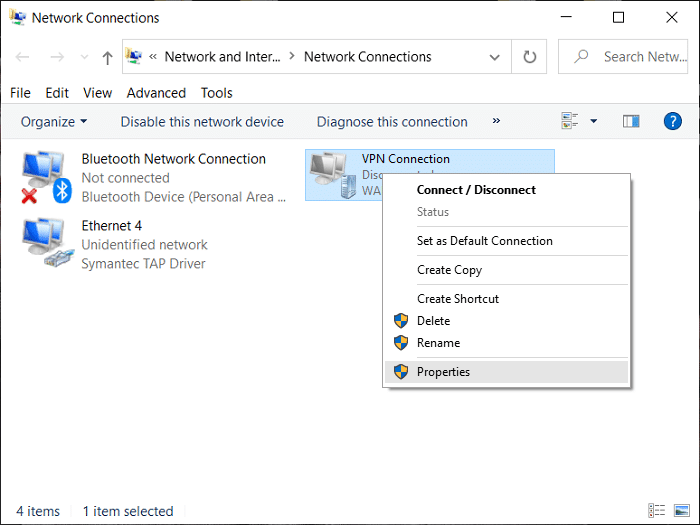
3.In the left side panel, click on Change adapter settings.
4.Right-click on the VPN server you just created and select Properties.
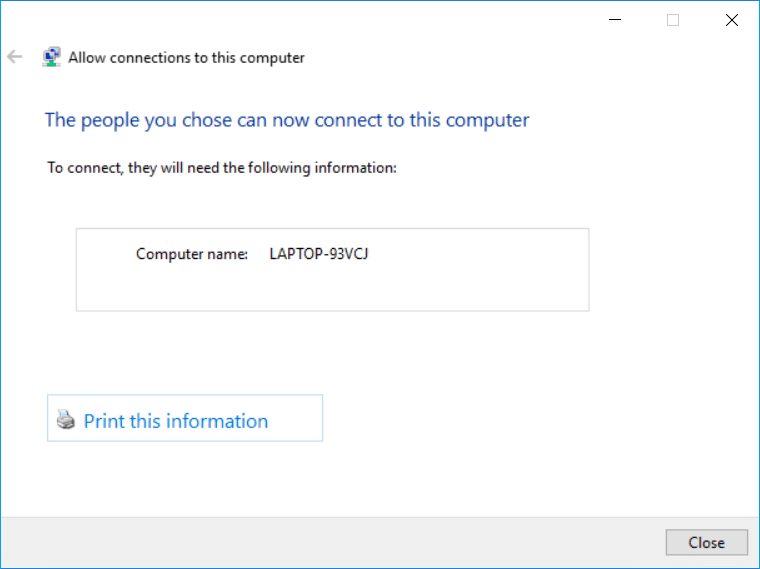
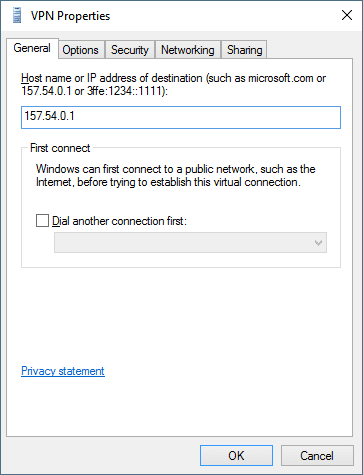
5.In the properties, click on the General tab and under Hostname type the same domain that you created while setting up DDNS.
6.Switch to the Security tab then from the type of VPN dropdown select PPTP (point to point tunneling protocol).
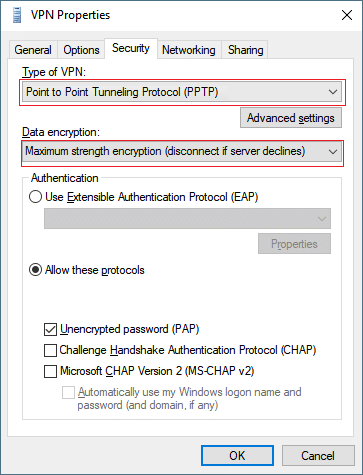
7.Select Maximum strength encryption from the Data encryption drop-down.
8.Click Ok and switch to the Networking tab.
9.Unmark the TCP/IPv6 option and mark the Internet Protocol Version 4 (TCP/IPv4) option.
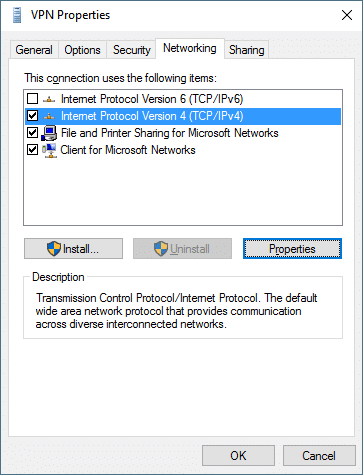
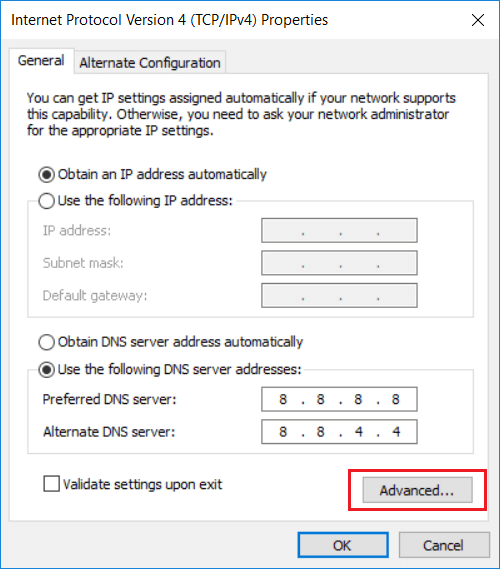
10.Click on the Properties button. Then click the Advanced button.
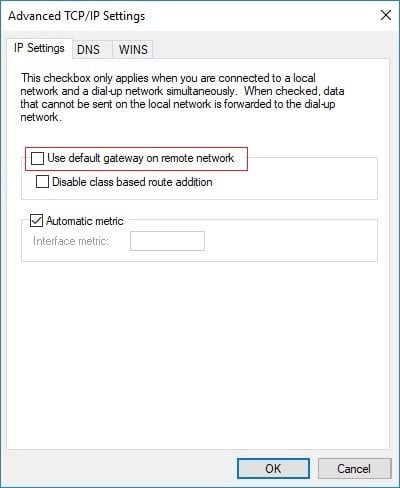
11.Under the IP settings, uncheck the Use default gateway on a remote network & click OK.
12.Press Windows Key + I to open Settings then click on Network & Internet.

13.From the left-hand menu select VPN.
14.Click on the Connect.
Recommended:
There are many other third-party software that provides VPN’s, but this way you can use your own system to make a VPN server and then connect it to all the devices.