5 Ways to Stop Automatic Updates on Windows 10

Most users have a love-hate relationship when it comes to Windows updates. This is partially due to the fact that updates are automatically installed for most users and interrupt the workflow by demanding a computer restart. On top of this, there is no guarantee on how long one would have to stare at the restarting blue screen or how many times their computer will restart before finishing the update installation. To multiple levels of frustration, if you postpone the updates several times, you won’t be able to shut down or restart your computer normally. You will be forced to install the updates alongside one of those actions. Another reason why users seem to dislike the automatic installation of updates is that driver and application updates often break more things than they fix. This can further disrupt your workflow and require you to divert your time and energy towards fixing these new issues.
Before the introduction of Windows 10, users were allowed to fine-tune their preference for updates and select exactly what they wanted Windows to do with them; either to download & install all updates automatically, download updates but install only when permitted, notify the user before downloading, and lastly, to never check for new updates. In an attempt to streamline and uncomplicate the updating process, Microsoft removed all of these options come Windows 10.
This removal of customization features naturally sparked controversy among more experienced users but they also found ways around the auto-update process. There are multiple direct and indirect methods to stop automatic updates on Windows 10, let’s get started.
How to Stop Automatic Updates on Windows 10?
The easiest way to prevent auto-updates is to pause them in Windows settings. Although there exists a limit to how long you can pause them for. Next, you can completely disable the automatic installation of updates by changing a group policy or editing the Windows Registry (only implement these methods if you are an experienced Windows user). A few indirect methods to avoid automatic updates are to disable the essential Windows Update service or to set up a metered connection and restrict the updates from being downloaded.
5 Ways to Disable Automatic Update on Windows 10
Method 1: Pause All Updates in Settings
If you are only looking to postpone the installation of a new update by a couple of days and do not want to entirely disable the auto-update setting, this is the method for you. Unfortunately, you can only delay the installation by 35 days after which you will need to install the updates. Also, earlier versions of Windows 10 allowed users to individually defer security and feature updates but the options have been retracted since.
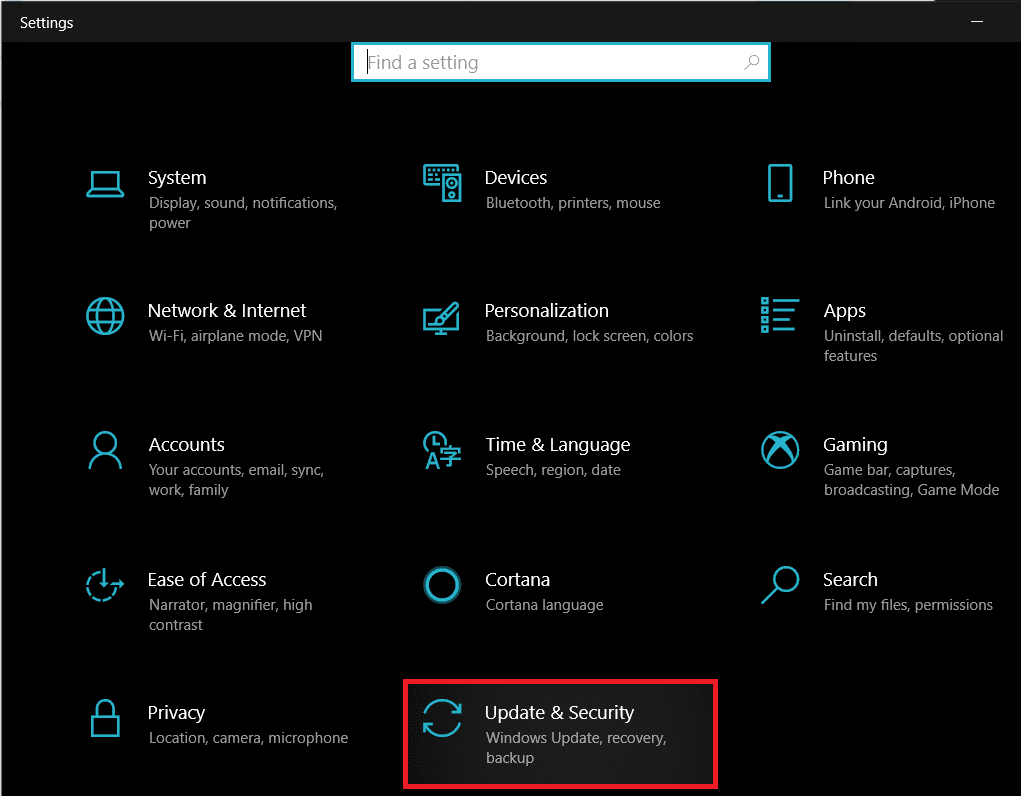
1. Press Windows key + I to open Settings then click on Update & Security.
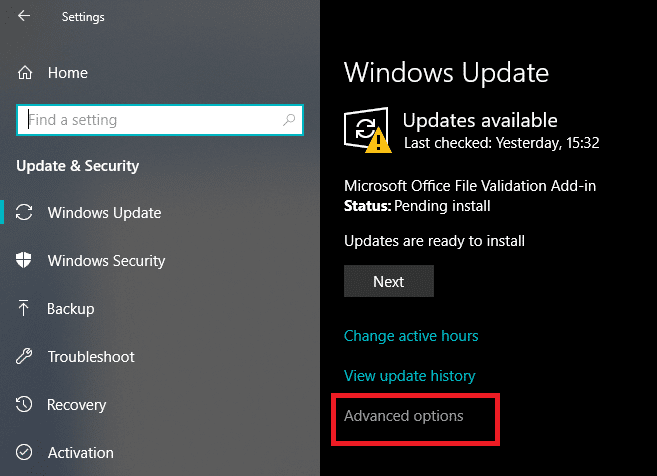
2. Ensure you are on the Windows Update page and scroll down on the right until you find Advanced Options. Click on it to open.
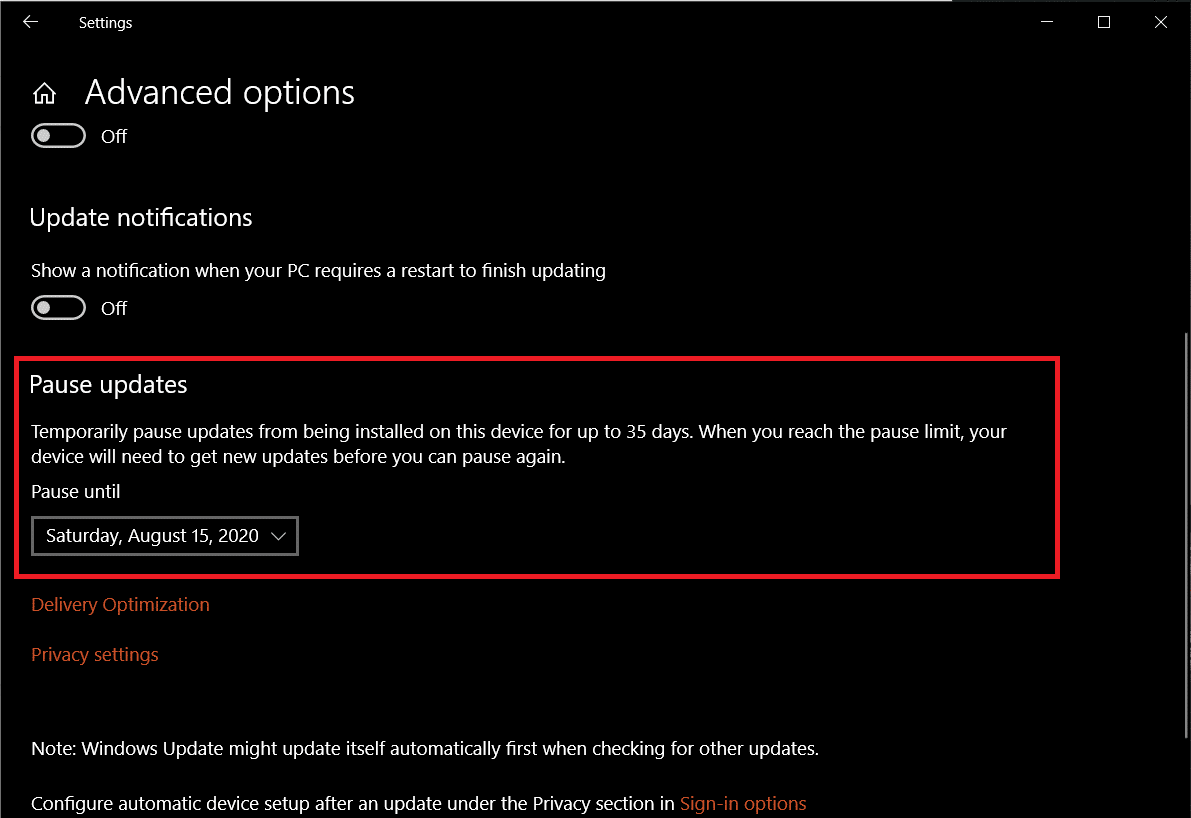
3. Expand the Pause Updates date selection drop-down menu and select the exact date until which you would like to block Windows from automatically installing new updates.
On the Advanced Options page, you can further tinker with the update process and select if you would like to receive updates for other Microsoft products as well, when to restart, update notifications, etc.
Method 2: Change Group Policy
Microsoft didn’t really remove the advance update options of Windows 7 we mentioned earlier but made it a little difficult to find them. The Group Policy Editor, an administrative tool included in Windows 10 Pro, Education, and Enterprise editions, now houses these options and allows users to either disable the auto-update process entirely or choose the extent of automation.
Unfortunately, Windows 10 Home users will need to skip this method as the group policy editor is unavailable to them or first install a third-party policy editor such as Policy Plus.
1. Press Windows Key + R on your keyboard to launch the Run command box, type gpedit.msc, and click OK to open the group policy editor.

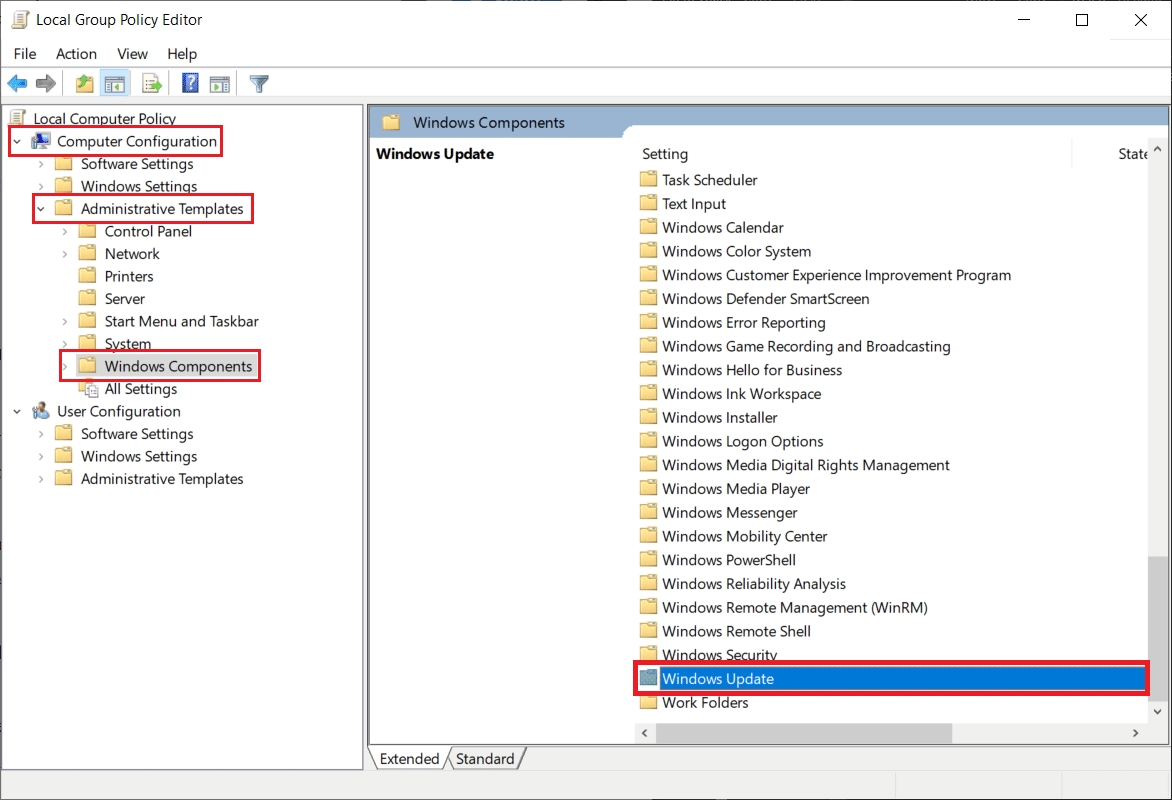
2. Using the navigation menu on the left, head to the following location –
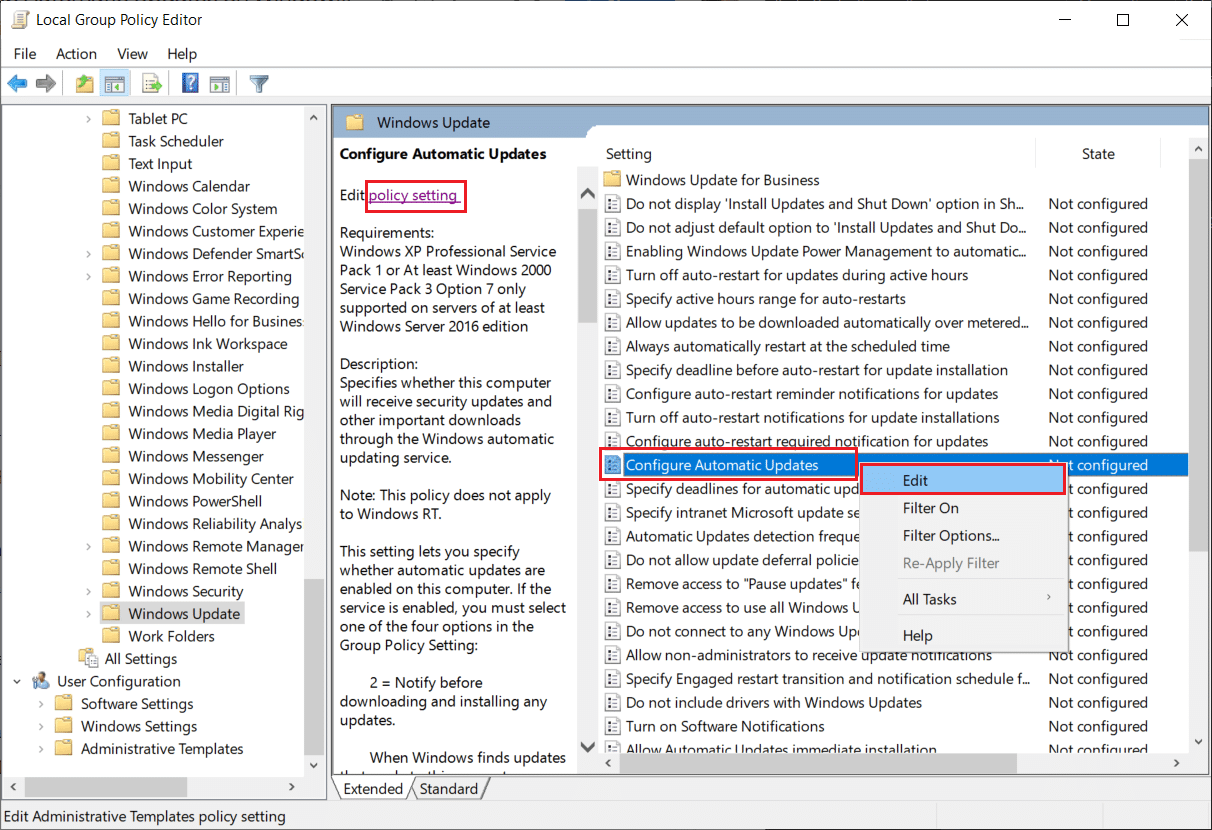
Computer Configuration > Administrative Templates > Windows Components > Windows Update
Note: You can double-click on a folder to expand it or click on the arrow to its left.
3. Now, on the right-panel, select Configure Automatic Updates policy and click on the policy settings hyperlink or right-click on the policy and select edit.
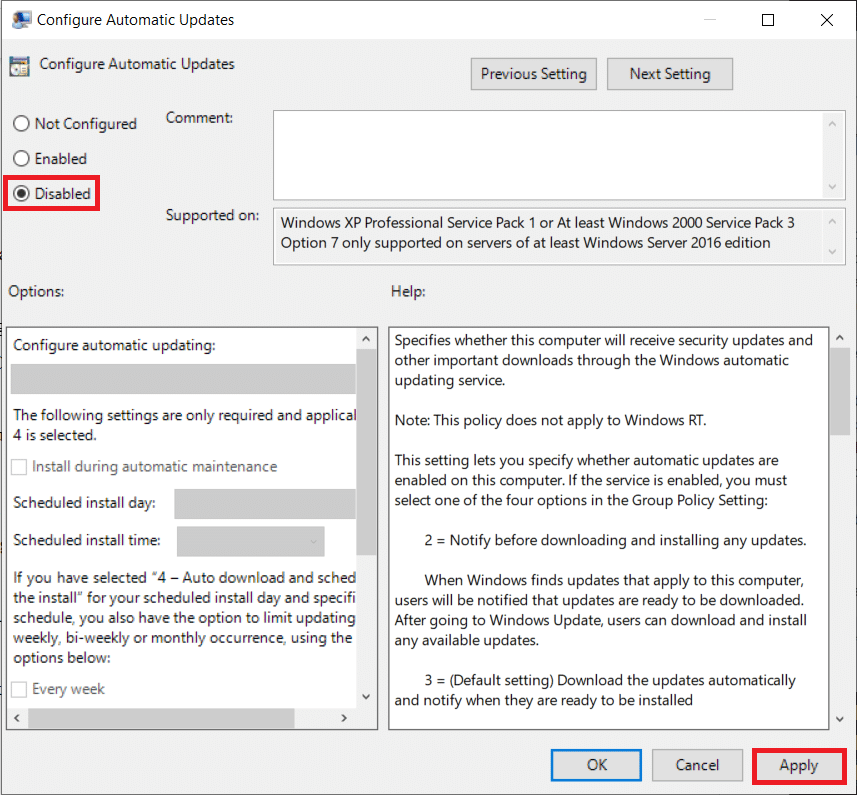
4. By default, the policy will be Not Configured. If you wish to totally disable automatic updates, select Disabled.
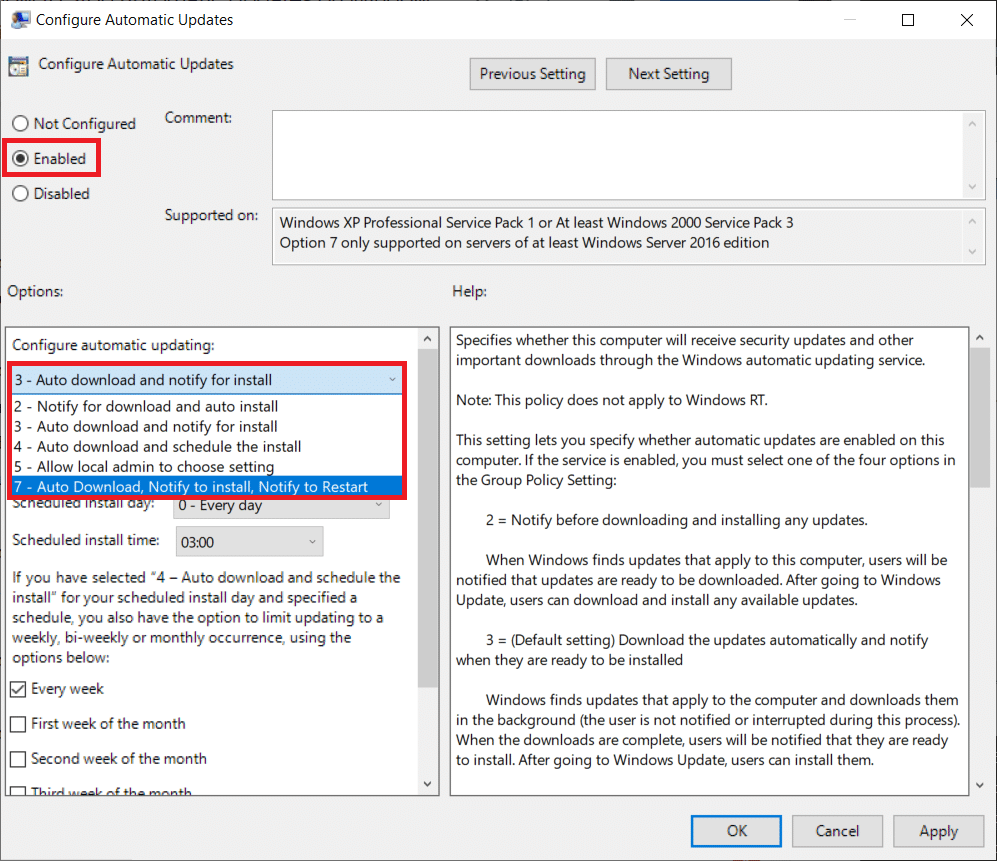
5. Now, if you only want to limit the amount of automation of Windows updates and not disable the policy entirely, select Enabled first. Next, in the Options section, expand the Configure automatic updating drop-down list and choose your preferred setting. You can refer to the Help section on the right for more information on each available configuration.
6. Click on Apply to save the new configuration and exit by clicking on OK. Restart your computer to bring the new updated policy into effect.
Method 3: Disable updates using Windows Registry Editor
Automatic Windows updates can also be disabled via the Registry Editor. This method comes in handy for Windows 10 home users who lack the Group Policy Editor. Although, similar to the previous method, be extremely cautious when changing any entries in the Registry Editor as a mishap can prompt a number of problems.
1. Open Windows Registry Editor by typing regedit in either the Run command box or start search bar and pressing enter.

2. Enter the following path in the address bar and press enter
HKEY_LOCAL_MACHINESOFTWAREPoliciesMicrosoftWindows
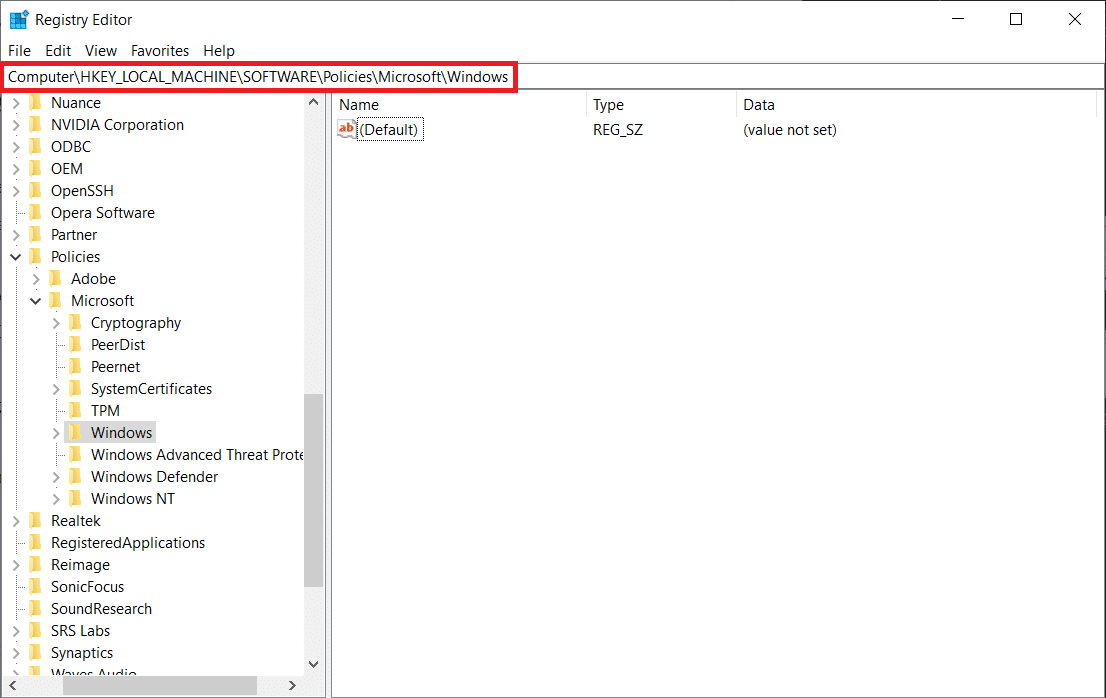
3. Right-click on the Windows folder and select New > Key.
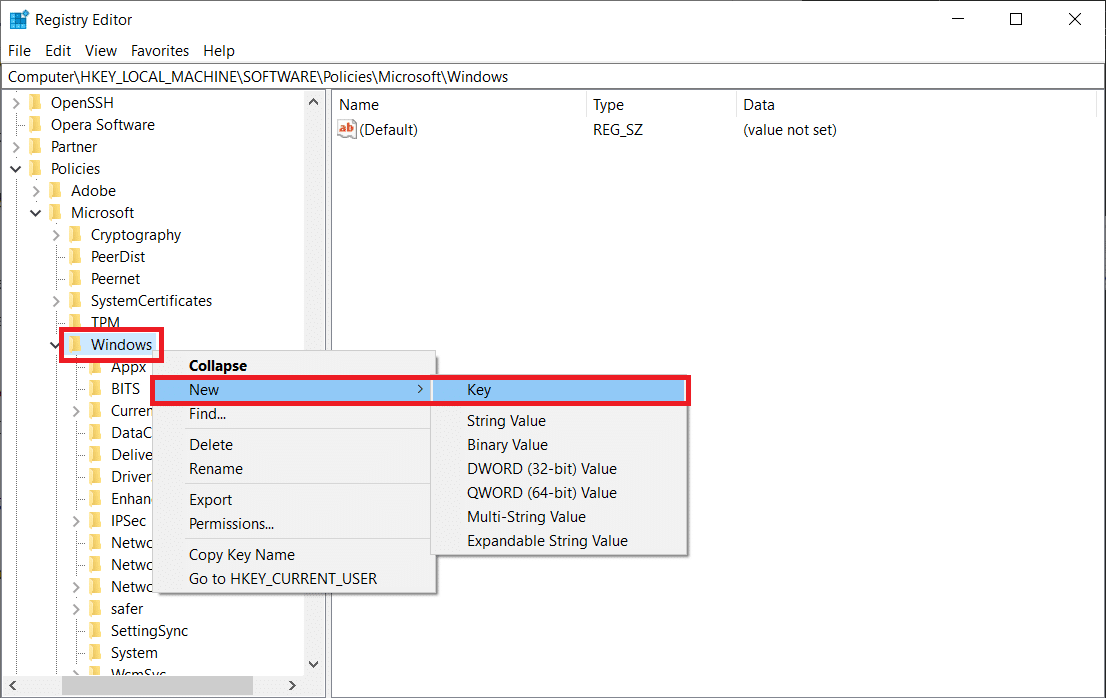
4. Rename the newly created key as WindowsUpdate and press enter to save.
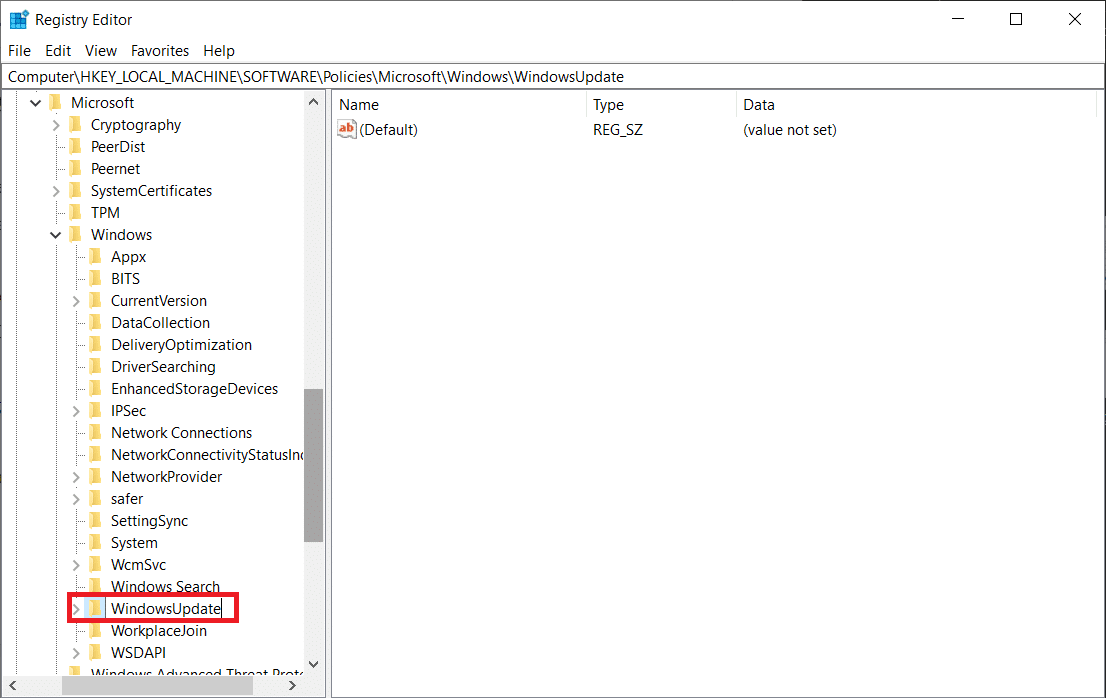
5. Now, right-click on the new WindowsUpdate folder and select New > Key again.
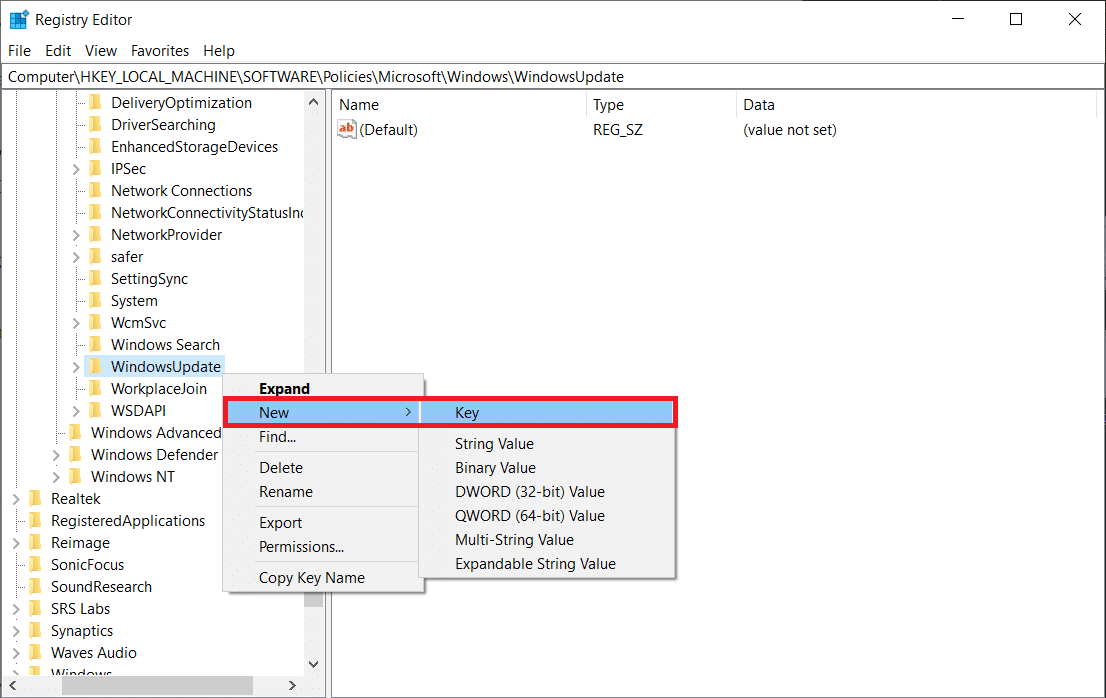
6. Name the key AU.
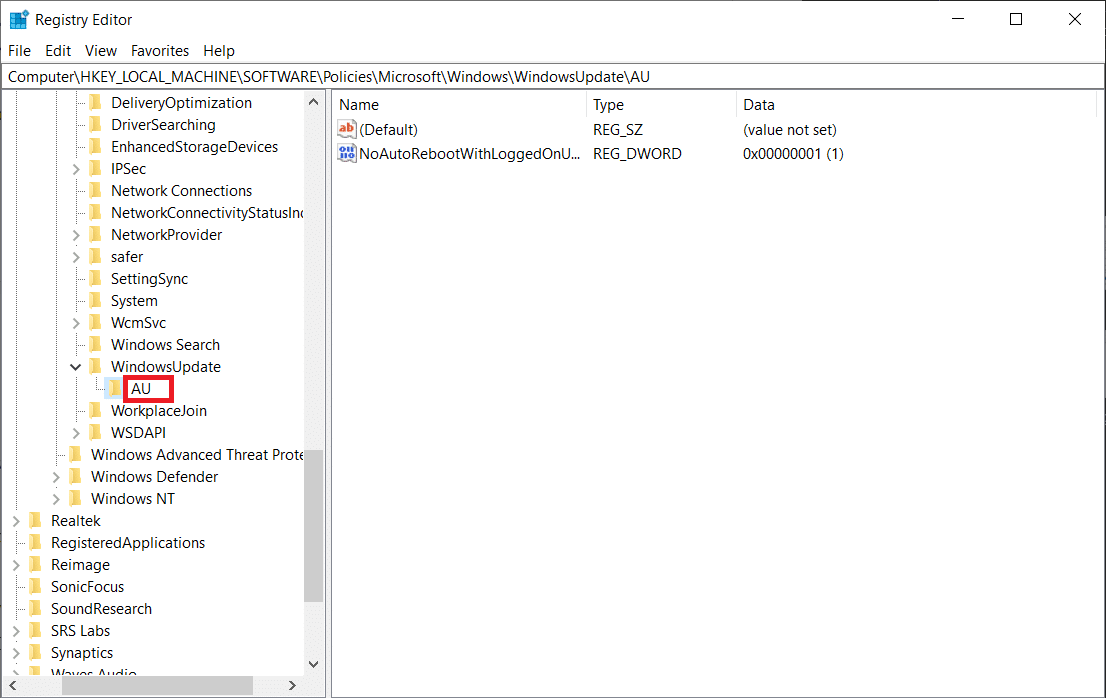
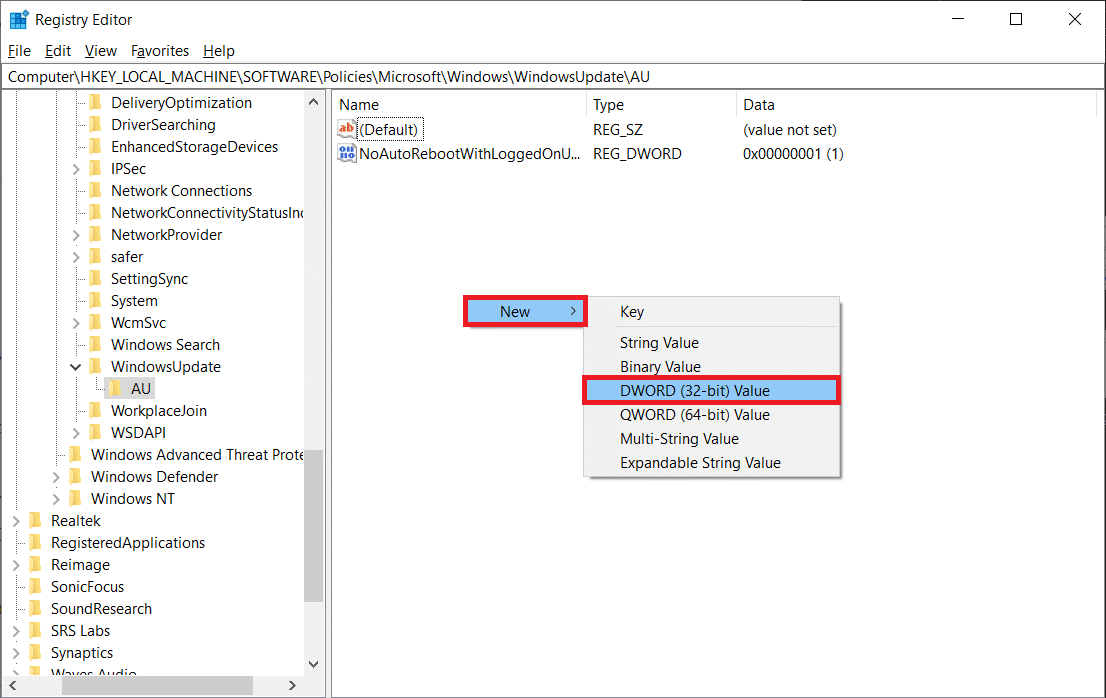
7. Move your cursor to the adjacent panel, right-click anywhere, and select New followed by DWORD (32-bit) Value.
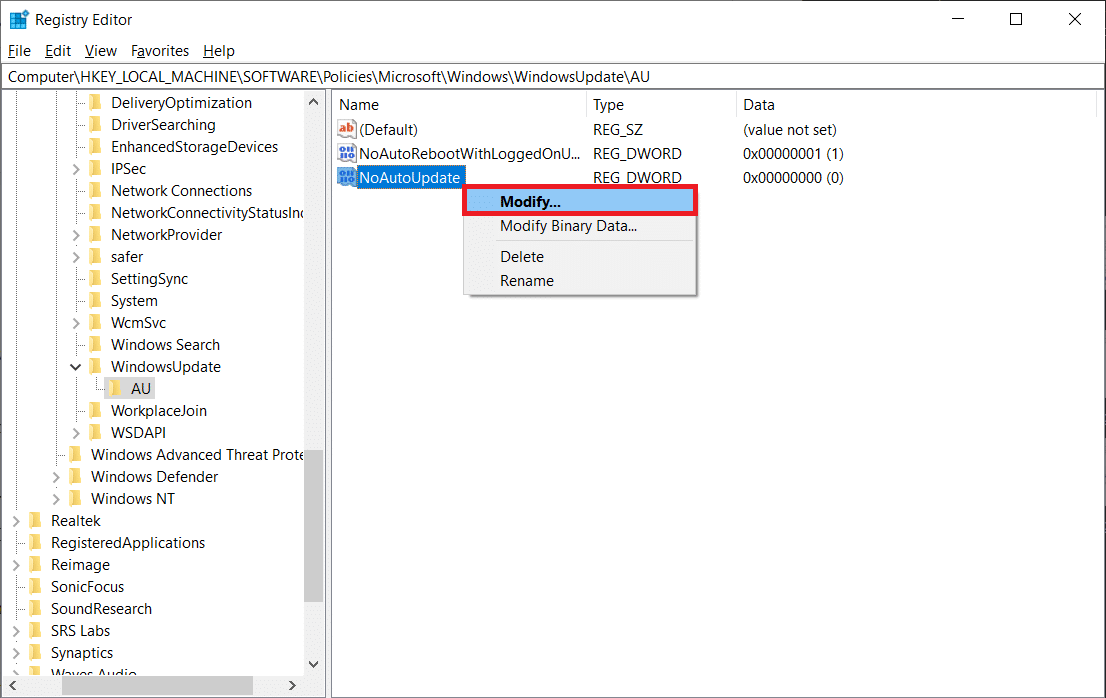
8. Rename the new DWORD Value as NoAutoUpdate.

9. Right-click on the NoAutoUpdate value and choose Modify (or double-click on it to bring up the Modify dialogue box).
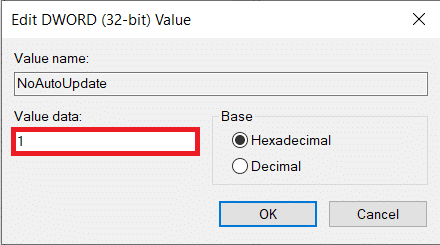
10. The default value data will be 0, i.e., disabled; change the value data to 1 and enable the NoAutoUpdate.
If you do not want to disable automatic updates entirely, rename the NoAutoUpdate DWORD to AUOptions first (or create a new 32bit DWORD Value & name it AUOptions) and set its value data according to your preference based on the below table.
| DWORD Value | Description |
| 2 | Notify before downloading and installing any updates |
| 3 | Download the updates automatically and notify when they are ready to be installed |
| 4 | Automatically download updates and install them on a pre-scheduled time |
| 5 | Allow local admins to choose the settings |
Method 4: Disable Windows Update Service
If messing around the Group Policy Editor and Registry Editor is proving to be a little too much to stop automatic updates on windows 10, you can indirectly disable automatic updates by disabling the Windows Update service. The said service is responsible for all update related activities, right from checking for new updates to downloading and installing them. To disable the Windows Update service –
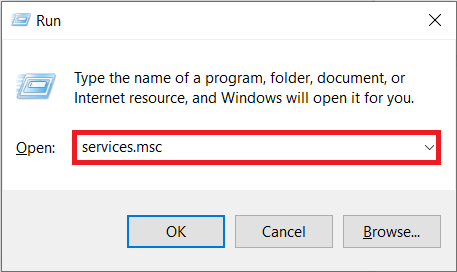
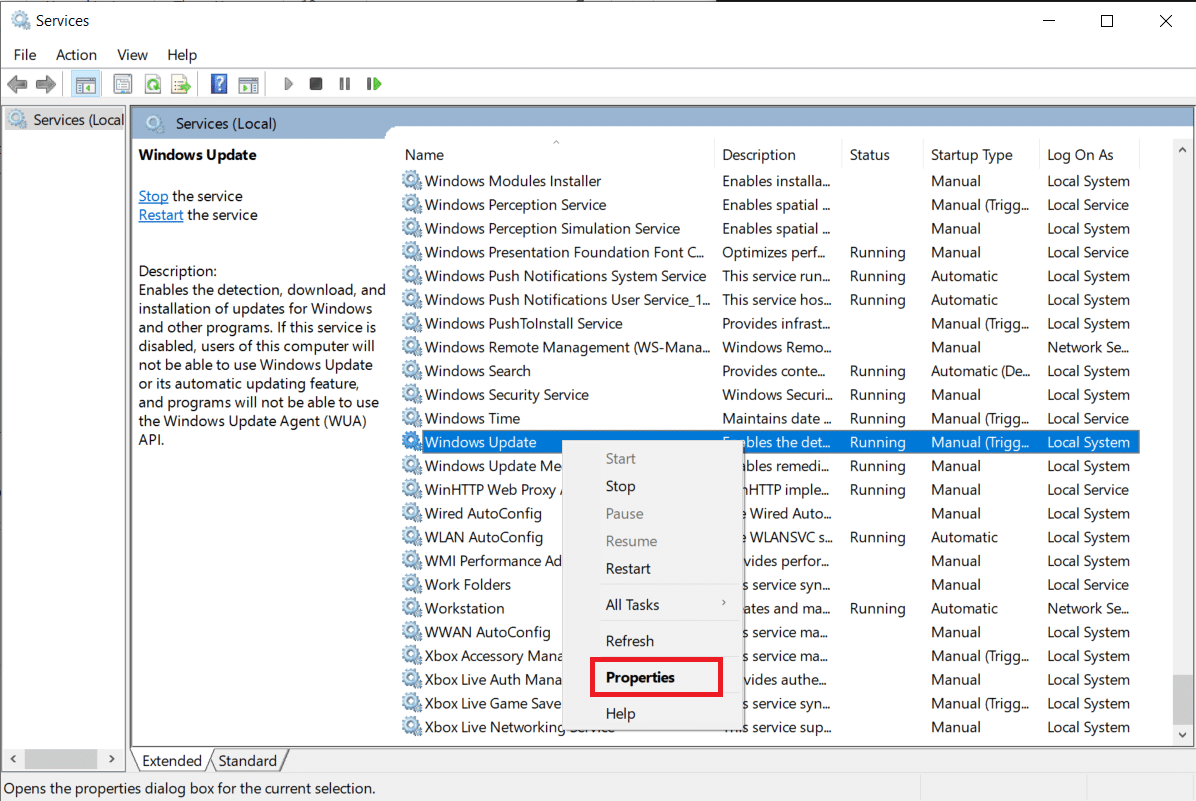
1. Press the Windows key + S on your keyboard to summon the start search bar, type Services, and click on Open.
2. Look for the Windows Update service in the following list. Once found, right-click on it and select Properties from the ensuing menu.
3. Ensure you are on the General tab and click on the Stop button under the Service Status to halt the service.
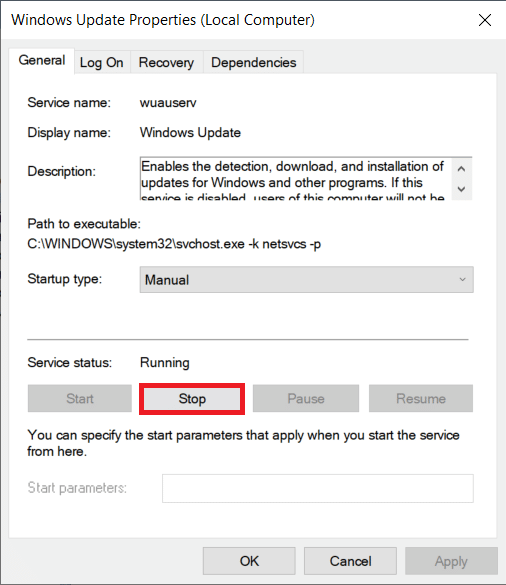
4. Next, expand the Startup type drop-down list and select Disabled.

5. Save this modification by clicking on Apply and close the window.
Method 5: Set Up a Metered Connection
Another indirect way of preventing automatic updates is to set up a metered connection. This will restrict Windows to only automatically download and install priority updates. Any other time-consuming and heavy updates will be prohibited as a data limit has been set.
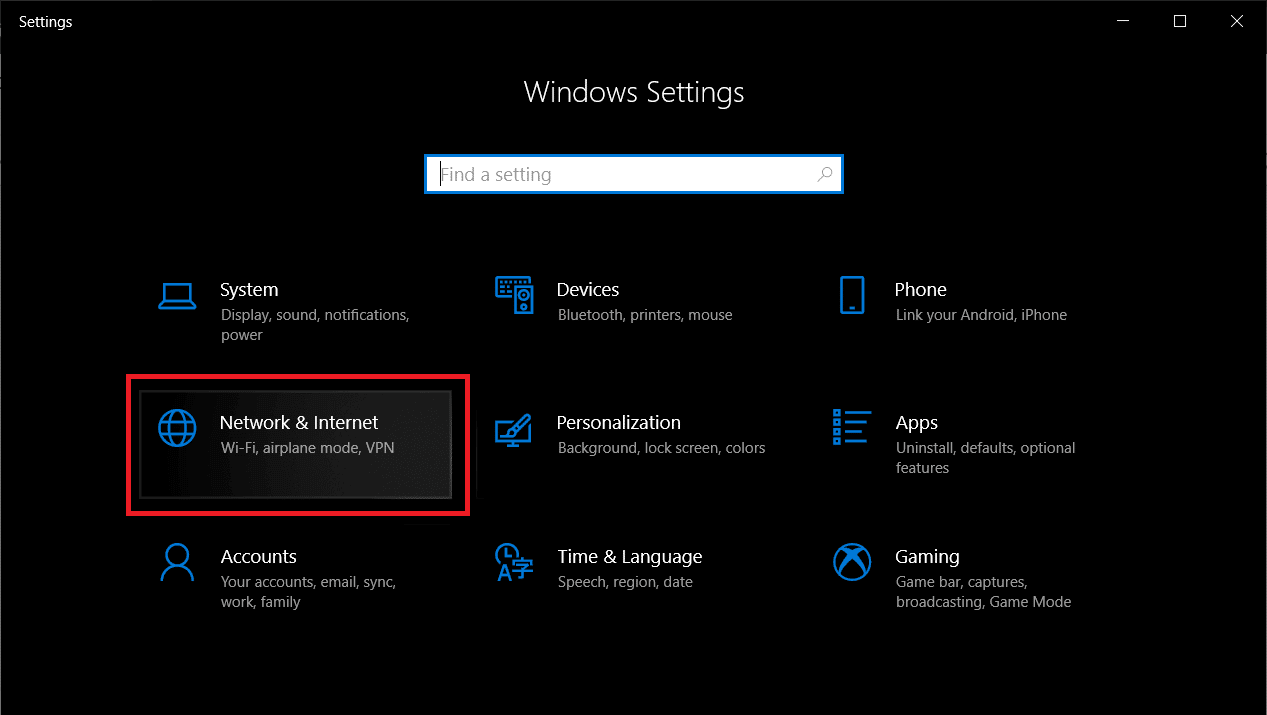
1. Launch the Windows Settings application by pressing Windows key + I and click on Network & Internet.
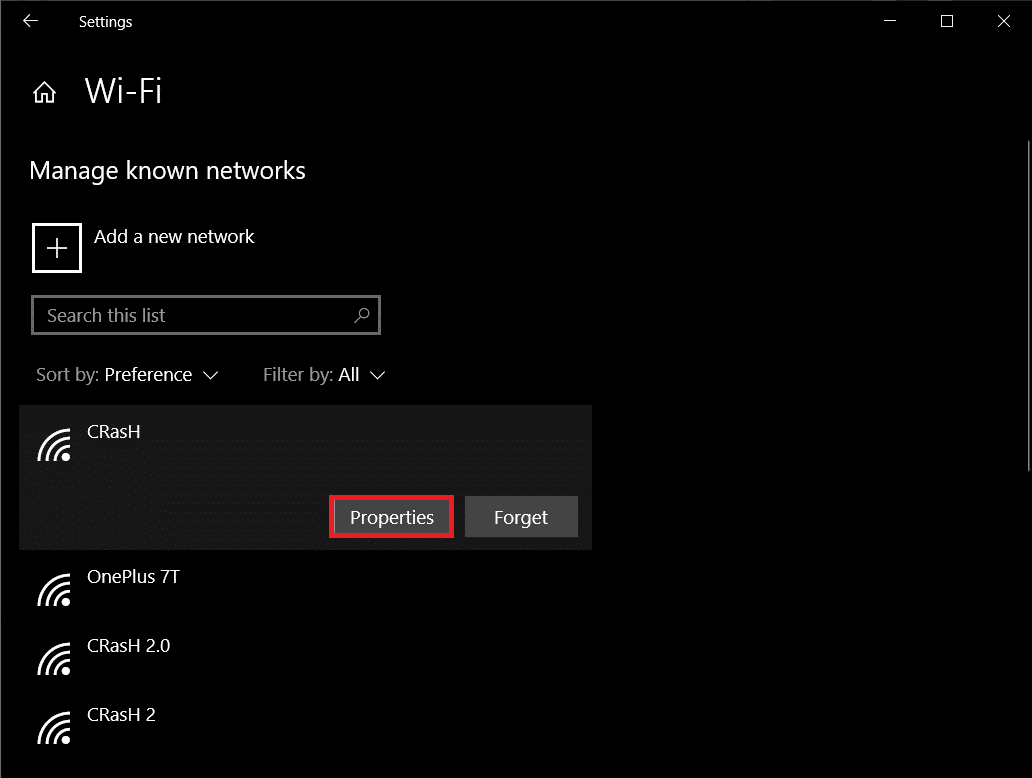
2. Switch to the Wi-Fi Settings page and on the right panel, click on Manage known networks.
3. Select your home Wi-Fi network (or the one your laptop usually exploits to download new updates) and click on the Properties button.
4. Scroll down until you find the Set as metered connection feature and toggle it On.

You can also choose to establish a custom data limit to prevent Windows from automatically downloading any heavy priority updates. To do this – click on the Set a data limit to help control data usage on this network hyperlink. The link will bring you back to the Network status settings; click on the Data usage button underneath your current network. Here, you can have a gander at how much data is utilized by each application. Click on the Enter limit button to restrict data usage.
Choose the appropriate period, reset date, and enter the data limit not to be exceeded. You can change the data unit from MB to GB to make things easier (or use the following conversion 1GB = 1024MB). Save the new data limit and exit.

Recommended:
We hope this guide was helpful and you were able to stop automatic updates on Windows 10 and you could prohibit Windows from automatically installing new updates and interrupting you. Let us know which one you implemented in the comments below.