How to Install XPS Viewer in Windows 11

Microsoft created the XPS i.e. XML Paper Specification format to compete with the widely used PDF or Portable Document Format. Although few people use XPS these days, it is not completely obsolete. You may come across an XPS file on rare occasions. An XPS Viewer was included in the Windows operating system until version 1803 of Windows 10. Unfortunately, it could not compete with PDF, therefore Microsoft stopped including it with Windows OS. However, as previously said, the spectator is not wholly inept. This post will guide you on how to install & use XPS viewer in Windows 11 to view XPS files. Additionally, we shall discuss how to uninstall XPS viewer too, in case, you find no use for it.
How to Install & Use XPS Viewer in Windows 11
Microsoft developed the XML Paper Specification format. XPS was designed to compete with PDF, however, it was never able to do so. The file extension for XPS documents is .xps or .oxps.
- Along with the text, this format can store information such as a document look, layout, and structure.
- Color and resolution independence are supported by this format.
- It also includes features such as printer calibration, transparencies, CMYK color spaces, and color gradients.
Microsoft’s official application for viewing and editing XPS documents is XPS Viewer. In Windows 11, it is no longer included with the operating system. Microsoft did, however, provide the opportunity to add it as a separate feature to the OS.
- You can use this program to read any .xps or .oxps file.
- You can digitally sign them, if necessary.
- You may also use an XPS reader to change the permissions on an XPS file or convert it to PDF.
Here’s how to install & use XPS Viewer on your Windows 11 PC:
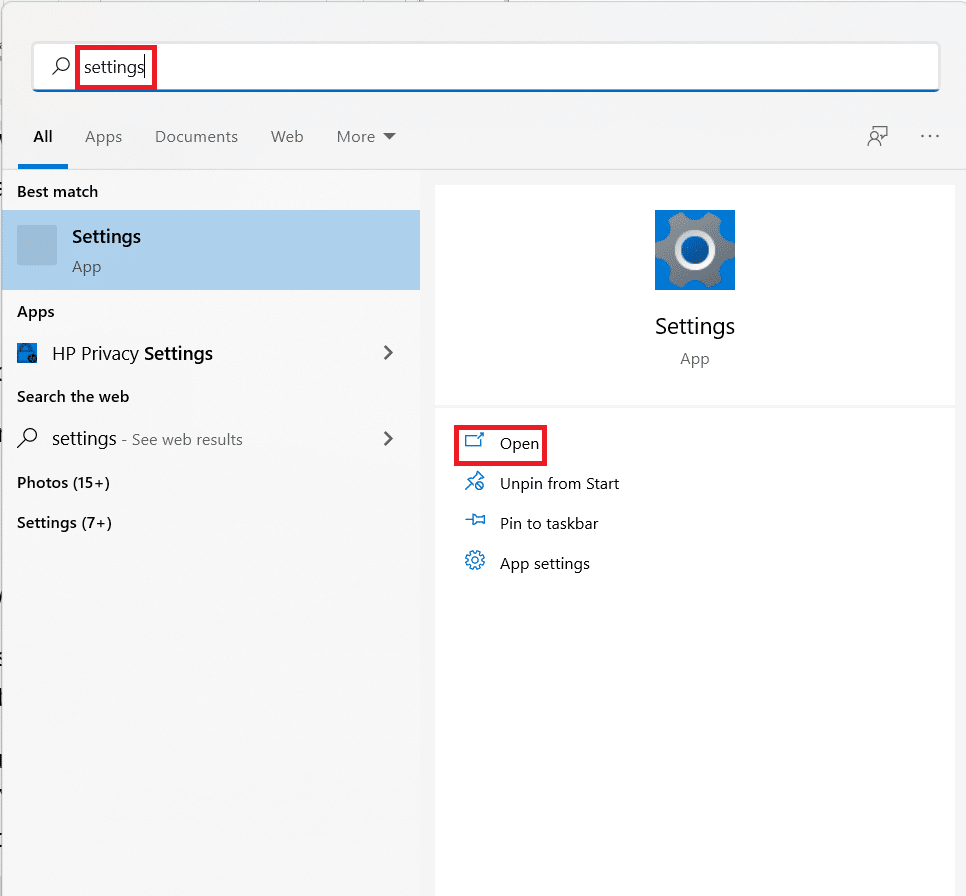
1. Click on the Search icon and type Settings.
2. Then, click on Open.

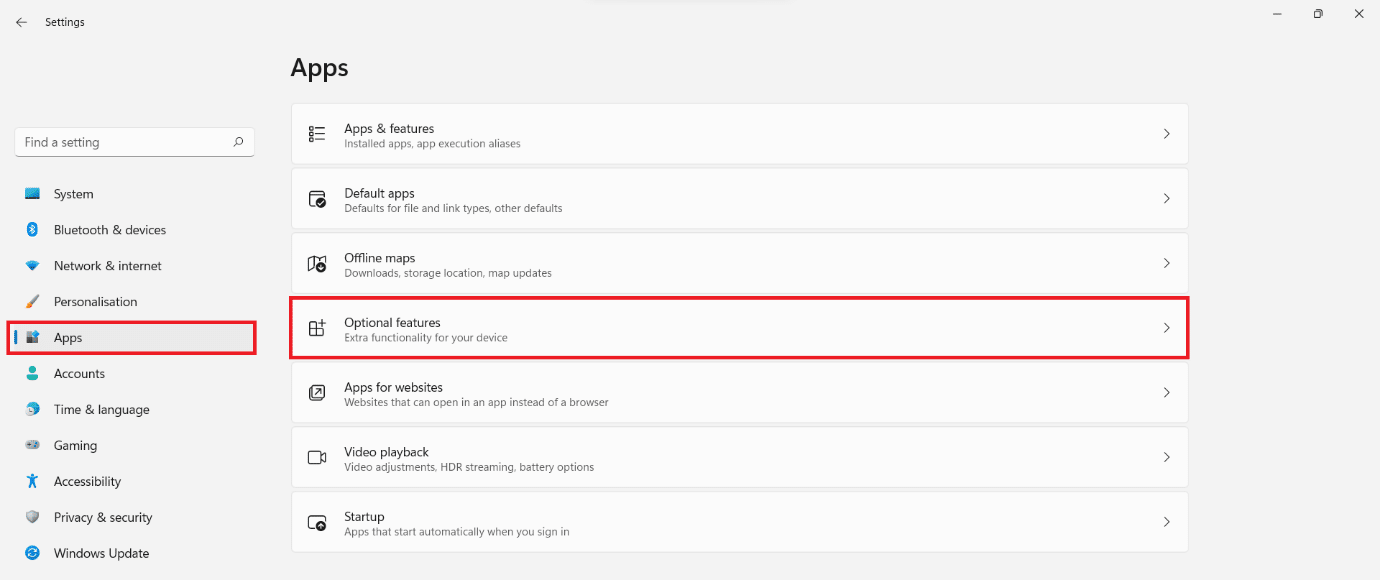
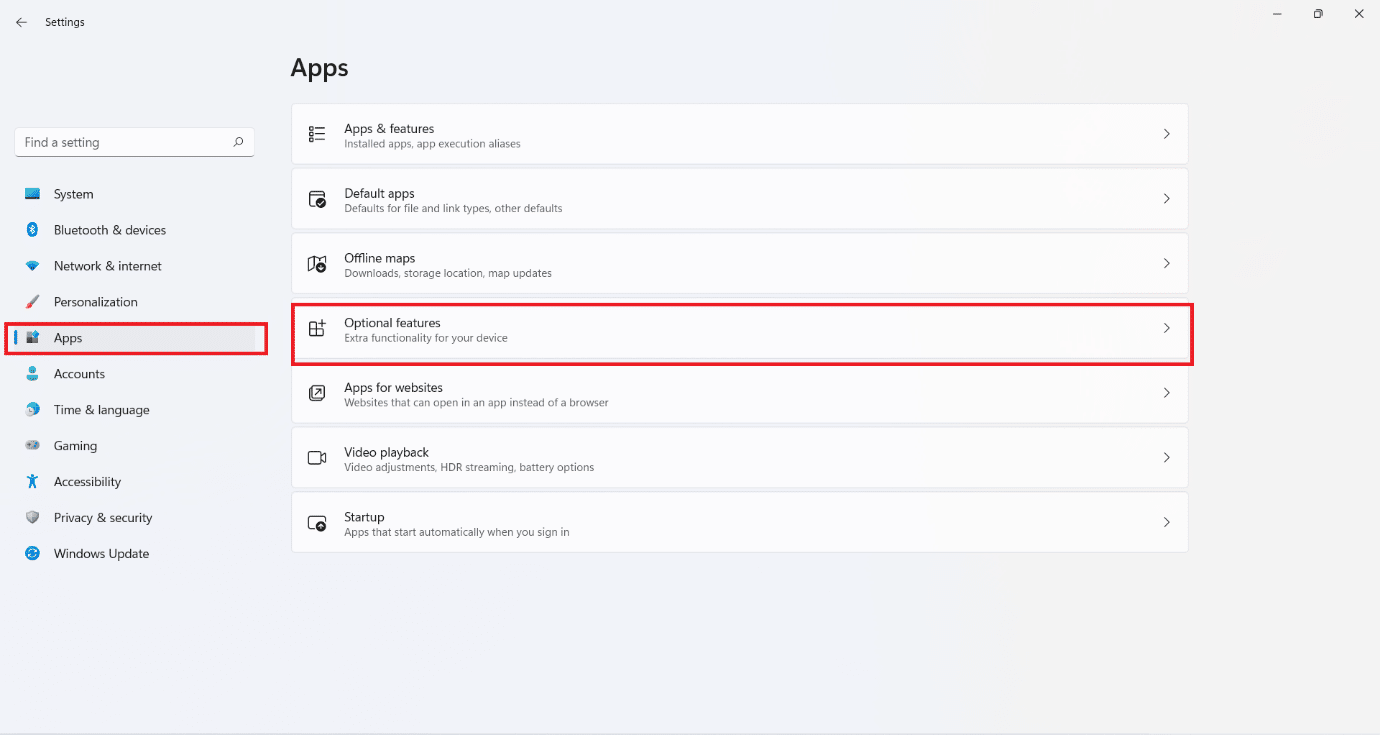
3. Click on Apps in the left pane.
4. Now, select Optional features, as depicted below.
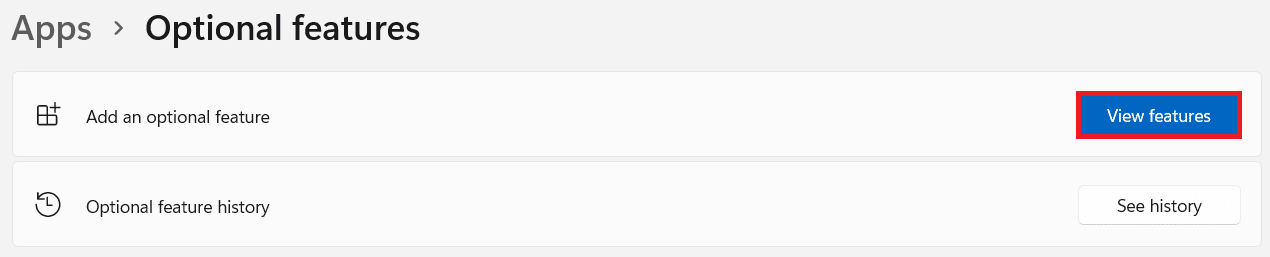
5. Click on View features, shown highlighted.
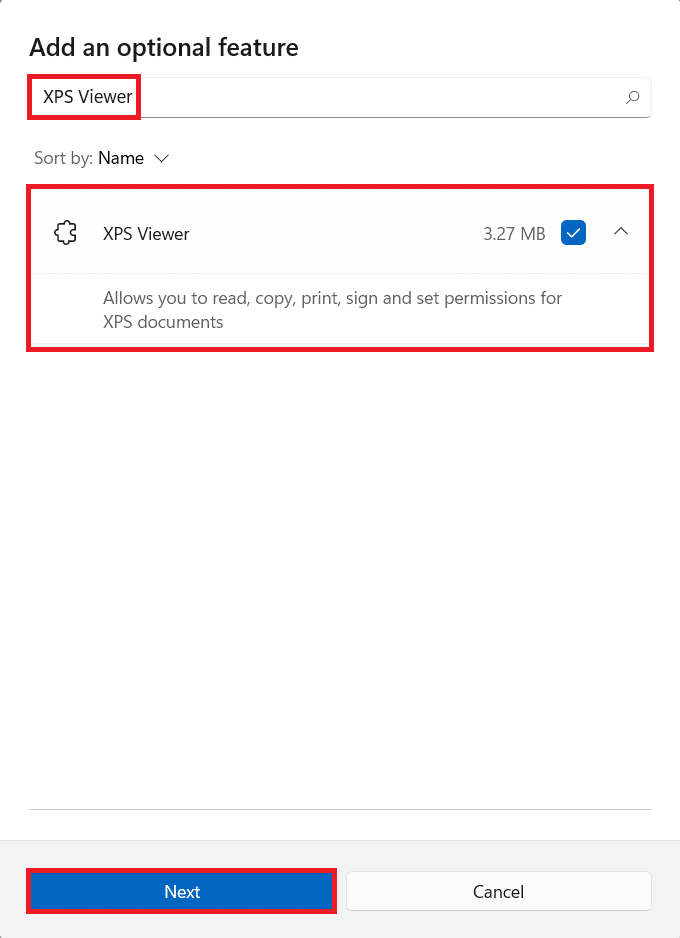
6. Type XPS viewer in the search bar provided in the Add an optional feature window.
7. Check the box marked XPS Viewer and click on Next, as depicted below.
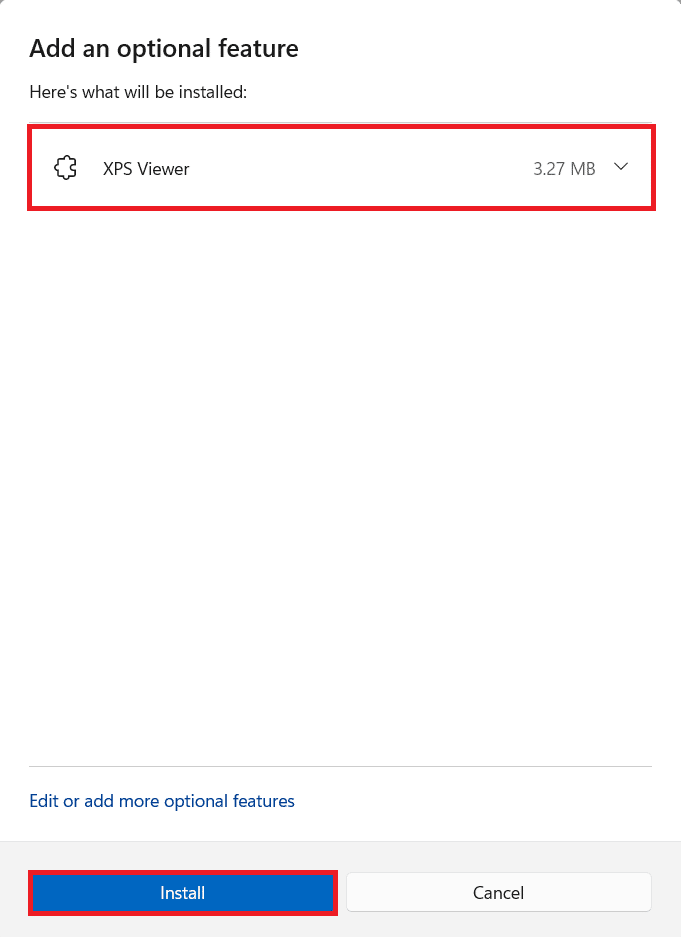
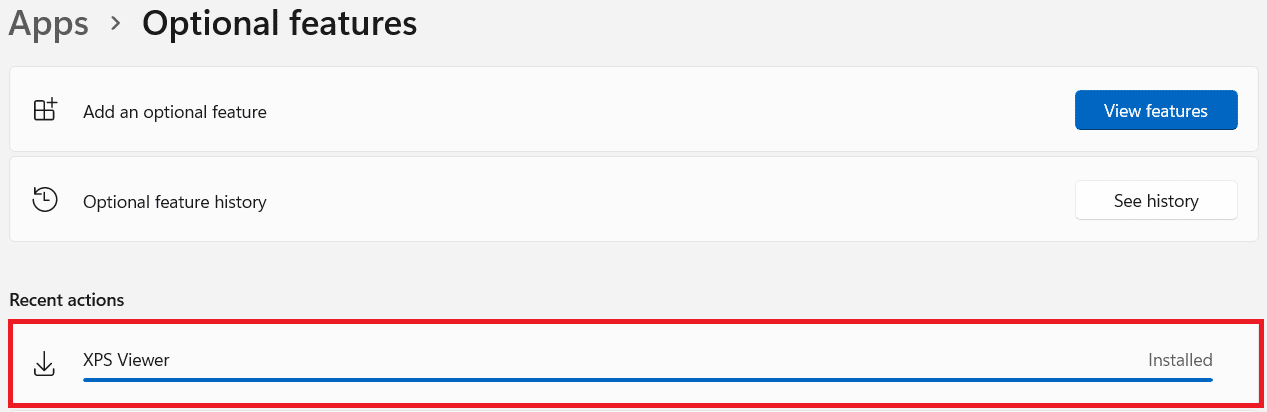
8. Finally, click on Install.
Allow the XPS viewer to be installed. You can see the progress under Recent actions, as shown.
Also Read: How to Update Microsoft PowerToys App on Windows 11
How to View XPS Files in Windows 11
Follow the given steps to use XPS viewer to open and view XPS files in Windows 11:
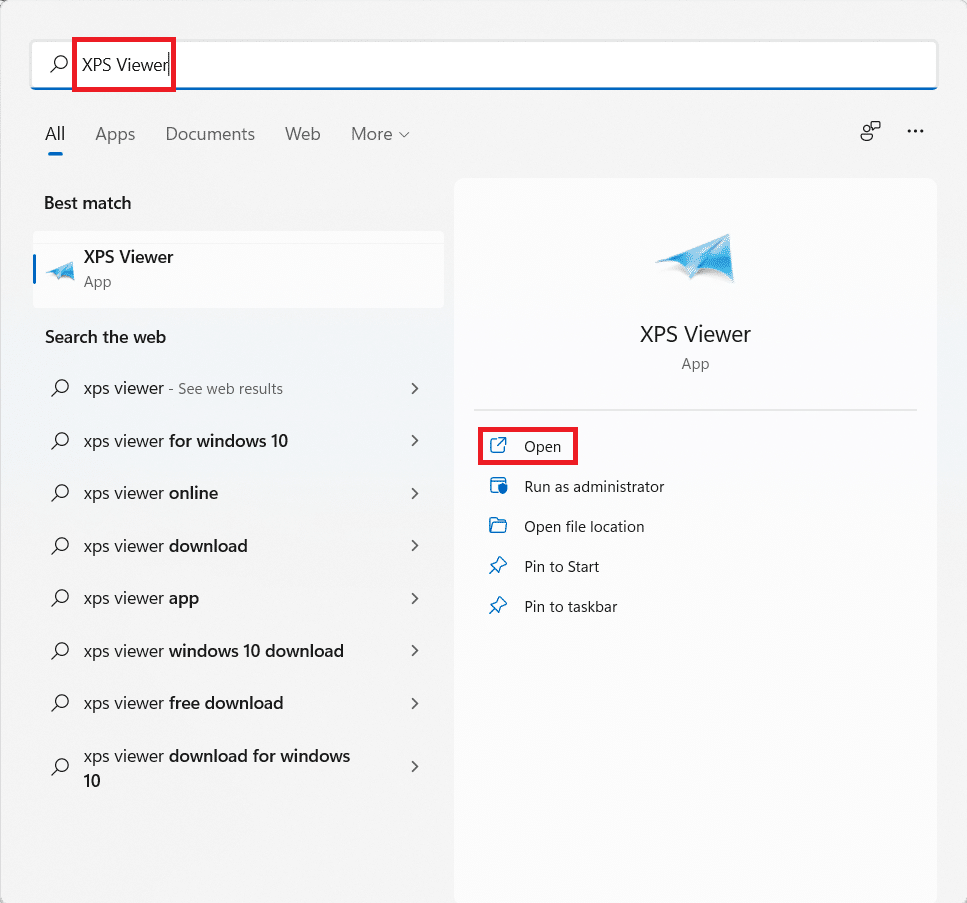
1. Click on the Search icon and type XPS Viewer.
2. Then, click on Open to launch it.
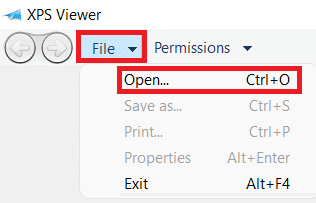
3. In the XPS Viewer window, click on File > Open… from the Menu bar at the top of the screen.
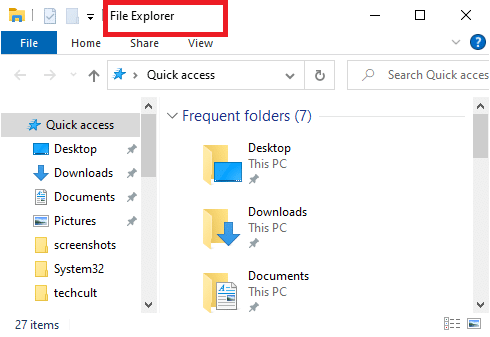
4. Locate and select your .xps file in the File Explorer and click on Open.
Also Read: How to Stop Microsoft Teams from Opening Automatically on Windows 11
How to Convert XPS File to PDF File
Follow the given instructions to convert the XPS file to PDF:
1. Launch XPS Viewer from the search bar, as earlier.
2. Click on File > Open.. as shown. Browse your PC and select the file to be opened & converted.
3. Click on the Print icon from the top of the screen
![]()
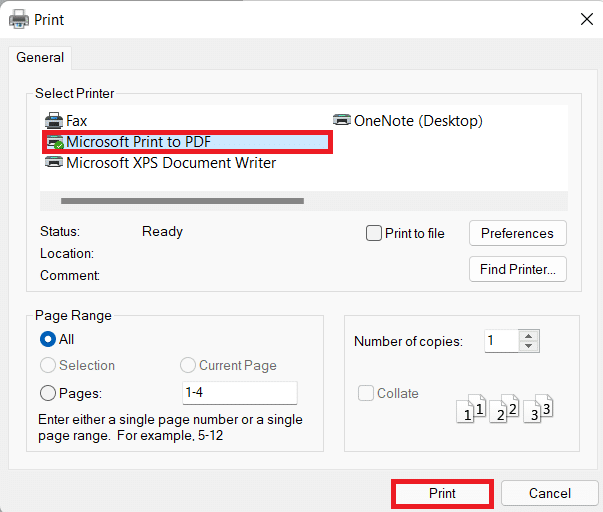
4. In the Print window, choose Microsoft Print to PDF in the Select Printer section.
5. Then, click on Print.
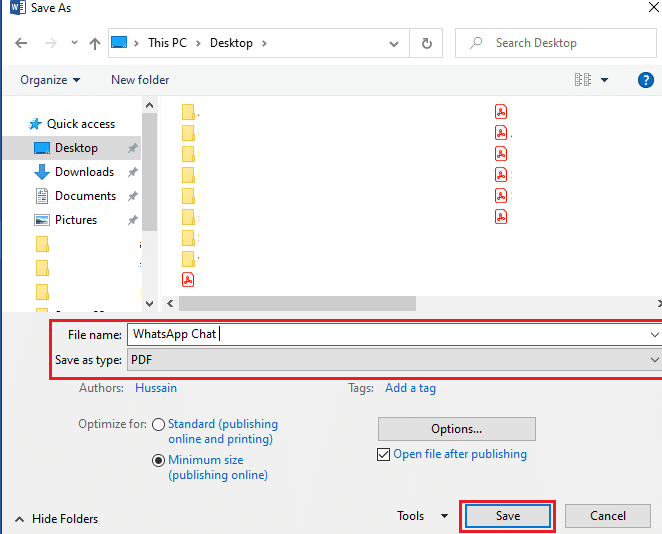
6. File Explorer window will appear. Rename & Save the file in the desired directory.
Also Read: How to Disable Microsoft Edge in Windows 11
How to Uninstall XPS Viewer
Now that you know how to install & use XPS viewer on Windows 11, you should also know how to uninstall XPS viewer, if & when need be.
1. Click on Start and type Settings. Then, click on Open.
2. Click on Apps in the left pane and Optional features in the right.
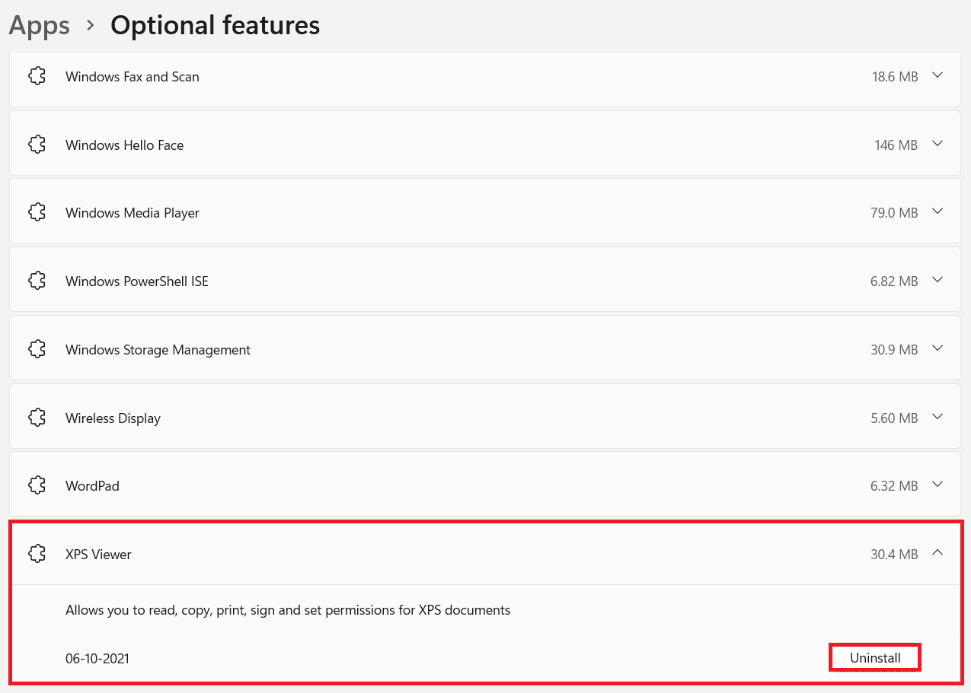
3. Scroll down or search for XPS Viewer. Click on it.
4. Under XPS Viewer tile, click on Uninstall, as depicted below.
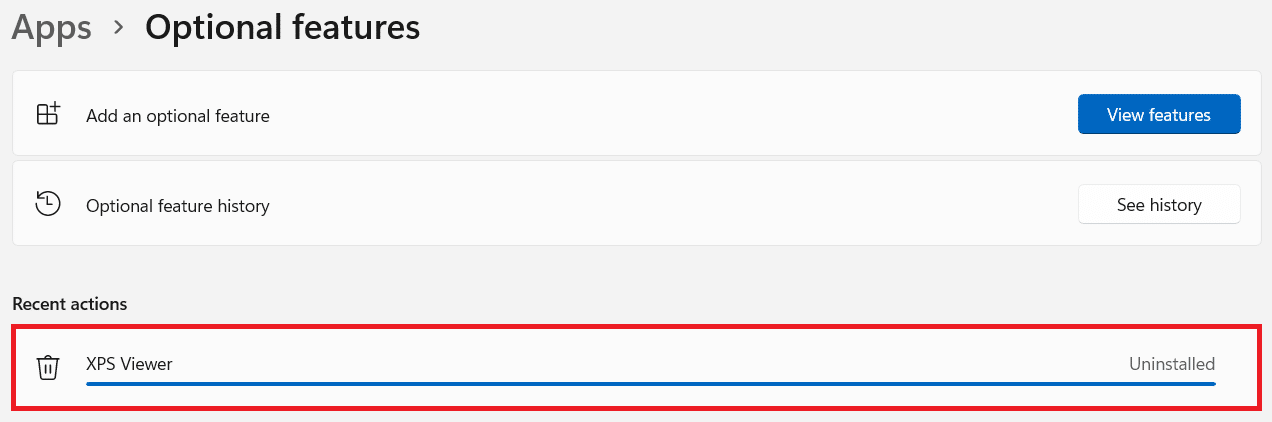
Note: You can view the progress of the uninstallation process under Recent actions section shown below.
Recommended:
We hope you found this article interesting and helpful about how to install XPS viewer in Windows 11. You can send your suggestions and queries in the comment section down below. We would love to know which topic you want us to explore next.