Fix Fallout 4 Stuttering on Windows 10

One of the games that still reigns among the gamers is the Fallout series. However, one of the terms associated with the game on the internet is Fallout 4 stuttering and freezing issue. Many reports have claimed that the Fallout 4 stuttering and freezing issue and the search for the Fallout 4 stutter fix continues. This article is a guide for troubleshooting the stuttering issue.
How to Fix Fallout 4 Stuttering on Windows 10
The section lists all the possible causes for the stuttering issue on the Fallout 4 game on your PC.
- Background apps- The apps running in the background may cause a delay in using the Fallout 4 game file.
- Outdated Graphics driver- Outdated Graphics driver on your PC can cause lag in using the Fallout 4 game, as they may not be able to support the files.
- Specifications of the PC are not optimum- If the PC specifications required to handle the Fallout 4 game are not optimum on your PC, you may experience the stuttering issue.
- Conflict with the resolution- If the resolution on your PC is not in alignment with the full-screen mode on the Fallout 4, you may see the lag.
- Incompatibility- If the Fallout 4 game is incompatible with your Windows version; you may experience the stuttering and freezing issue.
- FPS set to 60 in the Fallout 4 game- If the FPS or the Frame per Second is set to the value of 60 in the Fallout 4 game, you may experience the issue due to the speedy loading of the game file.
- Enabled v-sync on the Fallout 4 game- You must have enabled the Vertical Sync or the V-Sync feature on the Fallout 4 game, and you may experience stuttering in the game.
Method 1: Basic Troubleshooting methods
The first approach to fix the Fallout 4 stuttering issue should be to try the basic troubleshooting methods described in this section.
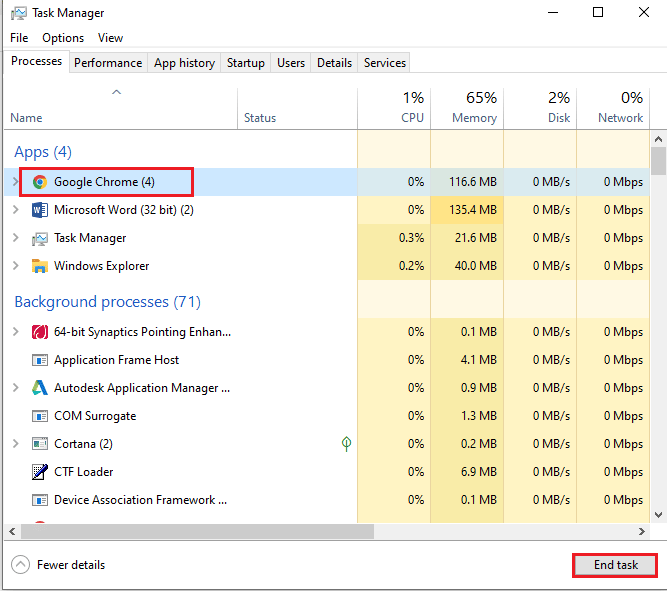
1. End Background Processes
If many memory-intensive apps are running in the background, you may experience Fallout 4 stuttering and freezing issue. To fix this issue, read the article on how to end task in Windows 10.
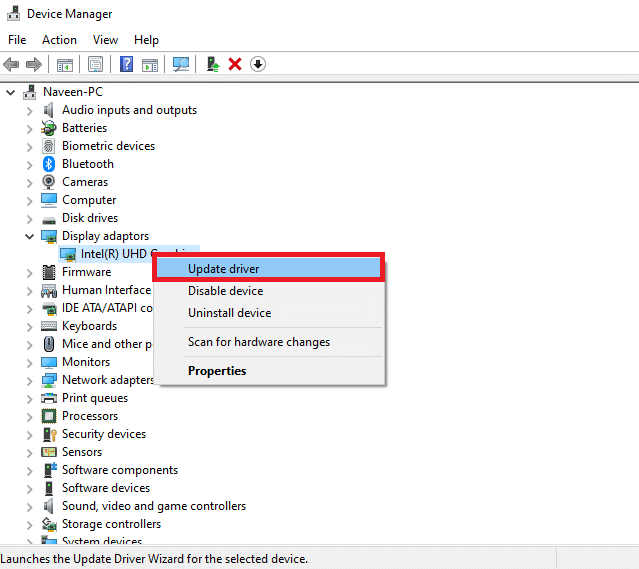
2. Update GPU Drivers
Since Fallout 4 is a game that requires an updated GPU driver, you need to make sure that the Graphics driver is updated. Use the link given here to update the Intel Graphics driver on your PC to solve the issue with the outdated or corrupt GPU driver.
The following methods will let you understand the basic requirements of the PC and help you alter them to fix the Fallout 4 stuttering issue.
3. Check System Specifications
The system specifications on your PC must satisfy the minimum basic system requirements for using the Fallout 4. You can check the system specifications on your Windows 10 PC using the link given here.
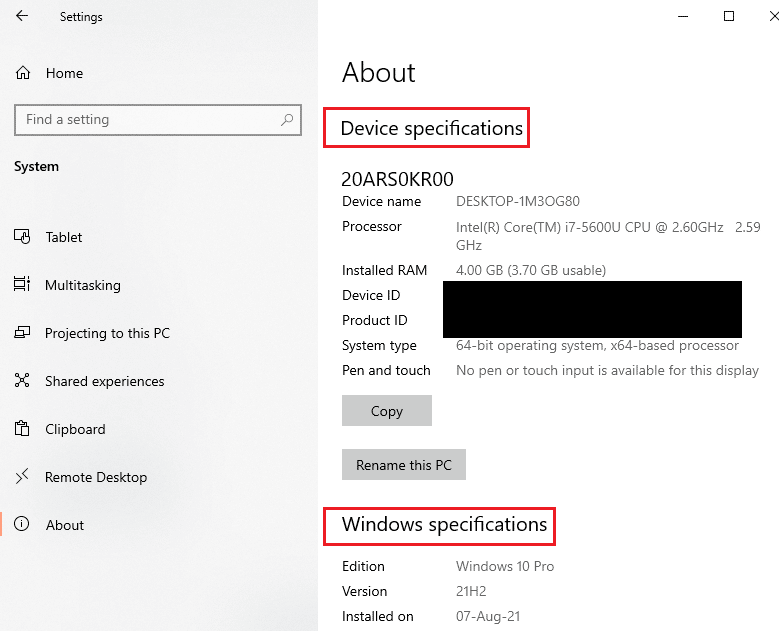
The basic system requirements for installing the Fallout 4 are listed here as:
- Operating System: Windows 7/ 8/ 10 (64- bit required)
- GPU Processor: Intel Core i5- 2300 2.8 GHz/ AMD Phenom II X4 945 3.0 GHz or equivalent
- Graphics: NVIDIA GTX 550 Ti 2 GB/ AMD Radeon HD 7870 2 GB or equivalent
You can either try upgrading the Windows or try installing the Fallout 4 on another PC with the specified requirements.
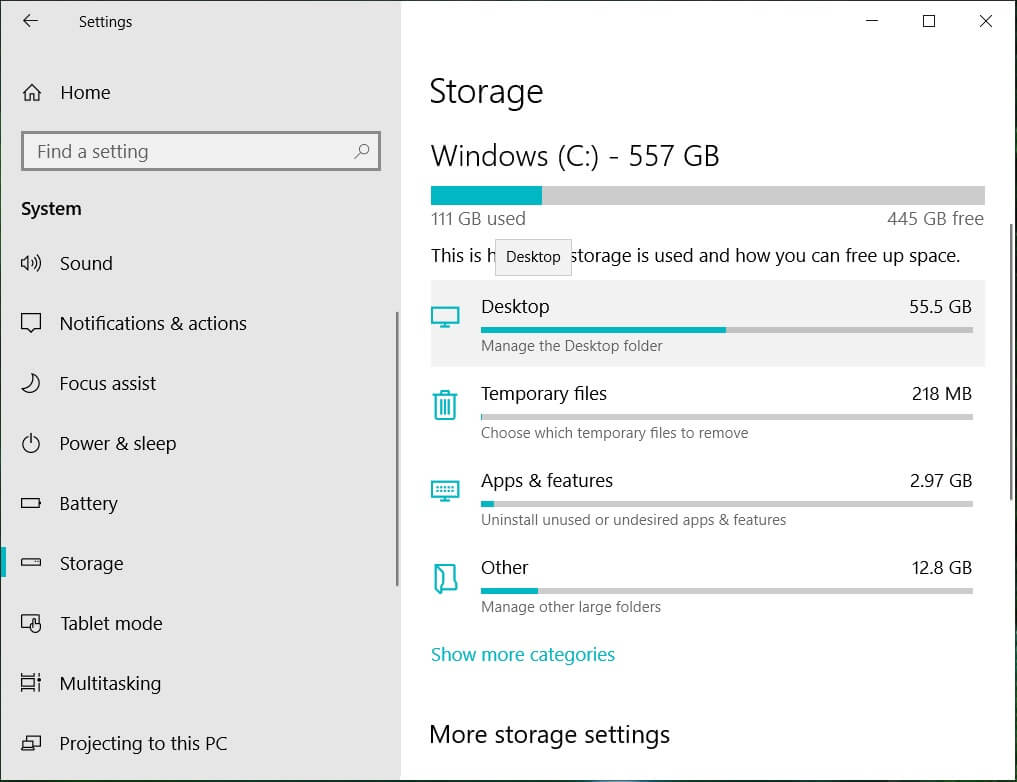
4. Manage Storage Space
If the storage space available on your PC is lesser than the basic requirements, you may not be able to use Fallout 4 without any stuttering issues. The minimum space requirements are as follows:
- Memory required: 8 GB RAM
- Storage space: 30 GB available space
To fix the issue with the storage, you can use the link to manage the storage space on your PC.
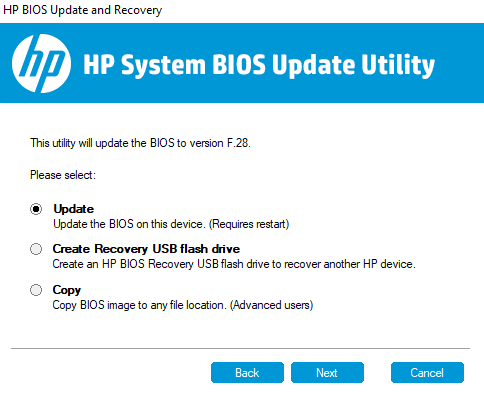
5. Update BIOS (Not Recommended)
The BIOS stands for Basic Input/ Output System and is your Computer’s core firmware. You can try updating the BIOS on your PC using the link provided here.
Note: It is advised to back up all the data and then try updating the BIOS as you might brick your PC in the process.
Also Read: Fix Fallout 76 Disconnected from Server
Method 2: Open Fallout 4 in Windowed Mode
In most instances, Fallout 4 stuttering and freezing issue occurs if you are using the game in full-screen mode. To avoid this issue, you can try using the game in the Windowed mode by following the steps below.
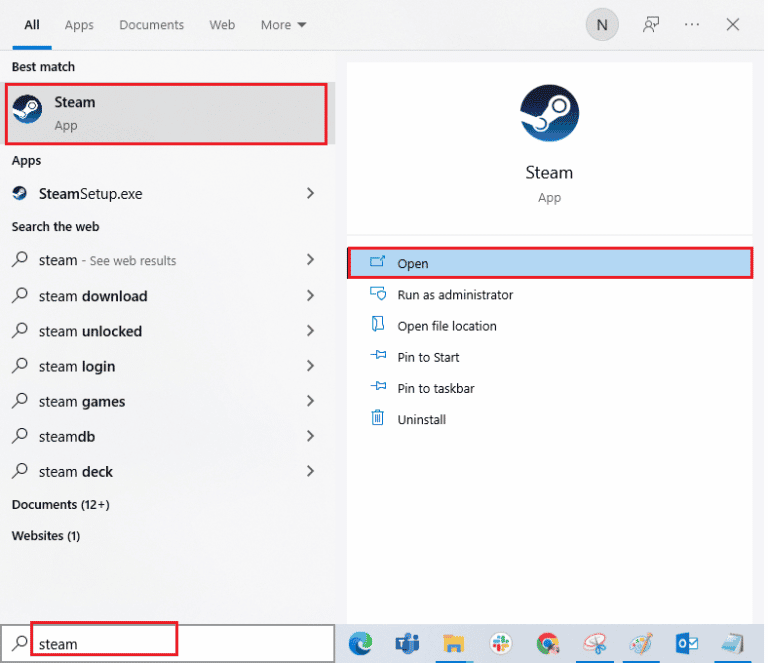
1. Hit the Windows key, type Steam and click on Open.
2. Click on the LIBRARY tab in the top menu, right-click on the Fallout 4 game, and click on the Properties option.
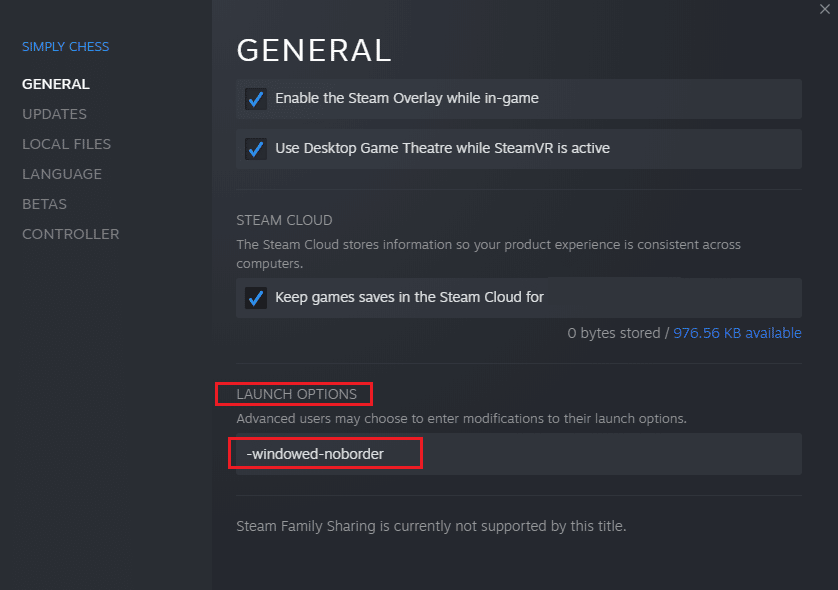
3. Then, in the General tab and go to the LAUNCH OPTIONS section.
4. In the text field provided, type in –windowed-noborder and click on the OK button to save the changes.
Note 1: Set the resolution of the game as the resolution of your PC to avoid any conflict with the display.
Note 2: Alternatively, you can select the options Windowed Mode and Borderless in the window.
5. Open the Fallout 4 game in the LIBRARY tab in the Steam app and check if you can play the game in windowed mode.
Method 3: Change Display Resolution
Sometimes, running the Fallout 4 app in the borderless mode can cause the Fallout 4 stuttering issue. If this is the case, you can try changing the resolution of the PC and then run the Fallout 4 app in the modified resolution interface.
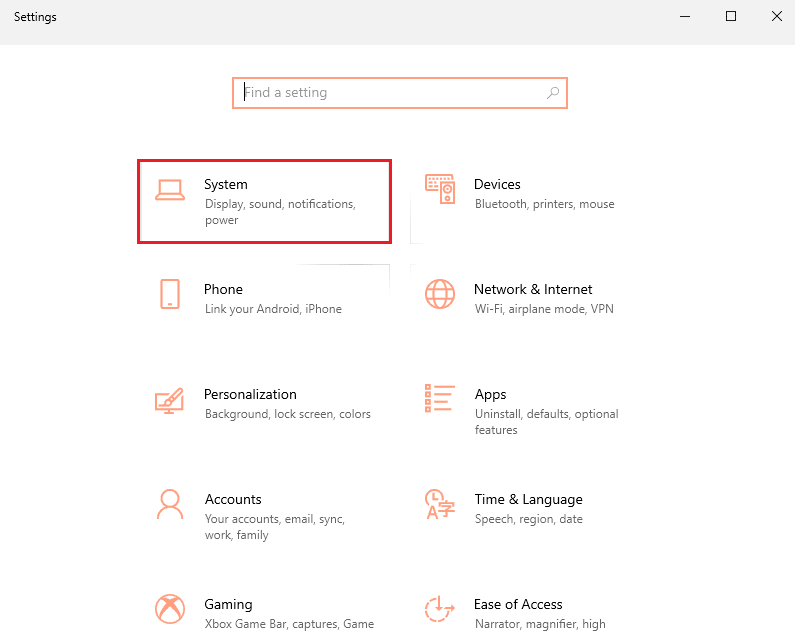
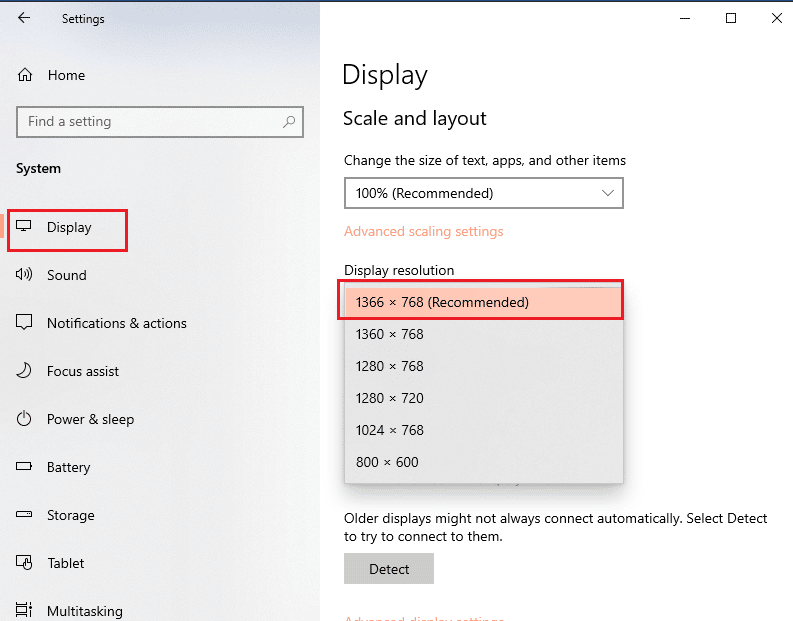
1. Press the Windows + I keys simultaneously to open the Settings.
2. Click on the System option in the menu displayed to open the System details window.
3. Click on the Display tab in the left pane of the window, and change the resolution in the Display resolution section to change the resolution of your PC.
Also Read: Fix Fallout 3 Ordinal 43 Not Found Error
Method 4: Modify Compatibility Settings
One of the reasons for the Fallout 4 stuttering issue is the compatibility of the game and the Windows. You can try running the Fallout 4 in compatibility mode to fix this issue.
1. In the Windows Search bar, search for Fallout 4 and click on the Open file location option in the right pane of the window.
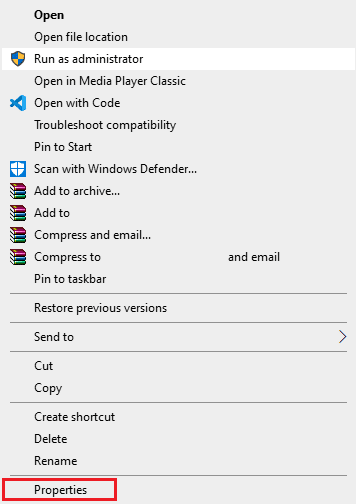
2. Right-click on the executable file of Fallout 4 and click on the Properties option in the list.
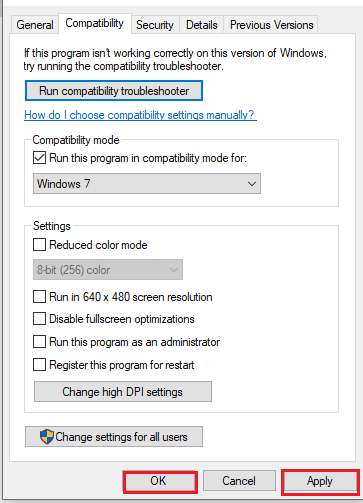
3. Navigate to the Compatibility tab in the Properties window, and select the option Run this program in compatibility mode for in the Compatibility mode section.

4. Click on the Apply and then on the OK button to run the Fallout 4 in the compatibility mode.
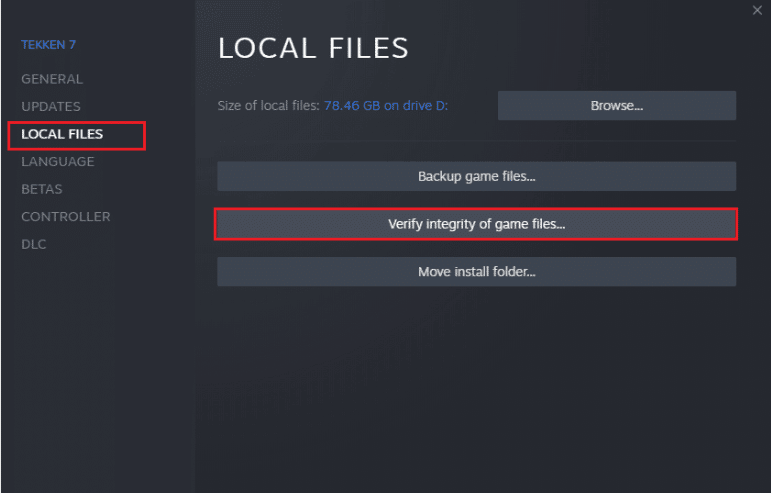
Method 5: Verify Integrity of Game Files (On Steam)
If the Fallout 4 game is missing or corrupt on the Steam app, you may experience the Fallout 4 stuttering issue. To fix the game file, you need to verify the integrity of the Fallout 4 game in the Steam app. The link provided here will lead you to an article on the method to verify the integrity of the game files on the Steam app.
Also Read: Fix Steam Remote Play Not Working in Windows 10
Method 6: Update Fallout 4 Game
If the Fallout 4 game is outdated, you may experience the lag issue on the game. You need to update the game to the latest version to fix this issue.
1. Download the latest Fallout game from Steam.

2. Install the latest version of the Fallout game and run the executable file on your PC.
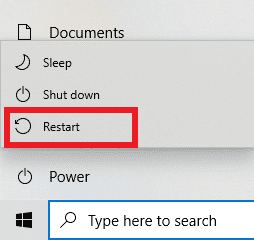
3. Press the Windows key, click on the Power button, and click on the Restart option to restart your PC.
Method 7: Edit Game Files
The methods described in this section will help you alter specific entries in the Fallout 4 game file and fix the lag issues in using the Fallout 4 game.
Step I: Change Game Mode and Resolution
This method will help you change the game mode and the resolution in the Fallout 4 game and the Fallout 4 stuttering issue can be resolved.
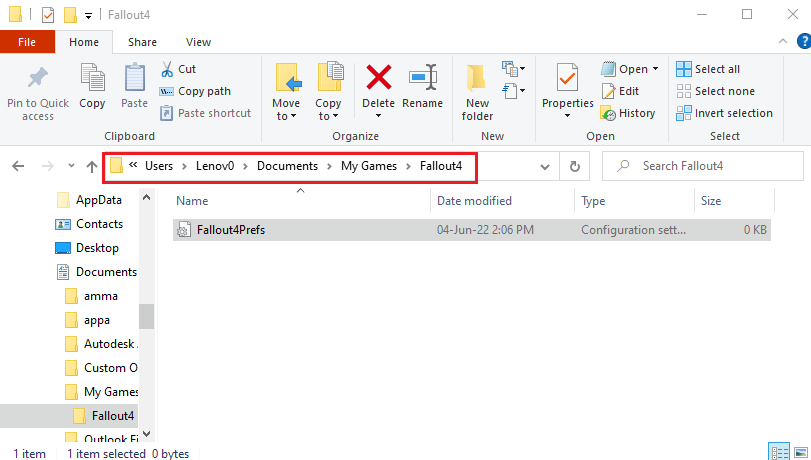
1. Press the Windows + E keys together to open the File Explorer.
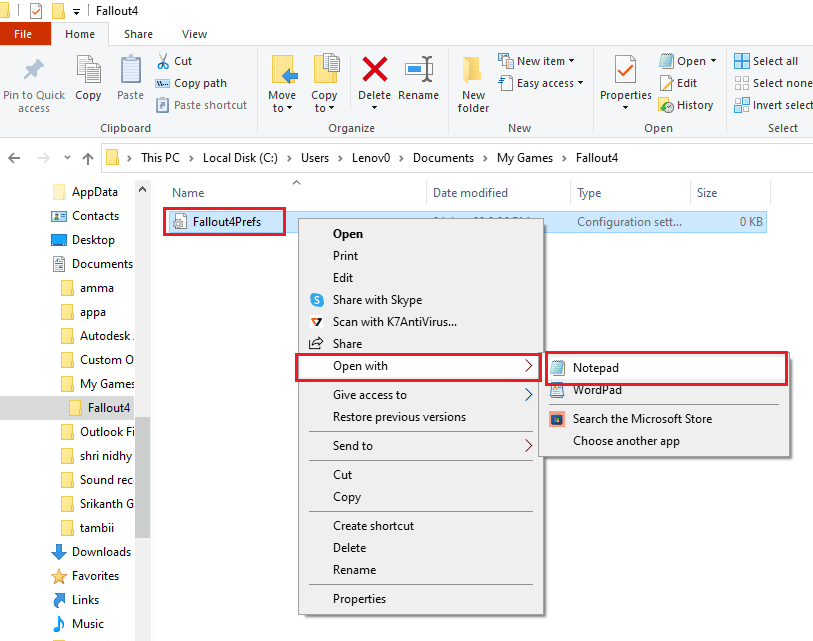
2. Navigate to the Fallout4 folder by following the location path as This PC > Local Disk (C:) > Users > Lenov0 > Documents > My Games > Fallout4.

3. Select and right-click on the Fallout4Prefs.ini file, move your cursor over the Open with option in the list, and click on the Notepad option in the adjacent menu displayed.
4. In the editor file, modify and adjust the entries in the file to change the game mode and resolution of the Fallout 4 app.
bMaximizeWindow= 1
bBorderless= 1
Full Screen= 0
W= 1440 H= 900 iSize W= 1440 iSize H= 900
Note: If you are not able to find the entry, you can press the Ctrl+ F keys and search for the entries to find the entries in the file.
5. Press the Ctrl + S keys together to save the file, close the file, and log in to your Fallout 4 app to see if the issue is fixed.
Step II: Adjust Frame Rate of Game
The Frame per Second rate of the Fallout 4 game is set to the value of 60, and this causes the Fallout 4 stuttering issue. You can try adjusting the frame rate of the Fallout 4 game file to fix this issue.
1. Press the Windows+ E keys simultaneously to open the File Explorer on your PC.
2. Navigate to the Fallout4 folder by following the location path as This PC > Local Disk (C:) > Users > Lenov0 > Documents > My Games > Fallout4.

3. Select and right-click on the Fallout4Prefs.ini file, move your cursor over the Open with option in the list, and click on the Notepad option in the adjacent menu displayed.

4. Change the entry for the frame rate of the game as iFPSClamp= 58.
Note: If you are not able to find the entry, you can press the Ctrl+ F keys and search for the entries to find the entries in the file.
5. Hit the Ctrl + S keys simultaneously to save the file, close the file, and log in to your Fallout 4 app to see if the issue is fixed.
Also Read: 5 Best FPS Counter For Windows 10
Method 8: Limit FPS Rate
Another method to change the FPS in the Fallout 4 game file is using any third-party software for limiting the FPS rate below the Display Refresh rate.
- AMD Graphics card- If you are using the AMD Graphics card, you can use the third-party software Radeon Chill to limit the FPS generation.

- NVIDIA Graphics card- You can use the drivers on the NVIDIA Graphics card to limit the FPS rate below the Display refresh rate.
Method 9: Modify Graphics Card Setting
If you are using the NVIDIA Graphics card, you can try modifying the settings on the Control Panel to fix the Fallout 4 stuttering issue.
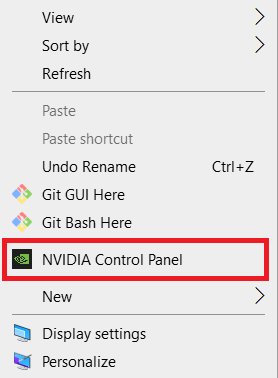
1. Right-click on any empty space on the Desktop, and click on the NVIDIA Control Panel option in the menu.
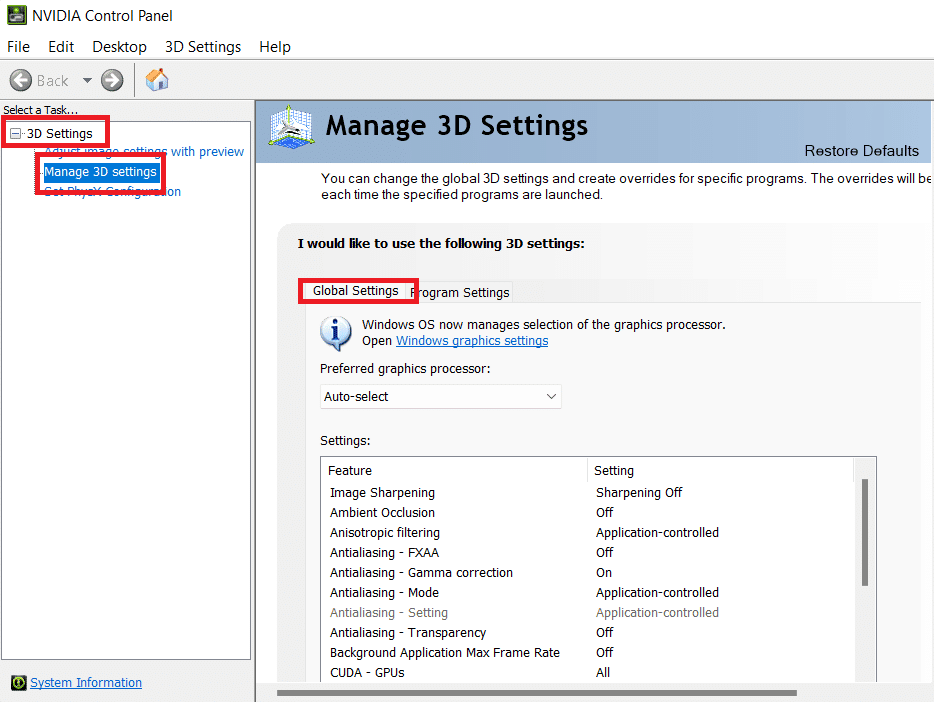
2. In the left pane of the window, expand the 3D Settings option and click on the Manage 3D settings option in the list.
3. Navigate to the Program Settings tab and select Fallout 4 in the Select a program to customize section.
Note: If you cannot find the Fallout 4 app in the drop-down menu, click on the Add button, browse and select the executable file of the Fallout 4.
4. In the Power management mode feature, modify the setting to Prefer maximum performance.
5. Set the Triple buffering feature to the On setting and the Maximum pre-rendered frames feature to the value 1 in the setting section.
6. Finally, launch the Fallout 4 game after modifying the settings in the Control Panel.
Also Read: Fix NVIDIA Container High CPU Usage on Windows 10
Method 10: Adjust V-Sync Feature
The use of V-sync or the Vertical Sync is to restrict your frame rate and prevent screen tearing while using the app. It helps you synchronize the frame rate of a game and the refresh rate of the game display. The V-Sync feature can be altered to fix the issues with the lag in using the Fallout 4 game file.
Option I: On NVIDIA Control Panel
The method to alter the V-Sync feature to fix the Fallout 4 stuttering issue on the NVIDIA Control Panel is explained here.
1. Launch the NVIDIA Control Panel window.
2. In the left pane of the window, expand the 3D Settings option and click on the Manage 3D settings option in the list.
3. Navigate to the Global Settings tab and select Fallout 4 in the Select a program to customize section.
Note: If you cannot find the Fallout 4 app in the drop-down menu, click on the Add button, browse and select the executable file of the Fallout 4.
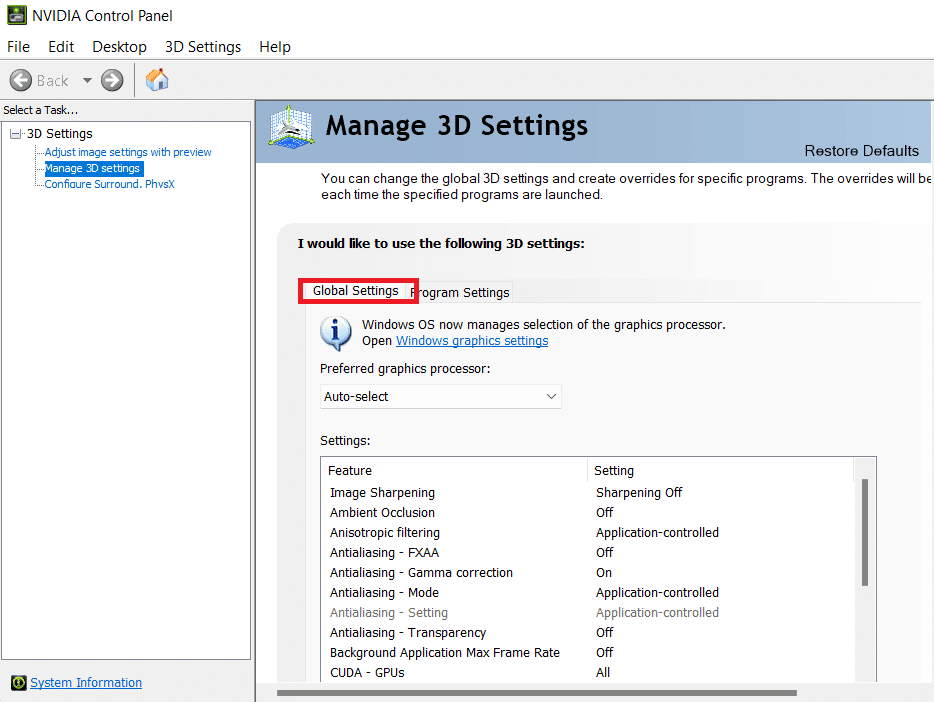
4. In the list, select the Vertical Sync feature and set the feature to adaptable in the Setting section.
Option II: On AMD Radeon Control Panel
If you are using the AMD Radeon Graphics card, you can fix the issue with the lag in the Fallout 4 game by following the steps below.
1. Open the official website of the RadeonTMPRO on your default web browser and click on the DOWNLOAD button to install the software.
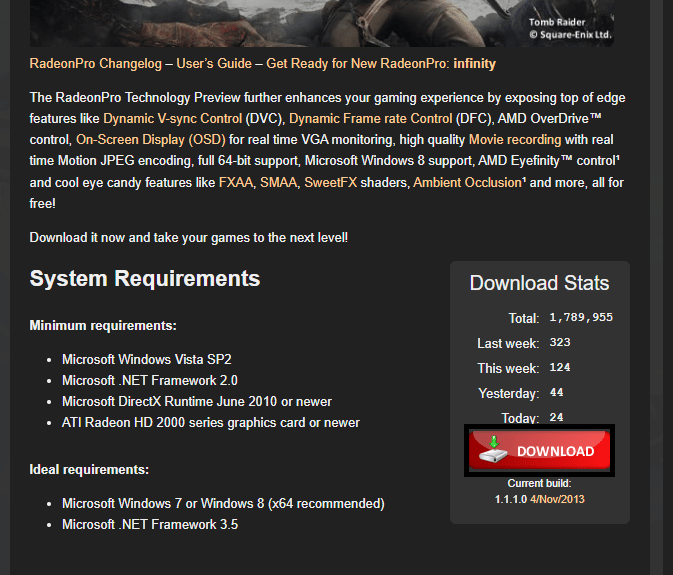
2. Run the Radeon Pro software, navigate to the Tweaks tab, and enable the dynamic V-Sync in the V-sync control options in the software.
Option III: Configure Fallout 4 File
This option will let you adjust the V-Sync feature manually on the game file to fix Fallout 4 stuttering and freezing issue.
1. Press the Windows + E keys simultaneously to open the File Explorer on your PC.
2. Navigate to the Fallout4 folder by following the location path as This PC > Local Disk (C:) > Users > Lenov0 > Documents > My Games > Fallout4.
3. Select and right-click on the Fallout4Prefs.ini file, move your cursor over the Open with option in the list, and click on the Notepad option in the adjacent menu displayed.

4. In the editor file, modify and adjust the entries in the file to change the FPS value. Set iPresentInterval= 0.
Note 1: If you are not able to find the entry, you can press the Ctrl + F keys simultaneously and search for the entries to find the entries in the file.
Note 2: If the iPresentInterval entry is set to the value 1, then the FPS limit cannot be uncapped on the game.
5. Press the keys Ctrl + S keys together to save the file, close the file, and log in to your Fallout 4 app to see if Fallout 4 stuttering and freezing issue is fixed.
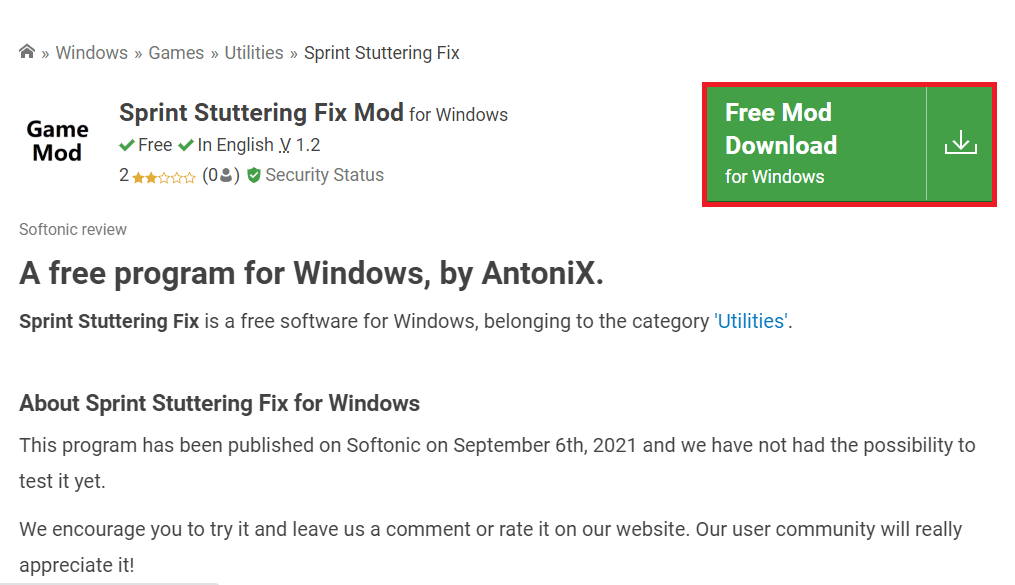
Method 11: Use Sprint Stuttering Fix Mod
Instead of using the mods, you can try applying the custom-developed mods in the Fallout 4 game. The Sprint stuttering fix mod developed from the Nexus mods will smoothen your gameplay. It resolves the weapon crashes and high FPS crashes on the game and by which you can solve the Fallout 4 stuttering issue.
Also Read: Fix Fallout 4 Mods Not Working
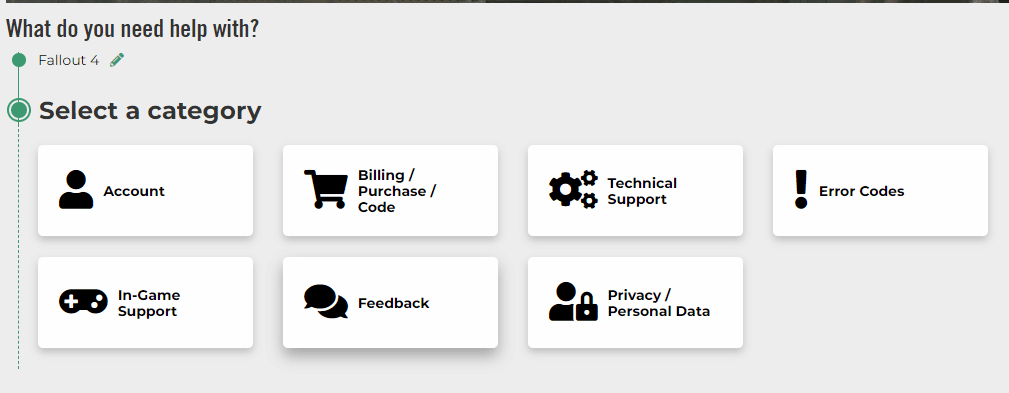
Method 12: Contact Official Bethesda Support
If none of the methods can fix the issue with the Fallout 4 game, you can try contacting the official Bethesda support for assistance. Address the issue to them and you will find the solutions to the issue soon.
Recommended:
The article discusses the issue of Fallout 4 stuttering and freezing. If you find out Fallout 4 laggy on your PC, you can use the methods given here as Fallout 4 stutter fix guide. Drop your suggestions and queries on this topic in the comments section.