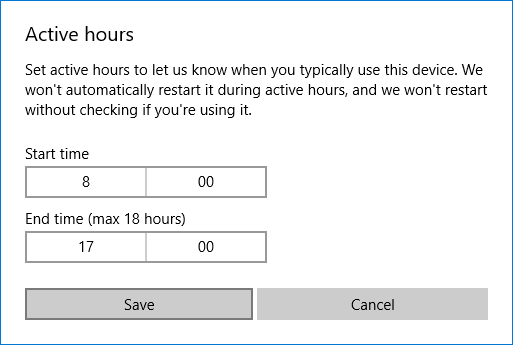
If you have installed the latest Windows 10 Anniversary Update, then you should be aware of a new feature introduced in this update called Windows Update Active Hours which we have covered in detail here. But what if you don’t want this feature or want to get rid of this unnecessary feature. Well, in this tutorial we would be exactly covering how to disable active hours for Windows update.
The best part about this feature is that Windows 10 allows you to disable this feature using Registry Editor. If you don’t want to disable active hours, you could easily override it using the Restart options. So without wasting any time let’s see How to Disable Active Hours for Windows 10 Update with the help of the below-listed tutorial.
Disable Active Hours for Windows 10 Update
Make sure to create a restore point just in case something goes wrong.
Method 1: Override Active Hours for Windows Update
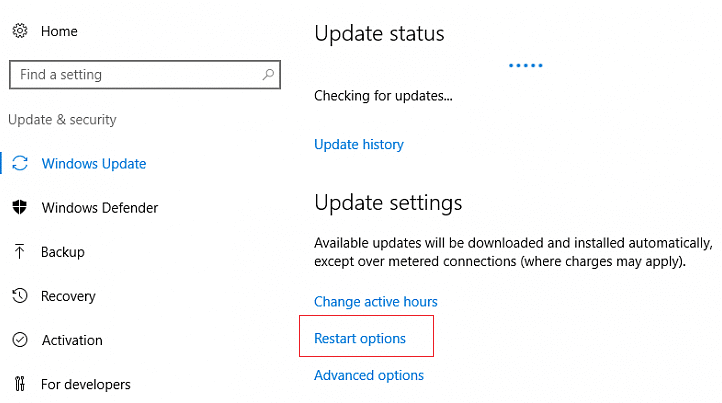
1. Press Windows Key + I to open Settings then click on Update & Security.
![]()
2. From the left-hand menu, select Windows Update.
3. Under Update Settings, click on “Restart options“.
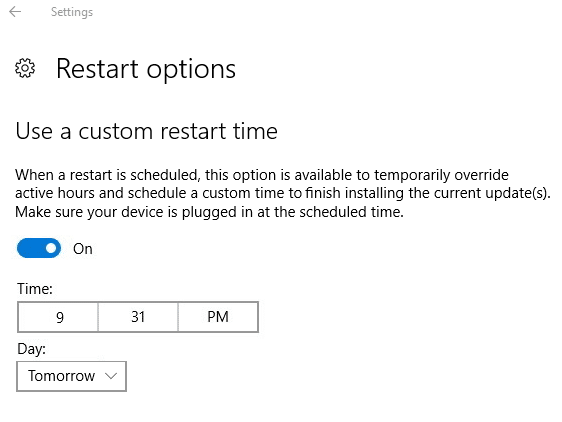
4. Now under “Use a custom restart time” toggle the switch to ON.
5. Next, pick a custom time when you want your device to restart for Windows to finish installing the update.

6. You could also Pick a day and then at that time & the particular day, your system will automatically restart.
Note: You could only enable this option or set a custom time for restart if your device needs to restart to install updates.
7. That’s it, you could easily override Active Hours using the above method.
8. Also, if you need Windows to restart, you could manually click the Restart button under Settings > Update & Security > Windows Update screen.
Method 2: Disable Active Hours for Windows 10 Update via Registry
1. Press Windows Key + R then type regedit and hit Enter to open Registry Editor.

2. Navigate to the following registry key:
HKEY_LOCAL_MACHINESOFTWAREMicrosoftWindowsUpdateUXSettings
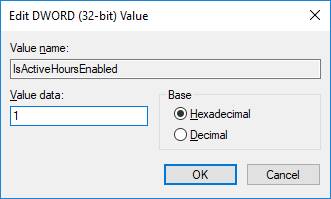
3. Right-click on Settings then selects New > DWORD (32-bit) Value.
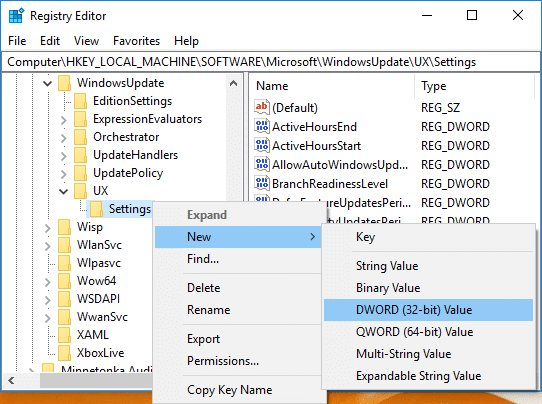
4. Name this new DWORD as IsActiveHoursEnabled then double-click on it and change it’s value to:
To Enable Active Hours for Windows Update: 0
To Disable Active Hours for Windows Update: 1
5. Close Everything and restart your PC to save changes.
6. Open Settings, and you won’t see Active Hours under Windows Update.
Recommended:
That’s it you have successfully learned How to Disable Active Hours for Windows 10 Update but if you still have any queries regarding this guide then feel free to ask them in the comment’s section.