How to Export Saved Passwords in Google Chrome

How to Export Saved Passwords in Google Chrome: If you have saved your login information (username and password) in Google Chrome then it might be helpful to export your saved password to a .csv file as a backup. In the future, if you need to reinstall Google Chrome then you can easily use this CSV file to restore the passwords that you saved for various websites. Whenever you visit any website Google Chrome asks you to save your credential for that website so that in future when you visit that website you could automatically login to the website with help of the saved credential.
For example, you go to facebook.com and Chrome asks you to save your password for Facebook, you give permission to Chrome to save your credential for Facebook. Now, whenever you visit Facebook you could automatically login with your saved credential without the need to enter your username & password each time you visit Facebook.
Well, taking a backup of all your saved credential makes sense, as without them, you might kind of feel lost. But I should mention that when you take backup in the .csv file, all your information is in plain text and anyone with access to your PC could easily retrieve your username & password for any of the listed websites in the CSV file. Anyway, you either store your .csv in a USB and then lock that USB in a safe place or you could import this file to your password manager.
So once you download the .csv file make sure you delete it right after you put that in a USB or inside password manager. So without wasting any time let’s see How to Export Saved Passwords in Google Chrome in Windows 10 with the help of the below-listed tutorial.
How to Export Saved Passwords in Google Chrome
Make sure to create a restore point just in case something goes wrong.
Method 1: Enable or Disable Password Export in Google Chrome
1.Open Google Chrome then copy the following address in the address bar and hit Enter:
chrome://flags/
2.The first option which you would see in the above screen would be “Password Export“.
3.Now from the Password Export drop-down select Enabled if you want to Enable Password Export in Chrome.
4.In case, you want to disable Password Export, simply select Disabled from the drop-down.
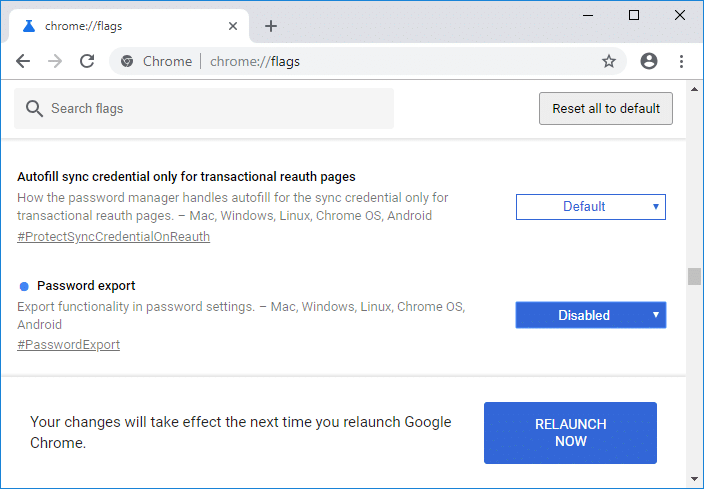
5.Restart Chrome to save changes.
Method 2: How to Export Saved Passwords in Google Chrome
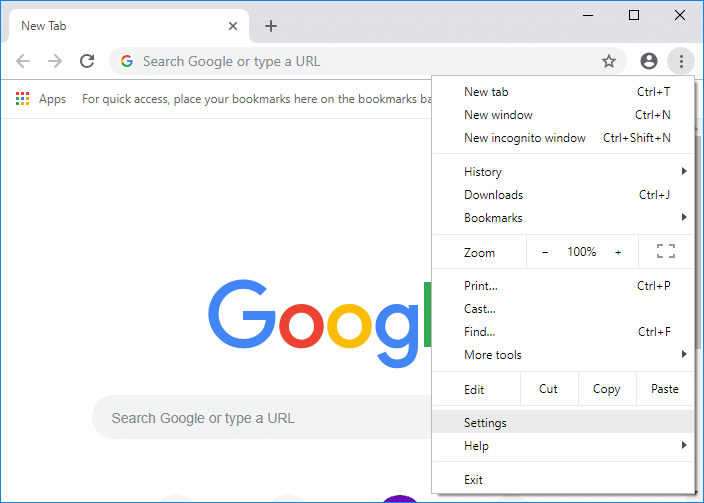
1.Open Google Chrome then click on three vertical dots (More button) on the top right corner and then click on Settings.
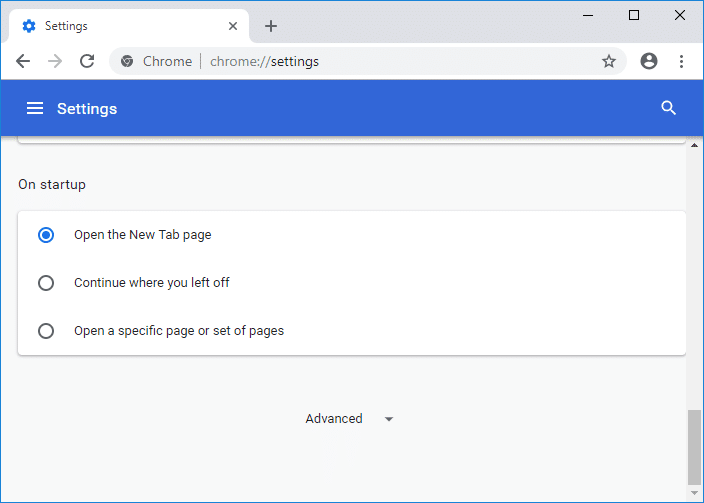
Note: You can directly access the Manage Passwords page by going to this address in the browser:
chrome://settings/passwords
2.Scroll down then click on the Advanced link at the bottom of the page.
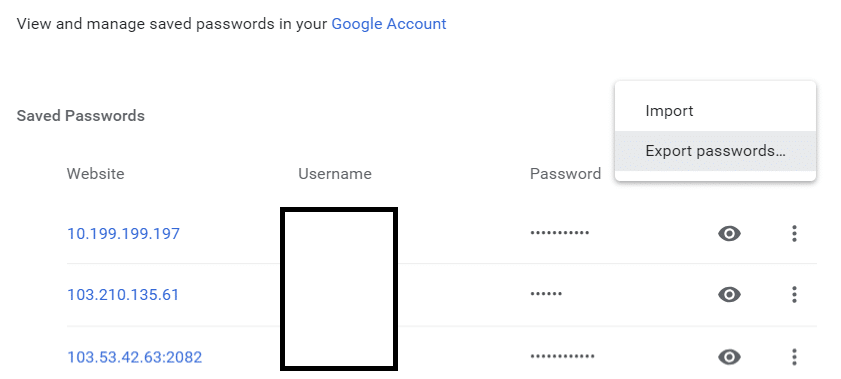
3.Now under Passwords and forms section click on “Manage passwords“.
4.Click on the More Action button (three vertical dots) next to “Saved Passwords” heading.
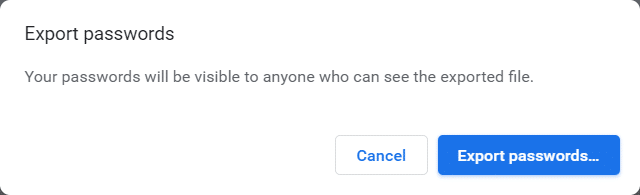
5.Then select “Export passwords” and then again click on “Export Passwords” button.
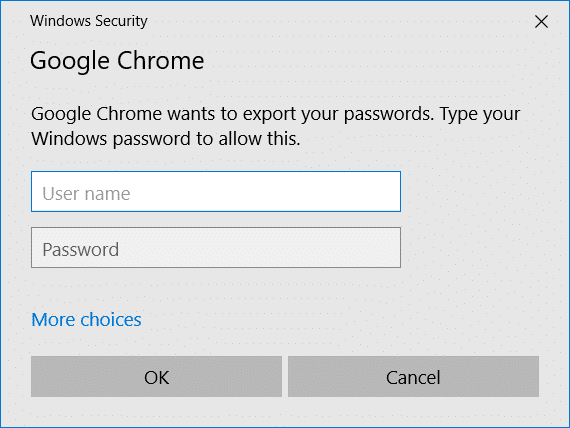
6.Once you click on “Export Passwords” button you would be asked to verify your identity by entering current Windows sign-in credentials.
7.Type your Windows username and password you use for login and click OK.
8.Navigate where you want to save Chrome password list and click Save.
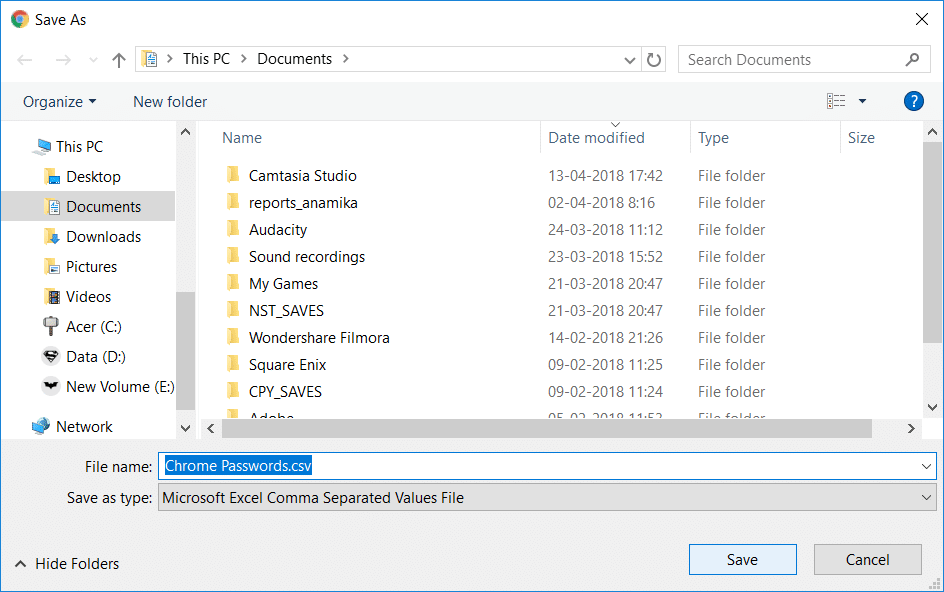
Note: By default, your password list would be named Chrome Passwords.csv, but if you want you can easily change that in the above Save as dialog box.
9.Close Chrome and navigate to the Chrome Passwords.csv file to verify that all your credential are there.
Recommended:
That’s it you have successfully learned How to Export Saved Passwords in Google Chrome but if you still have any questions regarding this tutorial then feel free to ask them in the comment’s section.