How to Delete Uber Eats Account

It is no secret that food delivery apps have grown tremendously in recent years. One such app is Uber Eats which was launched by Uber recently is worth mentioning. Uber Eats is commonly used on Android and iOS platforms but can also be accessed via the web browser of your PC. Some notable features like AI-driven app personalization, pre-orders, user-friendly, and push notifications are well-known. However, if you are looking to switch to a different food delivery app, if you feel that you are spending too much money, or it can be any reason, this article will guide you with instructions on how to delete Uber and Uber Eats accounts.

How to Delete Uber Eats Account
Nowadays, you can buy anything online and get them at your doorstep. In the same way, ordering food online has become an integral part of life especially when it is
- a long tiring day
- having a tightly packed schedule at work
- or even being too lazy to cook
It can be any reason, but people are ready to pay extra for their convenience and comfort. If you no longer want to use Uber Eats, the process of deletion is straightforward and easy. Note that even after deleting the account, the records of your Uber trips and food order deliveries will be retained on the Uber server. This is due to the Uber or Uber Eats driver’s requirement of data proof to maintain a log on their activity.
Option I: On Android
To delete your Uber Eats account you must delete your whole Uber account. This includes your ride-hailing taxi app Uber. If you only want to delete Uber Eats alone, you can remove the app from your Android or iOS phone by uninstalling it. But note that the main Uber account still exists. To know how to delete your Uber Eats account on mobile, follow the steps given below.
Note: We have used the Samsung M12 Android phone just for illustration purposes.
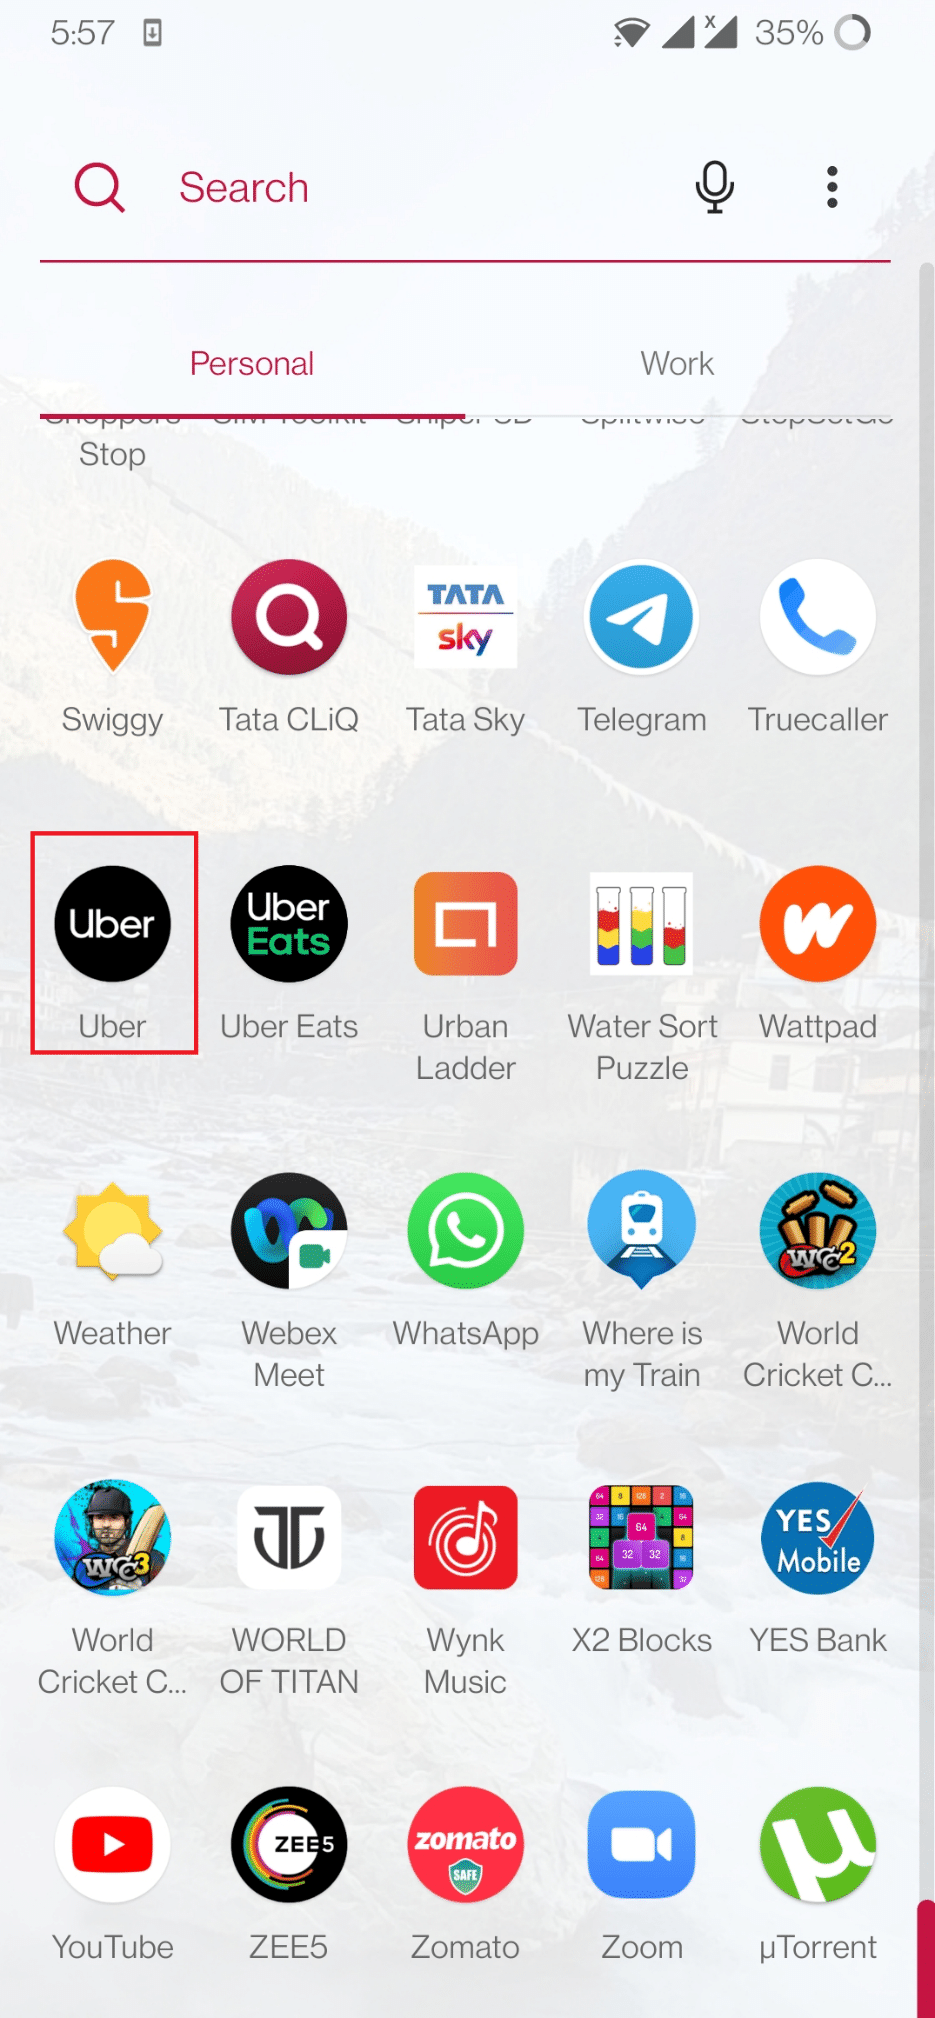
1. Launch the Uber app on your device.
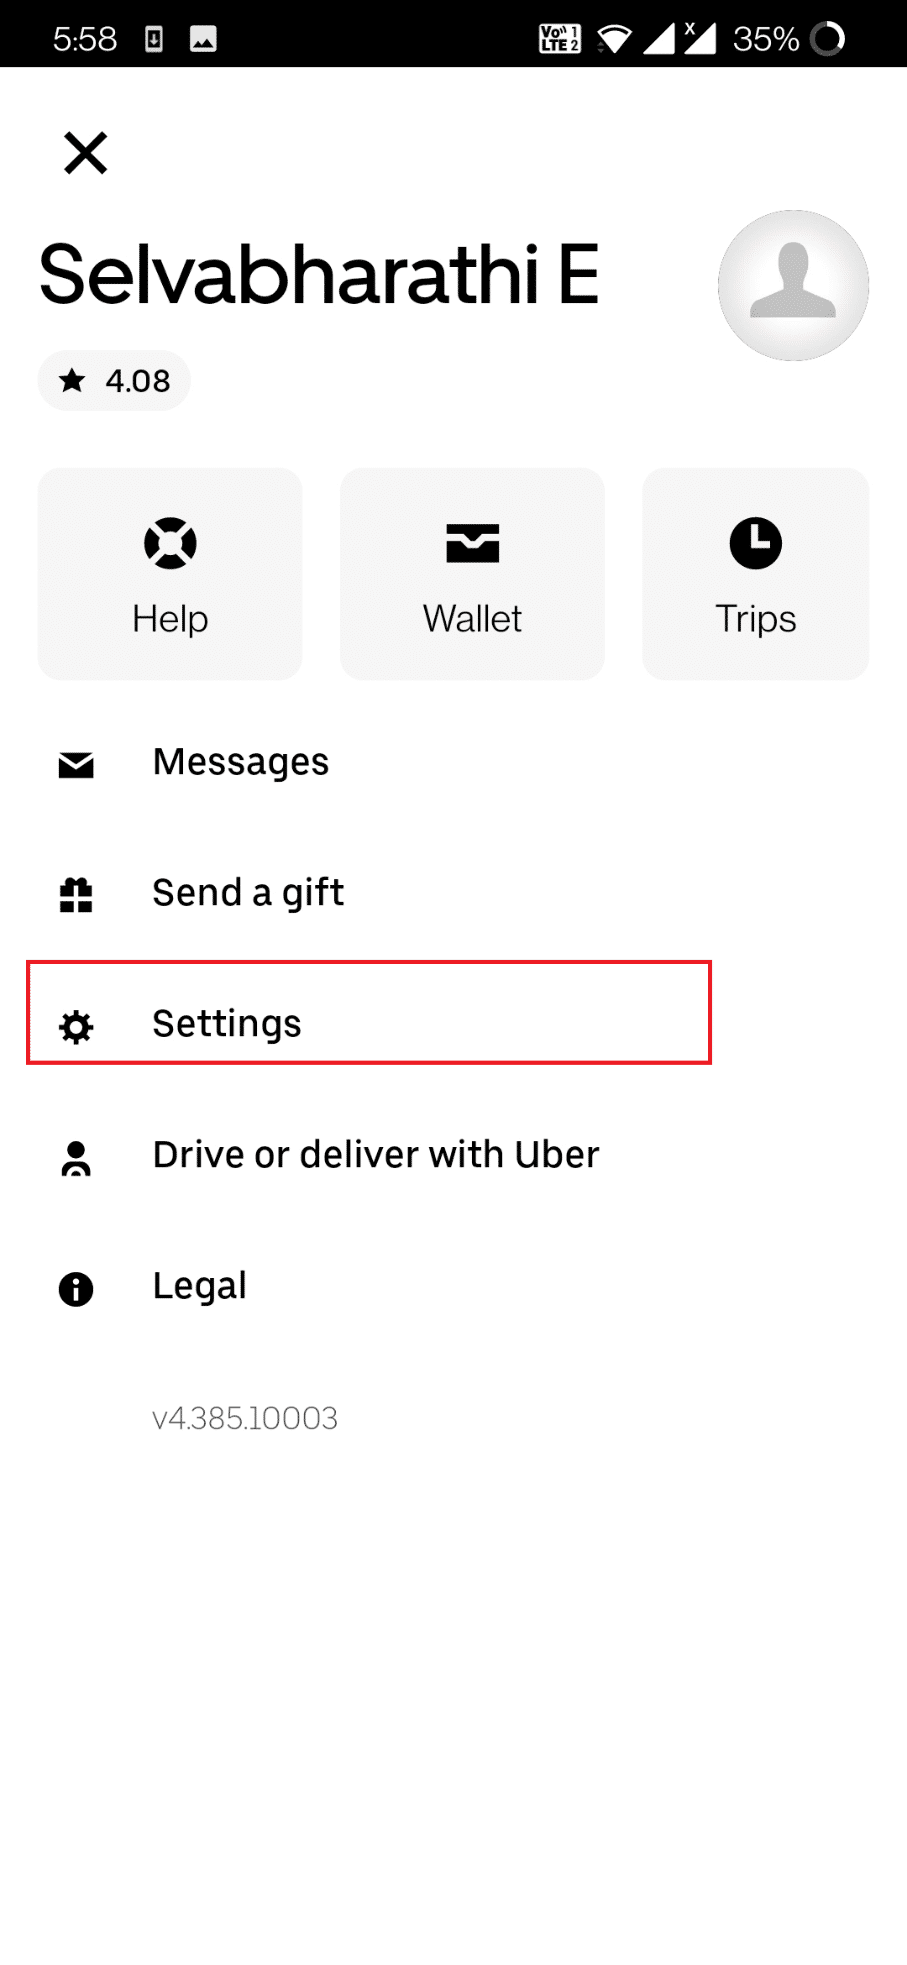
2. Tap on the Profile icon present at the top left corner.
![]()
3. Tap the Settings option.
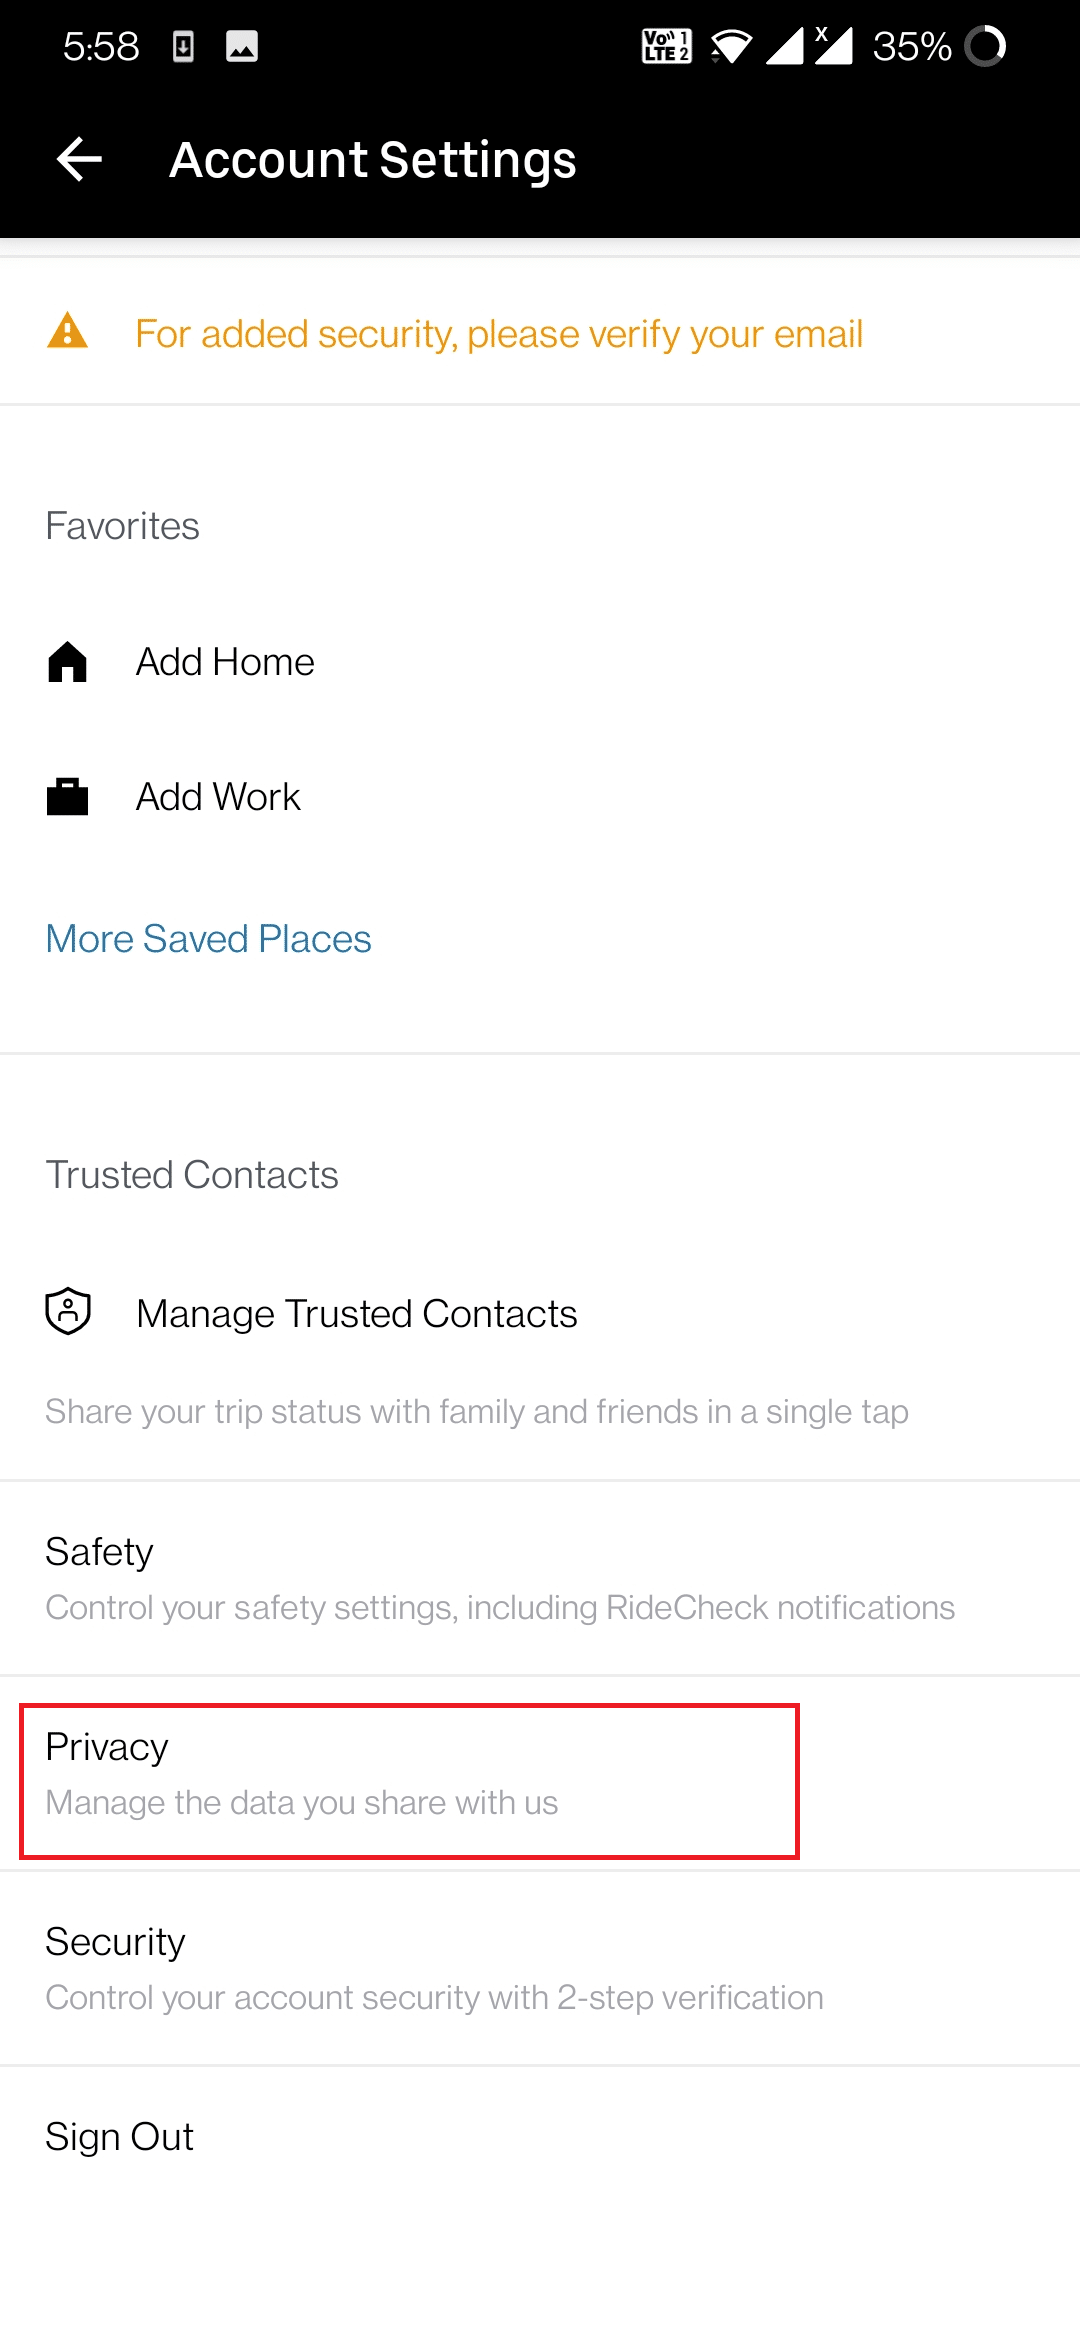
4. Swipe down and tap the Privacy option on the Account Settings.
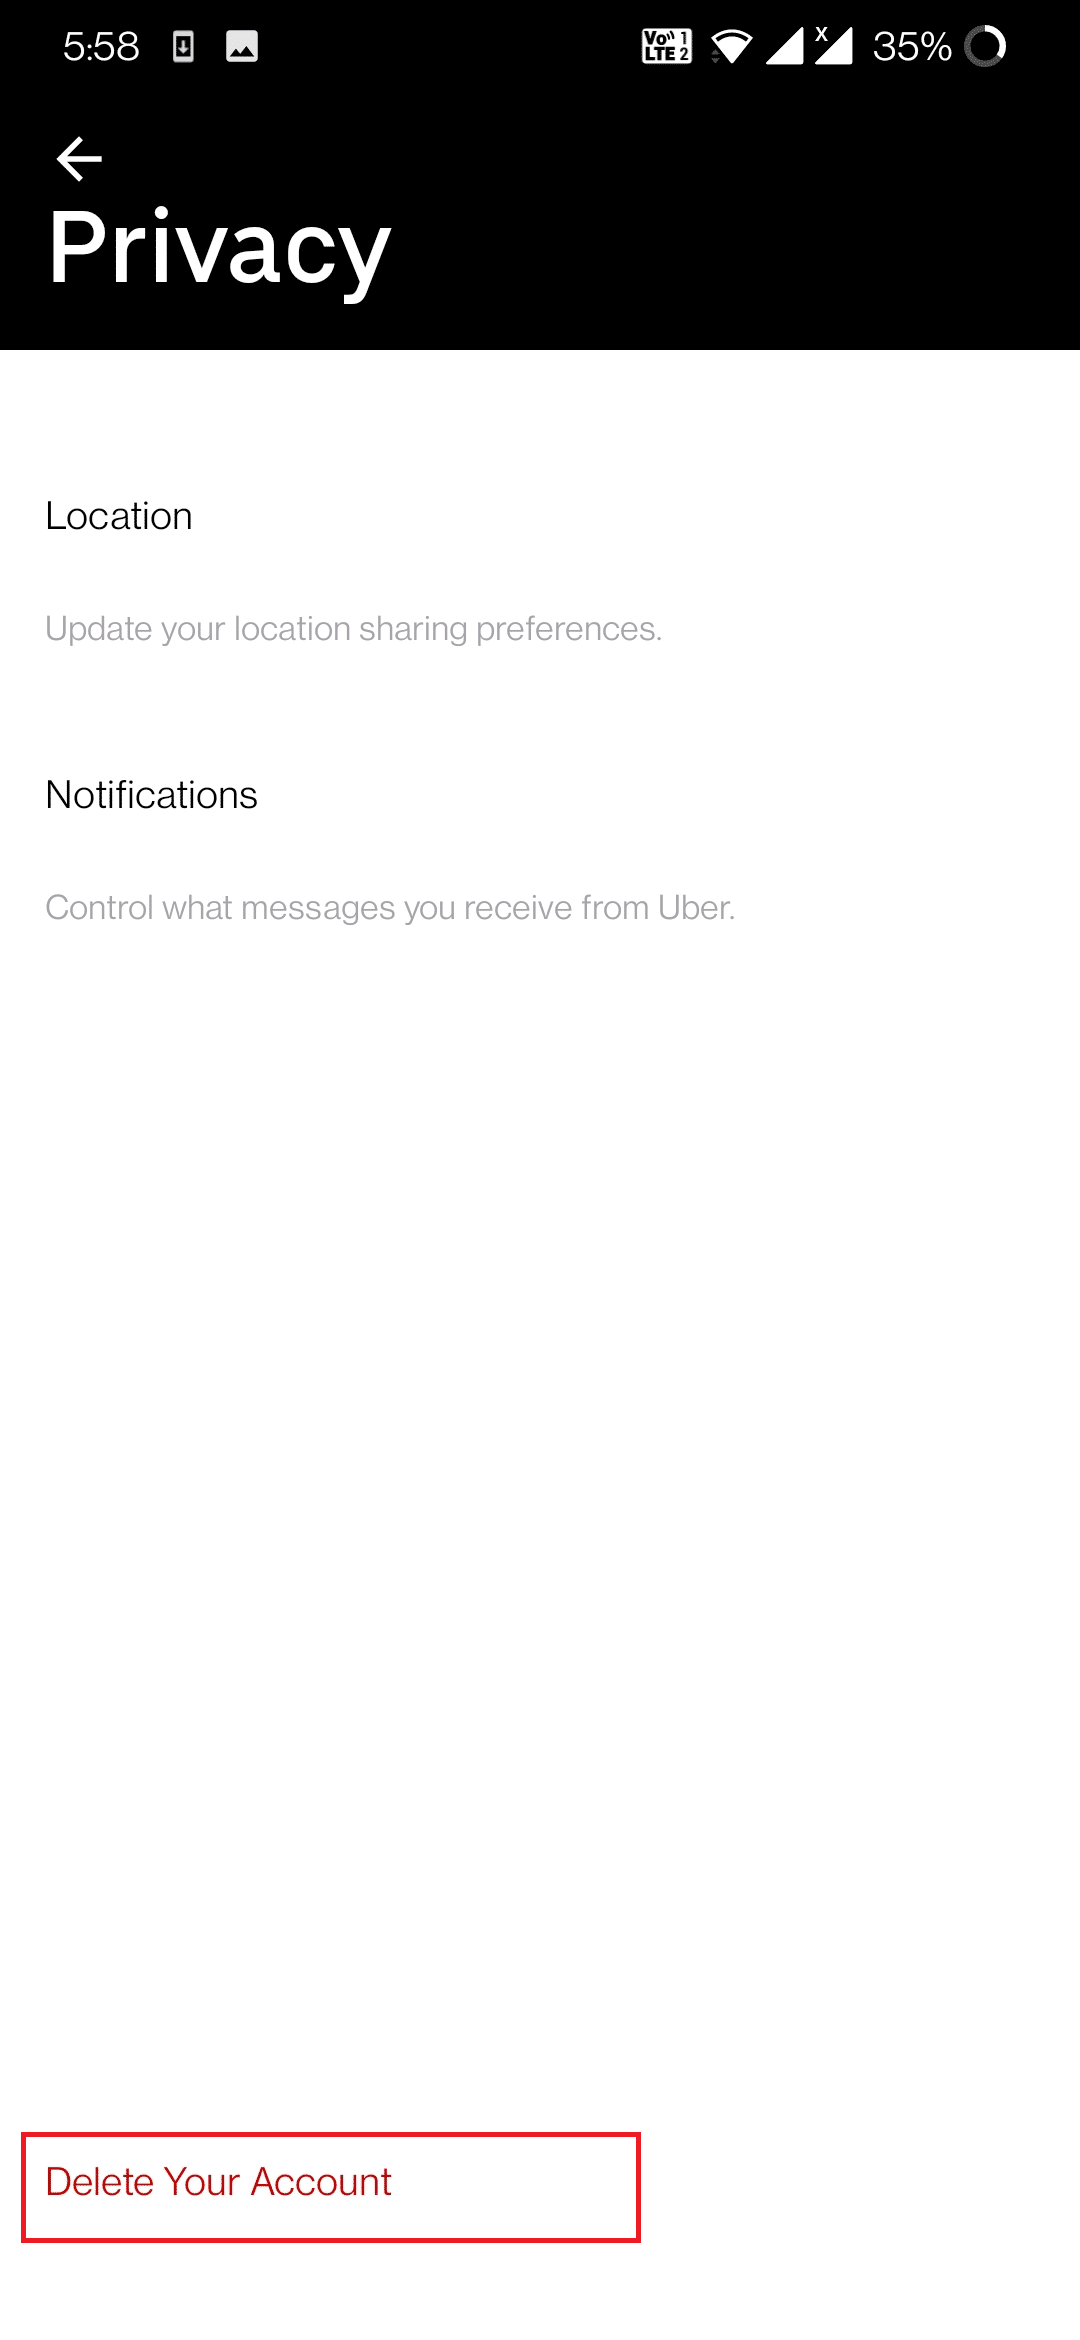
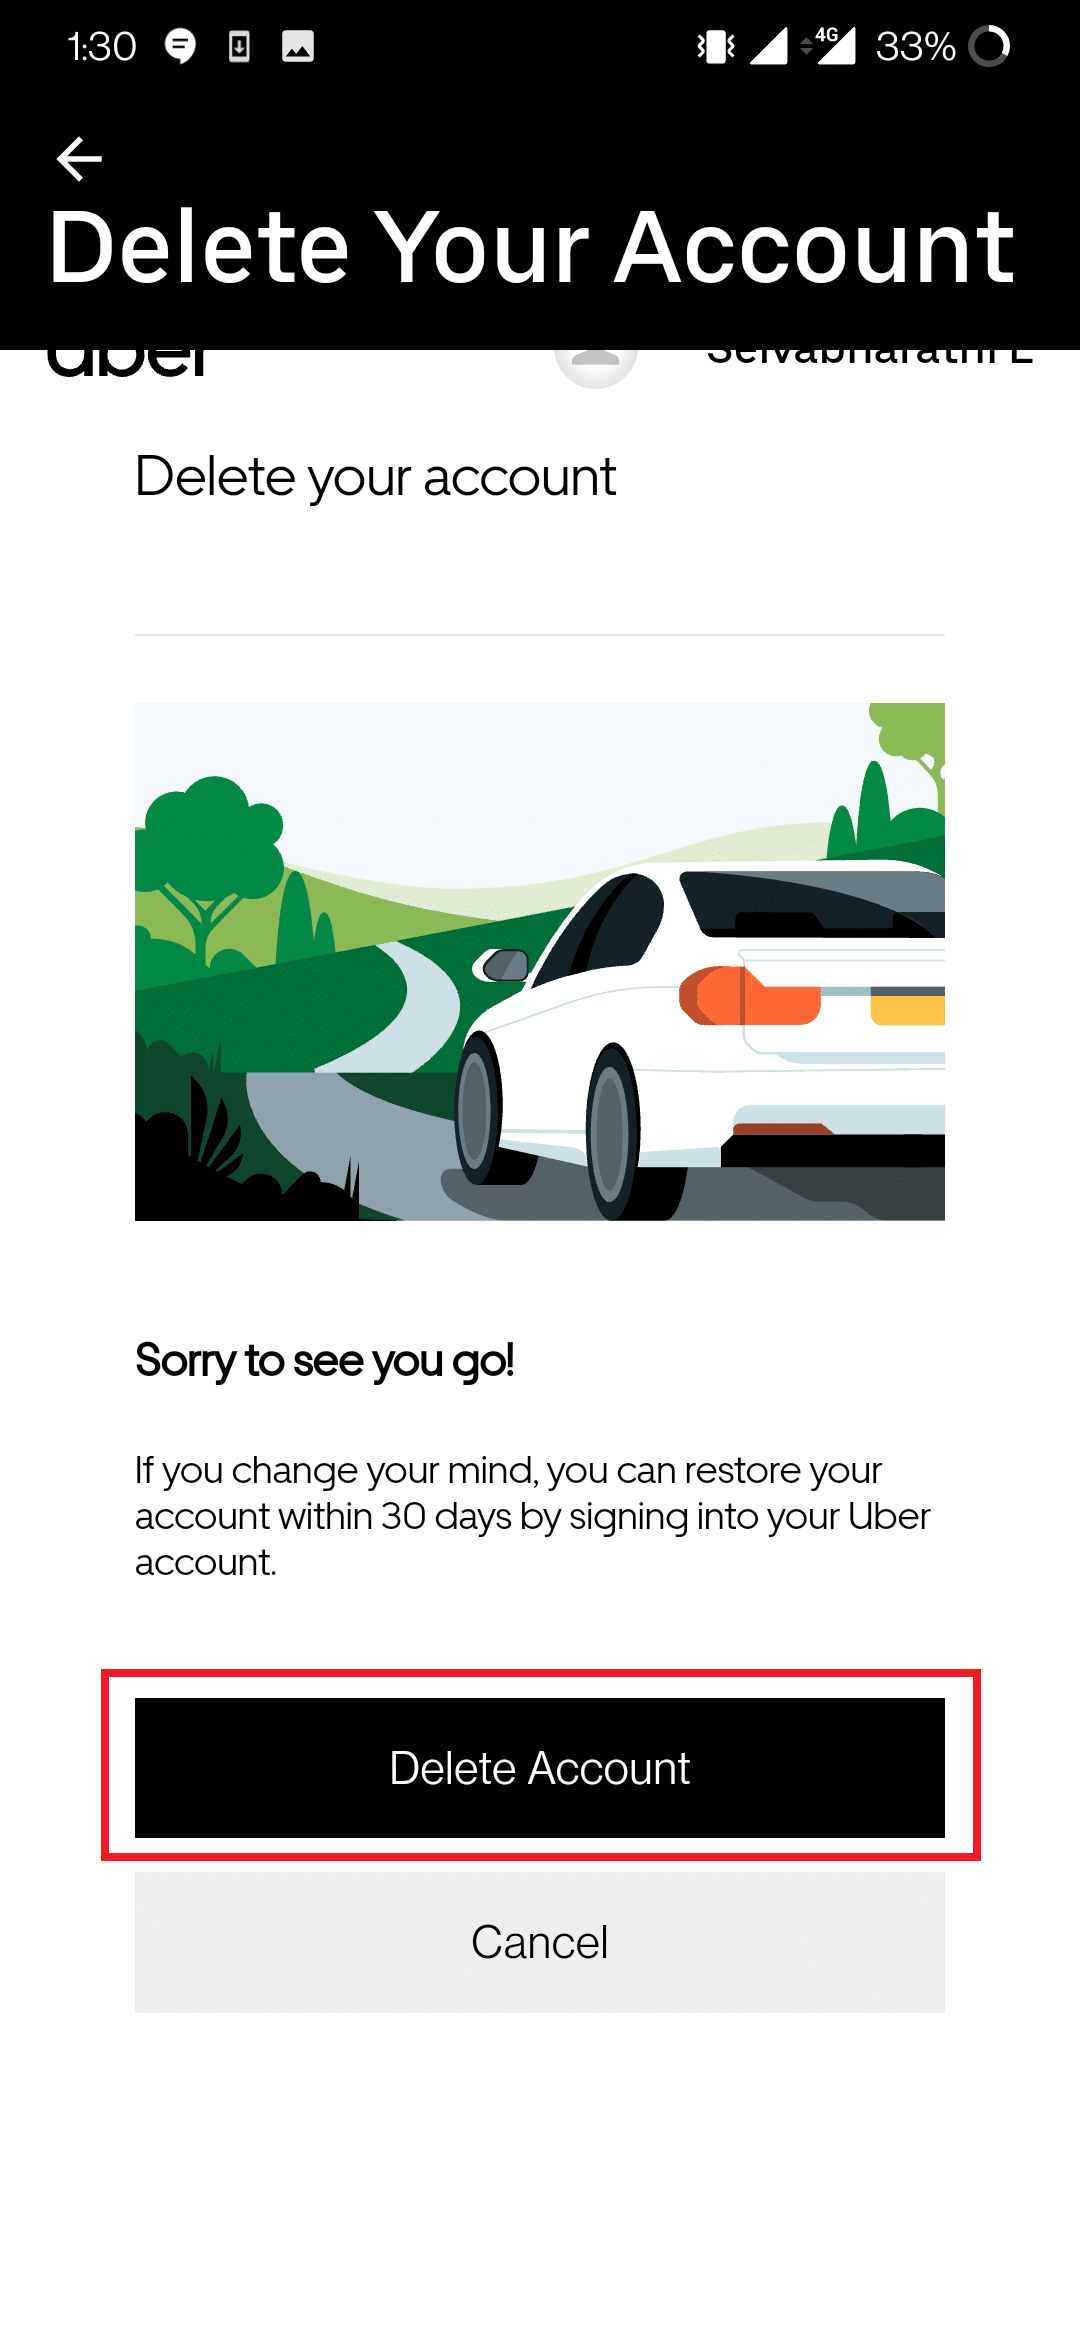
5. Tap Delete Your Account present at the bottom of the app screen.
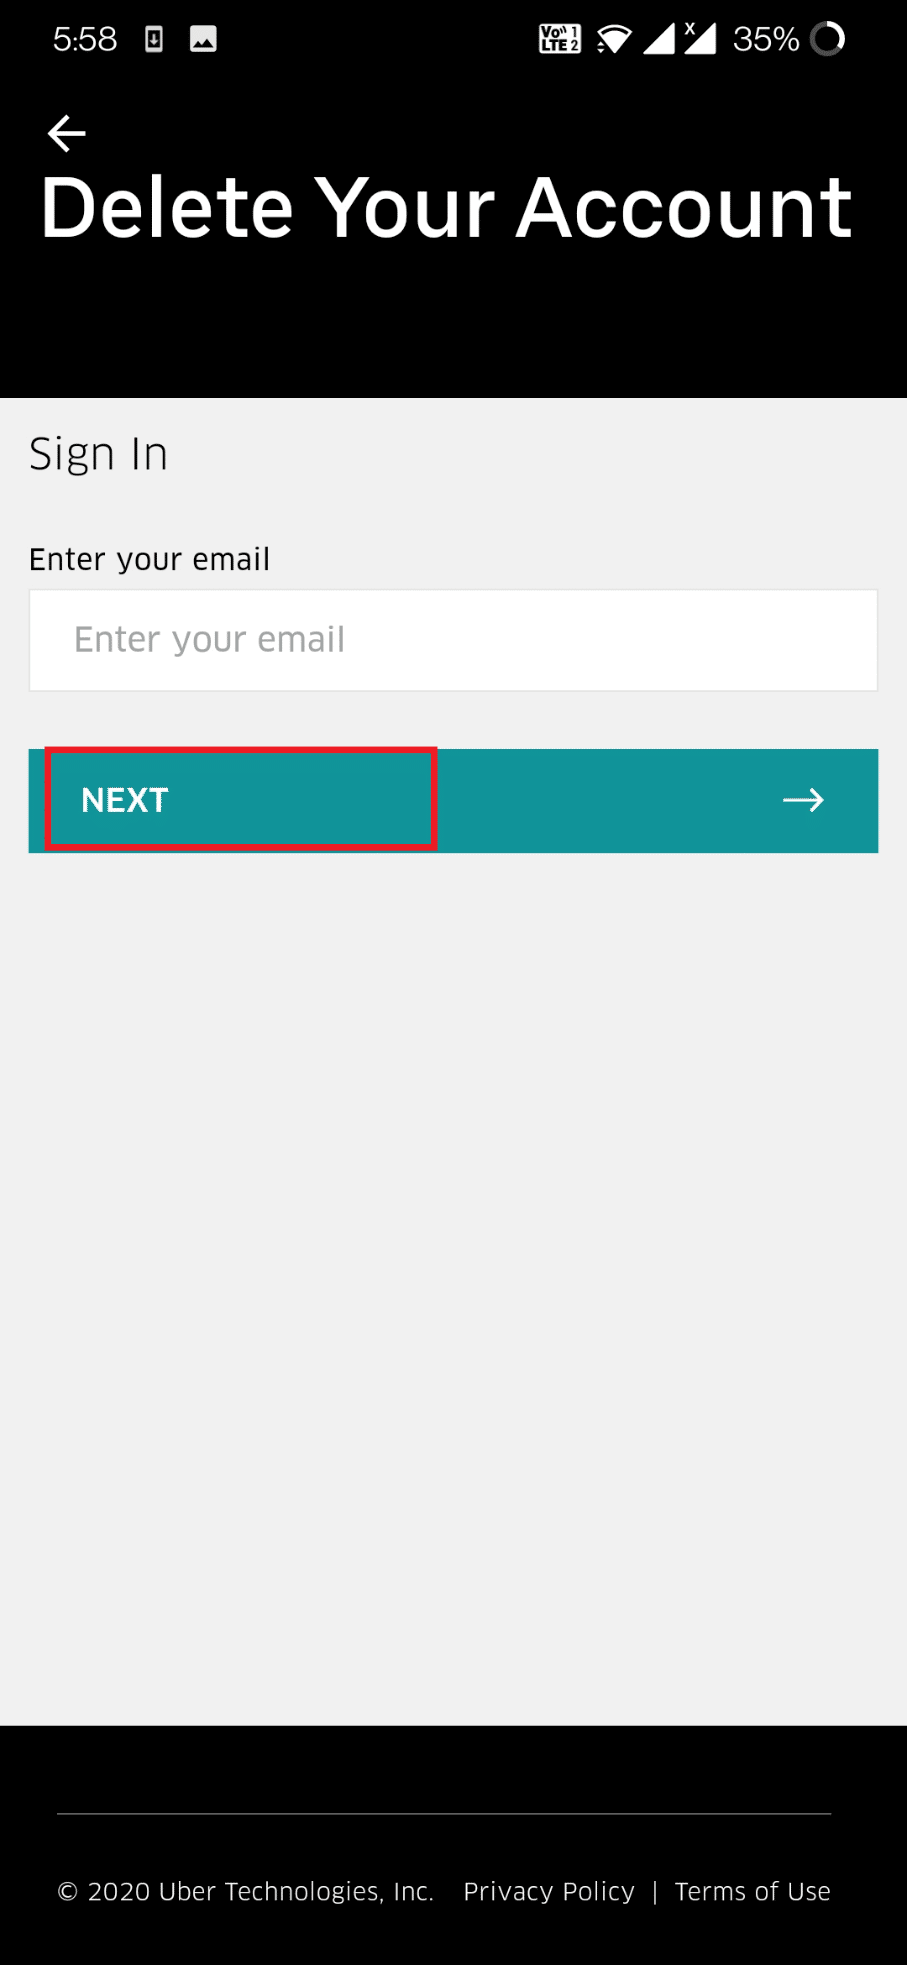
6. Log in to your Uber account with email and tap Next.
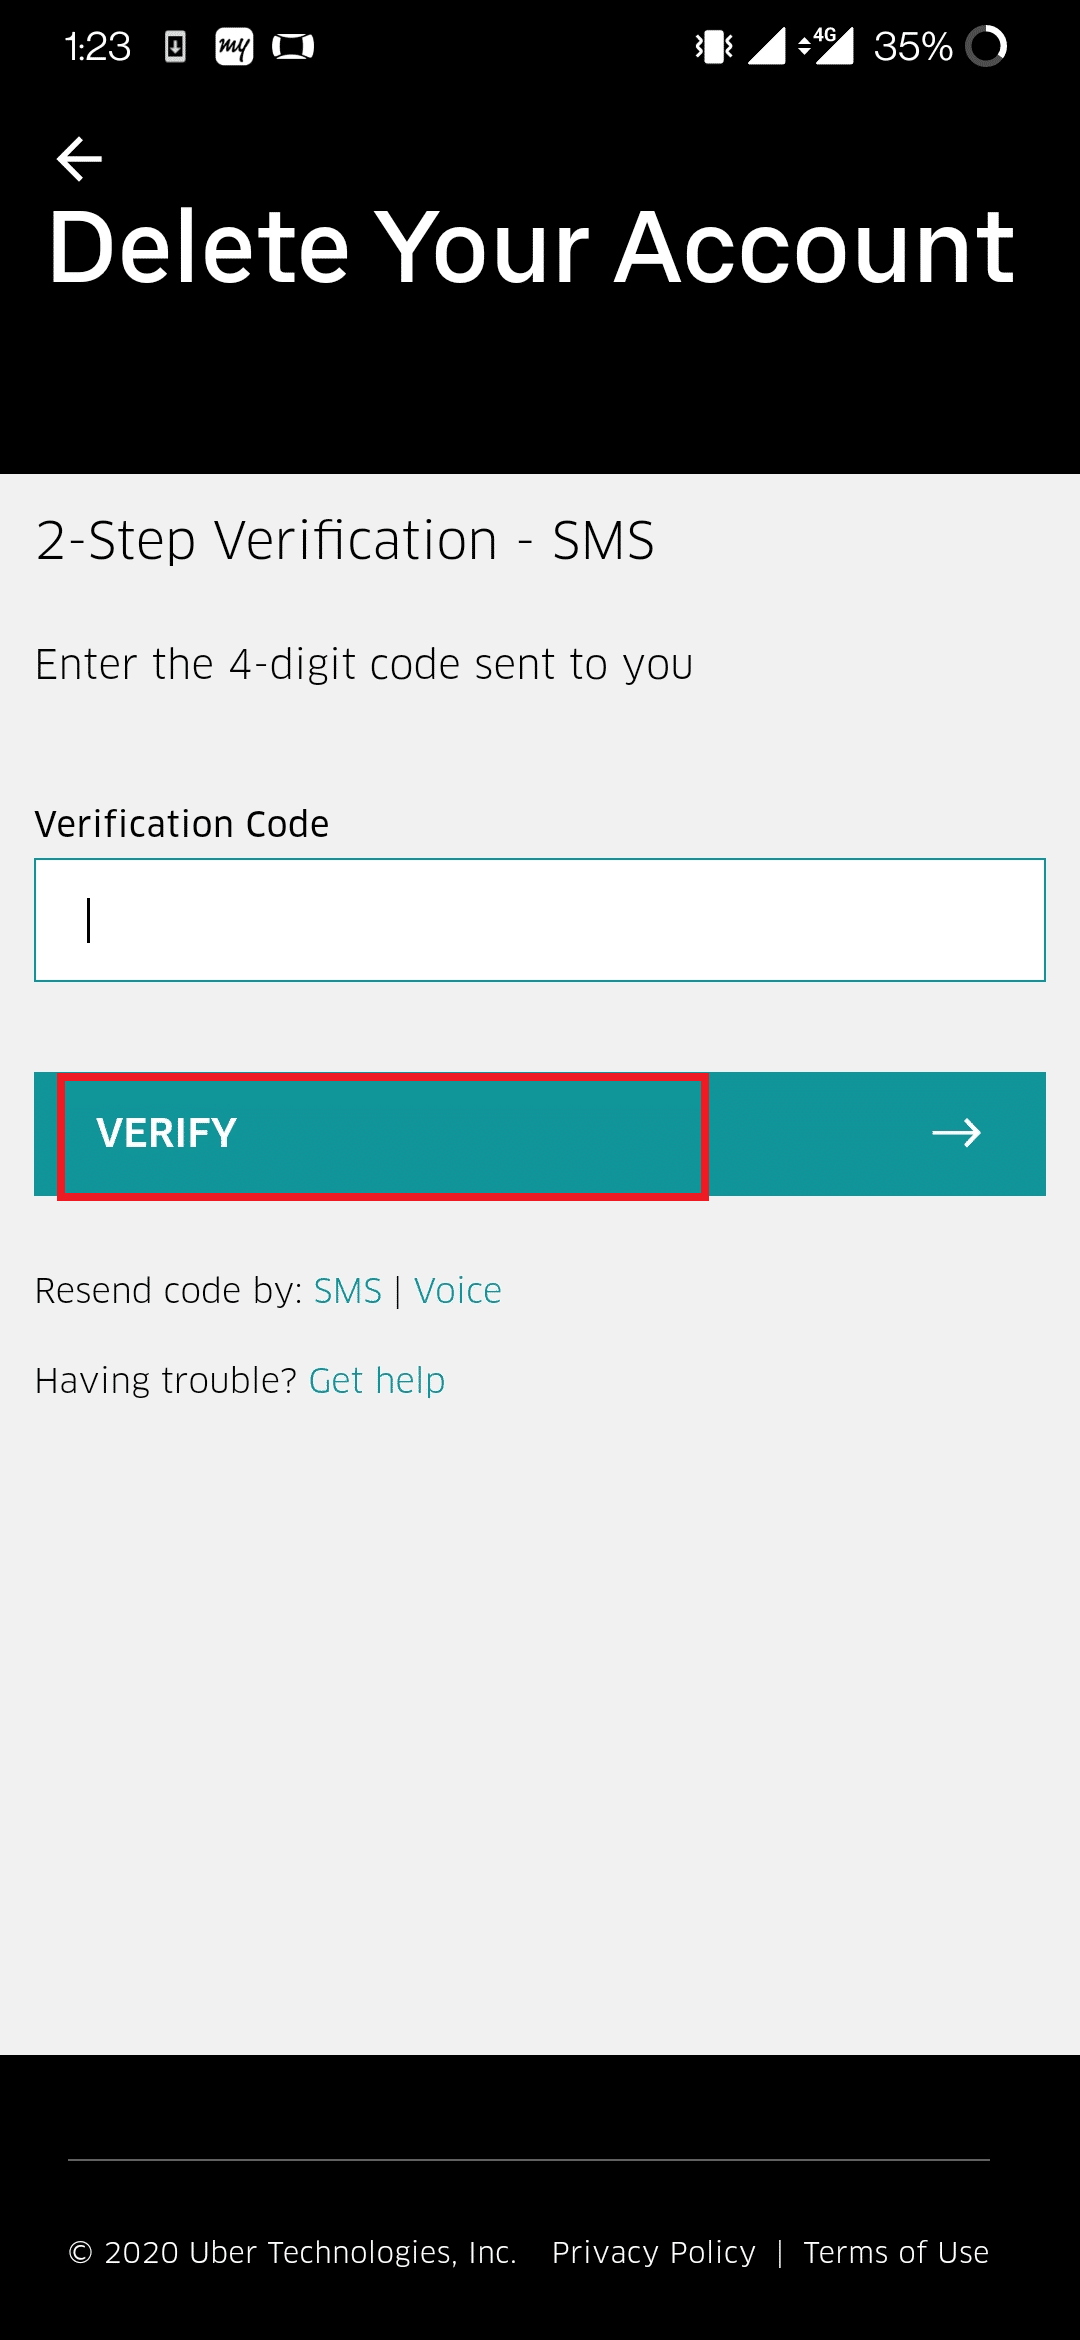
7. Enter the four-digit code received via text message or call on the Verification Code box and tap Verify button.
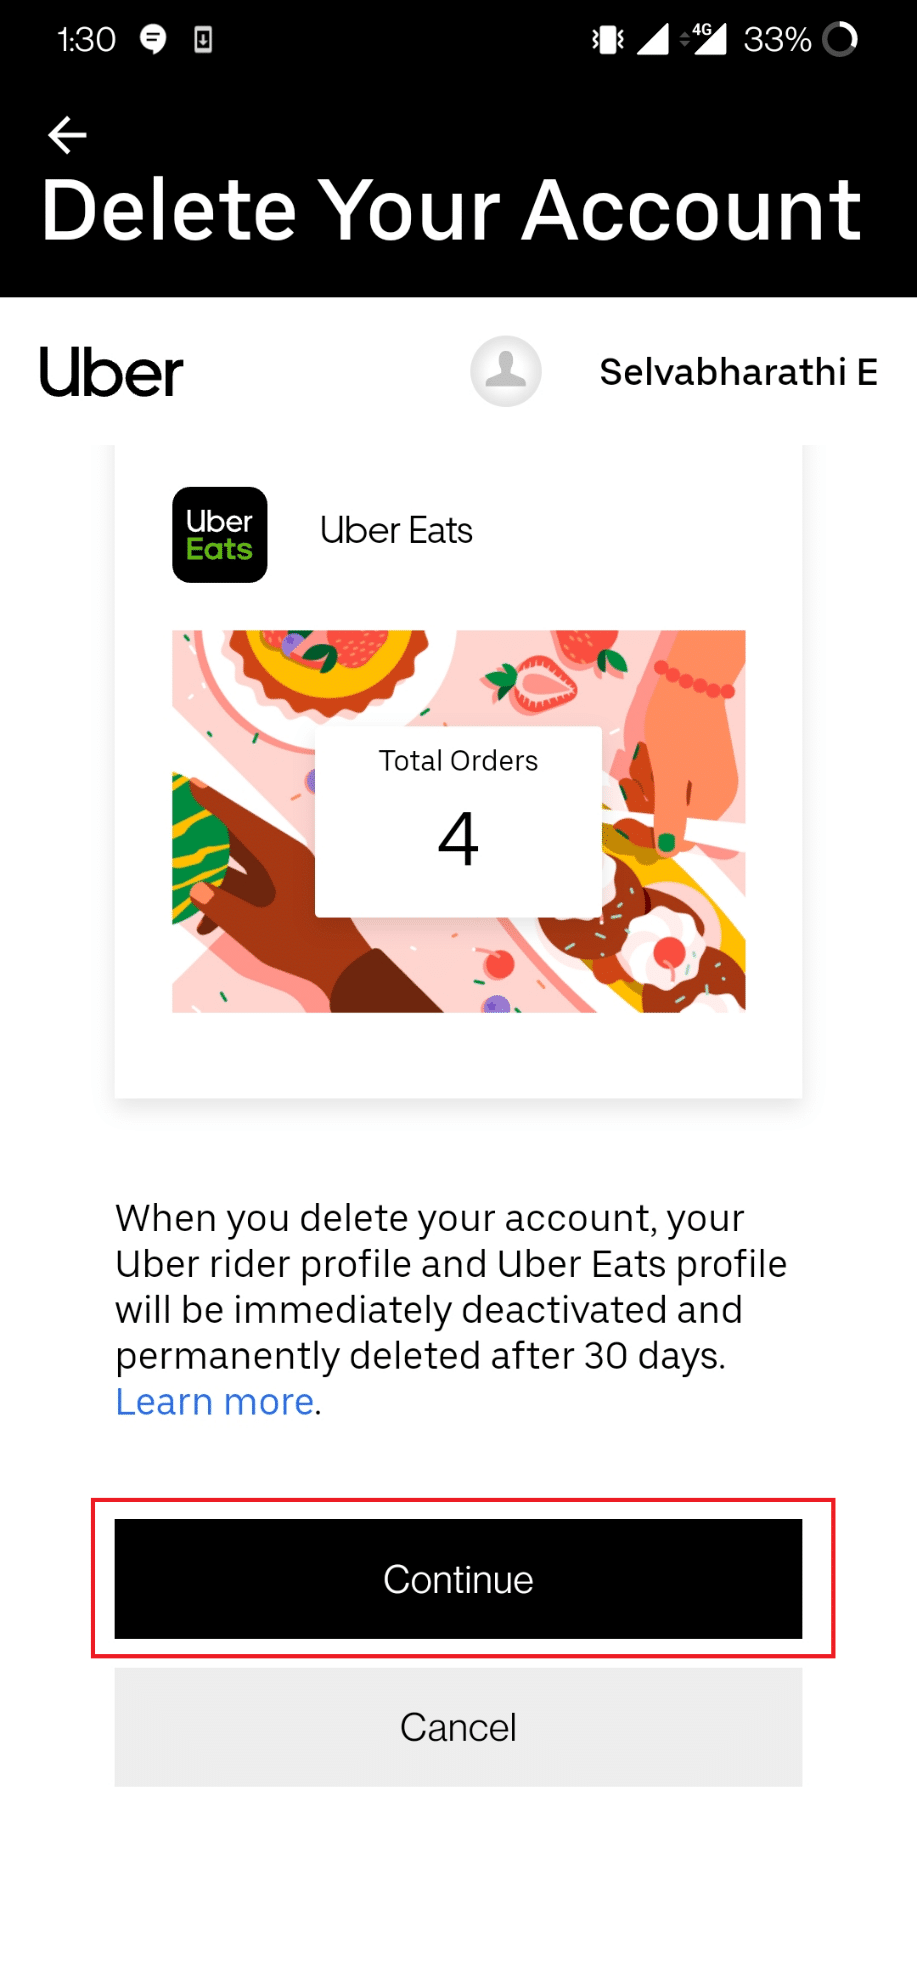
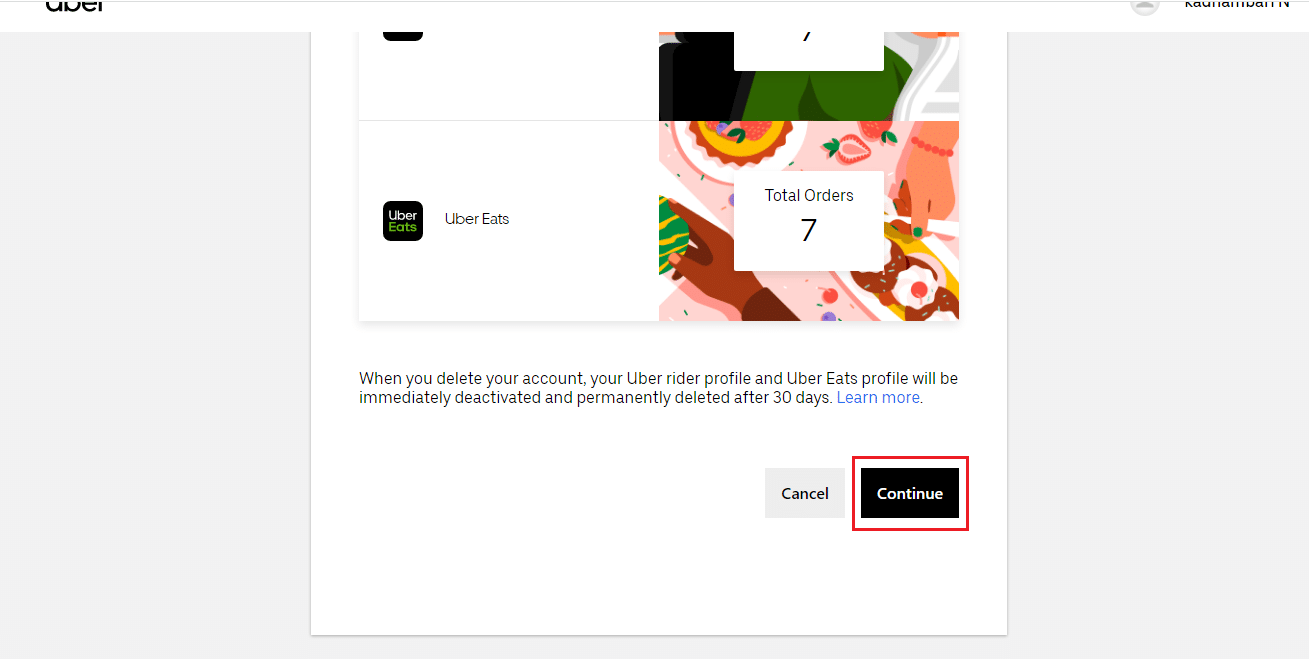
8. Swipe down and tap the Continue button on the bottom page.
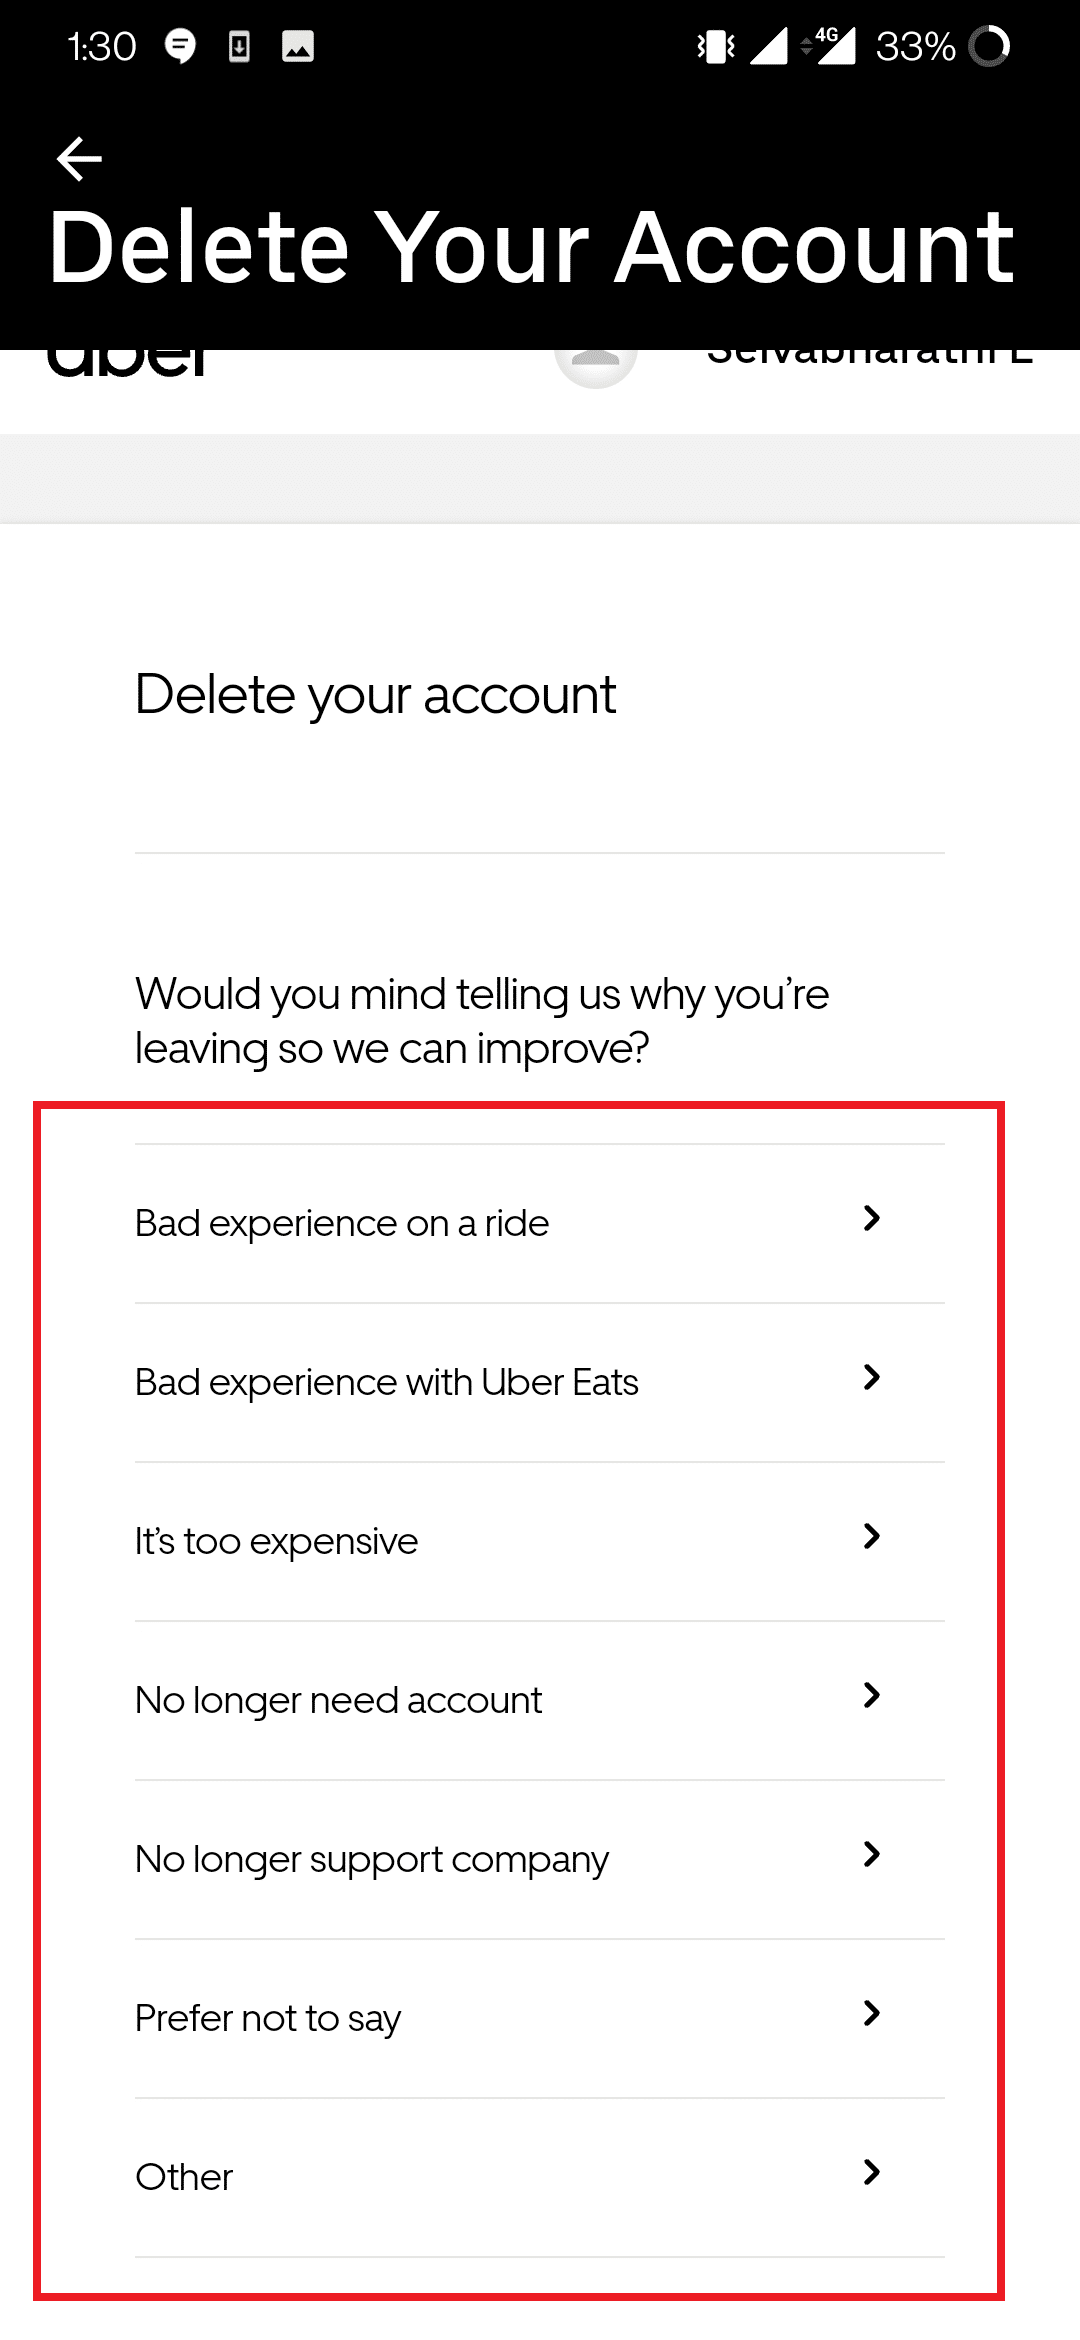
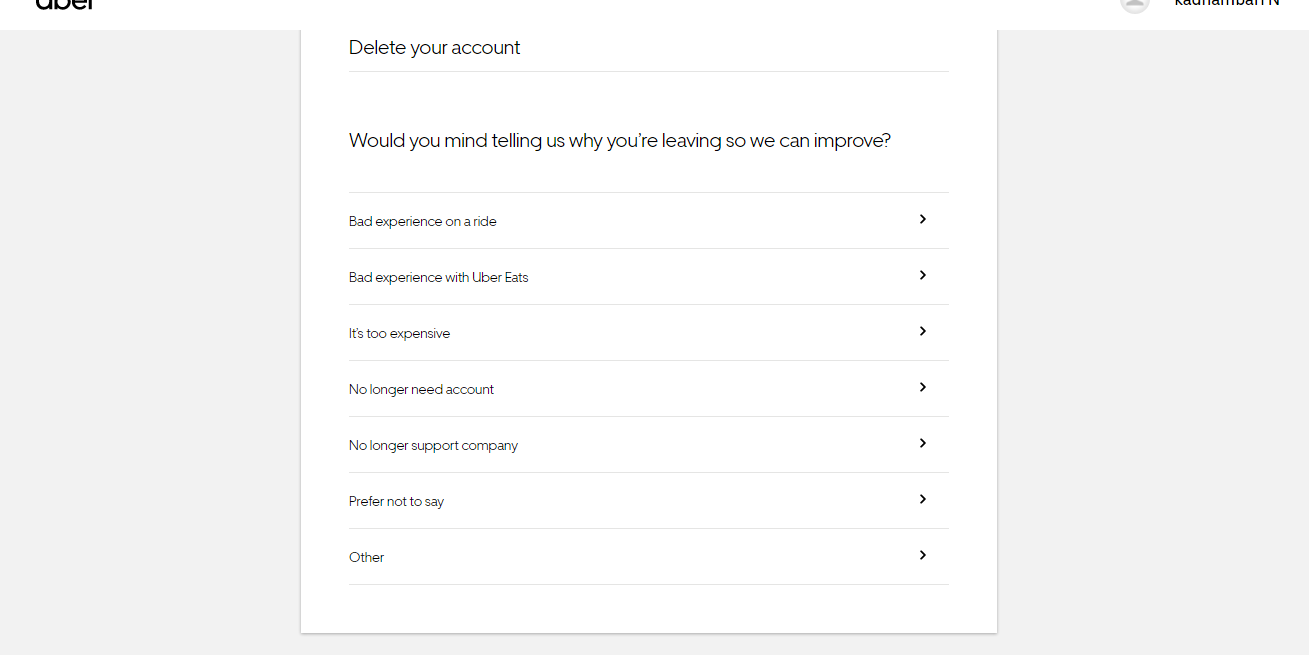
9. Choose the reason for deleting your Uber account.
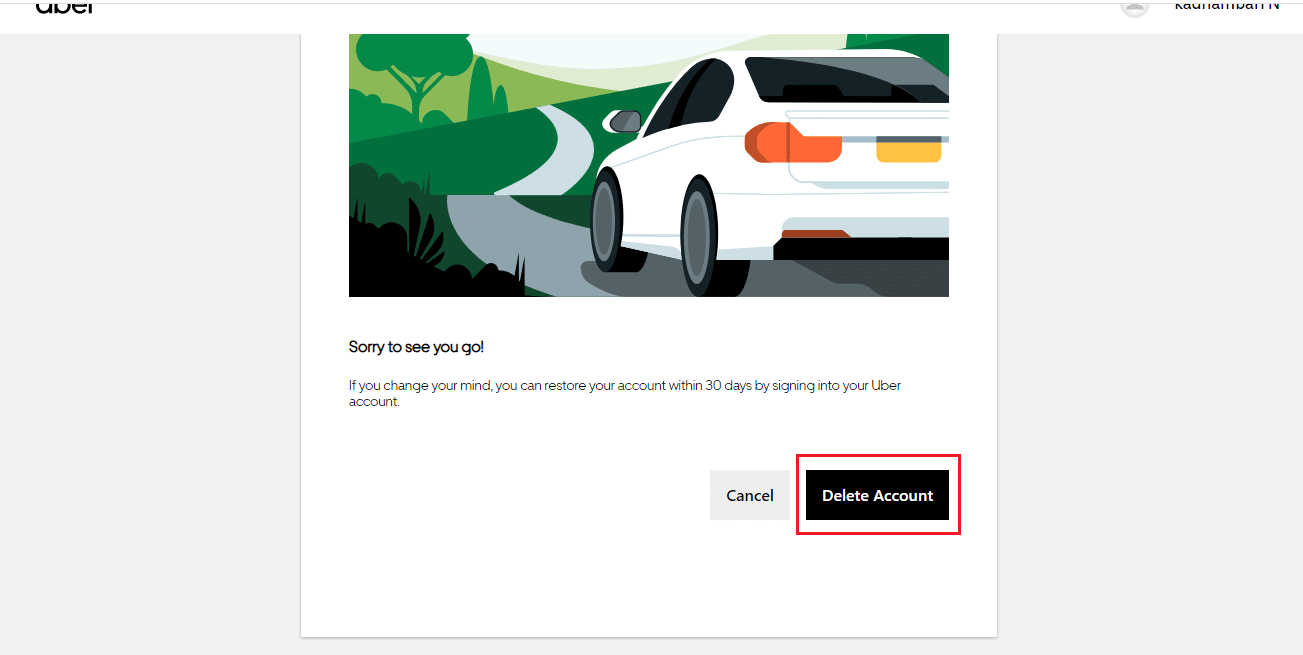
10. Finally, tap the Delete Account button to confirm the account deletion.
Note: Once the account deletion process is done, you will be logged out of your Uber account and will be temporarily deactivated for 30 days.
Also Read: How to Turn Off Firestick
Option II: On Windows
You can also delete your Uber account via desktop or laptop internet web browser. To know how to delete your Uber Eats account on computer, follow the steps given below.
Note: We have used Google Chrome for the web browser. You can use other web browsers instead.
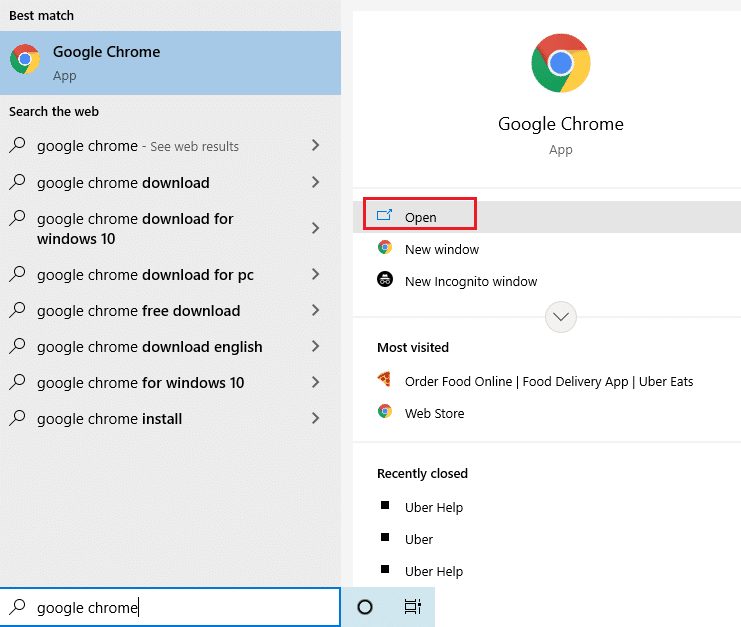
1. Hit the Windows key, type Chrome, and click on Open.
2. Navigate to the Uber Account Closure Page. Enter your Uber account email address and click NEXT to proceed further.

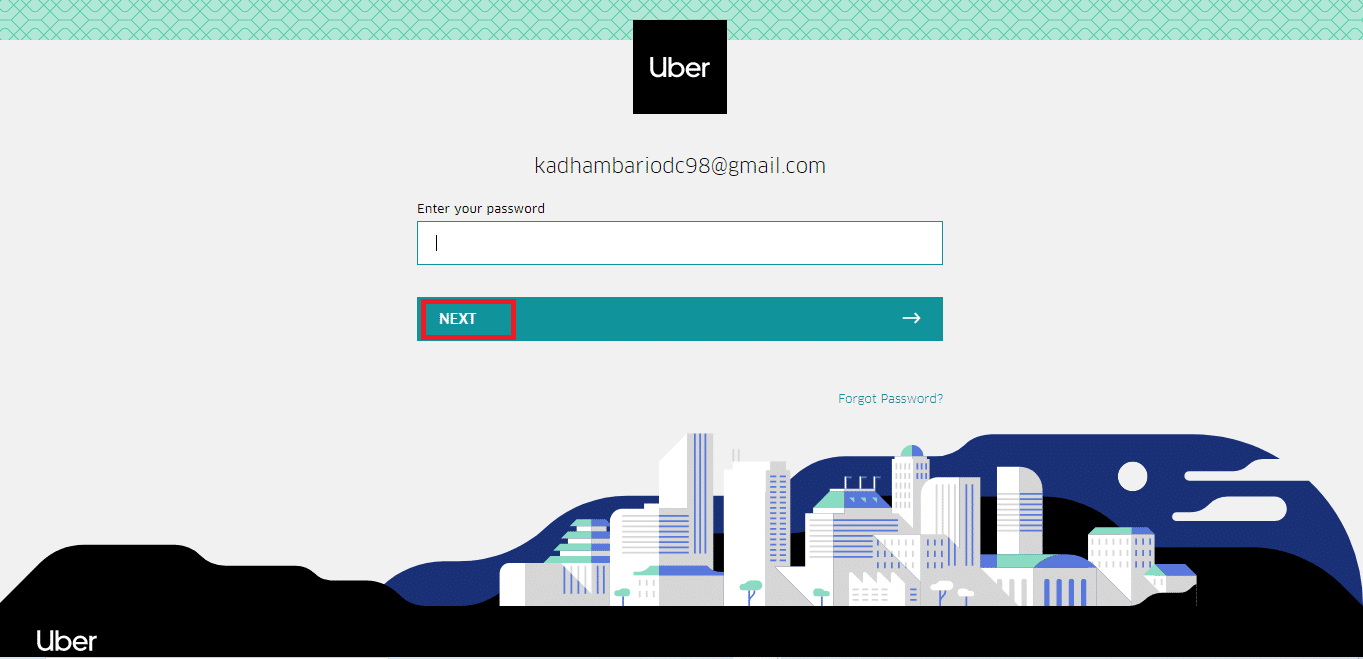
3. Enter your Password and select NEXT.
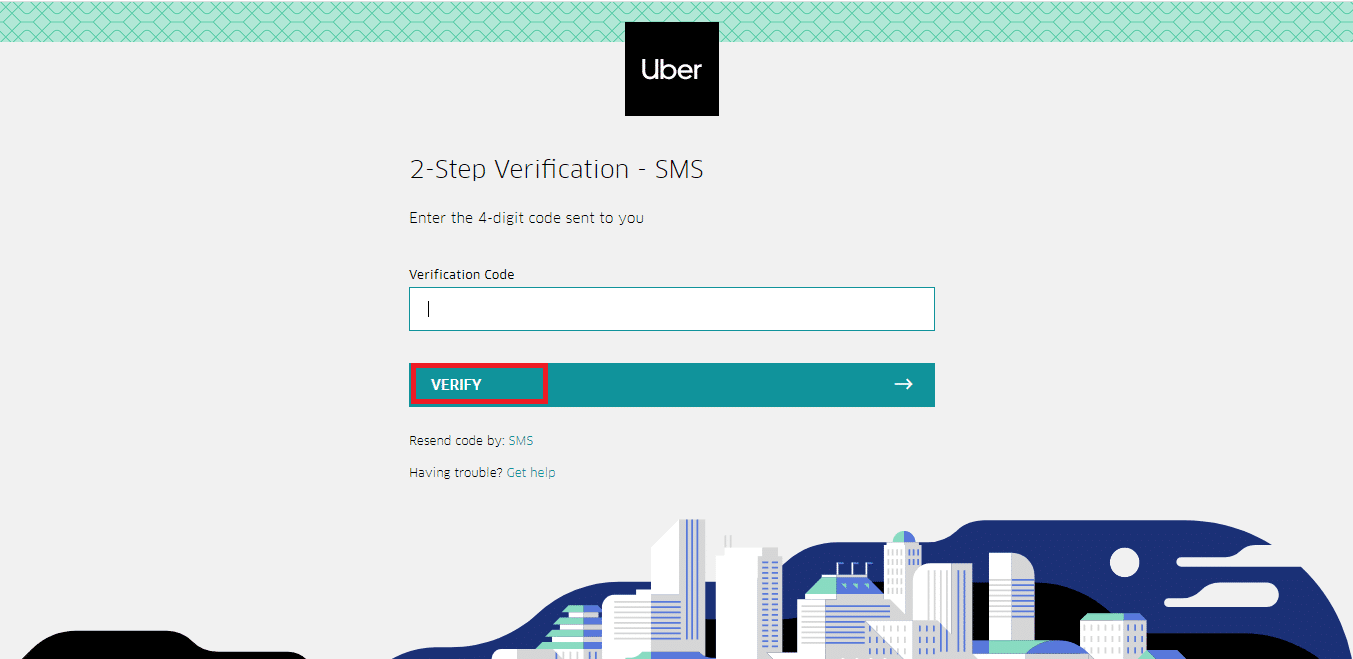
4. Enter the four-digit code received via text message or call on the Verification Code box and click the VERIFY button.
5. Select Continue to process account deletion.
6. Choose a reason for leaving and click on it.
7. Click on the Delete Account button to delete your Uber account.
Once you have raised Uber account closure request, the uber account will only be deactivated. The deactivation stays up to 30 days where in the meantime if you change your mind, you can reactivate it by logging in with old credentials via the Uber app on your mobile phone. Once you log in, there is no requirement of doing anything else as the Uber account will be the same as earlier with all past rides, deliveries, and content information.
After 30 days, the account will be permanently removed, and you will lose all the promotion codes, coupons, incentives, unused credits, or rewards. Therefore, please think again and reactivate within the stipulated deactivation time before losing everything.
Frequently Asked Questions (FAQs)
Q1. Is it possible to delete only the Uber Eats account alone?
Ans. Unfortunately no, it is not possible to delete the Uber Eats account alone. This is because both your Uber Eats and Uber accounts are the same. If one is deleted, the other one also gets automatically removed.
Q2. How can you recover the Uber account after 30 days?
Ans. You cannot recover the Uber account after missing the grace period of 30 days given for reactivation. You need to freshly open an Uber or Uber Eats account.
Q3. Can you have more than two Uber Eats accounts?
Ans. Yes, you can have more accounts with different phone numbers. But it is not recommended due to security concerns.
Q4. How to contact the Uber support team?
Ans. If you need any sort of support, you can contact Uber via tweeting on their Twitter handle, complaining or giving feedback on your Uber Eats app, calling Uber Eats customer care (800) 253-6882, or sending mail to eats@uber.com.
Recommended:
We hope that you find this article helpful about how to delete Uber Eats account. Let us what you want to learn about next. Feel free to reach out to us with your queries and suggestions via the comments section below.