Stop Windows 10 from automatically installing Realtek Audio Drivers

Every time you check for Windows Update, it keeps on installing Realtek Audio drivers, now if you uninstall them and install a different set of drivers, everything will work fine until you again check for Windows Update. As the drivers will be again automatically installed and you can’t do anything about it. The problem is that the driver’s Windows Update install is not compatible; thus, it messes with the system audio.
You can’t use headphones properly; also, the speaker fill enhancement is disabled when playing stereo content through surround sound. To solve this problem whenever the user tries to uninstall Realtek drivers, it automatically gets reinstalled via Windows Update. So without wasting any time let’s see How to Stop Windows 10 from automatically installing Realtek Audio Drivers with the help of below-listed troubleshooting guide.
Stop Windows 10 from automatically installing Realtek Audio Drivers
Make sure to create a restore point, just in case something goes wrong.
Method 1: Reinstall Windows Audio Drivers
1. Press Windows Key + R then type sysdm.cpl and hit enter to open Advanced System Settings.

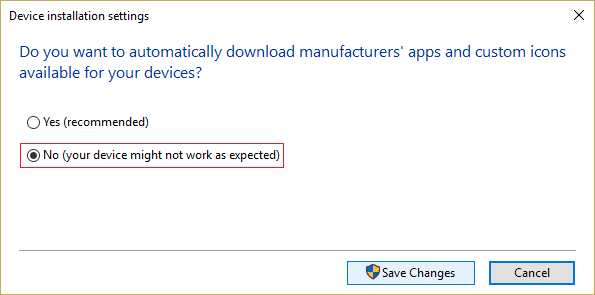
2. Switch to Hardware tab and then click on Device Installation Settings.

3. Select “No (your device might not work as expected)” and click Save Changes.
4. Again, Click Apply, followed by OK.
5. Press Windows Key + R then type devmgmt.msc and hit Enter to open Device Manager.

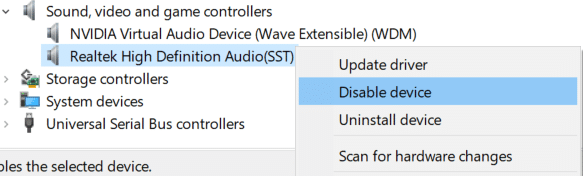
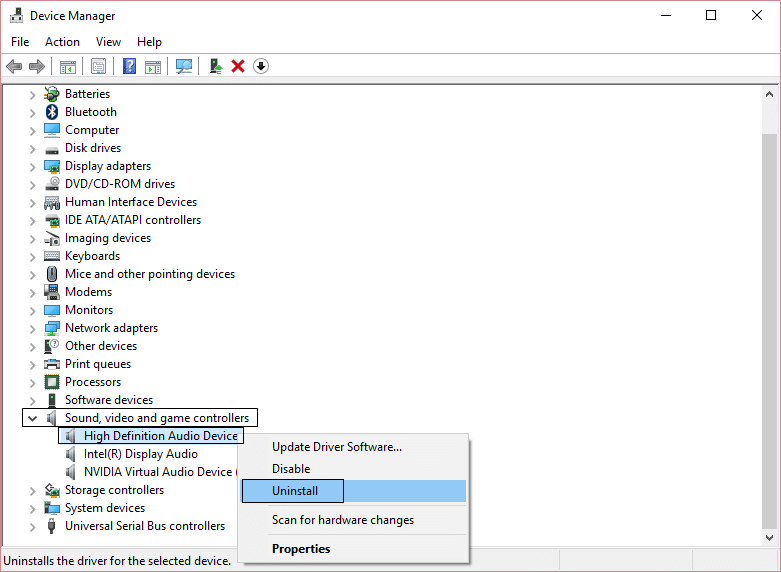
6. Expand Sound, video and game controller.
7. Now right-click on Realtek HD Audio Device and select Disable.
8. Again right-click on it but this time select Update Driver.
9. Select Browse my computer for driver software.

10. On the next screen, click ok “Let me pick from a list of available drivers on my computer.“

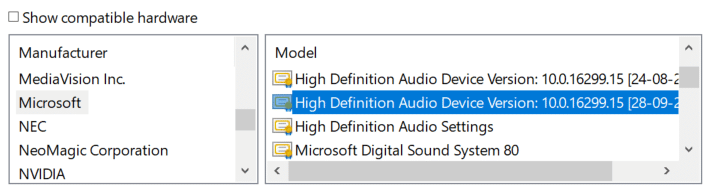
12. Uncheck Show compatible hardware then select the Microsoft driver (High Definition Audio Device) and click next.
13. Wait for the drivers to be installed then reboot your PC.
Method 2: Roll Back the drivers
1. Press Windows Key + R then type devmgmt.msc and hit Enter to open Device Manager.
2. Expand Sound, video and game controller.
3. Right-click Realtek HD Audio Device and select Properties.
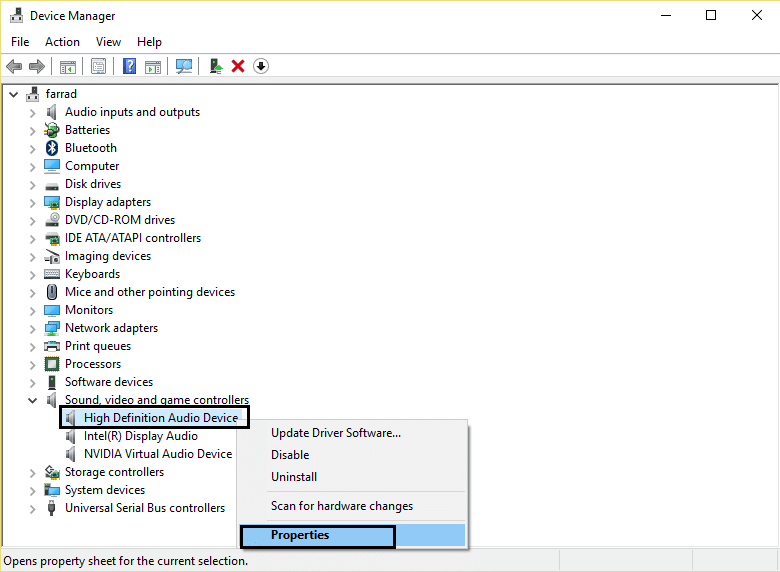
4. Switch to Driver tab and click on Roll Back Driver.
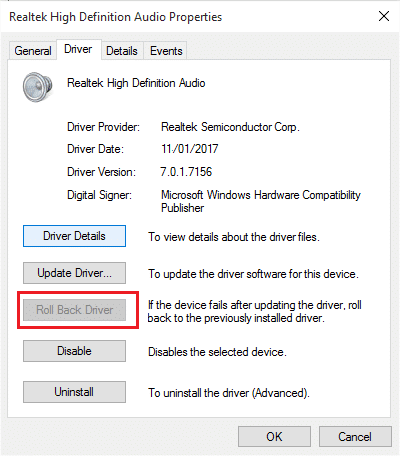
5. This will remove the problematic driver and replace it with the Standard Windows drivers.
6. Reboot your PC to save changes.
Method 3: Using Windows Update Show/Hide Troubleshooter
1. Press Windows Key + R then type devmgmt.msc and hit Enter.
2. Expand Sound, video and game controller.
3. Right-click Realtek HD Audio Device and select Uninstall.
4. Checkmark the box “Delete the driver software for this device.”
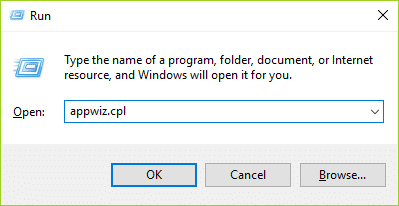
5. Press Windows Key + R then type appwiz.cpl and hit Enter.
6. From the left-hand menu, select View installed updates.
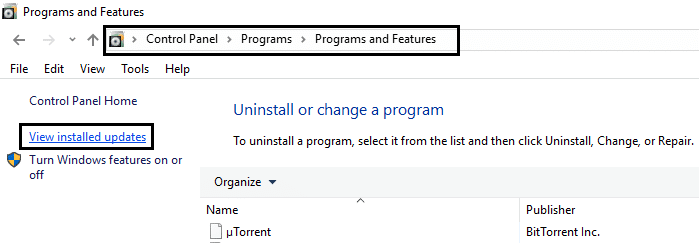
7. To uninstall the unwanted updated, right-click on it and then select Uninstall.
8. Now to prevent the driver or update being reinstalled, download them and run the “Show or hide updates troubleshooter“.
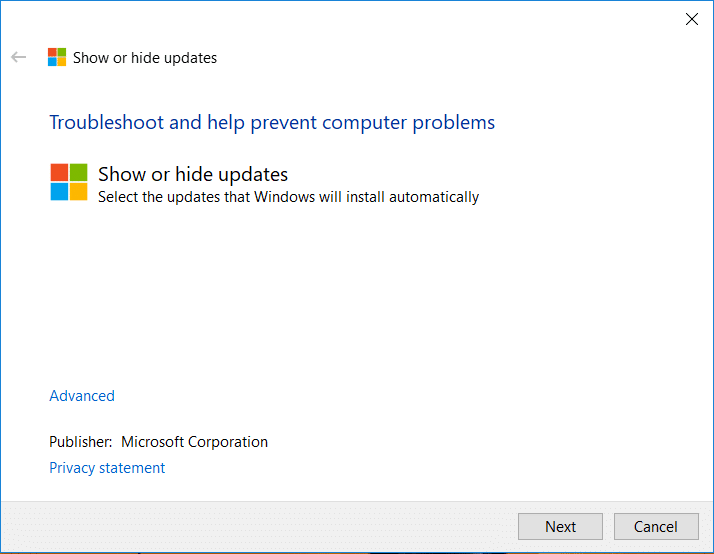
9. Follow the instructions within the troubleshooter, and then select to hide the problematic driver.
Recommended:
That’s it you have successfully learned How to Stop Windows 10 from automatically installing Realtek Audio Drivers but if you still have any questions regarding this post then feel free to ask them in the comment’s section.