How to Delete System32 Folder in Windows?

Sometimes you may face technical problems with your Windows computer such as slow internet problems or Audio errors. If you are not a technical person, you might browse for the solutions online. When you browse for solutions, you may find about deleting System32 folder, which is a directory where all the essential files of your Windows installation are stored. And deleting System32 is not really recommended. So, if you are deleting some files in the directory System32, there are chances that your Windows system may start to work improperly or stop working.
But if you want to remove a problematic Windows installation, then you must know everything about System32 and how to delete system32. Therefore, to help you out, we have a small guide that you can follow to learn how to delete the system32 folder on your computer. Before we start listing down the methods, let us first understand what exactly is System32.
How to Delete System32 on Windows Computer
What is System32?
System32 is a directory with all the essential files of your Windows installation. It is usually located in the C drive that is C:WindowsSystem32 or C:Winntsystem32. System32 also contains program files, which are important for running the Windows operating system and all the software programs on your computer. System32 is present in all the versions of Windows from Windows 2000 and forward.
Reasons to Delete System32
It is not recommended to delete System32 from your Windows computer as it helps in the operation of the operating system and the program files running under Windows. Moreover, the files in System32 are protected by the TrustedInstaller, so that these files are not deleted accidentally.
Furthermore, if you delete System32, it could cause a Windows installation breakdown and you may have to reset your Windows. Therefore, the only reason for deleting System32 is when you want to remove a problematic Windows installation.
What will happen when you Delete System32?
Your System32 folder contains all the important files of the Windows Operating System and the software programs that are running under Windows. Therefore, when you delete System32 or some files in System32 from your Windows computer, then the Windows operating system may become unstable and crash.
It is highly recommended to not delete System32 from your Windows computer unless it is absolutely necessary.
3 Ways to Delete System32 Folder in Windows 10
Method 1: Delete System32 by using a Batch file
You can easily delete the files in System32 by following these steps:
1. The first step is to locate System32 on your Windows computer. System32 is usually located in the C drive: C:WindowsSystem32.
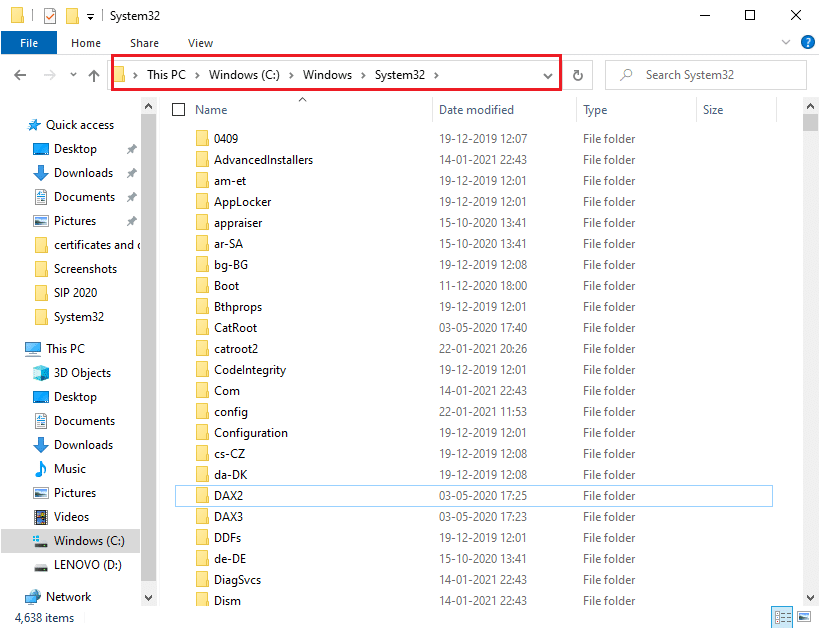
2. Now you have to copy the file location of the specific file that you want to delete from the System32 folder. For this, you can easily right-click on the file and select Properties.
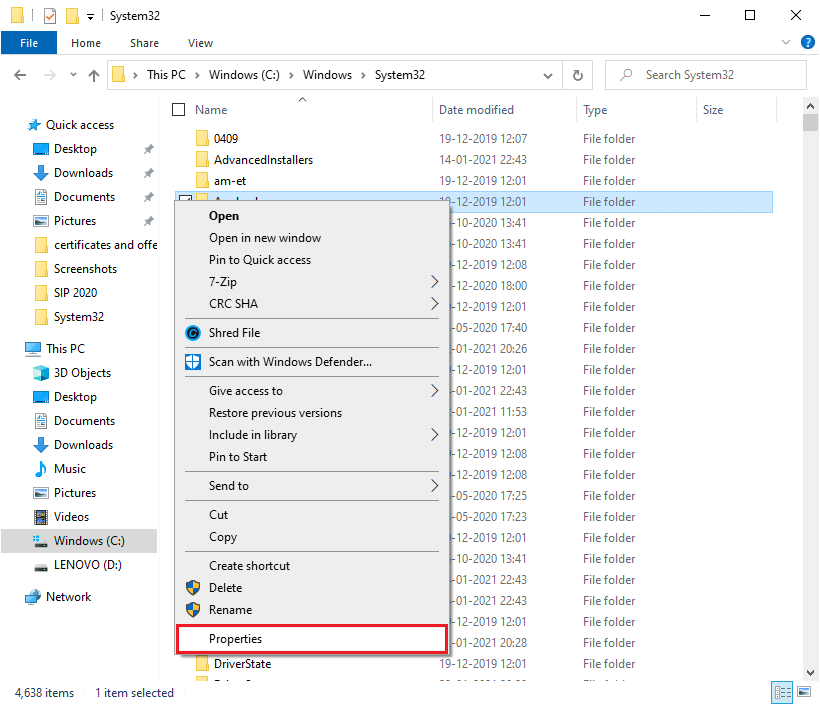
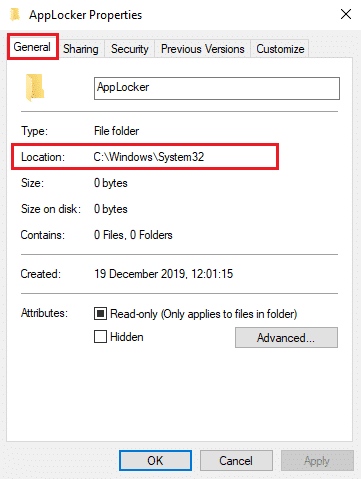
3. In Properties window, go to the General tab and copy the file location from the window.
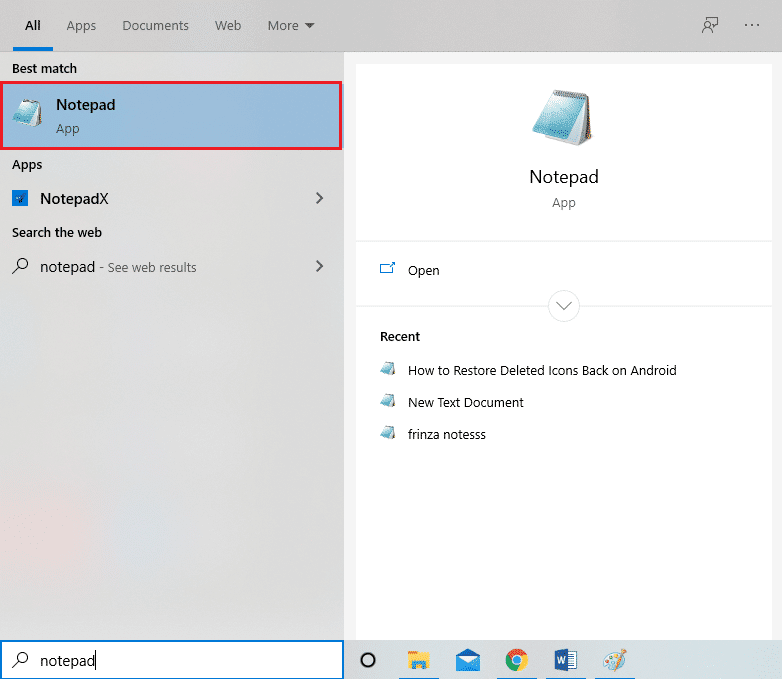
4. Now open Notepad on your Windows computer. Press the Windows key and type ‘Notepad’ in the search bar.
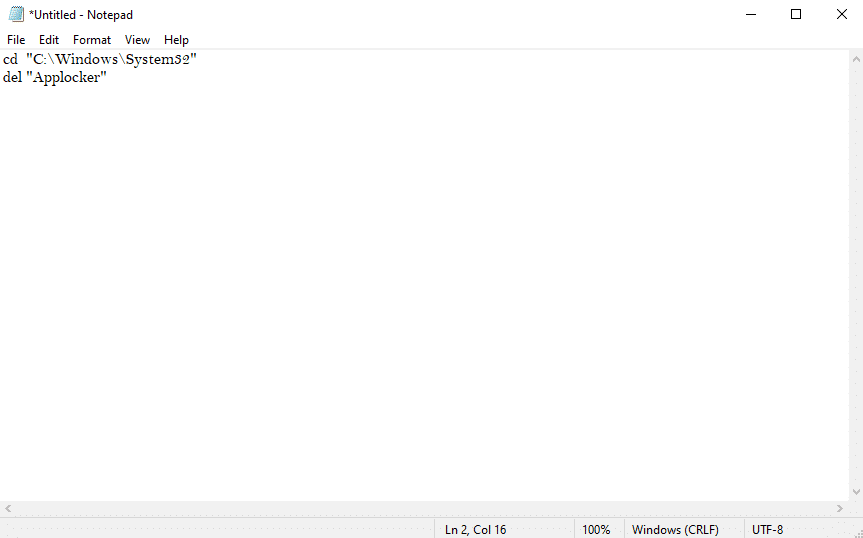
5. In the Notepad, you have to type cd “location”. In location, replace it with the file location that you have copied earlier. Make sure you are typing the location in quotes. Now press Enter and in the next line type del.
6. After you type del, give space and type the name of the file, which you want to delete from the System32 folder. In our case, we are typing del AppLocker. If there are any extensions in the file name, then make sure to type them.
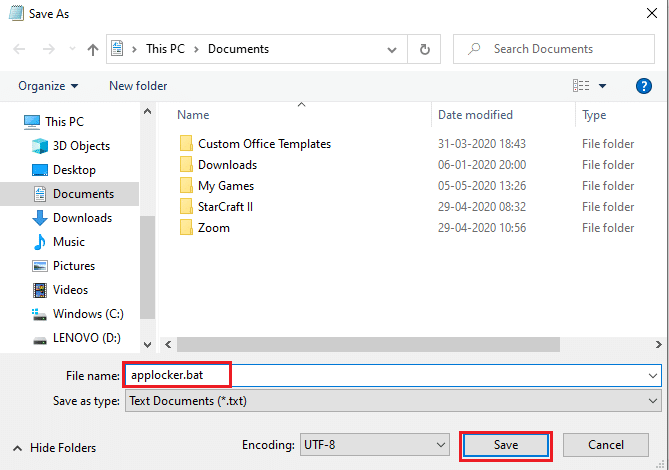
7. Now you have to click on the File in the top left corner and select Save As to save the file with any name. However, make sure you add a .bat extension after the name. In our case, we are saving it as AppLocker.bat. Once done, click on the Save button.
8. Finally, locate the location of the file that you just saved and double click on it. When you double click on the batch file, it will be deleted the particular file from the System32 folder.
Also Read: How to Repair Corrupted System Files in Windows 10
Method 2: Acquire Administrative Privileges To Delete System32
In this method, you can acquire the administrative privileges and easily delete the System32 folder or some files under it.
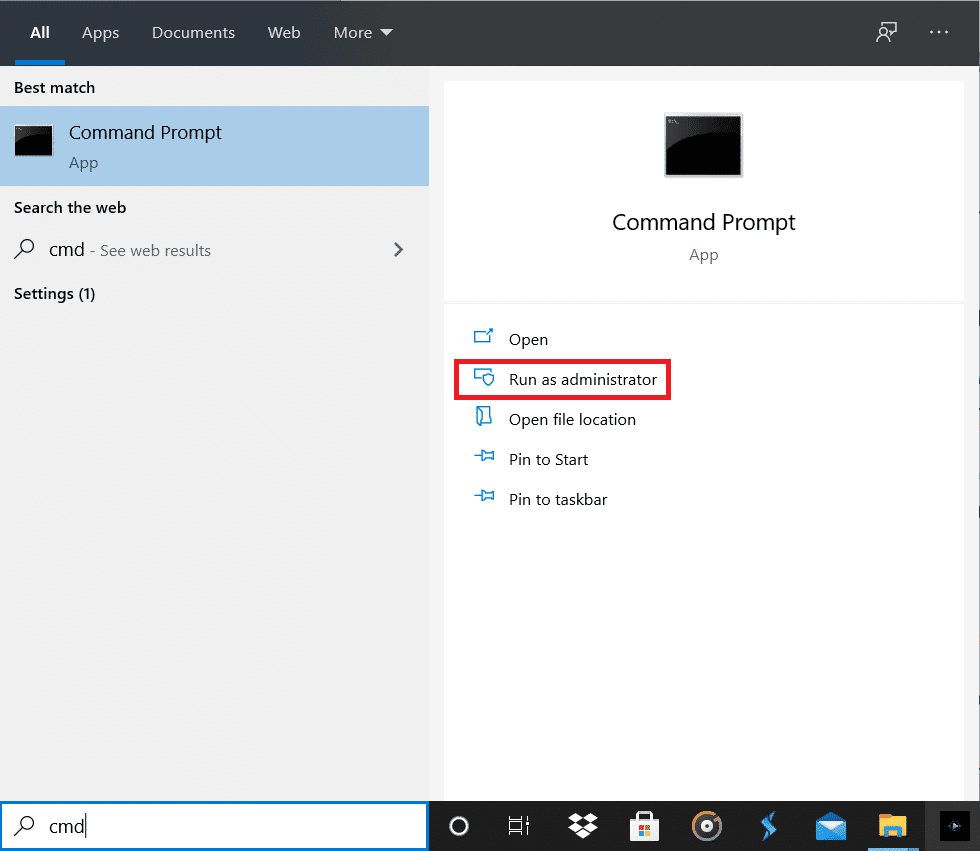
1. Type cmd in Windows Search bar then click on Run as Administrator under Command Prompt from the search result.
2. Now the Command Prompt window will pop up, type the following command into cmd and hit Enter:
takeown /f C:WindowsSystem32
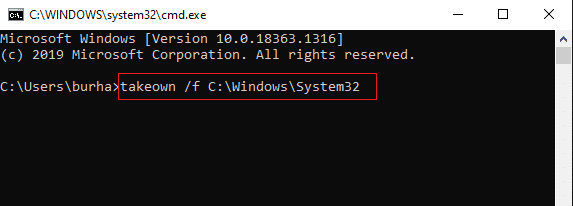
3. The above command will give you the ownership privileges of the System32 folder.
4. For deleting System32, you have to type the following command in the cmd and hit Enter:
cacls C:WindowsSystem32
5. Close the command prompt and all running programs on your computer.
6. Go to the C drive and locate the System32 folder.
7. Finally, you can easily delete the entire folder or specific files under the System32 folder.
Also Read: 6 Ways to Delete System Error Memory Dump Files
Method 3: Gain File Permissions With TrustedInstaler
If you were not able to perform steps under the previous method or you encountered a “You don’t have permission to perform this action” error while deleting the System32 folder from your computer, then you can gain file permission with a TrustedInstaller by following these steps:
1. Locate the System32 folder in the C drive. It is usually located in the C drive: C:WindowsSystem32.
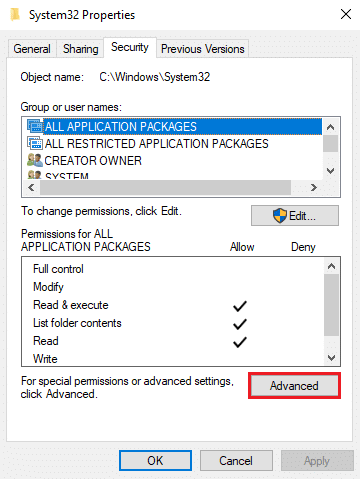
2. Right-click on the System32 folder and click on Properties.
3. In the Properties window, switch to the Security tab and click on ‘Advanced’ from the bottom of the window.
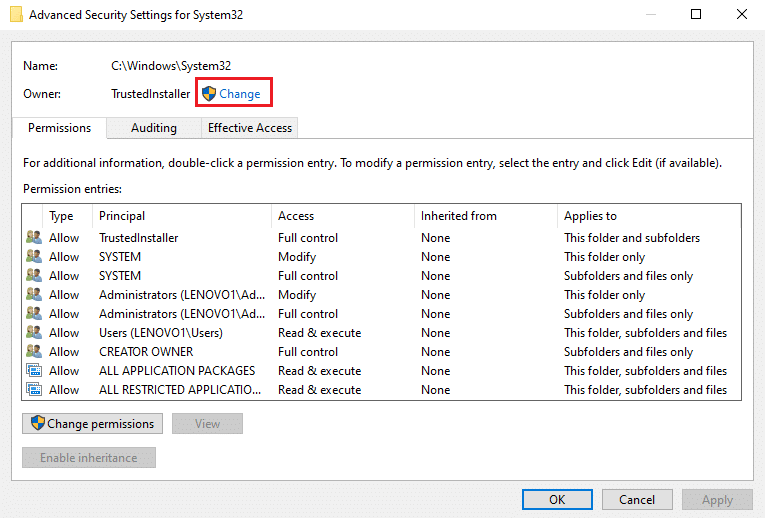
4. A dialog box will pop up, where you will see the option of ‘Change’ near TrustedInstaller. Click on it.
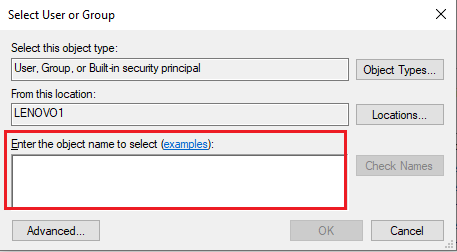
5. Now, you have to Enter the Username of your Windows computer, where it says ‘Enter the object name to select’.
6. Click on ‘Check Names’ to see if your username appears in the menu. If you see your Username, then click on OK.
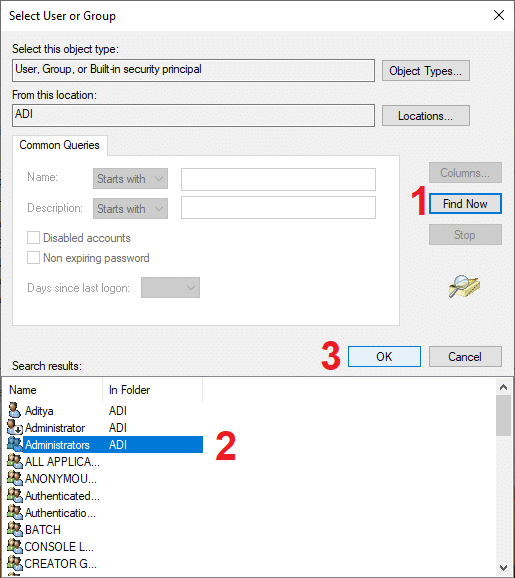
Note: If you don’t know your username then click on the Advanced button, then click on Find Now and select your username from the list of options and click OK.
7. Go back to the Security tab and in groups or username, select the username that your selected earlier and click OK.
8. Finally, you should be able to delete the System32 folder or specific files under it.
Recommended:
We hope this guide was helpful and you were able to delete System32 from your Windows computer. If the above-mentioned methods work for you, do let us know in the comments below. However, we do not recommend deleting the System32 folder from your computer as it can make the Windows OS unstable or nonfunctional.