Set Default User Logon Picture for all Users in Windows 10

By default, Windows assign a default user avatar for every user account which is an image with a grey background and white curves. If you have too many user accounts, then changing the account picture for every account is a tiring process; instead, you could set default User Logon Picture for all users in Windows 10. This feature of Windows 10 comes very handy for large offices where there are thousands of computers, and the company wants to display its logo as the default user logon picture.
To set your real photo or wallpaper as an account picture, first, you need to follow the below tutorial and set that image as the Default User Logon Picture for all Users. So without wasting any time let’s see How to Set Default User Logon Picture for all Users in Windows 10 with the help of the below-listed tutorial.
Set Default User Logon Picture for all Users in Windows 10
Make sure to create a restore point just in case something goes wrong.
Method 1: Change the default logon picture
1. First, select the image you want to set as your logon picture in Windows 10.
2. Also, the image needs to be in the following sizes (Use paint to resize your image to these dimensions) and rename them as shown below:
448 x 448px (user.png)
32 x 32px (user-32.png)
40 x 40px (user-40.png)
48 x 48px (user-48.png)
192 x 192px (user-192.png)
3. Now navigate to the following directory inside File Explorer:
C:ProgramDataMicrosoftUser Account Pictures
Note: Make sure Show hidden files, folders and drives option is check-marked in Folder Options.
4. Next, rename user.png, user-32.png, user-40.png, user-48.png, and user-192.png to user.png.bak, user 32.png.bak, user-40.png.bak, user-48.png.bak, and user-192.png.bak respectively.
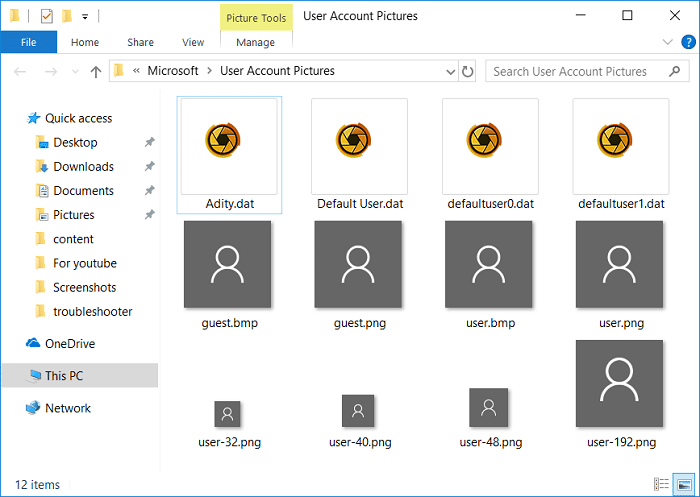
5. Copy & paste the images you resized & renamed in step 2 to the above directory.
7. Restart your PC to save changes.
Method 2: Set Default User Logon Picture for all Users in Windows 10 using Registry
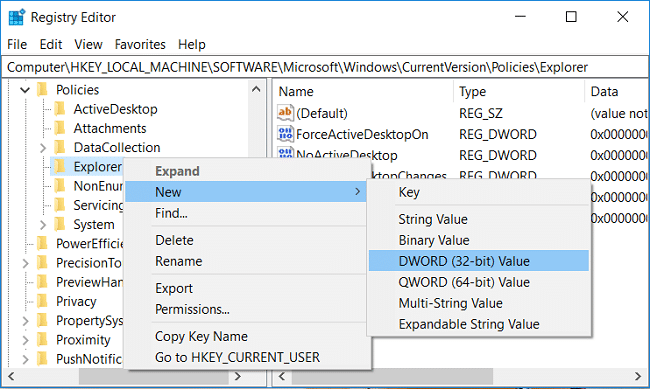
1. Press Windows Key + R then type regedit and hit Enter to open Registry Editor.

2. Navigate to the following registry key:
HKEY_LOCAL_MACHINESOFTWAREMicrosoftWindowsCurrentVersionPoliciesExplorer
3. Right-click on Explorer then selects New > DWORD (32-bit) value.
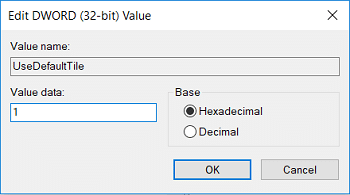
4. Name this new DWORD as UseDefaultTile and double-click on it to change its value.
5. Enter 1 in the Value data field for this DWORD and click OK.
6. Close everything and restart your PC to save changes.
After system restart, this new default user logon picture will appear for all users. In future, if you need to undo these changes delete the UseDefaultTile DWORD and reboot your PC.
Method 3: Set Default User Logon Picture for all Users in Windows 10 using gpedit.msc
Note: This method will only work for users running Windows 10 Pro, Enterprise, or Education edition.
1. Press Windows Key + R then type gpedit.msc and hit Enter to open Group Policy Editor.

2. Navigate to the following policy:
Computer Configuration > Administrative Templates > Control Panel > User Accounts
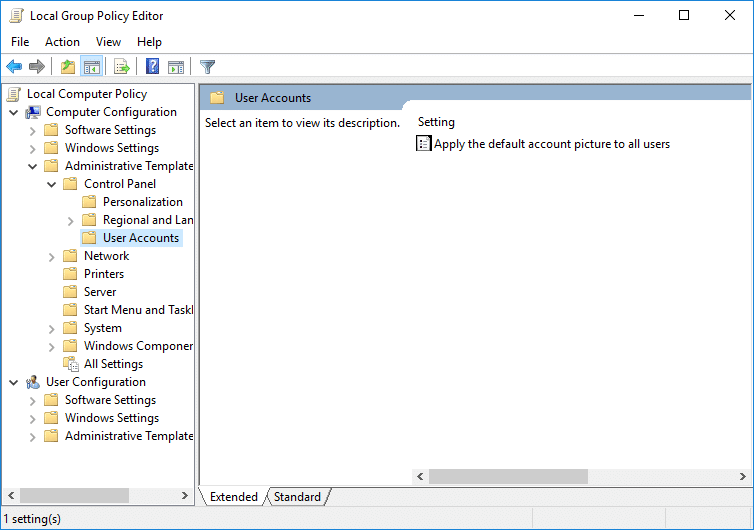
3. Make sure to select User Accounts then in the right window pane double-click on “Apply the default account picture to all users” policy and select Enabled.
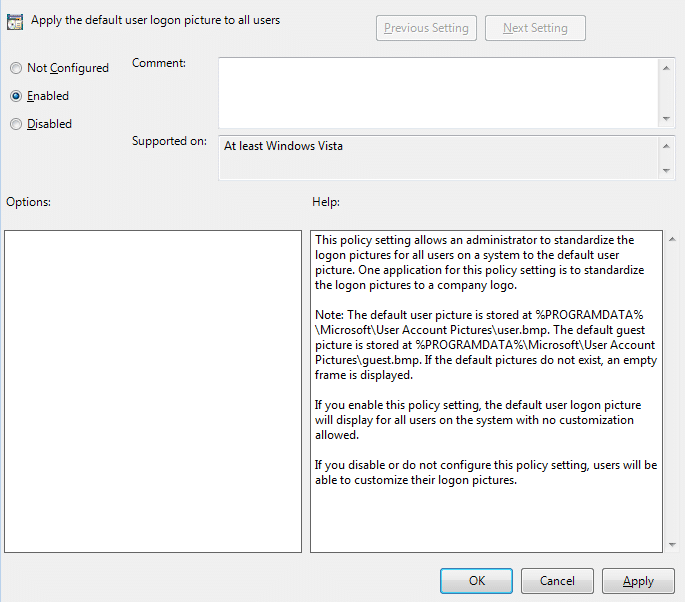
4. Click Apply, followed by OK.
5. Restart your PC to save changes.
If you need to undo this, then go back to Apply the default account picture to all users policy and checkmark.
“Not configured” in the settings.
Recommended:
That’s it you have successfully Set Default User Logon Picture for all Users in Windows 10 but if you still have any questions regarding this tutorial then feel free to ask them in the comment’s section.