How to Add Safe Mode to Boot Menu in Windows 10

Safe Mode is a diagnostic startup mode in Windows which disables all the third-party applications and drivers. When Windows starts in Safe Mode, it only loads basic drivers required for the basic functioning of the Windows so that user can troubleshoot the issue with their PC. Now you know that Safe Mode is an important feature in an Operating System which is often used for troubleshooting issues with the system.
In earlier versions of Windows accessing Safe Mode was very easy and straight-forward. On the boot screen, you press the F8 key to boot into advanced boot menu then select Safe Mode to start your PC into Safe Mode. However, with the introduction of Windows 10, starting your PC into Safe Mode is little more complicated. To access the Safe Mode easily in Windows 10, you can directly add the Safe Mode Option to the Boot Menu.
You can also configure the Windows to display the Safe Mode option on Boot Menu for two or three seconds. There are three types of Safe Mode available: the Safe Mode, the Safe Mode with Networking and the Safe Mode with Command Prompt. So without wasting any time, let’s see How to Add Safe Mode to Boot Menu in Windows 10 with the help of the below-listed tutorial.
Make sure to create a restore point just in case something goes wrong.
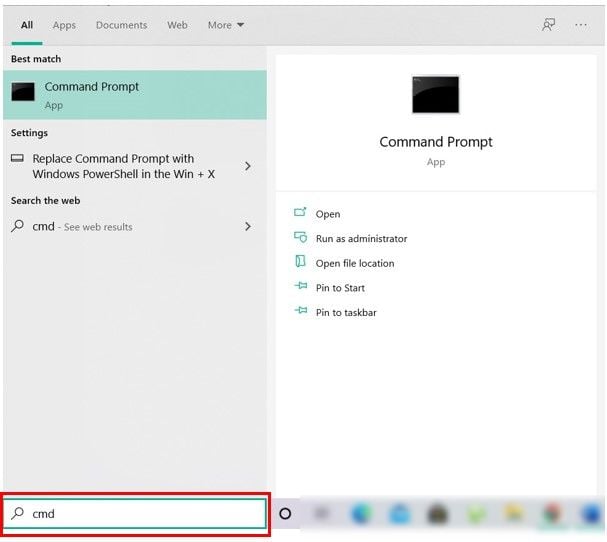
1. Open Command Prompt. The user can perform this step by searching for ‘cmd’ and then press Enter.
2. Type the following command into the cmd and hit Enter:
bcdedit /copy {current} /d “Safe Mode”

Note: You can replace “Safe Mode” with any name you like for example bcdedit /copy {current} /d “Windows 10 Safe Mode”. This is the name shown on the boot options screen, so choose according to your preferences.
3. Close cmd and then press Windows Key + R then type msconfig and hit Enter to open System Configuration.

4. In System Configuration switch to the Boot tab.
5. Select the newly created boot entry “Safe Mode” or “Windows 10 Safe Mode” then checkmark “Safe boot” under Boot options.
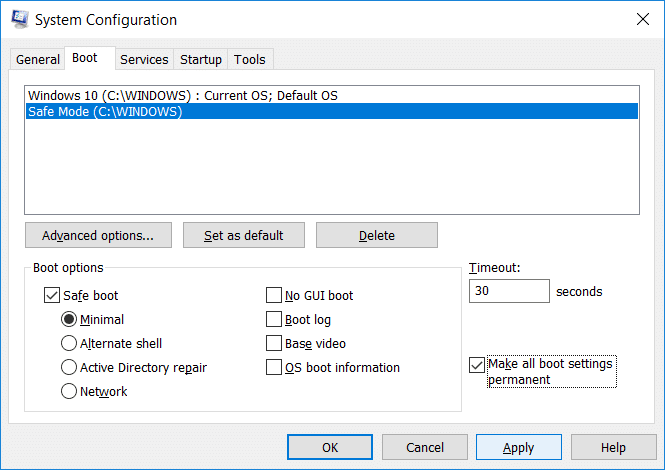
6. Now set the timeout to 30 seconds and checkmark “Make all boot settings permanent” box.
Note: This timeout settings define how many seconds you will get to choose an operating system at boot before your default OS automatically boots, so choose accordingly.
7. Click Apply, followed by OK. Click Yes on the warning pop up message.
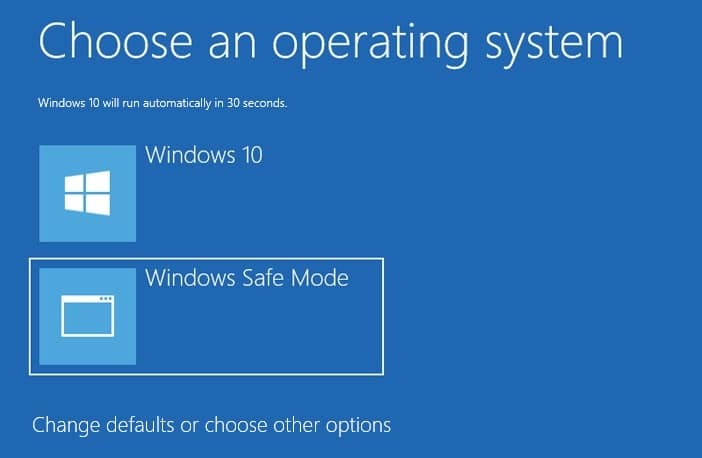
8. Now click Restart and the when the PC boots you will see the safe mode boot option available.
This is How to Add Safe Mode to Boot Menu in Windows 10 without using any third party software but if you face some problem following this method, don’t worry, continue to the next method.
Method 2: Add Safe Mode to Boot Menu in Windows 10 Using Command Prompt
1. Open Command Prompt. The user can perform this step by searching for ‘cmd’ and then press Enter.
2. Type the following command into the cmd and hit Enter:
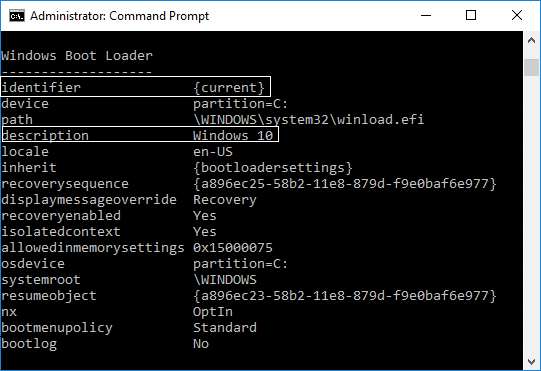
bcdedit

3. Under Windows Boot Loader section look for description and make sure it reads “Windows 10″ then note down the identifier’s value.
4. Now type the command below for the safe mode you want to use and hit Enter:
bcdedit /copy {IDENTIFIER} /d "Safe Mode"
bcdedit /copy {IDENTIFIER} /d "Safe Mode with Networking"
bcdedit /copy {IDENTIFIER} /d "Safe Mode with Command Prompt"
Note: Replace {IDENTIFIER} with the actual identifier you noted down in step 3. For example, to add safe mode option to the boot menu, the actual command would be: bcdedit /copy {current} /d “Windows 10 Safe Mode.”
5. Make note of the safe mode identifier for example {a896ec27 – 58b2 – 11e8 – 879d – f9e0baf6e977} that the entry was successfully copied to in the above step.
6. Type the command below for the same safe mode used in step 4:
Safe Mode: bcdedit /set {IDENTIFIER} safeboot minimal
Safe Mode with Networking: bcdedit /set {IDENTIFIER} safeboot network
Safe Mode with Command Prompt: bcdedit /set {IDENTIFIER} safeboot minimal
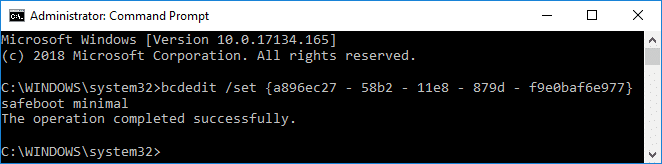
Note: Replace the {IDENTIFIER} with the actual identifier you noted down in the above step. For example:
bcdedit /set {a896ec27 – 58b2 – 11e8 – 879d – f9e0baf6e977} safeboot minimal
Also, if you want to use Safe Mode with Command Prompt, then you need to use one more command:
bcdedit /set {IDENTIFIER} safebootalternateshell yes
7. Close cmd and reboot your PC to save changes.
1. Open Command Prompt. The user can perform this step by searching for ‘cmd’ and then press Enter.
2. Type the following command into the cmd and hit Enter:
bcdedit
3. Under Windows Boot Loader section look for description and make sure it reads “Safe Mode” and then notes the identifier’s value.
4. Now type the following command to remove the safe mode from boot menu:
bcdedit /delete {IDENTIFIER}
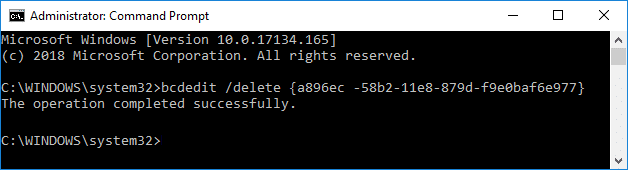
Note: Replace the {IDENTIFIER} with the actual value you noted down in step 3. For example:
bcdedit /delete {054cce21-a39e-11e4-99e2-de9099f7b7f1}
5. When finished close everything and rebooted your PC to save changes.
Recommended:
That’s it, you successfully learned How to Add Safe Mode to Boot Menu in Windows 10 but if you still have any questions regarding this tutorial then feel free to ask them in the comment’s section.