Windows 10 Tip: Enable or Disable On-Screen Keyboard

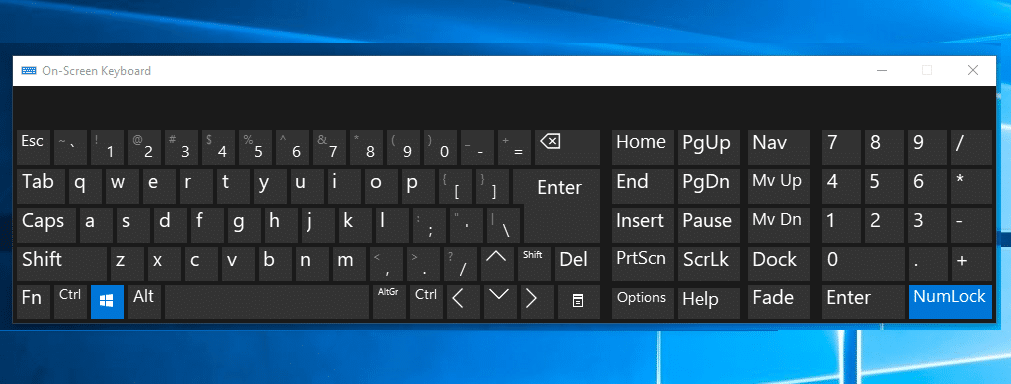
Enable or Disable On-Screen Keyboard: Windows 10 is a lightweight and user-friendly operating system featured with exclusive built-in tools to make your user experience more delightful. Ease of access is one of those features of Windows which contains several tools for the users to give better user experience. An on-screen keyboard feature is a tool for those who cannot type in general keyboard, they can easily use this keyboard and type with the mouse. What if you get on-screen keyboard every time on your screen? Yes, many users reported that they experience the unsolicited appearance of this feature on their login screen. As we all know before reaching the solution, we need to first think of the root cause/causes of the problems.
What could be the reasons behind this?
If you ponder upon the probable causes or reasons behind this problem, we explored some most common reasons. Windows 10 enables developers to invoke the feature of the on-screen keyboard. Thus, there could be several applications that require an on-screen keyboard. If those applications are set to start in the startup, the on-screen keyboard will appear along with that application whenever system boots. Another simple reason could be that you mistakenly setup to start whenever your system starts. How to resolve this problem?
Enable or Disable On-Screen Keyboard in Windows 10
Make sure to create a restore point just in case something goes wrong.
Method 1 – Disable On-Screen Keyboard from Ease of Access Centre
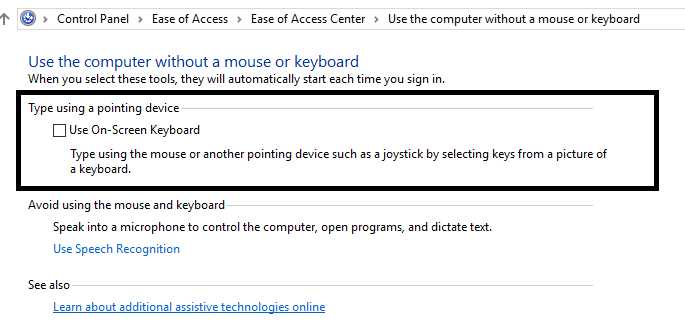
1.Press Windows Key + U to open ease of access Centre.
2.Navigate to Keyboard section on the left pane and click on it.
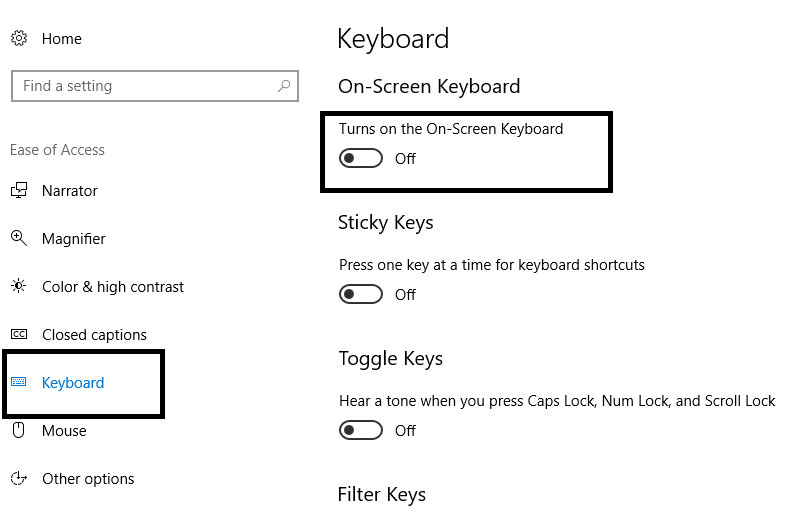
3.Here you need to turn off the toggle next to Use On-Screen Keyboard option.
4.If in future you need to Enable On-Screen Keyboard again then simply turn the above toggle to ON.
Method 2 – Disable On-Screen Keyboard using Options Key
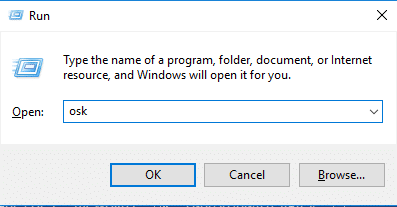
1.Press Windows Key + R and type osk to start On-Screen keyboard.
2.On the bottom of the virtual keyboard, you will find options key and click on the Options tab.
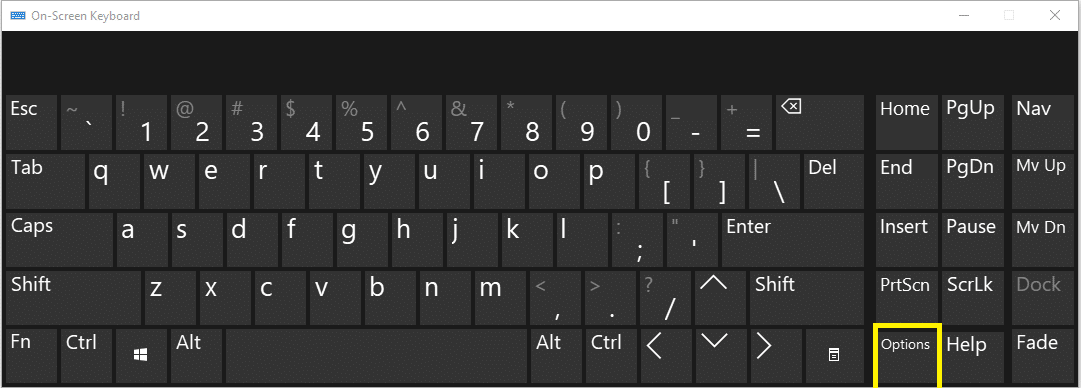
3.This will open Options window and at the bottom of the box you will notice “Control whether the On-Screen Keyboard starts when I sign in.” You need to click on it.
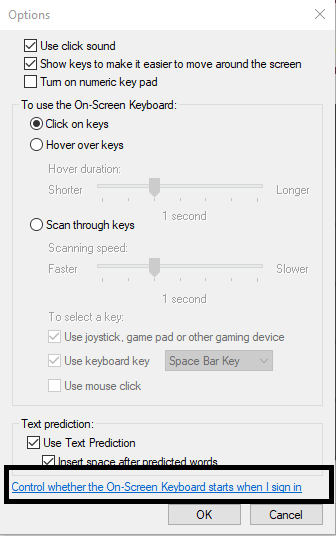
4.Make sure that “Use On-Screen Keyboard” box is unchecked.
5.Now you need to Apply all the settings and then close the settings window.
Method 3 – Disable On-Screen Keyboard via Registry Editor
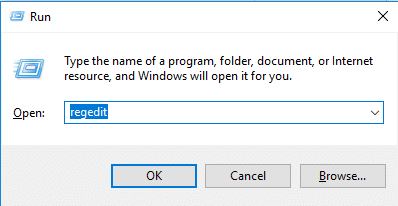
1.Press Windows Key + R and type regedit and hit Enter.
2.Once registry editor opens, you need to navigate to the below-given path.
HKEY_LOCAL_MACHINESOFTWAREMicrosoftWindowsCurrentVersionAuthenticationLogonUI
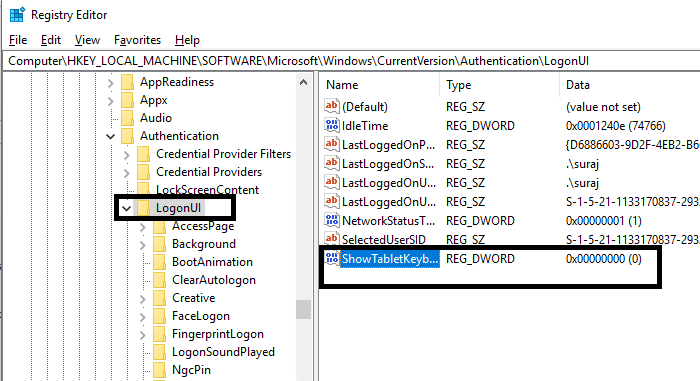
3.Make sure to select LogonUI then from the right window pane double-click on “ShowTabletKeyboard”.
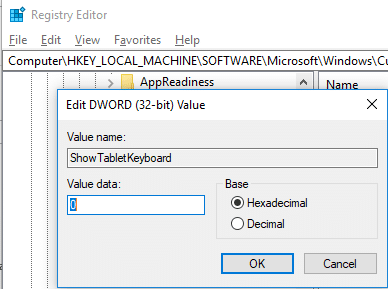
4.You need to set it’s value to “0” in order to disable On-Screen Keyboard in Windows 10.
If in future you need to again enable the On-Screen Keyboard then change the value of ShowTabletKeyboard DWORD to 1.
Method 4 – Disable Touch screen keyboard & handwriting panel service
1.Press Windows Key + R and type services.msc and press Enter.

2.Navigate to “Touch screen keyboard and handwriting panel”.
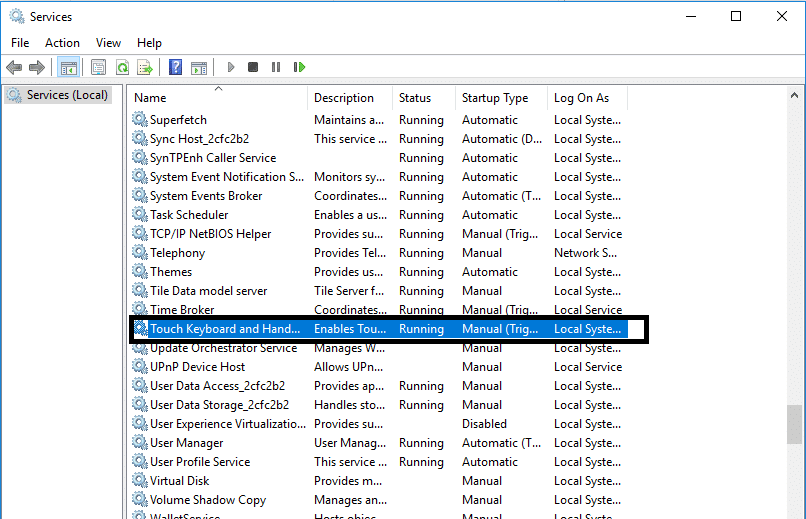
3.Right-click on it and select Stop from the Context Menu.
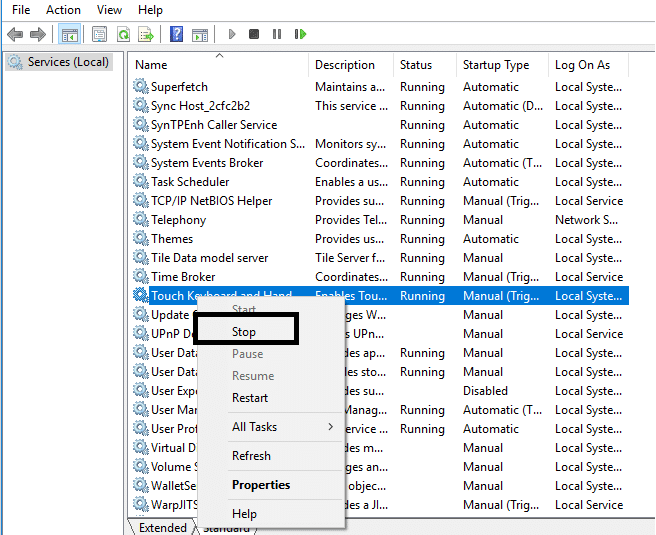
4.Again right-click on Touch screen keyboard and handwriting panel and select Properties.
5.Here under the General tab in the properties section, you need to change the Startup type from “Automatic” to “Disabled”.
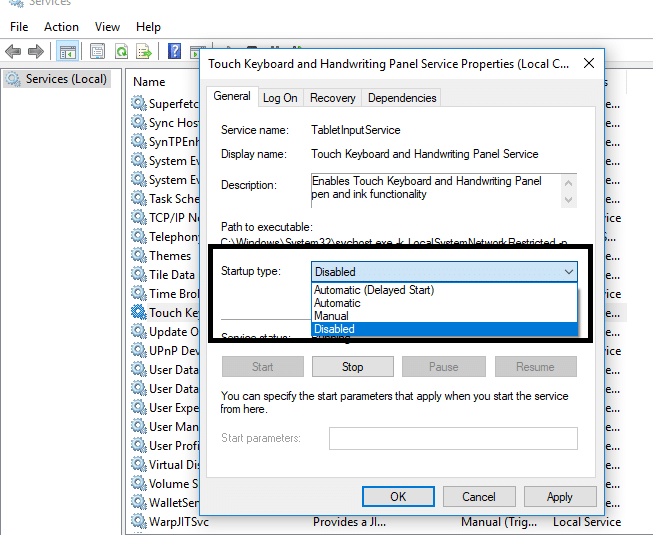
6.Click Apply followed by OK
7.You can reboot your system to apply all the settings.
In case you experience any trouble with this function later, you can re-enable it to automatic.
Method 5 – Disable On-Screen Keyboard on Login using Command Prompt
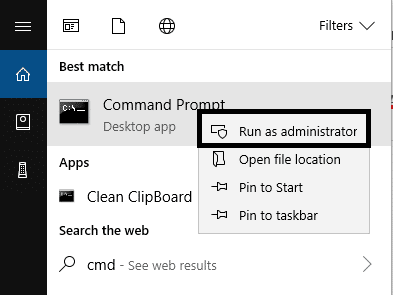
1.Open the command prompt with administrator access on your device. You need to type cmd in Windows search box and then right-click on Command Prompt and select Run as administrator.
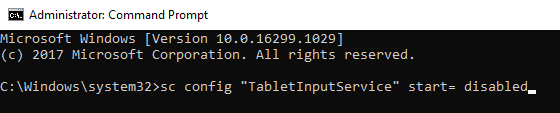
2.Once the elevated command prompts open, you need to type the following command and hit Enter after each one:
sc config “Tablet Input Service” start= disabled
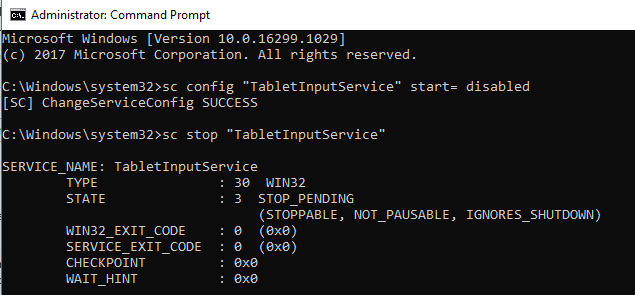
sc stop “Tablet Input Service”.
3.This will stop the service that was already running.
4.To re-enable the above services you will need to use the following command:
sc config “Tablet Input Service” start= auto sc start “Tablet Input Service”
Method 6 – Stop third-party applications which requires on-screen keyboard
If you have some apps which need a touchscreen keyboard then Windows will automatically start the On-Screen Keyboard on Login. Therefore, in order to disable the On-Screen Keyboard, you will first need to disable those apps.
You need to think about those apps that you have recently installed on your device, it may possible that one of those applications cause the computers that it has a touchscreen or require an onscreen keyboard.
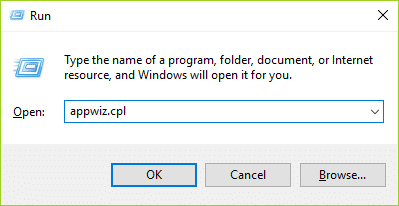
1.Press Windows Key + R and start run program and type “appwiz.cpl“ and hit Enter.
2.You need to double click on any program that you want to Uninstall.
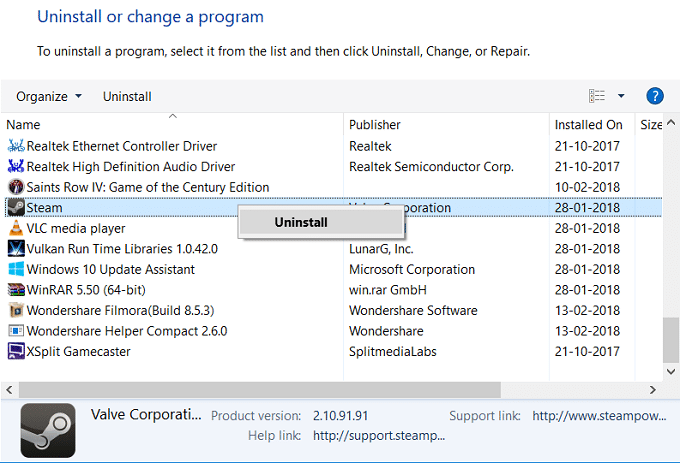
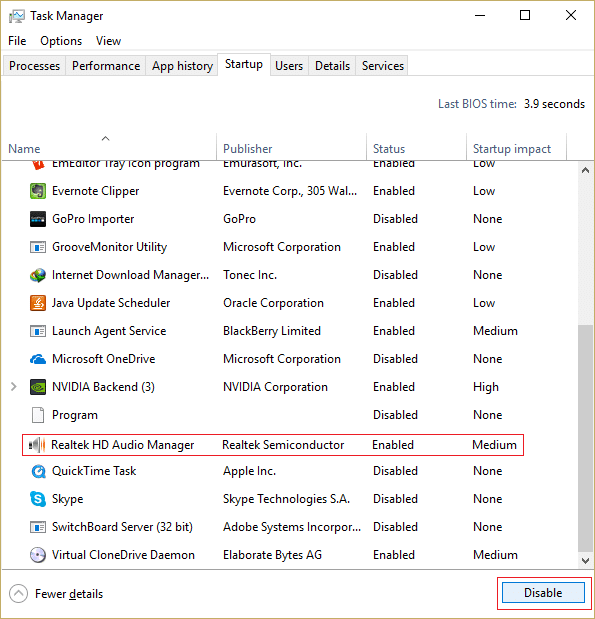
3.You can open Task Manager and navigate to the Startup tab where you need to disable particular tasks that you suspect causing this problem.
Recommended:
I hope this article was helpful and you can now easily Enable or Disable On-Screen Keyboard in Windows 10, but if you still have any questions regarding this tutorial then feel free to ask them in the comment’s section.