Enable or Disable Windows Error Reporting in Windows 10: When your system crashes or it stops working or responding, Windows 10 automatically send the error log to Microsoft and check if a solution is available to that particular problem. All these events are handled by Windows Error Reporting (WER) which is a flexible event-based feedback infrastructure which records information about software crash or failure from end users.
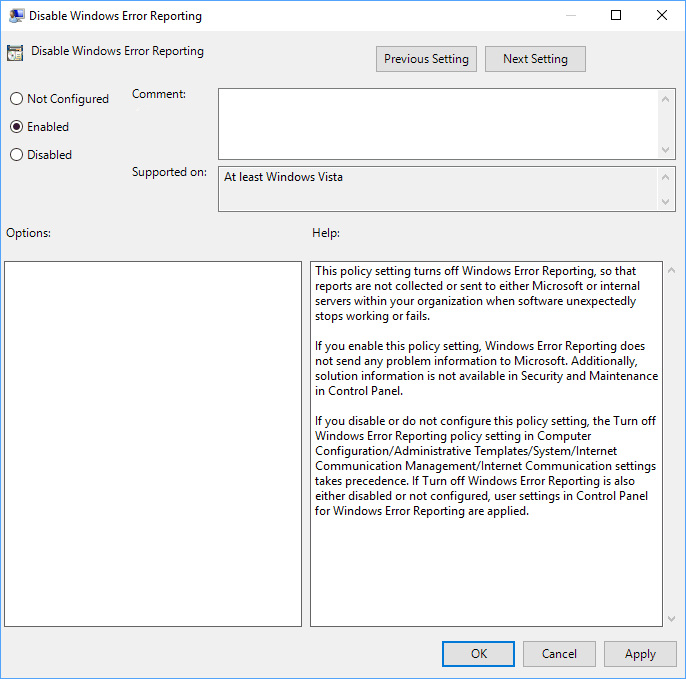
The data collected by Windows Error Reporting is analyzed to gather more information about the hardware and software problems that Windows can detect, then this information is sent to Microsoft and any available solution to the problem is sent back to the user from Microsoft. Anyway, without wasting any time let’s see How to Enable or Disable Windows Error Reporting in Windows 10 with the help of the below-listed tutorial.
Enable or Disable Windows Error Reporting in Windows 10
Make sure to create a restore point just in case something goes wrong.
Method 1: Enable or Disable Windows Error Reporting in Registry Editor
1.Press Windows Key + R then type regedit and hit Enter to open Registry Editor.

2.Navigate to the following registry key:
HKEY_LOCAL_MACHINESOFTWAREMicrosoftWindowsWindows Error Reporting
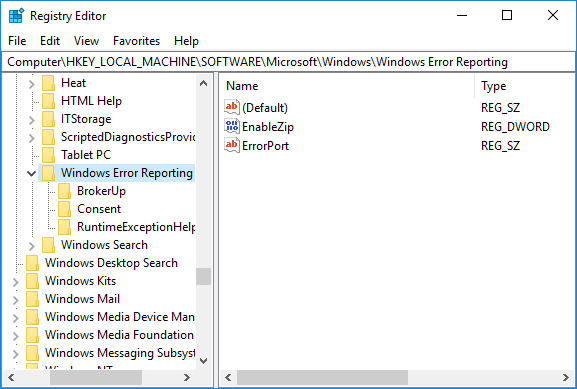
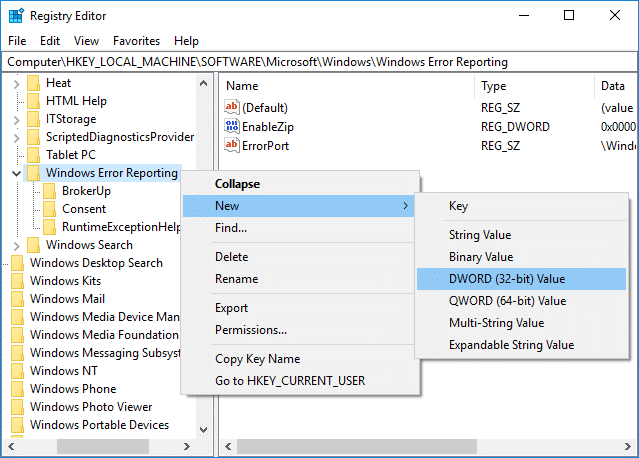
3.Right-click on Windows Error Reporting then select New > DWORD (32-bit) Value.
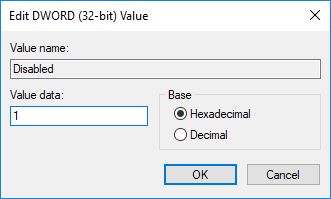
4.Name this DWORD as Disabled and hit Enter. Double-click on Disabled DWORD and change it’s value to:
0 = On
1 = Off
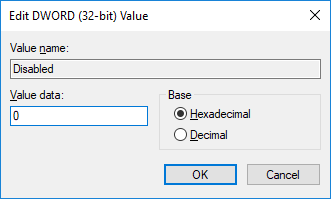
5.To Disable Windows Error Reporting in Windows 10 change the value of the above DWORD to 1 and click OK.
Note: In case you want to Enable Windows Error Reporting in Windows 10, simply right-click on Disabled DWORD and select Delete.
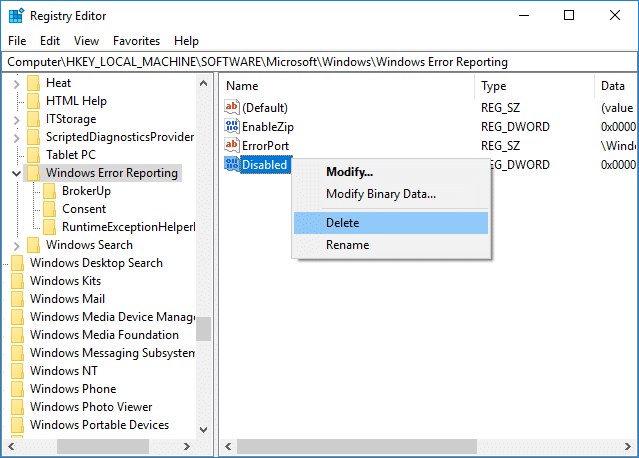
6.Close Registry Editor and restart your PC to save changes.
Method 2: Enable or Disable Windows Error Reporting in Group Policy Editor
Note: This method won’t work for Windows 10 Home Edition Users, it will only for Windows 10 Pro, Education, and Enterprise Edition.
1.Press Windows Key + R then type gpedit.msc and hit Enter to open Group Policy Editor.

2.Navigate to the following location:
Computer Configuration > Administrative Templates > Windows Components > Windows Error Reporting
3.Make sure to select Windows Error Reporting then in right window pane double-click on Disable Windows Error Reporting policy.
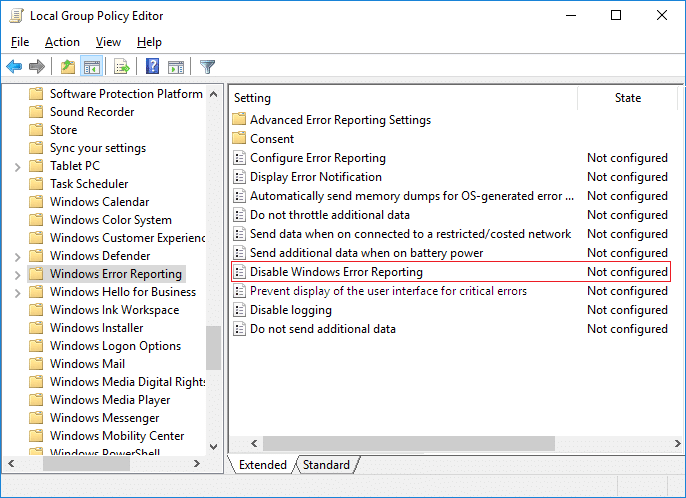
4.Now change the settings of Disable Windows Error Reporting policy according to:
To Enable Windows Error Reporting in Windows 10: Select Not Configured or Enabled
To Disable Windows Error Reporting in Windows 10: Select Disabled
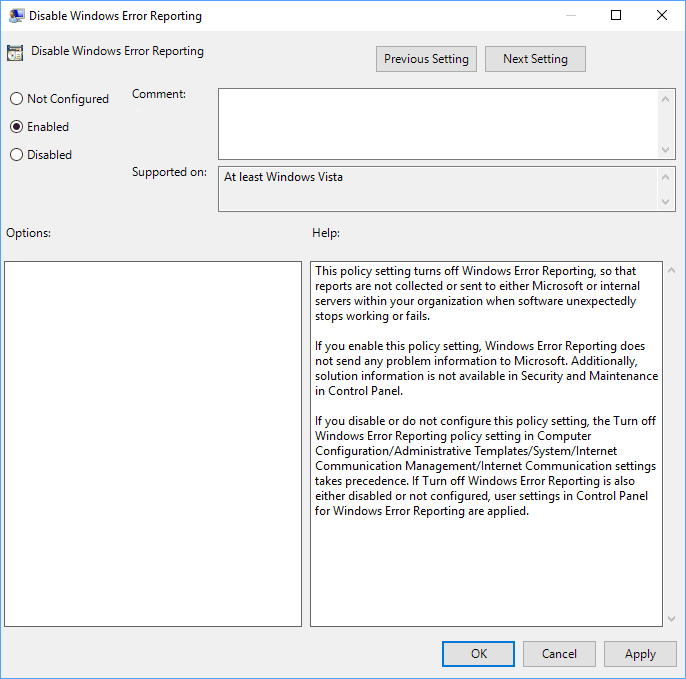
5.Once you have selected the appropriate options, click Apply followed by OK.
Recommended:
That’s it you have successfully learned How to Enable or Disable Windows Error Reporting in Windows 10 but if you still have any questions regarding this post then feel free to ask them in the comment’s section.

![Mouse and Keyboard Not Working in Windows 10 [SOLVED] Mouse and Keyboard Not Working in Windows 10 [SOLVED]](https://lbsite.org/wp-content/uploads/2023/02/Fix-Mouse-and-keyboard-not-working-in-Windows-10.jpg)