How to Control Fan Speed in Windows 10

All the major hardware components of a PC, majorly CPU & GPU, generate an immense amount of heat during their working, especially when heavy resource-consuming applications are running. Heat is the main culprit behind permanent hardware damage due to over-heating, as dust just works as a catalyst for it. Primarily, an effective cooling system is required to handle the heating issues. To solve this issue, CPU fans are introduced, which cools down the heating effectively & efficiently. Today, a large variety of fans are available in the market, from small capacity to high capacity. And the PC fan speed is controllable by using various applications. So, keep reading this article to know how to perform fan control Windows 10 in detail.
How to Control Fan Speed in Windows 10
A CPU fan is a crucial part of the computer hardware found in the motherboard, which can be a life-saver. Its most heroic function is to continuously cool down the hot CPU and prevent it from permanent damage due to burning out. It’s the CPU fan that saves the CPU and other nearby components from damage due to overheating and keeps the PC running.
- It not only provides cooling but also prevents dust from accumulating in the CPU.
- The power of CPU fans is measured in RPM, which decides the PC fan speed.
- It can be detached from the CPU and then attached back to the motherboard after cleaning.
- Higher the RPM higher the power of cooling. Also, gamers, graphic designers, animators, and VFX designers need the highest capacity and high-power fans to cool down their scorching CPU.
Fans are connected to the motherboard by:
- 3-pin DC connector: Speed can be altered by limiting the voltage.
- 4-pin PWM (Pulse Width Modulation) connector: Speed can be controlled using software easily.
We are here with the guide on how to control fan speed in Windows 10 and how to change CPU fan speed without BIOS. Follow these methods to control pc fan speed:
Method 1: Change Fan Speed Through Power Options
It is the only method in Windows 10 to optimize the fan speed. Follow these steps to perform the same.
1. Press Windows + X keys to open the Quick Link menu and select the Power Options.
![]()
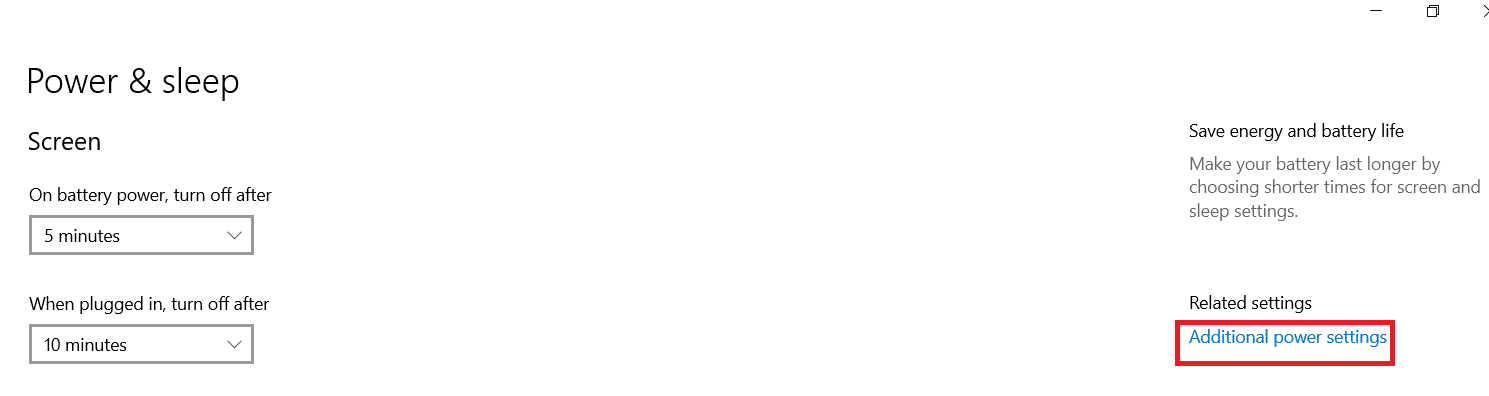
2. Under Power & sleep menu, click on Additional power settings situated in the right pane.
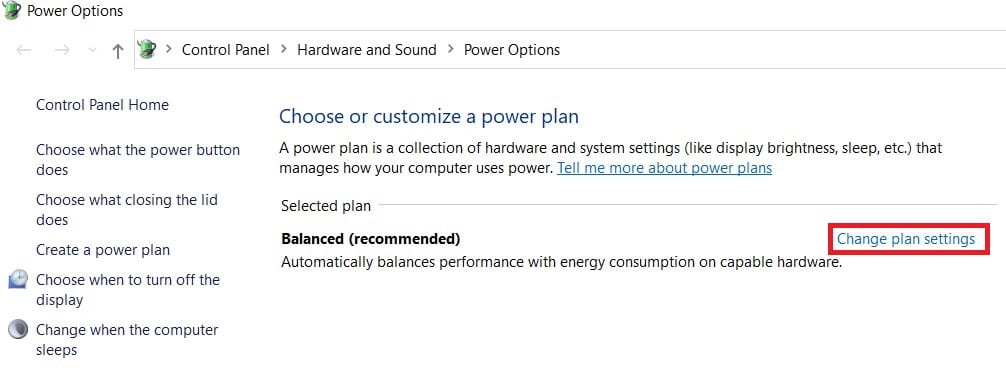
3. This will open Power Options, and now click on Change plan settings beside Balanced (recommended).
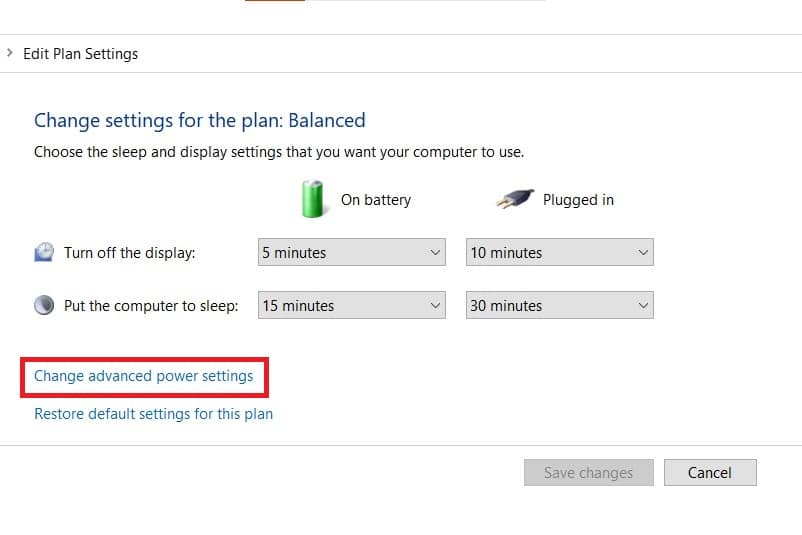
4. Now, the Edit Plan Settings window appears. Click on Change advanced power settings.
5. This action will open a dialog box of Power Options containing services of different system components.
6. Scroll down and double-click on Processor power management.
7. Then, double-click on System cooling policy and choose Active from the drop-down menu in both On battery & Plugged in modes.
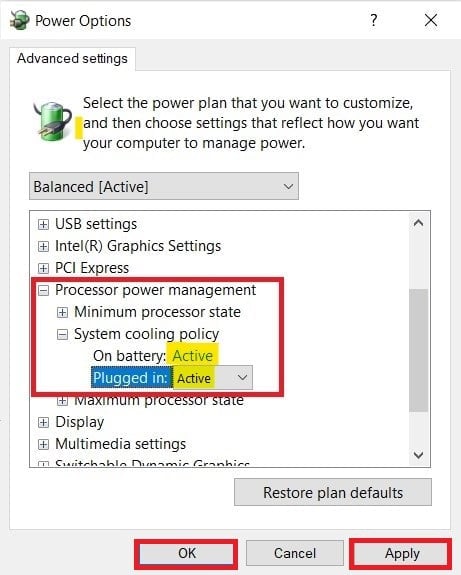
8. Now click on Apply then OK.
Note: Make sure to Activate the system cooling policy on both Battery & Plugged-in mode to fetch maximum fan performance.
It is the only method in Windows 10 OS that will help you in fan control Windows 10.
Also Read: 7 Ways to Fix CPU Fan Not Spinning
Method 2: Use SpeedFan Software
SpeedFan is a hardware monitoring program that is able to change fan speeds according to system temperatures. SpeedFan can read S.M.A.R.T. values and temperatures from the hard disk and can change the fan speed.
Note: This application will not detect all fan models. If you can’t find the fan listed there, then this method will not work. Also, do not alter the default CPU clock settings and other important settings of CPU, GPU & HDD to avoid causing trouble in the system.
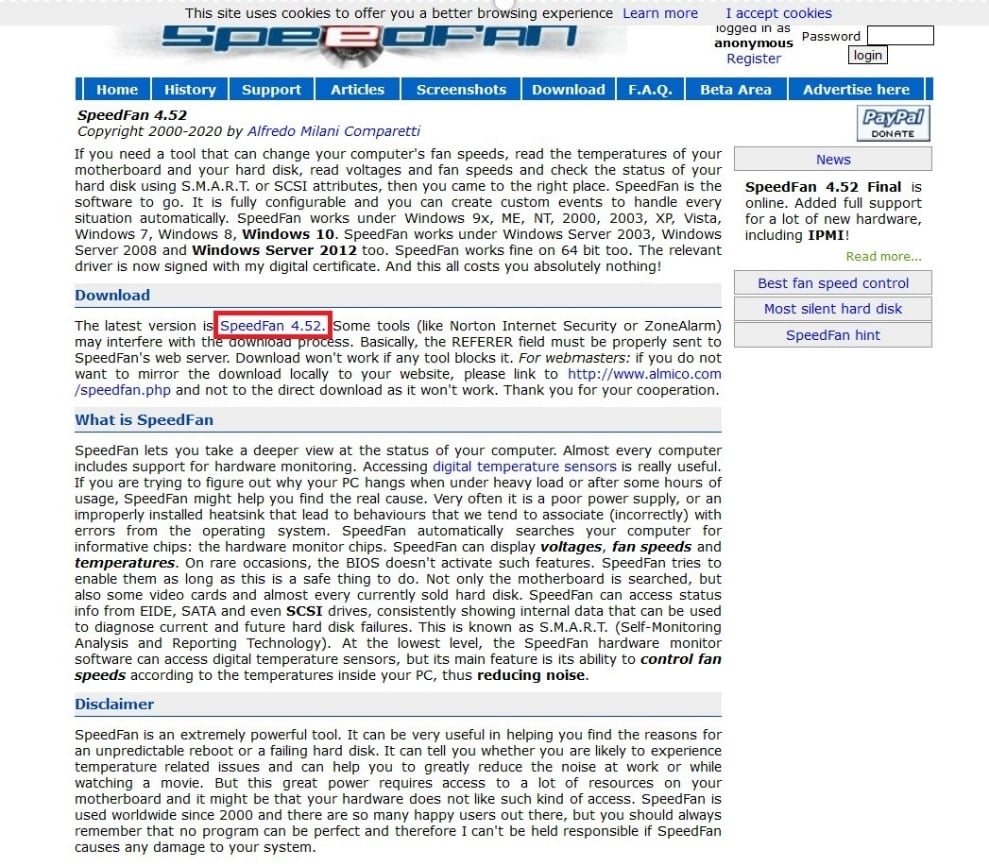
1. Download SpeedFan 4.52 from the official website.
2. Then, install the downloaded app on your PC and launch it.
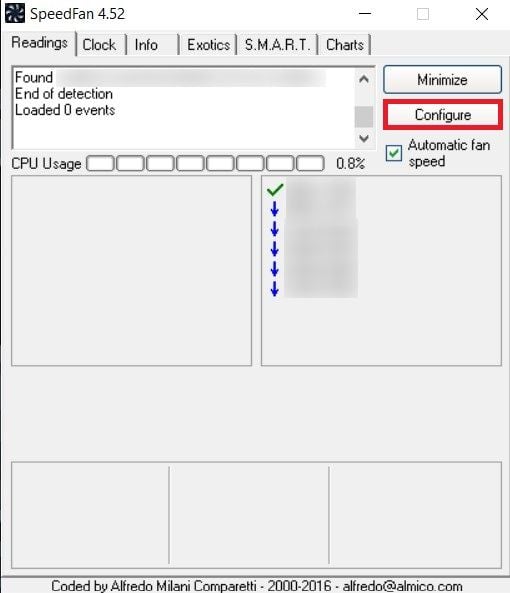
3. Now click on Configure.
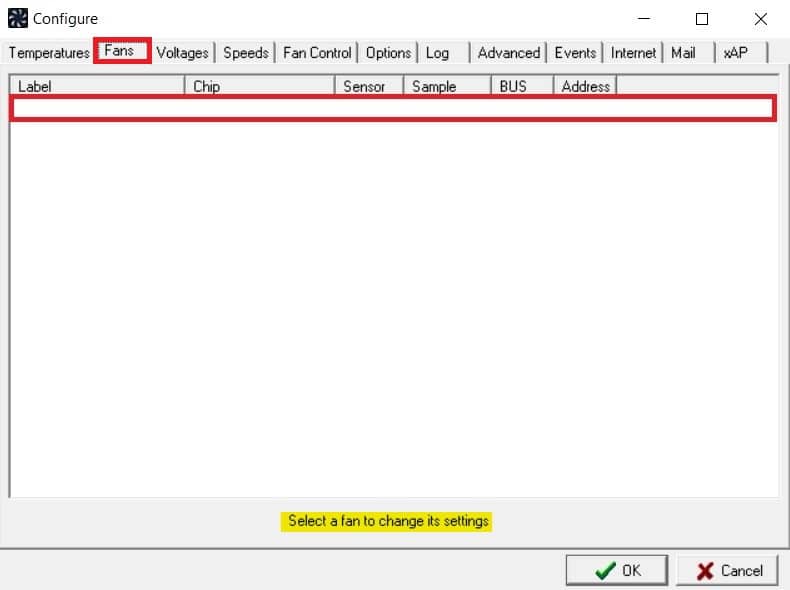
4. Navigate to the Fans tab and see if the system fan is listed there.
Note: If any fan is detected by the program, then it will show it under the red-highlighted area, as shown below.
5. If you found the system fan listed there, then select it and explore the options it shows. After modifying the speed of the fan. Click OK.
Also Read: How to Check Your CPU Temperature in Windows 10
Method 3: Use HWiNFo Software
HWiNFo is an award-winning professional hardware analysis, monitoring, diagnosing, and reporting software for Windows and DOS. It is a highly trusted software that is even used by NASA. This real-time system monitoring software has won several awards and is trusted by Intel, AMD, Dell, and Asus. It is also totally free.
Follow the upcoming steps to install this software on your PC to learn fan control Windows 10:
Note: Do not change default system settings related to CPU, GPU & HDD. It may result in system instability. Only alter fan speed if you are sure about it.
1. Download HWiNFo portable or installer version from the official website.
Note: Portable versions run directly without installation.

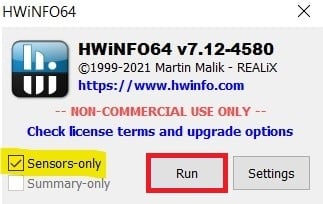
2. Launch the application. Now, select the Sensors-only option and click on Run.
3. Wait for the program to fetch all the hardware-related information.
Note: This software does not detect the fan in our laptop due to some other reasons. That doesn’t mean it will not work for others also.
4. Once it is open, locate a Fan logo on the bottom and click on it.
![]()
5. Here you’ll find the specifications of the CPU fan, including its speed, RPM, temperature, etc. Choose the settings carefully and alter them with caution and follow the on-screen instructions.
Here, we explained the most possible working methods which can be the solution of how to change CPU fan speed without BIOS and that can be helpful in controlling PC fan speed in Windows 10.
Recommended:
We hope that this guide was helpful and you were able to learn to control fan speed in Windows 10. Let us know which method worked the best for you. If you have any queries or suggestions, then feel free to drop them in the comments section.