Fix Command Prompt Appears then Disappears on Windows 10

If you are experiencing Command Prompt appears briefly then disappears problem, you are at the right place. Through this guide, you can learn everything you need to know about Command Prompt viz what is Command Prompt, how to use it, reasons for this issue, and how to fix the Command Prompt that disappears on Windows 10.
What is Command Prompt?
Command Prompt is a useful feature of Windows systems that can be used to install & update programs. Moreover, multiple troubleshooting actions can be performed using Command Prompt on your Windows computers.
How to launch Command Prompt?
You can open Command Prompt through these steps:
1. Type Command Prompt or cmd in the Windows search box.
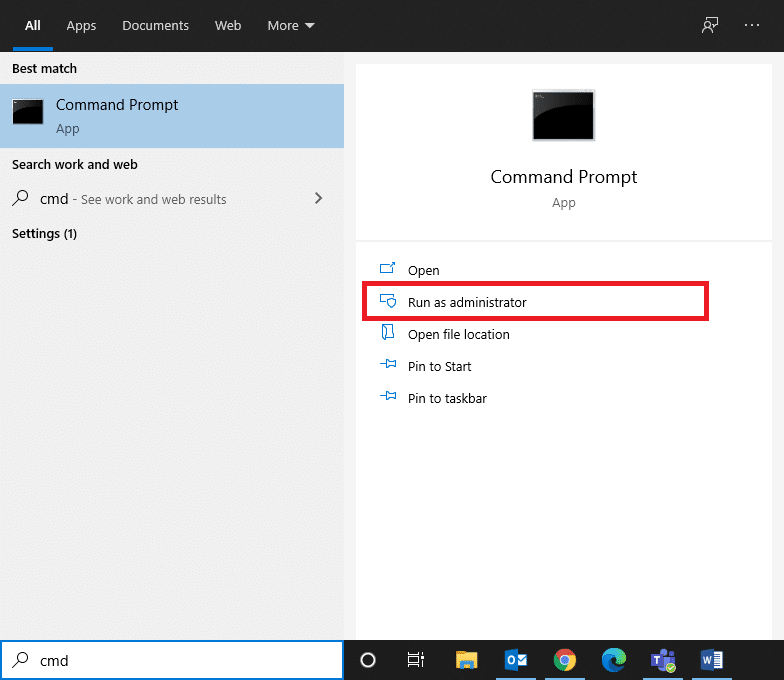
2. Click on Open from the right pane of search results to launch it.
3. Alternatively, click on Run as administrator, if you want to use it as an administrator.
In this case, you will not only be able to run commands, but also make necessary changes.
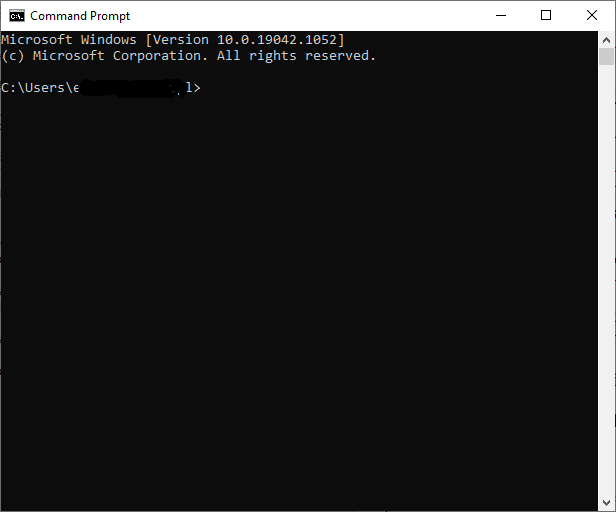
4. Type any command into cmd: and press Enter key to execute it.
Many users have complained that the Command Prompt appears then disappears on Windows 10. It appears randomly on the screen and then, disappears within a few seconds. The users are not able to read what is written in the Command Prompt as it vanishes quickly.
Fix Command Prompt Appears then Disappears on Windows 10
What causes Command Prompt appears then disappears on Windows 10 PC?
The most common reasons for Command Prompt appears then disappears on Windows 10 problem are listed below:
1. The primary cause behind this issue is the Task Scheduler. Sometimes, when you download a program or application from the internet and it fails, the Windows Update Service automatically tries to resume the download over and over again.
2. You may have granted it permission to launch at Start-up. This may be the cause behind the launch of the Command Prompt window when you sign in to your computer.
3. Corrupt or missing files might trigger the Command Prompt window to pop up during startup.
4. The rare cause behind the problem may be malware. A virus attack may force your system to run or download something from the internet continuously, resulting in Command Prompt appears then disappears on Windows 10 issue.
It has been observed that the CMD window appears and disappears more often during gaming and streaming sessions. This is even more annoying than usual, and hence, there’s an urgent need to fix this issue.
Method 1: Run Commands in Command Prompt Window
Sometimes, the Command Prompt appears then disappears on Windows 10 or the CMD window pops up randomly when you run a CMD-specific command, for example, ipconfig.exe in the Run Dialog box.
Hence, you should always ensure that you run your commands in the built-in Command Prompt Window on Windows systems.
Also Read: Delete a Folder or File using Command Prompt (CMD)
Method 2: Open Command Prompt using cmd /k ipconfig/all
If you wish to use the Command Prompt but, it keeps closing randomly, you can execute the given command in the Run dialog box. This will make the Command Prompt stay open and active thereby, solving CMD appears then disappears issue.
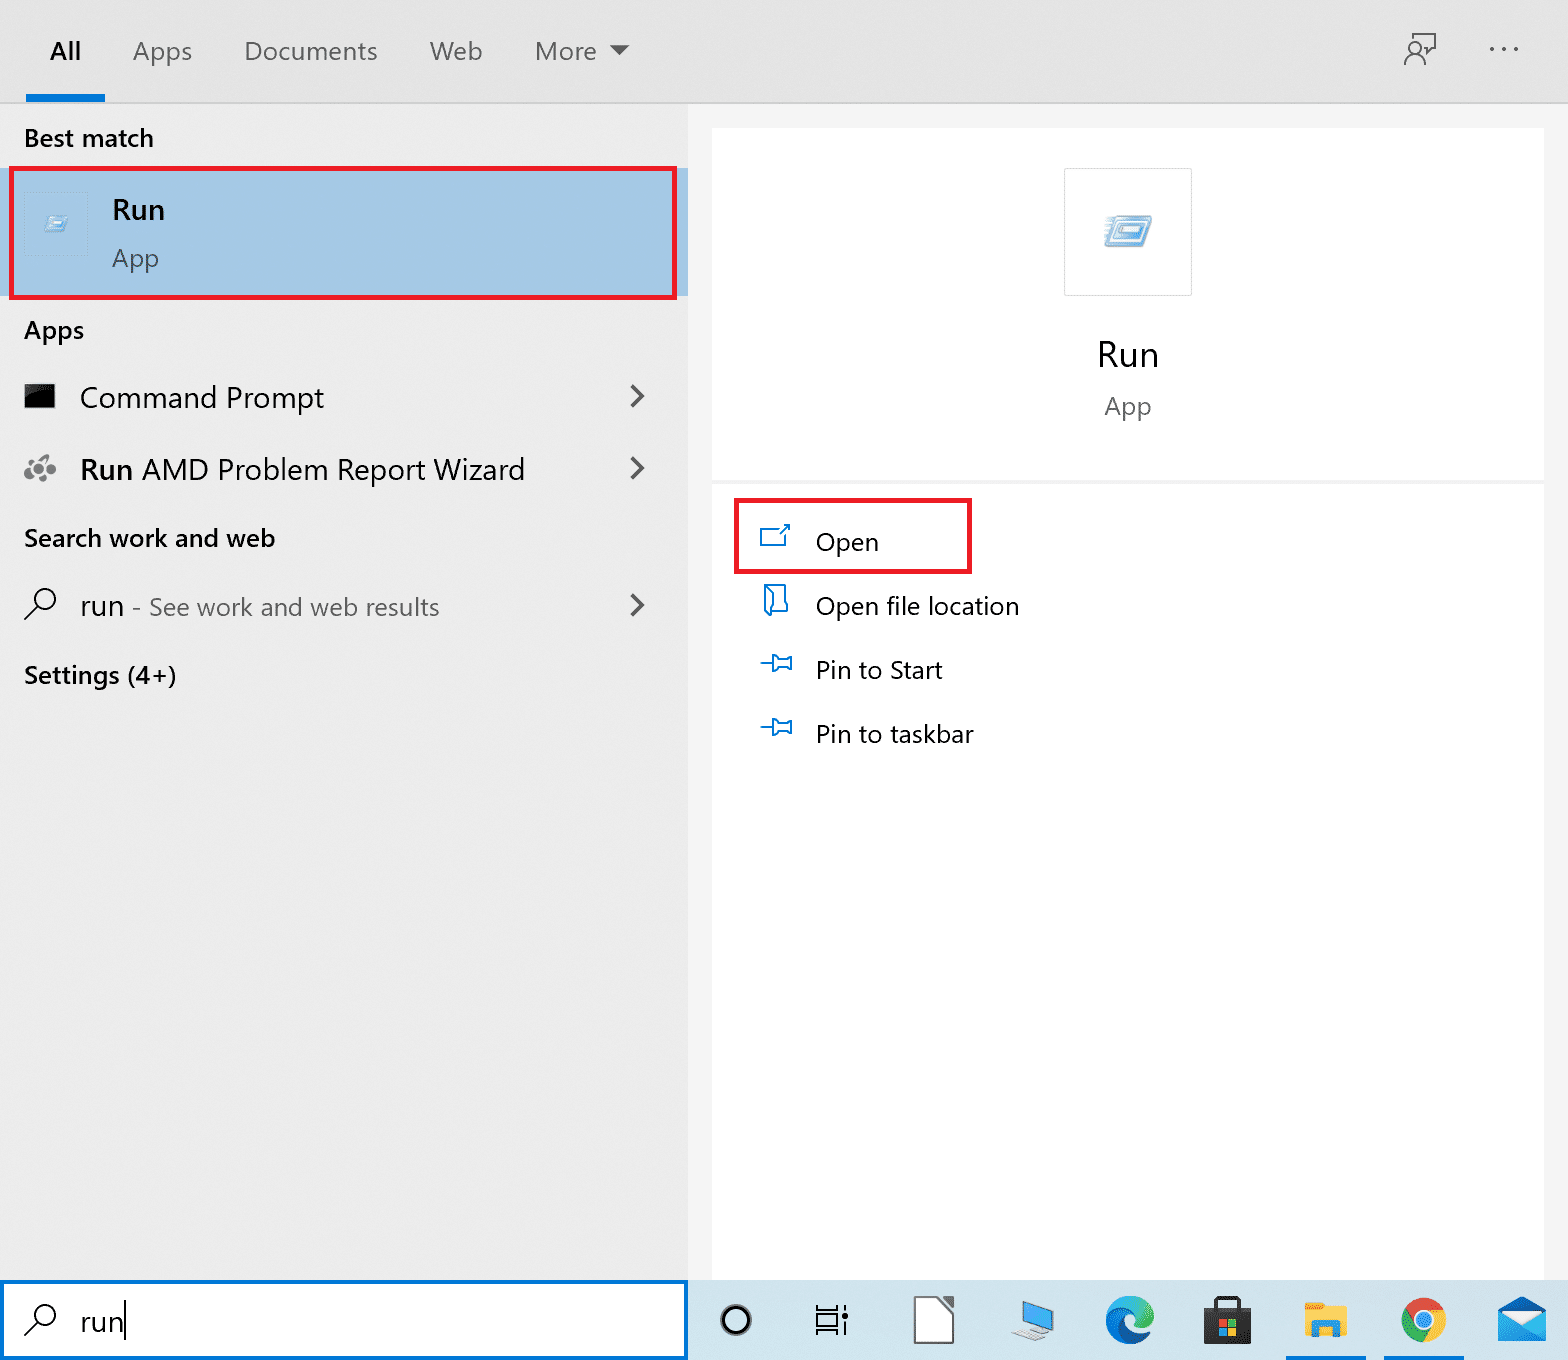
1. Launch the Run dialog box by typing Run in the Windows search box and clicking on Open from the search results.
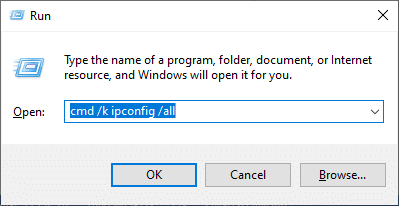
2. Type cmd /k ipconfig /all as shown and click OK.
Method 3: Create Windows 10 CMD shortcut
If you want to fix Command Prompt appears then disappears on Windows 10, you can simply create a desktop shortcut. Once you double-click on this shortcut, Windows 10 Command Prompt will open. Here is how to create this shortcut on your Windows 10 PC:
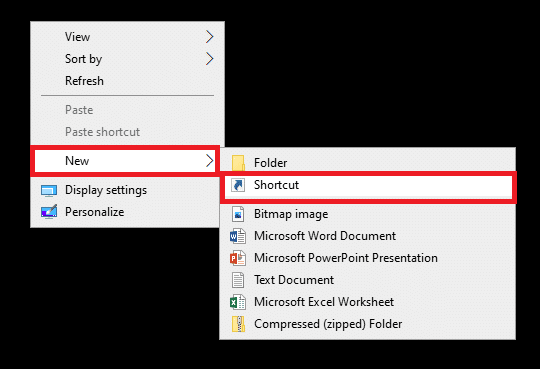
1. Right-click anywhere in the blank space on the desktop screen.
2. Click on New and select Shortcut, as depicted below.
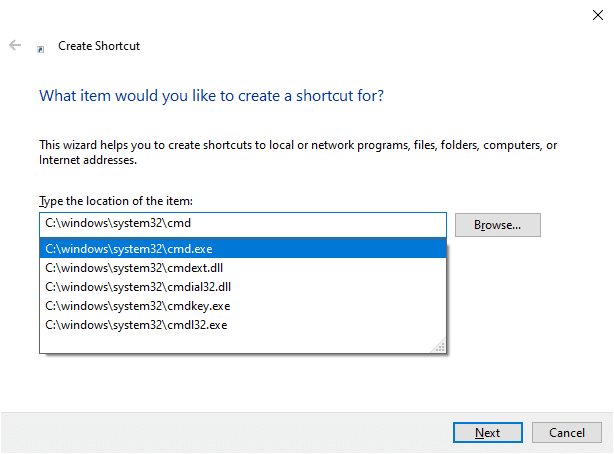
3. Now, copy-paste the given location in the Type the location of the item field:
C:windowssystem32cmd
4. Next, choose C:windowssystem32cmd.exe from the drop-down menu, as shown.
5. Type a name, e.g. cmd in Type a name for this shortcut field.
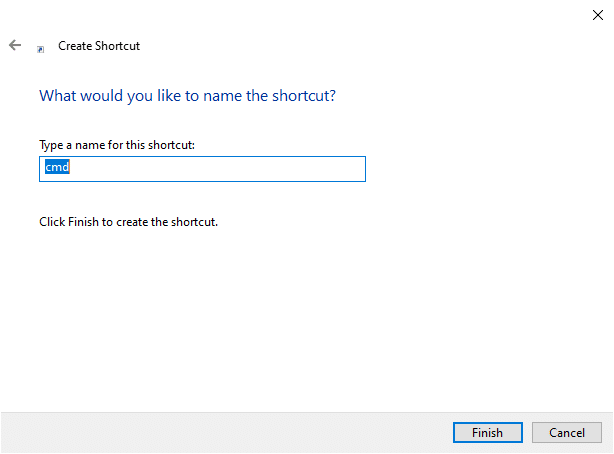
6. Click Finish to create the shortcut.
7. The shortcut will be displayed on the desktop as shown below.
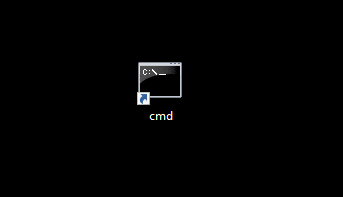
The next time you want to use Command Prompt on your system, double-click on the shortcut created. Many users benefitted from this simple solution. But, if this does not work, continue reading to close tasks & processes running on your system.
Method 4: Turn off Office Tasks on Windows 10
When a scheduled task runs in the background all the time, it might trigger the Command Prompt to appear and disappear quite often. Unfortunately, many applications have scheduled tasks that run periodically on your Windows system.
Follow the given steps to take care of MS Office tasks on your Windows 10 systems.
Method 4A: Disabling MS Office Tasks
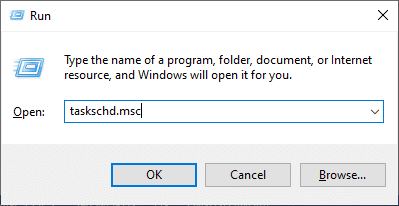
1. Launch the Run dialog box as explained in Method 2.
2. Type taskschd.msc as shown and click OK.
3. Now, the Task Scheduler window will appear.
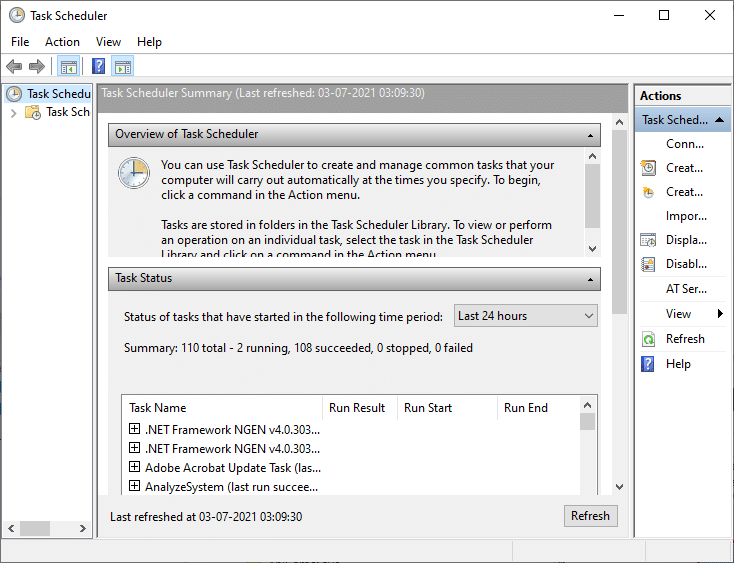
Note: You can use Task Scheduler to create and manage common tasks for your computer to carry out automatically at times specified by you. Click on Action > Create new task and follow on-screen steps to create a task of your choice.
4. Now, click on the arrow shown highlighted in the picture below to expand the Task Scheduler Library.
Note: Tasks are stored in folders in the Task Scheduler Library. To view or perform an individual task, select the task in the Task Scheduler Library and click on a command in the Actions menu displayed on the right-hand side.
5. Here, open the Microsoft folder and double-click on the Office folder to expand it.
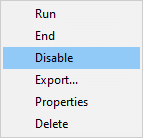
6. In the middle pane, search for OfficeBackgroundTaskHandlerRegistration.
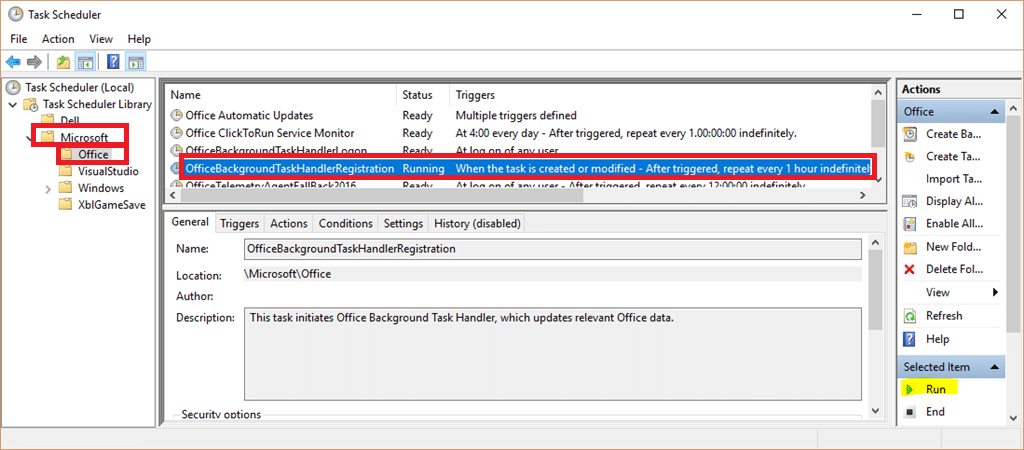
7. Now, right-click on OfficeBackgroundTaskHandlerRegistration and select Disable.
Method 4B: Altering MS Office Tasks Settings
Alternatively, changing a few settings may give you a fix for the CMD window appears and disappears issue.
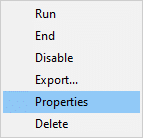
1. Navigate to OfficeBackgroundTaskHandlerRegistration by following Steps 1- 6 explained above.
2. Now, right-click on OfficeBackgroundTaskHandlerRegistration and select Properties, as shown.
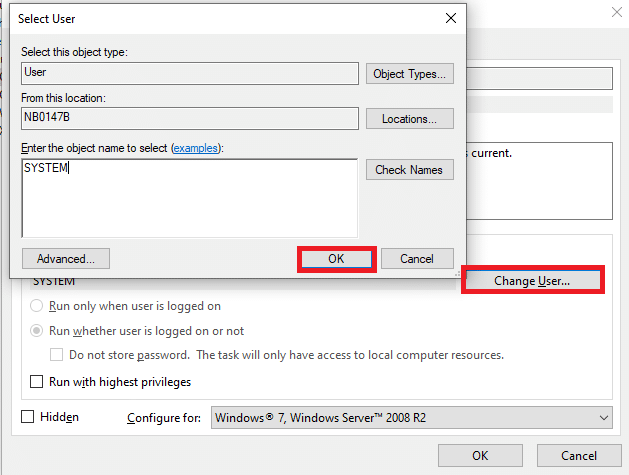
3. Next, click on Change User or Group… to select specific users.
4. Type SYSTEM in the Enter the object name to select(examples): field and click on OK, as depicted below.
This solution should fix Command Prompt appears briefly then disappears issue.
Tip: If CMD appears then disappears issue is not resolved by modifying settings or disabling OfficeBackgroundTaskHandlerRegistration, follow the same steps to open the Task Scheduler and navigate to Task Scheduler Library. Here, you will find plenty of tasks that are scheduled to run automatically in the background. Disable all scheduled functions that seem odd and this might potentially, fix it.
Also Read: How to Open Command Prompt at Boot in Windows 10
Method 5: Close All Unwanted Programs using Task Manager
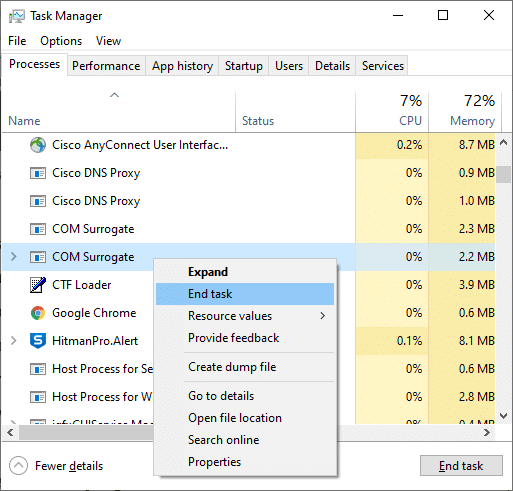
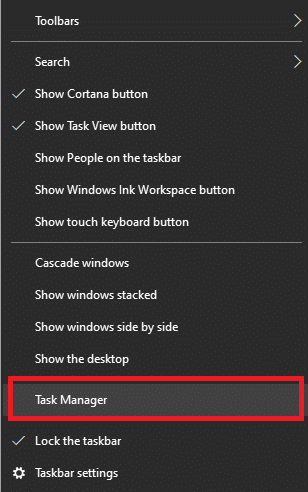
1. Launch Task Manager by right-clicking on an empty space in the Taskbar. Click on Task Manager from the menu that appears.
2. In the Processes tab, search for any unusual processes in your system.
3. Right-click on such processess and select End task, as shown.
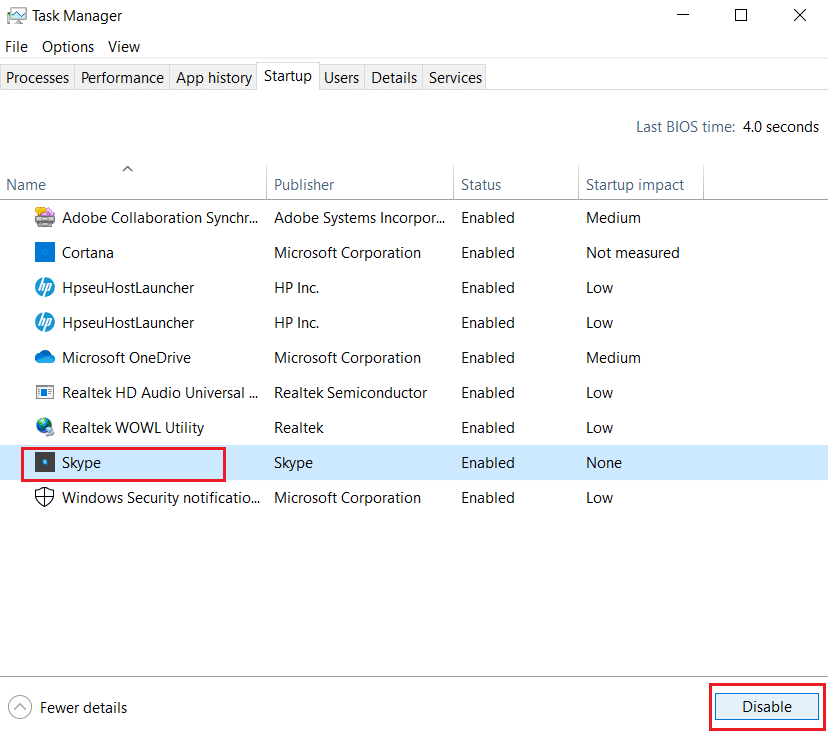
4. Next, switch to the Startup tab. Click on the newly installed program or unwanted application and select Disable displayed at the bottom-right corner. Here, we have used Skype as an example for illustration purposes.
5. Reboot the system and check if the issue is fixed now.
Method 6: Update your Device Drivers
The device drivers installed on your system, if incompatible, might trigger Command Prompt appears then disappears issue on Windows 10. You can easily fix this problem by updating your driver to the latest version. You can do so in two ways:
Method 6A: Via Manufacturer Website
Visit the manufacturer’s website. Find, download, and install the device drivers such as audio, video, network, etc. corresponding to the Windows version on your computer.
Method 6B: Via Device Manager
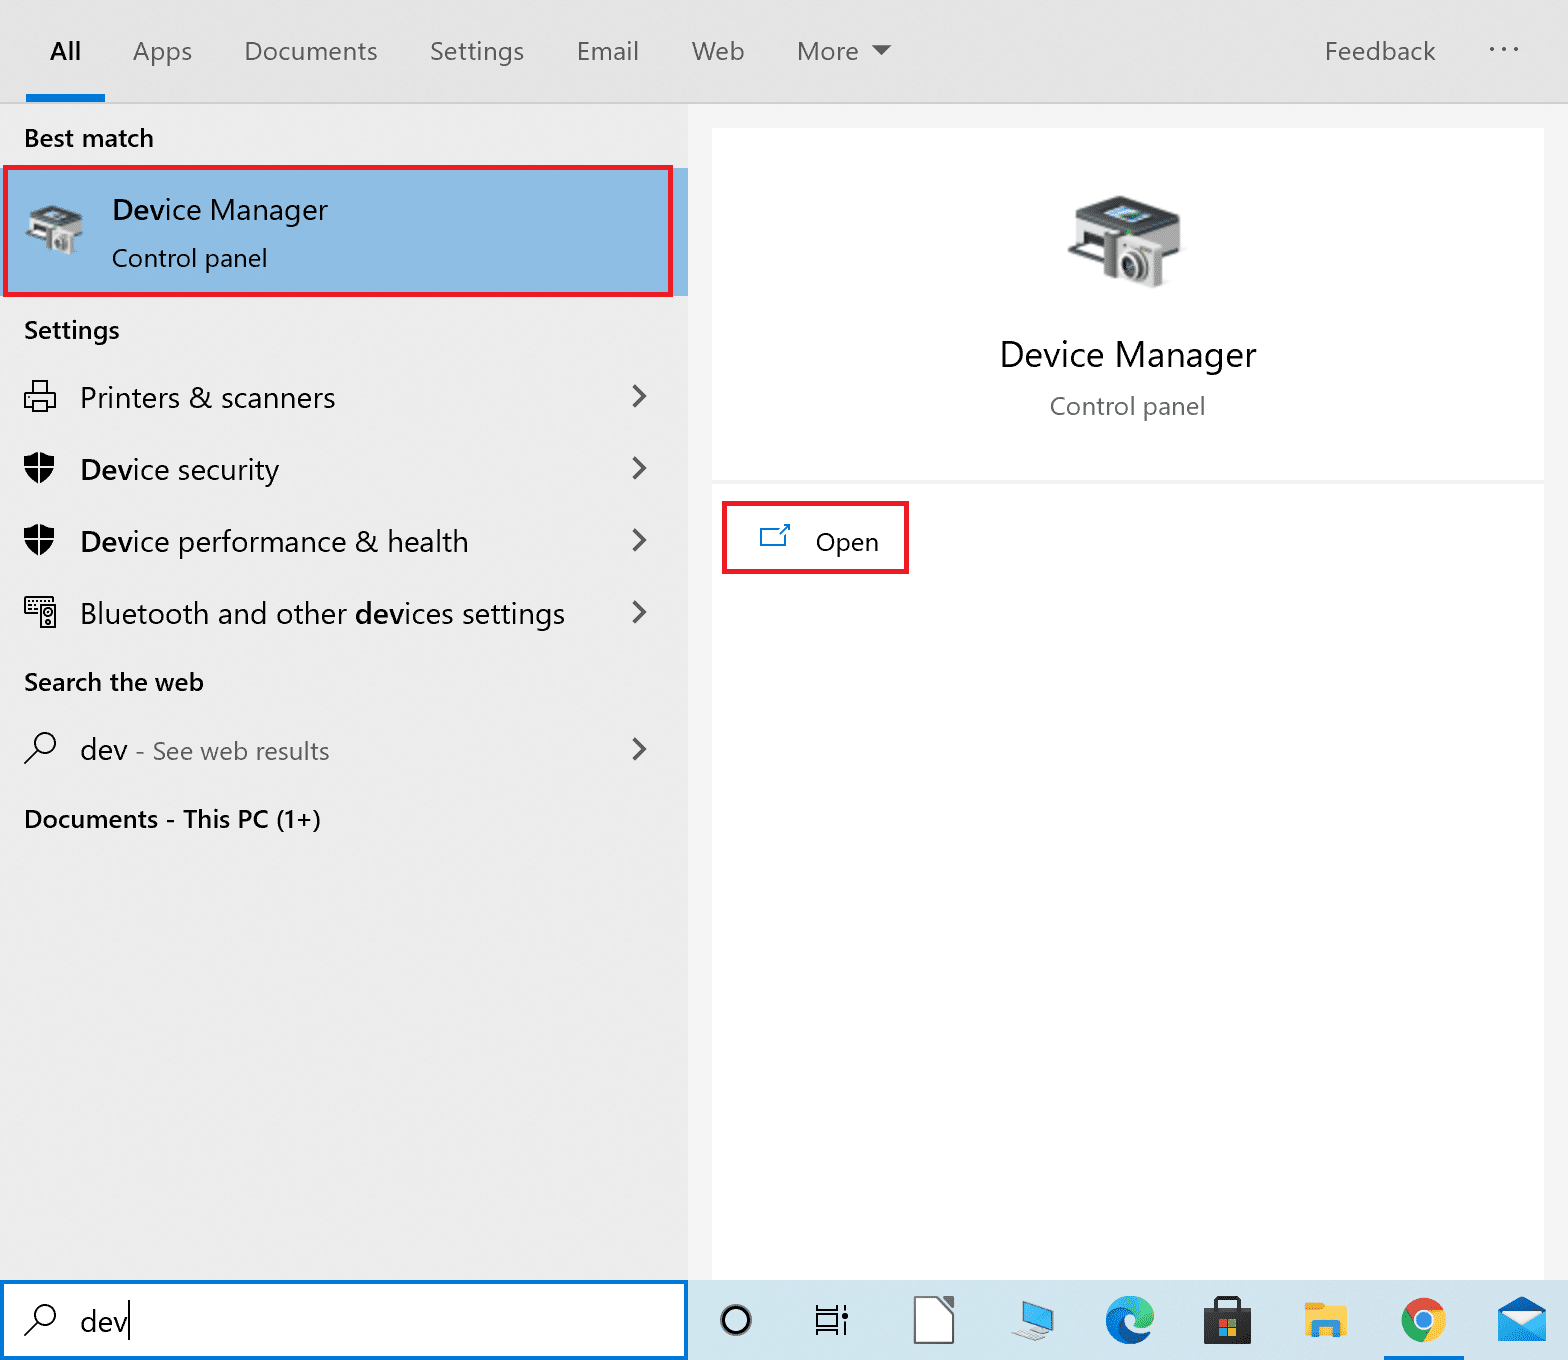
1. Launch Device Manager by searching for it in the Windows search bar, as shown.
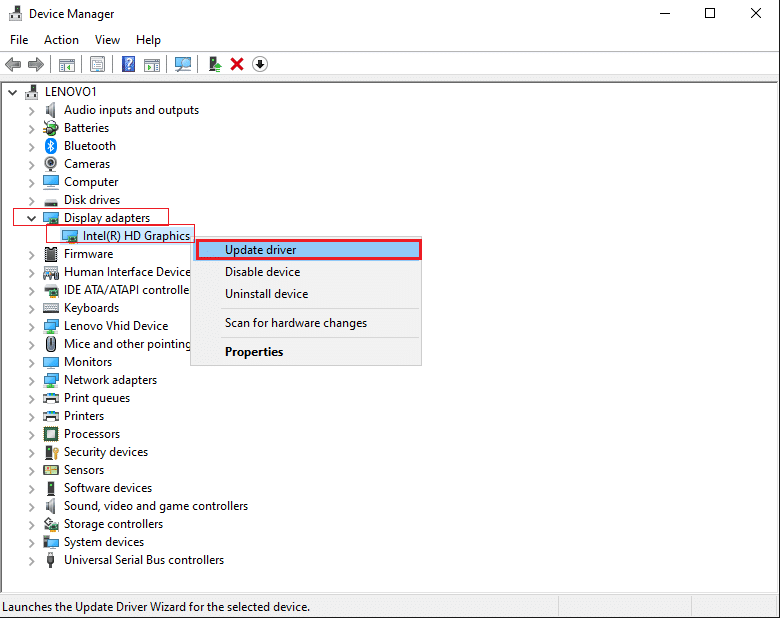
2. In the Device Manager window, right-click on Display Adapters and select Update Driver, as highlighted below.
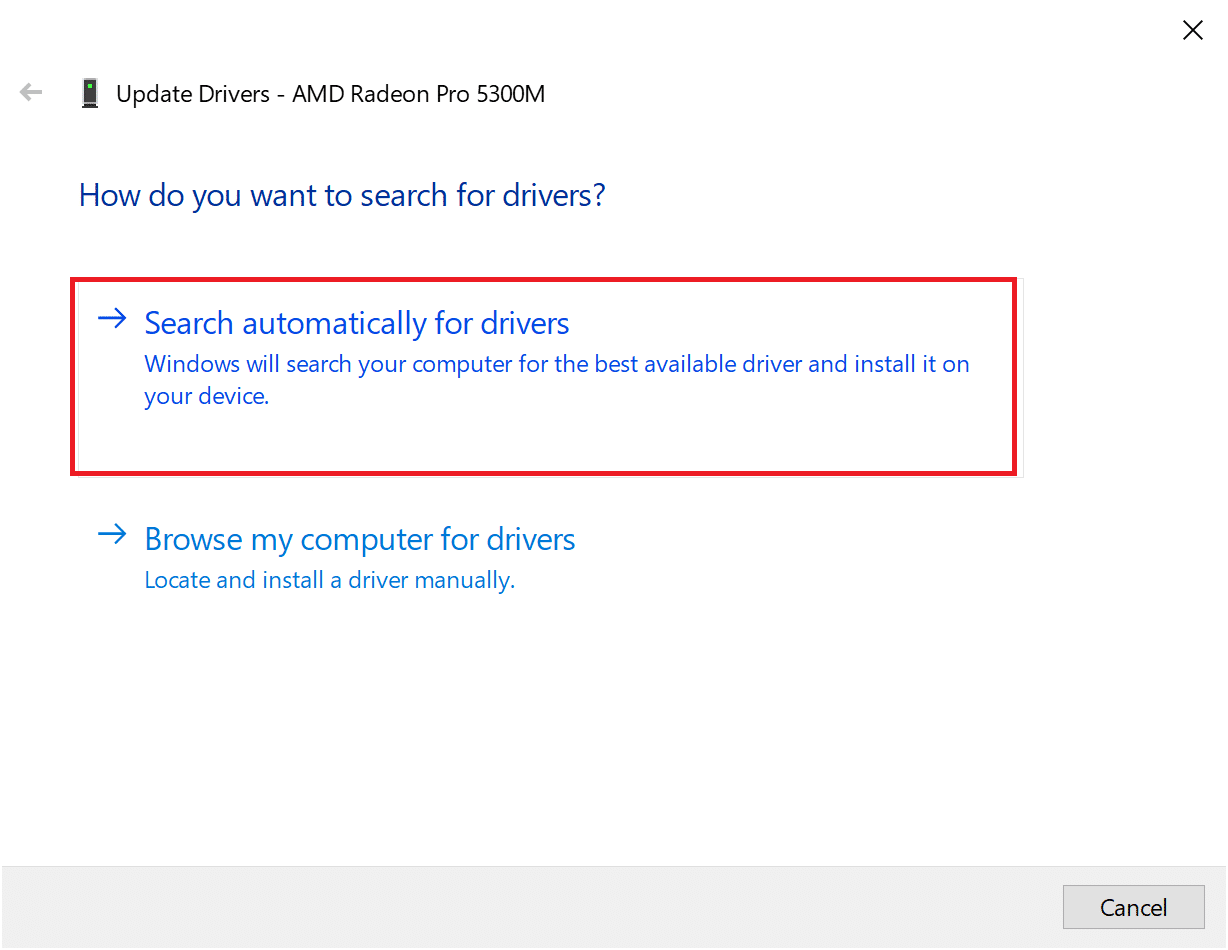
3. Click on Search automatically for drivers under How do you want to search for drivers?
4. Repeat the above steps for Network, Audio, drivers as well.
Also Read: Fix Folder Keeps Reverting to Read Only on Windows 10
Method 7: Scan Windows 10 using Windows Defender
Any malware present in the Windows computers can be fixed using Windows Defender. It is essentially an in-built scanning tool that can get rid of viruses/malware in your system.
Note: It is recommended to back up your data into an external hard drive to ensure data safety. Also, save all changes made to the currently open files before beginning the scan.
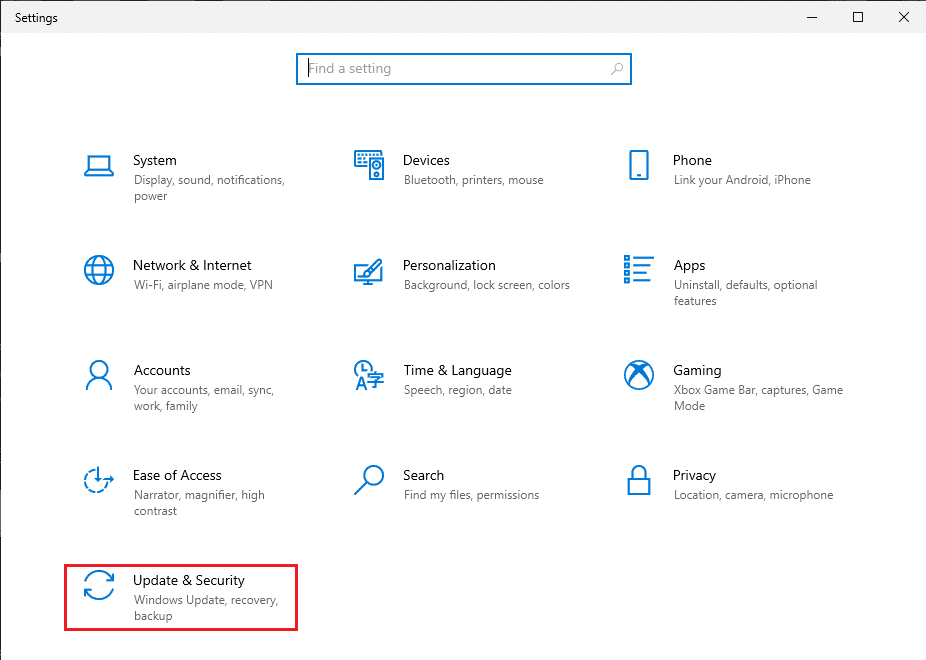
1. Launch System Settings by clicking Windows icon > Gear icon.
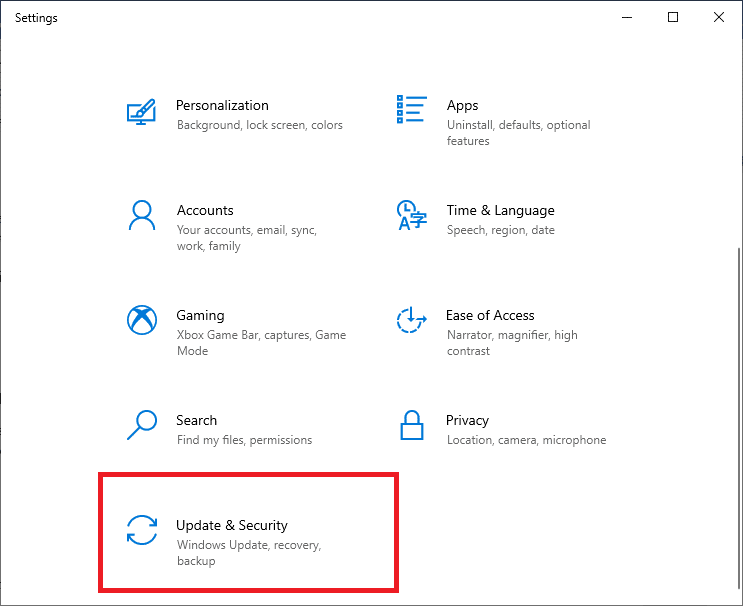
2. Open the Update & security section.
3. Select the Windows Security option from the left pane.
4. Now, select Virus & threat protection under Protection Areas.

5. Click on the link titled Scan Options where you will be given 4 Scan options.
6. Here, click on Windows Defender Offline scan > Scan now.
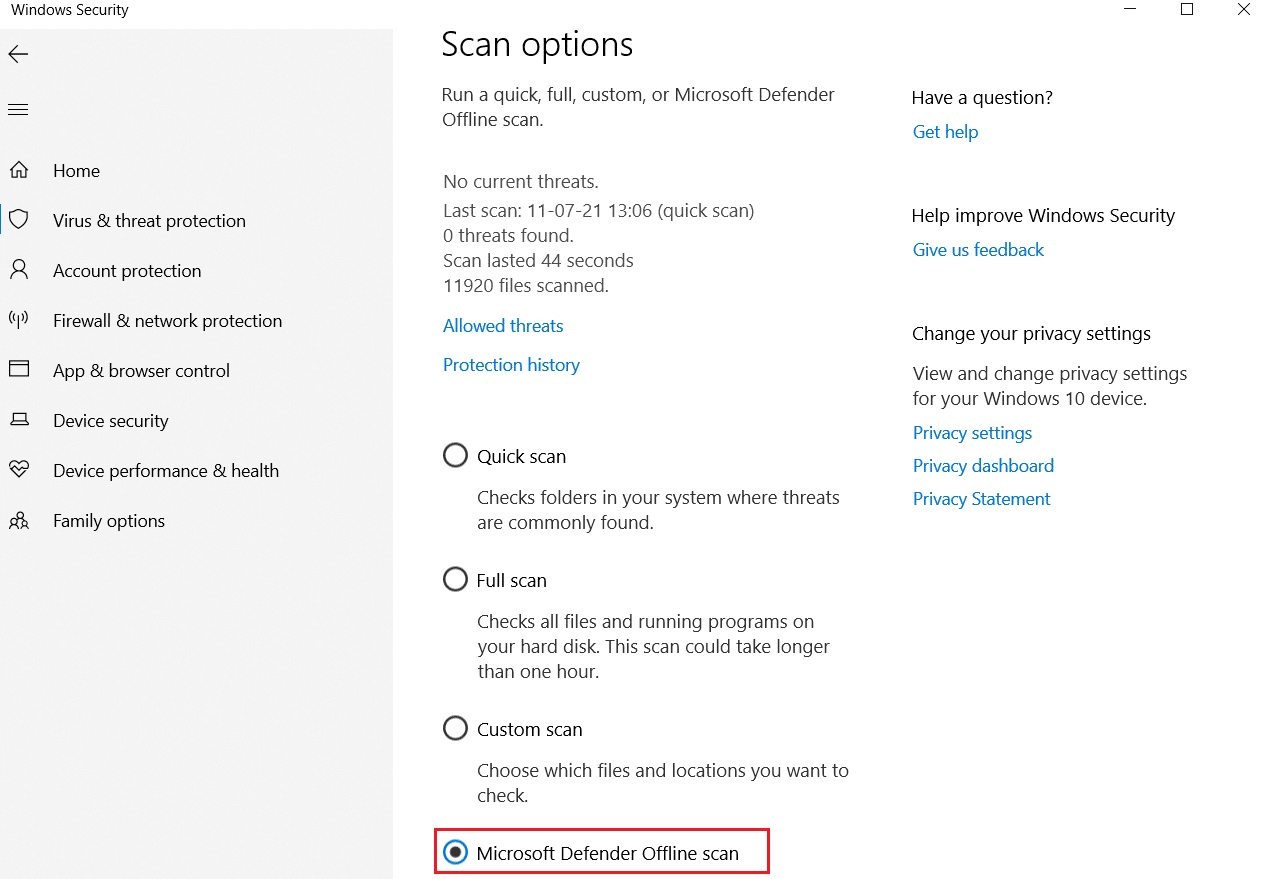
7. Windows Defender will check for and remove malware present in your system, and your computer will restart automatically.
Once the scan is over, you will be notified of the scan results. Additionally, all malware and/or viruses thus found, will be quarantined away from the system. Now, confirm if the command window pops up randomly issue is fixed.
Method 8: Scan Windows Systems using Antivirus Software
Some malware might trigger the CMD window to appear and disappear on your computer randomly. This may be because they install malicious programs on your computer. Third-party Antivirus software help protect your system from such issues. Run a complete system-wide antivirus scan and disable/remove the virus and malware found during the scan. Your Windows 10 should be able to fix the CMD window appears and disappears error.
Also Read: How to Remove Malware from your PC in Windows 10
Method 9: Check for Malware using AdwCleaner and ESET Online Scanner
If the Command Prompt pops up randomly, the common cause is malware or virus attack. Many viruses and malware trigger legitimate services that download harmful files from the internet, without the knowledge or consent of the user. You can check for malware and virus in your system with the help of AdwCleaner and ESET Online Scanner as:
Method 9A: Check for Malware using AdwCleaner
1. Download the application by using the link attached here.
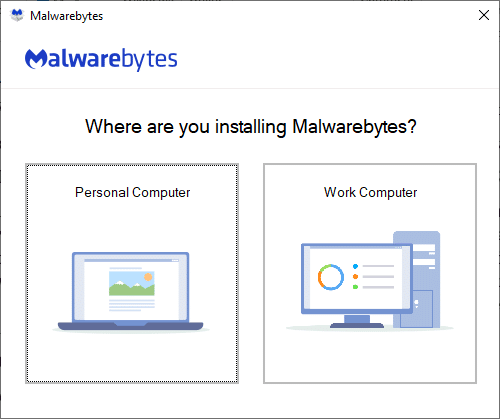
2. Open Malwarebytes and select Where are you installing Malwarebytes?
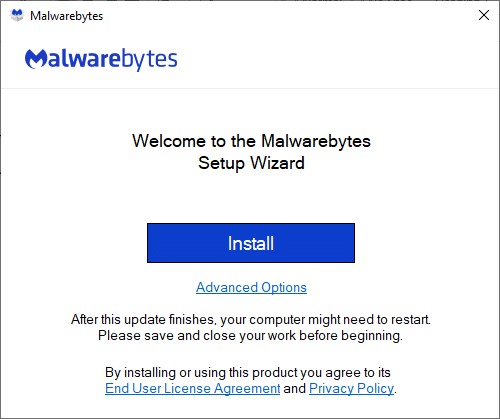
3. Install the application and wait for the process to be completed.
4. Click on Get Started button to complete the installation and select the Scan option to begin the scanning process, as shown.
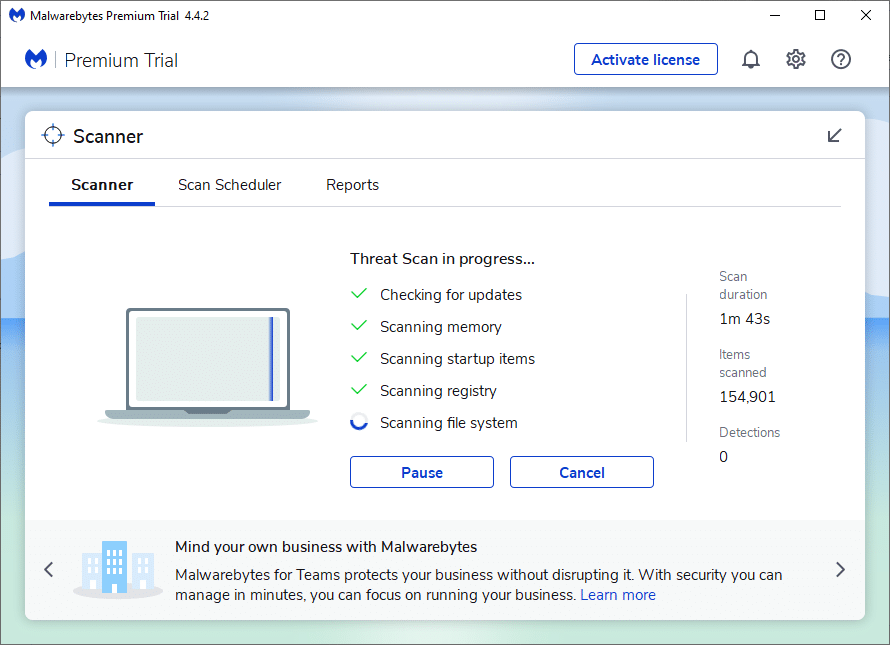
5. Check if any threat files are found. If yes, remove them entirely from your computer.
Method 9B: Check for Malware using ESET Online Scanner
Note: Before running a scan using ESET Online Scanner, ensure that Kaspersky or other third-party antivirus applications are not installed in your system. Else, the scanning process through ESET Online Scanner will either not finish completely or furnish inaccurate results.
1. Use the link attached here to download ESET Online Scanner for your Windows system.
2. Go to Downloads and open esetonlinescanner.
3. Now, read the terms and conditions and click on the Accept button as depicted below.

4. Now click on the Get started button followed by Continue to begin the scanning process.
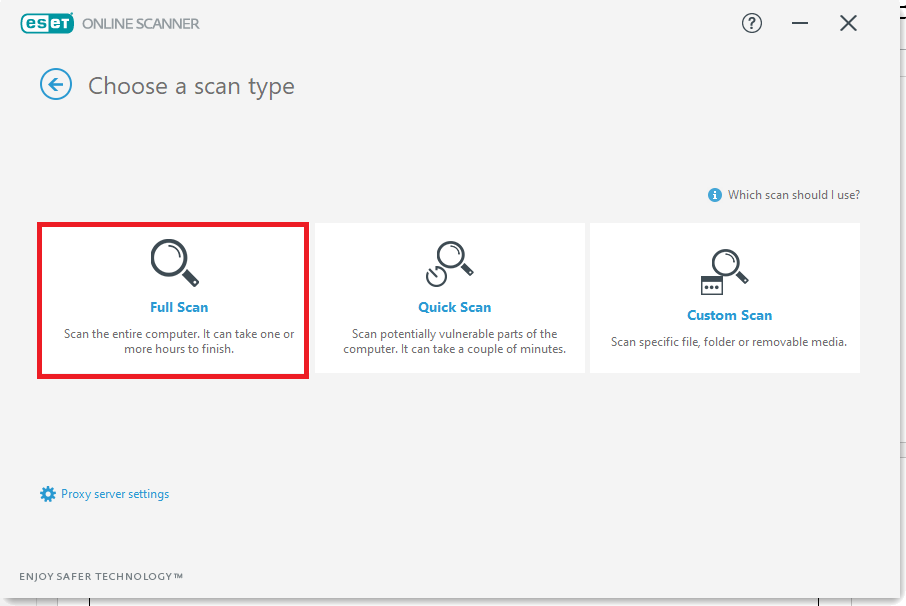
5. On the next screen, select Full scan, as highlighted.
Note: The Full Scan option scans the entire data present in the system. It may take one or more hours to complete the process.
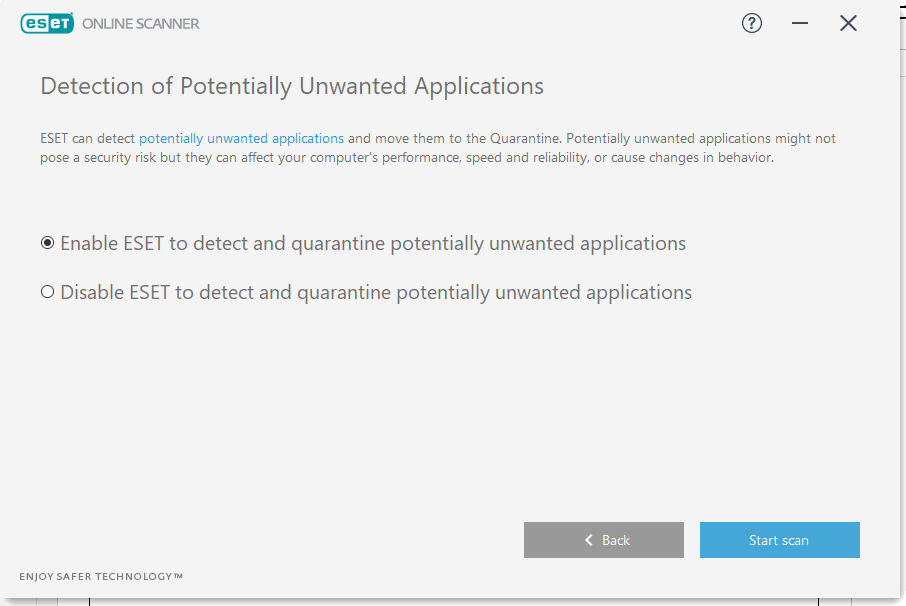
6. Now, the Detection of Potentially Unwanted Applications window will ask you to select one of these two options:
- Enable ESET to detect and quarantine potentially unwanted applications.
- Disable ESET to detect and quarantine potentially unwanted applications.
Note: ESET can detect potentially unwanted applications and move them to Quarantine. Unwanted apps might not pose a security risk, per se, but they can affect the speed, reliability, and performance of your computer and/or can cause changes in the functioning of your system.
7. After making the desired selection, click on the Start scan option displayed in blue at the bottom of the screen.
8. Wait for the scanning process to be completed. Delete threat files from your system.
Also Read: 5 Ways to Completely Uninstall Avast Antivirus in Windows 10
Method 10: Run Windows Clean Boot
The issues concerning Command Prompt can be fixed by a clean boot of all essential services and files in your Windows 10 system as explained in this method.
Note: Make sure you log in as an administrator to perform Windows clean boot.
1. To launch the Run dialog box, press the Windows + R keys together.
2. After entering the msconfig command, click the OK button.
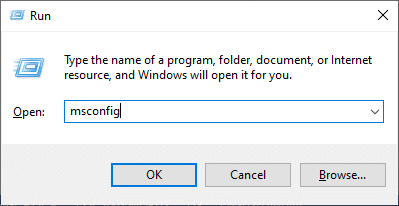
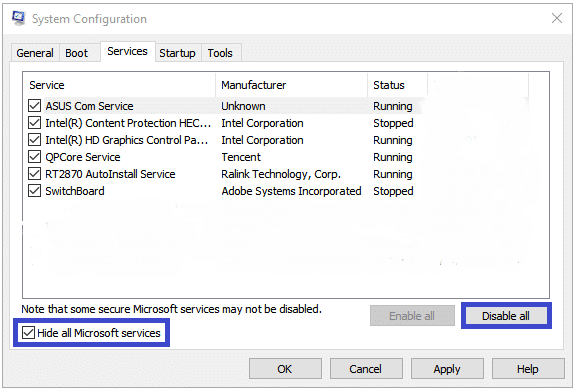
3. The System Configuration window appears. Switch to the Services tab.
4. Check the box next to Hide all Microsoft services, and click on Disable all button as shown highlighted.
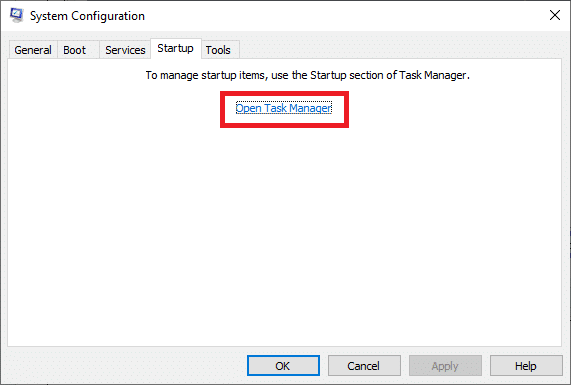
5. Now, switch to the Startup tab and click the link to Open Task Manager as shown highlighted.
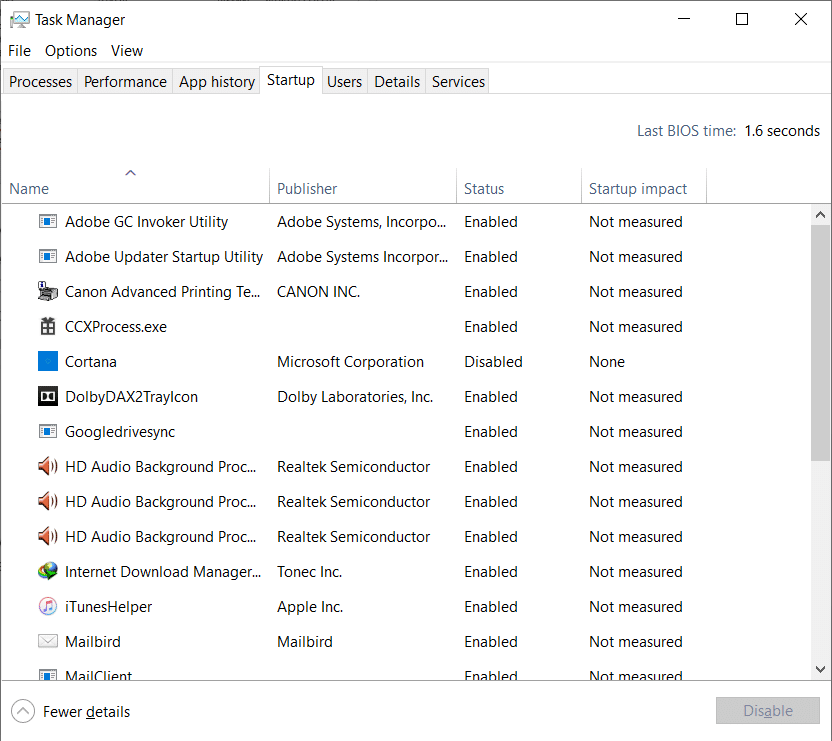
6. Now, Task Manager window will pop up. Switch to the Startup tab.
7. Next, select the startup tasks which are not required and click Disable displayed in the bottom right corner. Refer Method 5A.
8. Exit the Task Manager and System Configuration window.
9. Finally, restart your computer and check if the Command Prompt appears then disappears on Windows 10 issue is fixed.
Method 11: Run System File Checker
Windows 10 users can automatically scan and repair their system files by running the System File Checker utility. In addition, this built-in tool lets the user delete corrupt system files.
1. Launch Command Prompt as an administrator following the instructions given at the beginning of this article.
2. Enter the sfc/scannow command and hit Enter, as shown.
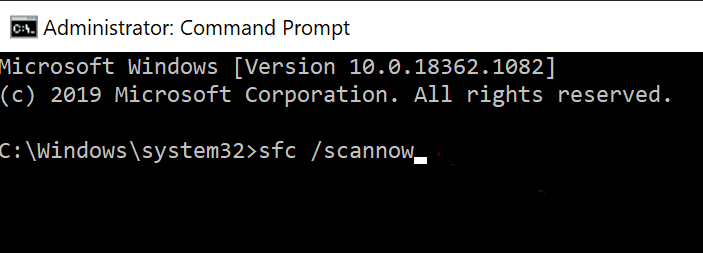
3. Once the command is executed, restart your system. Read below if the said issue still persists.
The succeeding methods will help you fix the Command Prompt that appears then disappears on the Windows 10 issue with the help of third-party software services.
Also Read: How to Delete Temp Files in Windows 10
Method 12: Check for Bad Sectors in the Hard Drive using MiniTool Partition Wizard
A bad sector in your hard drive corresponds to a disk sector from where the stored data will be lost if the disk gets damaged. Various tools help you manage your hard disk drive or HDD. Here are some utilities that will help you to check for bad sectors:
- CMD
- Disk Management.
- MiniTool Partition Wizard.
The bad sectors in your system can be analyzed and fixed using a third-party program called MiniTool Partition Wizard. Just, follow these steps:
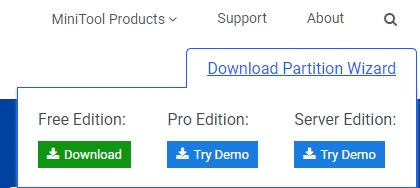
1. Download the MiniTool Partition Wizard by using the link attached here.
2. Click on the Download Partition Wizard button displayed in blue on the right-hand side.

3. Now, click on the Edition Type (Free/Pro/Server) and wait for the download to be completed.
4. Navigate to the Downloads folder and open the downloaded application.
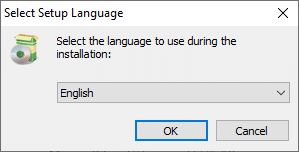
5. Now, Select Setup Language from the drop-down menu and click on OK. In the example below, we have selected English.
6. Finish the installation process. Once completed, the MiniTool Partition Wizard window will open.
Note: In this case, we have used the Free 12.5 version for illustration purposes.
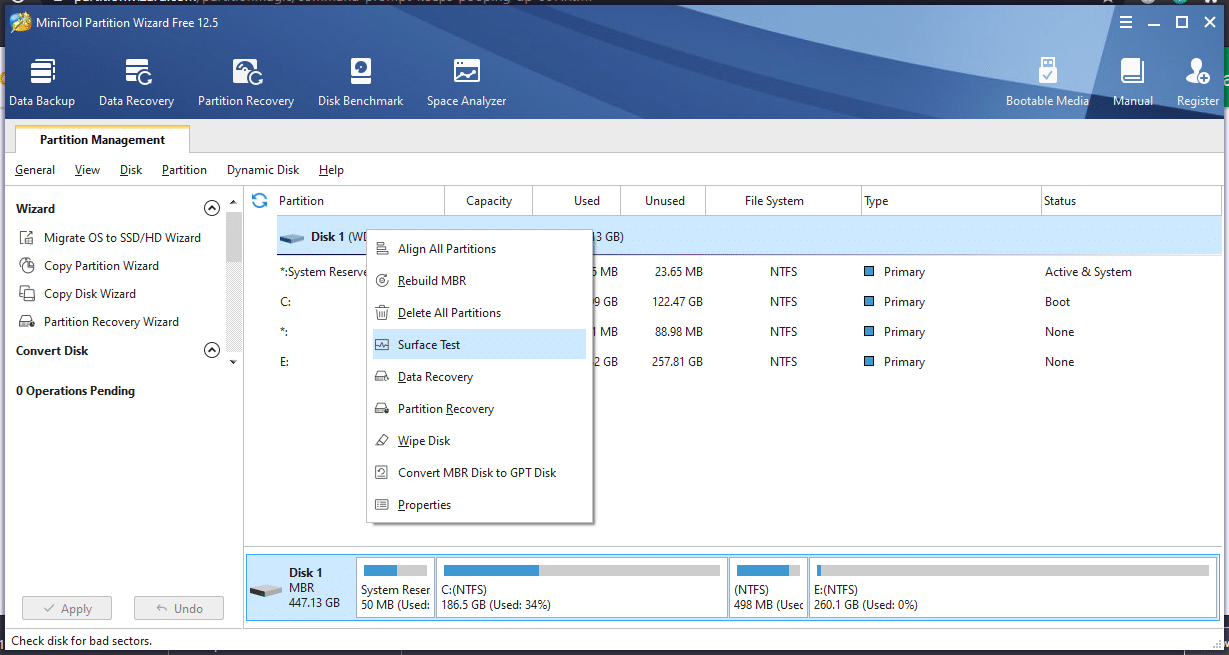
7. Now, right-click on the Disk and select Surface Test, as depicted below.
8. Click on the Start Now button in the Surface Test window.
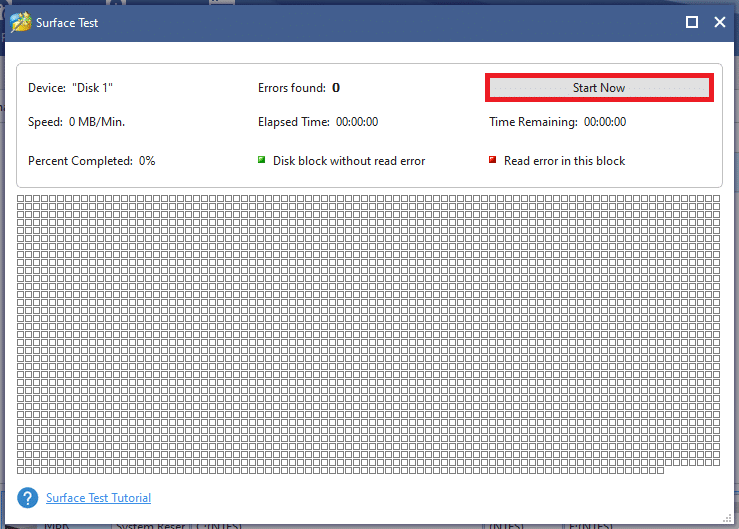
9. Refer to the following parameters:
- Disk block containing red error– This indicates that there are few bad sectors in your hard drive.
- Disk blocks without red errors– This indicates that there are no bad sectors in your hard drive.
10A. If any bad sectors are found, send these for repair using the MiniTool Partition Wizard tool.
10B. If you do not find any red errors, try alternative methods discussed in this article.
Method 13: Check File System using MiniTool Partition Wizard
One of the advantages of using MiniTool Partition Wizard is that you can Check File System of your drive as well. This might help you fix the Command Prompt appears then disappears on Windows 10 issue.
Note: This method to Check File System can be used only if the partition is depicted by a Drive Letter. If your partition does not have a drive letter assigned to it, you need to allocate one before proceeding.
Here are the steps to Check File System using MiniTool Partition Wizard:
1. Launch MiniTool Partition Wizard as discussed in the previous method.
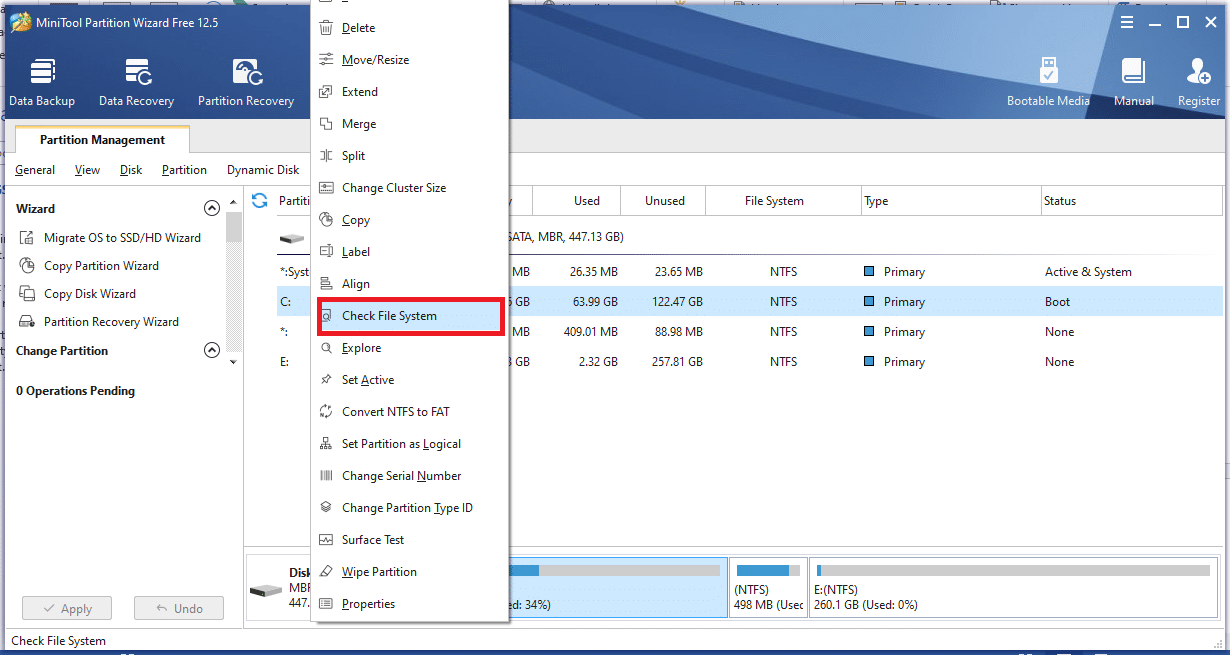
2. Now, right-click on any partition and select the Check File System, as highlighted below.
3. Now, click on Check & fix detected errors.
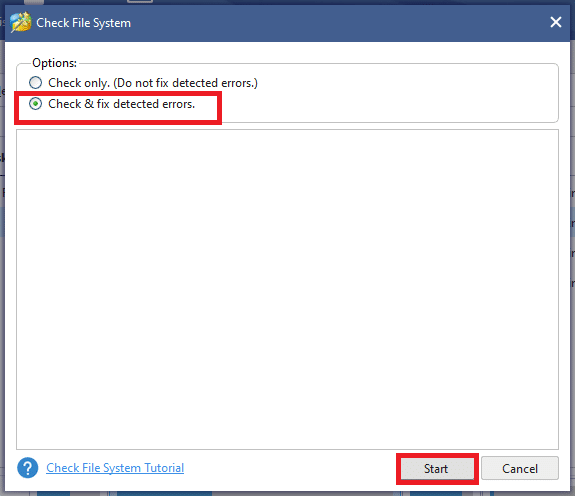
4. Here, select the Start option to begin the process.
5. Wait for the process to be completed and check if the CMD issue is resolved.
Also Read: How to Repair or Fix Corrupted Hard Drive Using CMD?
Method 14: Install Recent Updates
1. Install the latest updates by clicking on Settings > Update & Security >
2. Windows Update > Check for updates.
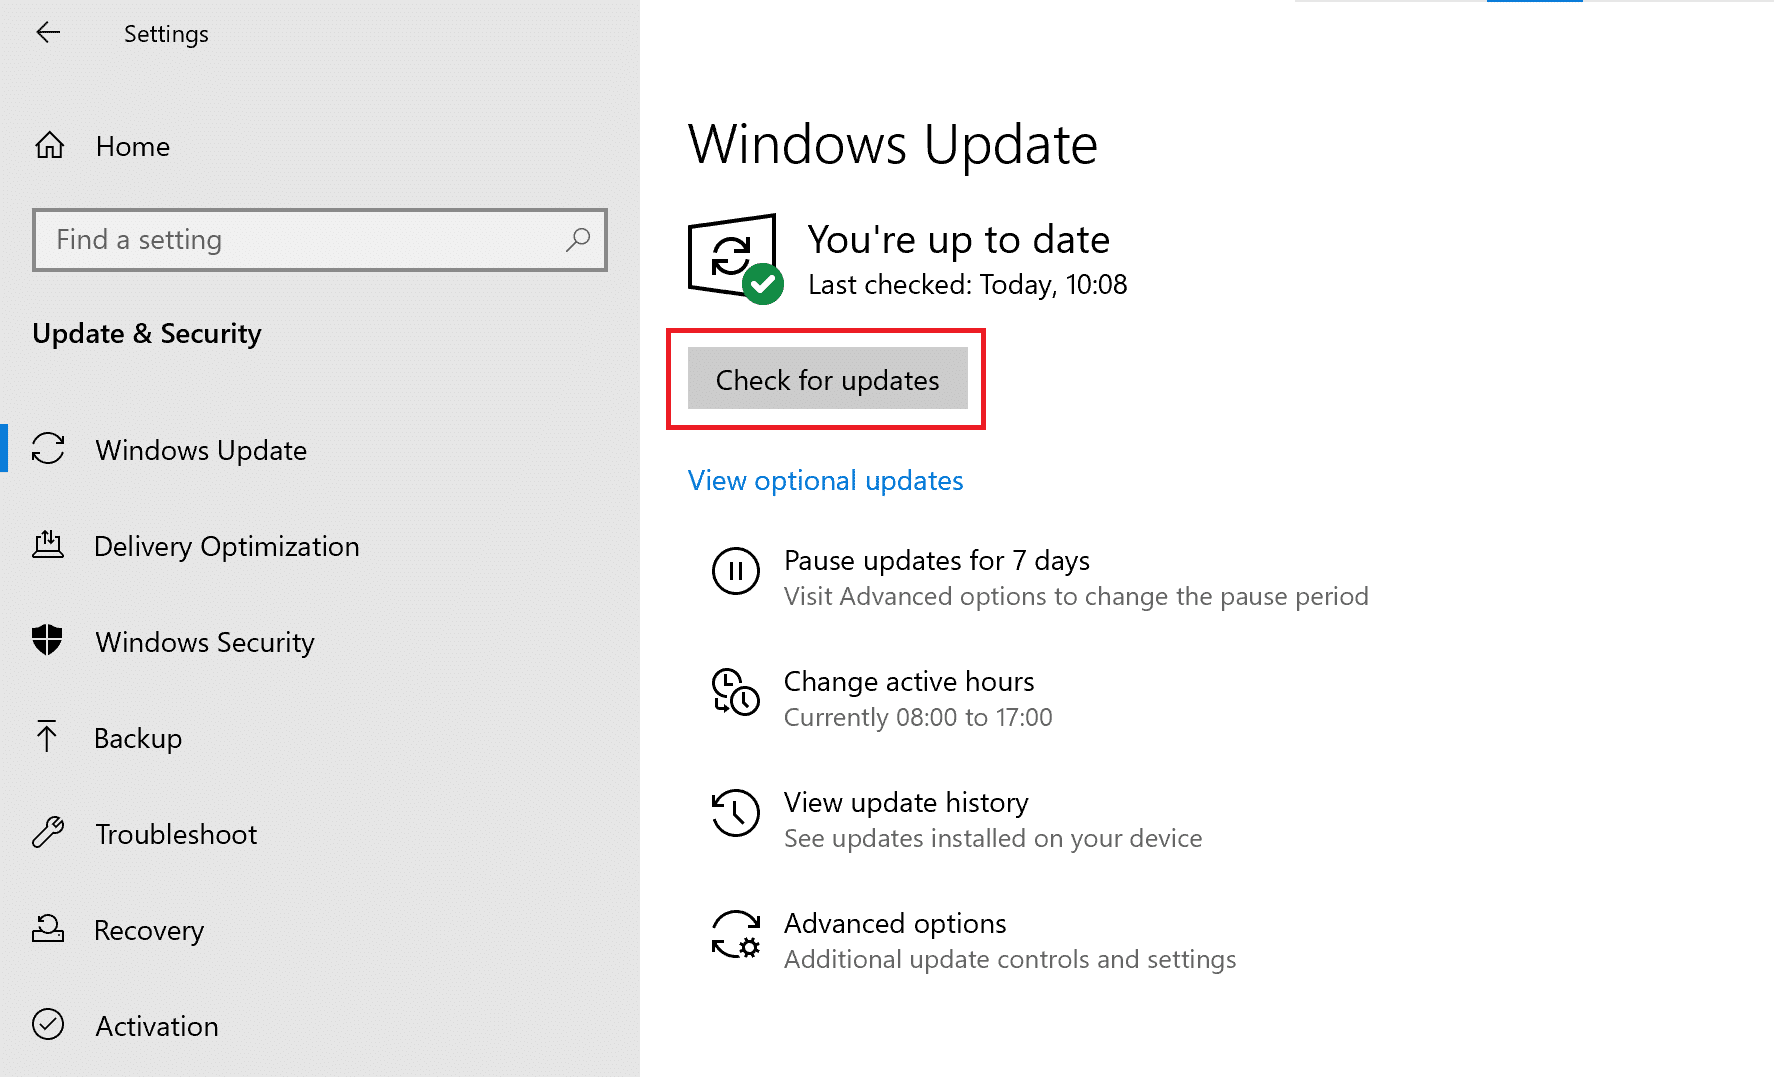
3. Click on Install now to install the available updates, as depicted below.
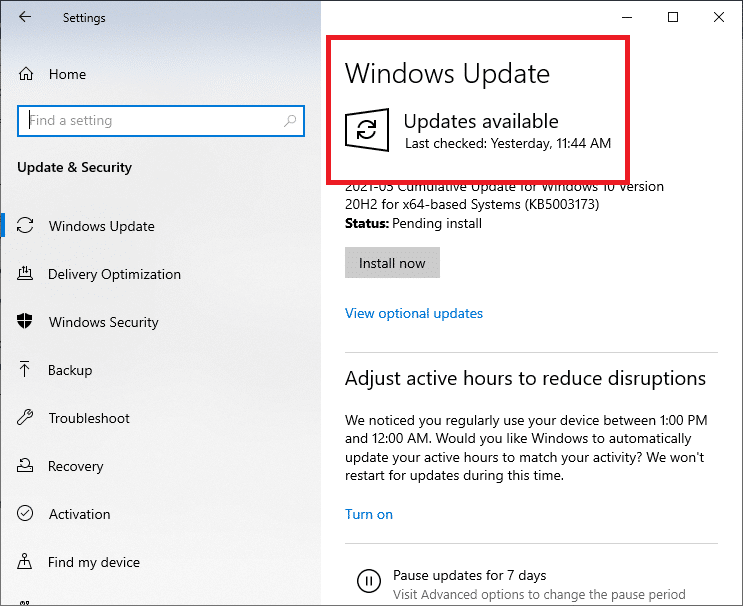
4. Finally, restart your system to enforce these updates.
Also Read: Fix keyboard Input lag in Windows 10
Method 15: Run SFC/DISM scans
1. Launch the Command Prompt as earlier.
2. Enter the following command and hit Enter:
dism/online/cleanup-image/restorehealth
Note: This will restore the health of your system to its system image as per the DISM command.
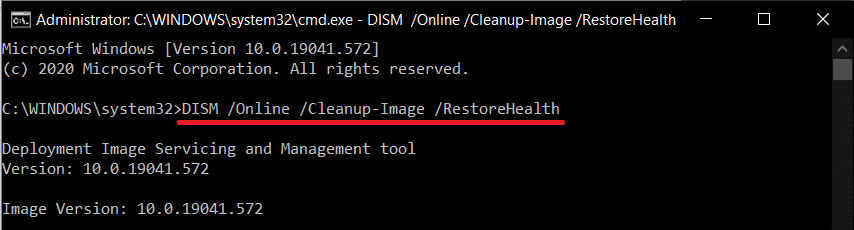
3. Wait for the process to get completed.
4. Now, run the SFC command to check for & repair system files.
5. Type sfc/scannow command in the Command Prompt window & press Enter key.
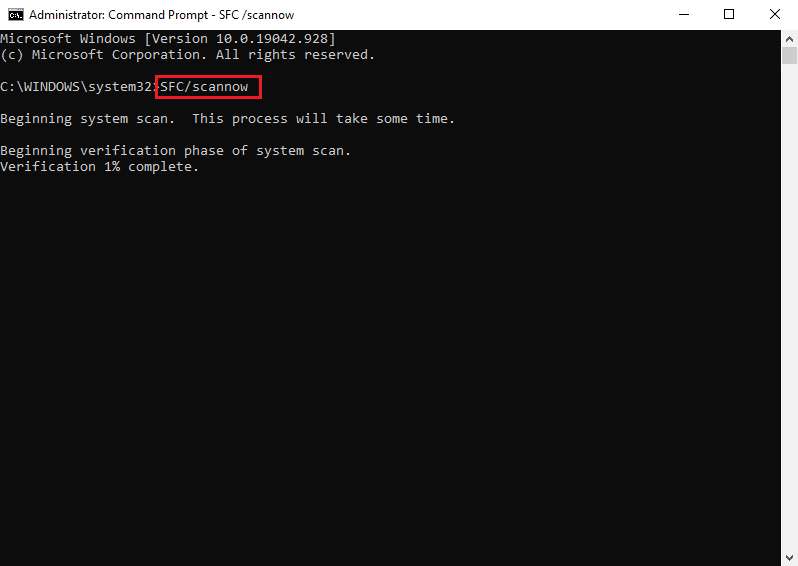
6. Again, reboot your system.
Method 16: Create a New User Account
In certain cases, the CMD window pops up randomly when the User profile gets corrupt. So, create a new user profile and check if the issues related to the Command Prompt are fixed in your system. Follow the given steps:
1. Press Windows + R keys to launch Run Dialog box. Type control userpasswords2 and press Enter.
2. In the User Accounts window that opens, click Add… under Users tab, as depicted.
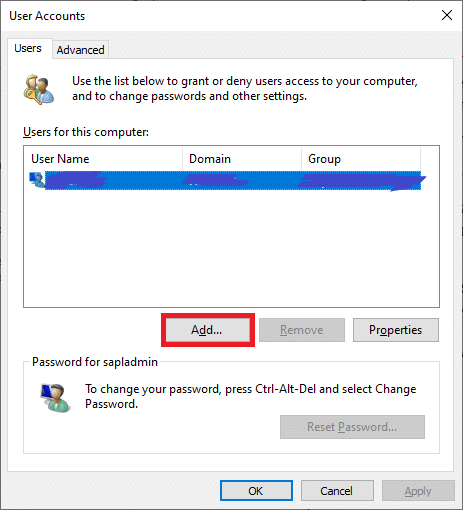
3. Choose Sign in without a Microsoft account (not recommended) under How will this person sign-in window.
4. Now, in the new window, select Local Account.
5. Select a Username and click on Next > Finish.
6. Next, click on the username so created and navigate to Properties.
7. Here, click Group Membership > Administrator.
8. Now, click on Other > Administrator.
9. Finally, click on Apply and OK to save the changes on your system.
Now, check whether the issues with the Command Prompt are fixed. If no, then restart your system with a new user account created using this method, and the issue will be resolved now.
Method 17: Check for Downloads using Windows PowerShell
As discussed earlier, when data is being installed on your system, in the background, the Command Prompt window often pops up on the screen, in the foreground. To check for programs or applications being downloaded, use specific commands in Windows PowerShell as explained below.
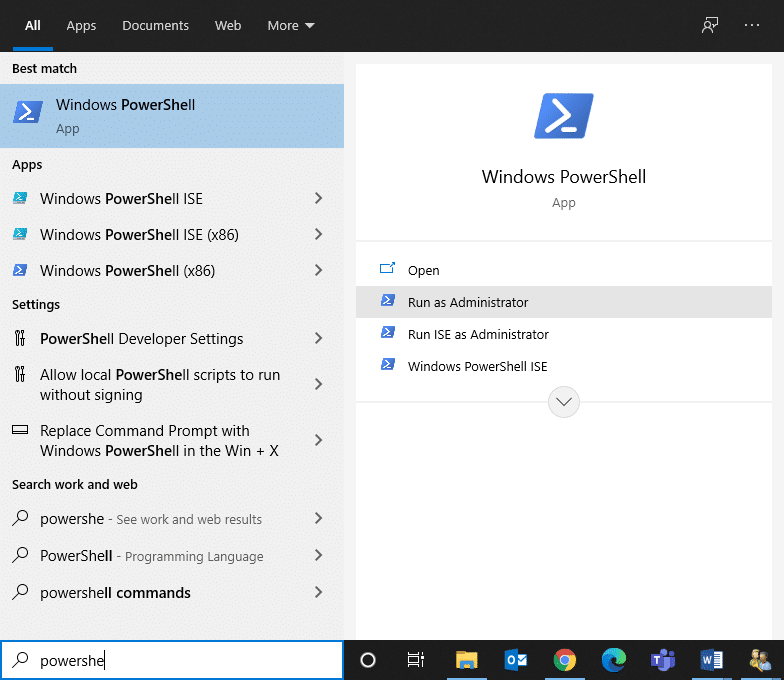
1. Search Windows PowerShell in the Windows search box. Then, launch the app with administrative privileges by clicking on Run as Administrator, as shown.
2. Type the following command in the PowerShell window and press Enter key:
Get-BitsTransfer -AllUsers | select -ExpandProperty FileList | Select -ExpandProperty RemoteName
3. All the processes and programs being downloaded on the system will be displayed on the screen, along with their respective locations.
Note: If this command retrieves no data, it means that nothing is being downloaded on your Windows system.
4. Next, type the following command in the PowerShell window and hit Enter:
Get-BitsTransfer -AllUsers | Remove-BitsTransfer
Once done, all the non-Windows updates will stop downloading and Command Prompt should stop flashing.
Recommended:
We hope that this guide was helpful, and you were able to fix Command Prompt appears then disappears on Windows 10 issue. Let us know which method worked for you the best. Also, if you have any queries/comments regarding this article, then feel free to drop them in the comments section.