- in Windows 10 by Admin
Change Recycle Bin Settings in Windows 10

Windows 10 ships with a level of customization
features that we haven’t seen in many other versions of the operating system.
Something completely new to this iteration of Windows is a set of settings
exclusive to the Recycle Bin.
Up through Windows 8, the Recycle Bin just is
what it is—a container for your deleted files. In Windows 10, we can make
changes to the Recycle Bin force it to behave in several new and useful ways.
For many, we only know to periodically clean
the Recycle Bin so that it isn’t taking up precious disk space. However, you
have the option to change the maximum size of the Recycle Bin, set the Recycle
Bin to automatically clean itself after a number of days, or bypass the Recycle
Bin entirely to just permanently delete any discarded files.
In this article, we’ll explain how to do each
of these three actions on any Windows 10 machine.
How to Change the Maximum Size of
the Recycle Bin
The Recycle Bin has a default storage space of
around 5% of the total size of your disk volume. With that in mind, let’s
assume that you’ve assigned 500 GB of space to your volume. For this volume,
the Recycle Bin will begin to automatically permanently delete your oldest
files when a little over 25 GB of its space has been used.
For the vast majority of users, 5% is more
than enough space in the Recycle Bin. However, you may find yourself in the
middle of an OCD-induced cleaning session where you want to be extra careful
that anything you’re deleting isn’t gone forever. In this case, you may
consider changing the maximum size of the Recycle Bin.
To do so, simply right-click on the Recycle
Bin icon on your desktop. If you don’t have the icon on your desktop, search
Windows for “desktop icons” and click
on the “Themes and related settings”
option. On this window, scroll down to “Desktop
icon settings”.
Here, you’ll be able to restore the icon to
your desktop.
The Properties
window of your Recycle Bin will allow you to set a custom maximum size for each
volume.
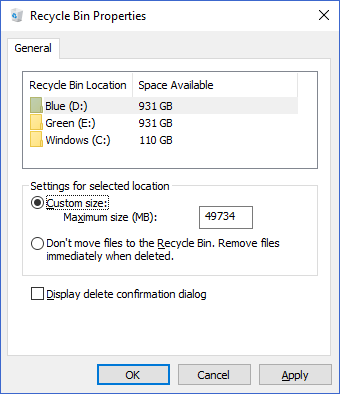
By selecting the “Custom size” radio option, you can enter a maximum size, in
megabytes, that the Recycle Bin can grow to before files begin to permanently
delete.
How to Bypass the Recycle Bin and
Delete Files Permanently
If the Recycle Bin is useless in your
workflow, you can set the default action for file deletions to completely
bypass the Recycle Bin and delete permanently.
You can do so in that same Properties menu when you right-click
the Recycle Bin icon.
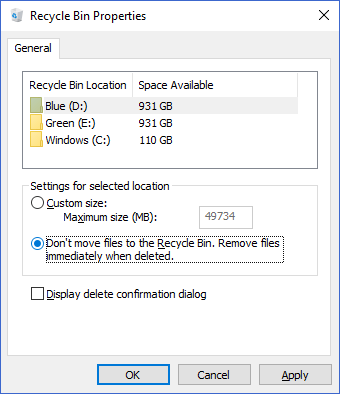
By selecting the “Don’t move files to the Recycle Bin. Remove files immediately when
deleted.” radio option, Windows will do just that.
How to Make the Recycle Bin
Delete Files After a Number of Days
One of the Windows 10 Recycle Bin features that everyone can benefit from is for Windows to clean up after itself. This feature is built into Windows 10’s Storage Sense, which assists users in performing automated clean-ups of their drives. It’s comparable to a native Windows solution for something like CCleaner (which we can no longer recommend).
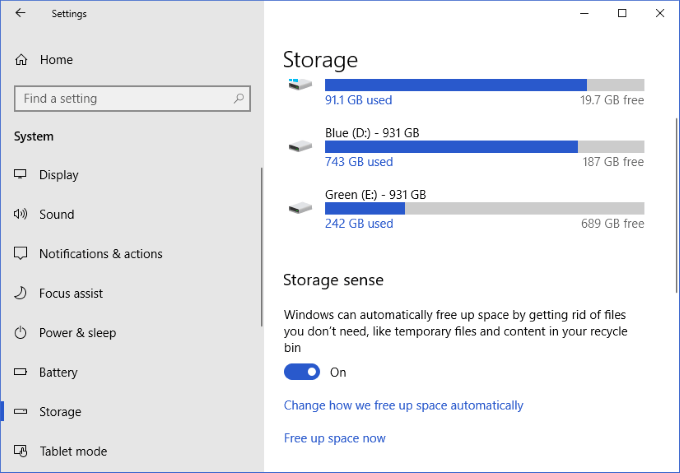
To begin using Storage Sense to free up your
Recycle Bin’s space after a number of days, press the Windows + I keys to bring up Windows Settings. From there, click on
System. On this window, click on Storage on the menu to the left. You
should then be at a window that looks like this:
Here, click on “Change how we free up space automatically”.
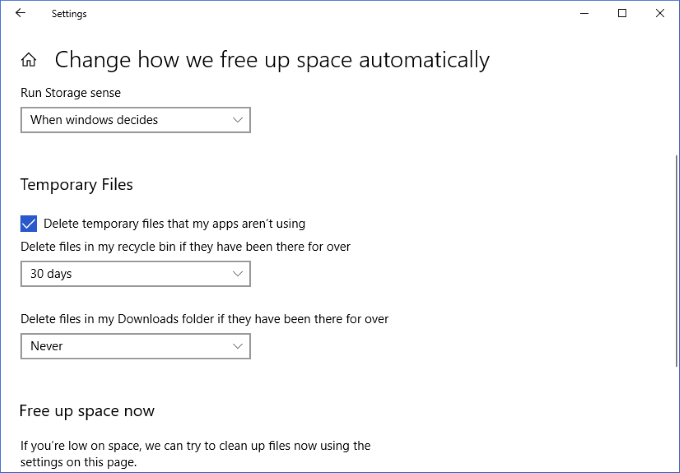
On this window, you’ll see a dropdown box
belonging to the “Delete files in my
recycle bin if they have been there for over” setting. The available
options are as follows:
- Never
- 1 day
- 14 days
- 30 days
- 60 days
Using the dropdown box to select one of these
options will save this change to your Storage Sense’s settings. This change
will apply retroactively, so if you have files that have been in your Recycle
Bin for 80 days and you opt for Storage Sense to delete them after 60 days,
they will be deleted upon applying this change.
While maintaining a healthy Recycle Bin is as
simple as a few clicks, it’s appreciated that Windows 10 has offered users
settings to help automate and better control how one of the longest and most
important parts of the operating system behaves. These three simple settings
are worth checking out and only take a few seconds of your time!
If you’re interested in learning more ways to clean your Windows 10 machine, be sure to check out our article on running disk cleanup in Windows 10.