Fix the Wireless Autoconfig Service wlansvc Is Not Running in Windows 10

The WLANSVC (WLAN AutoConfig) service helps your computer to identify any wireless network and connect to the same as long as your computer has a wireless adapter installed to it. This service identifies which particular network has to be connected to your PC and automatically configures any necessary settings. Hence, the most preferred wireless network is connected to ensure proper internet connectivity. But, sometimes you may face the wireless autoconfig service wlansvc is not running problem in your Windows 10 PC and thus you cannot connect to a wireless network seamlessly. If you are facing the same, you are at the right place! We bring a perfect guide that will help you fix Wlansvc not running issue. So, continue reading.
How to Fix the Wireless Autoconfig Service wlansvc Is Not Running in Windows 10
If you want to solve Wlansvc is not running issue, you have to analyze which parameter is causing you the trouble. Here are some reasons that cause this issue in Windows 10.
- WLAN AutoConfig service is disabled on your computer.
- Your PC has outdated drivers installed in it.
- Network settings are corrupt.
- The wireless adapter is corrupt or incompatible.
- Operating System is corrupt.
- The Previous OS update is incompatible with Windows services.
So, now move ahead to the next section to learn the troubleshooting steps to resolve the wireless autoconfig service wlansvc is not running issue.
In this section, we have compiled a list of methods that will help you resolve the wireless autoconfig service Wlansvc is not running issue. Follow them in the same order to attain perfect results.
Note: Always create a system restore point to restore your system to its previous version if something goes wrong.
Method 1: Enable WLAN
Before you step into other methods, you must make sure whether the wireless service is turned on your device. If the WiFi service is physically turned off or if the inbuilt settings are incompatible with the device, you will face the wireless autoconfig service wlansvc is not running issue. Yet, you can enable WiFi or WLAN services by following the steps as instructed.
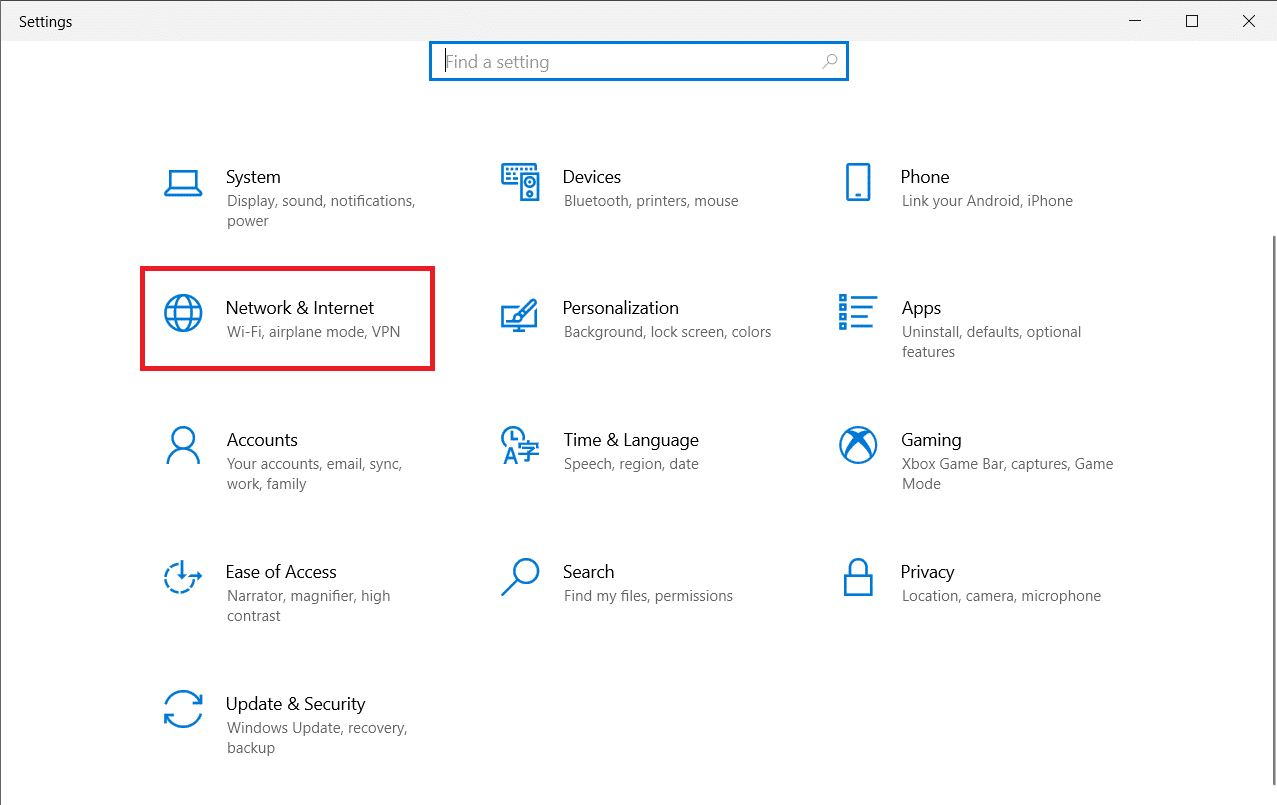
1. Press and hold Windows + I keys together to open Windows settings.
2. Click on Network & Internet.
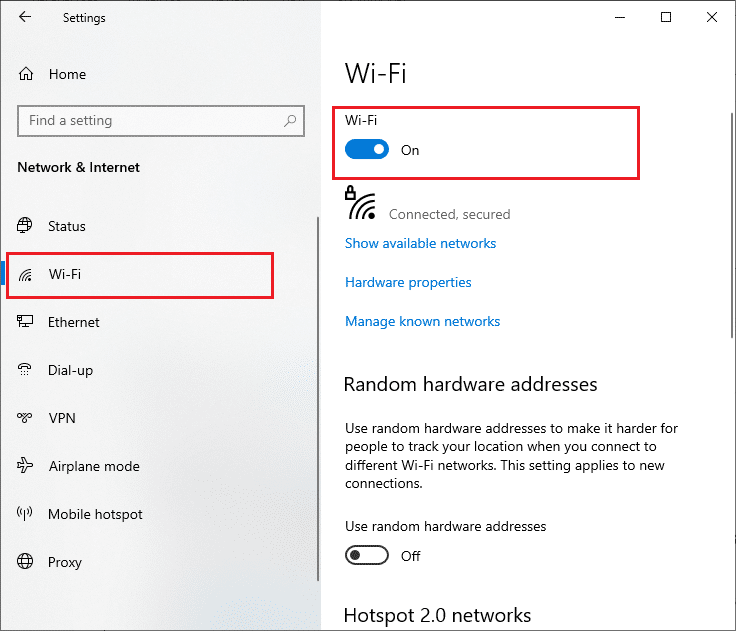
3. Now, in the left pane click on the Wi-Fi tab and toggle on the Wi-Fi button.
4. Check if you have fixed Wlansvc is not running issue.
Method 2: Enable WiFi Adapters
Also, you must ensure whether the wireless adapters in your device are enabled to ensure proper internet connectivity. Follow the below-mentioned steps to enable WiFi adapters on your computer.
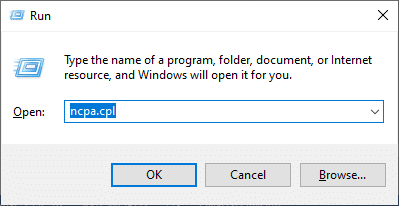
1. Launch the Run dialog box by pressing Windows + R keys simultaneously.
2. Now, type ncpa.cpl and hit Enter key to open Network Connections.
3. Now, right-click on your active network adapter and check whether it is enabled or disabled.
3A. Select Enable if the network adapter is disabled.
3B. If the network adapter is already in Enable status, switch to the next method.
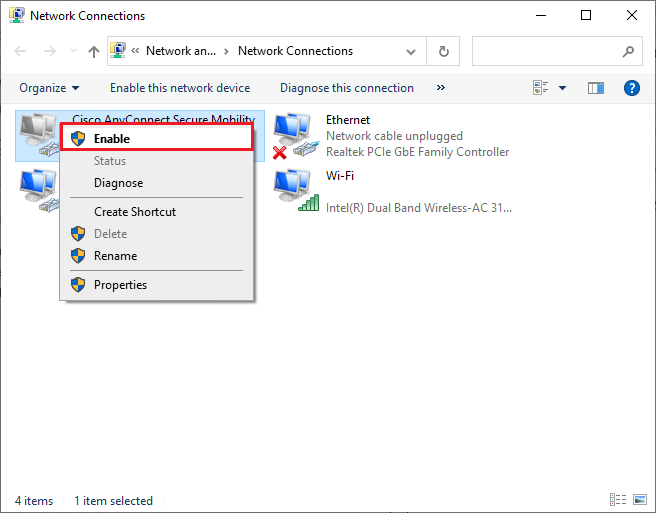
4. Check if you have fixed Wlansvc not running issue.
Also Read: Fix Windows could not automatically detect this Network’s Proxy settings
Method 3: Run Network Troubleshooter
Your Windows 10 PC has an inbuilt tool to troubleshoot any internet connectivity issues. You can use the same tool to analyze common network issues and once you have completed the troubleshooting process, you will be able to fix the wireless autoconfig service wlansvc is not running issue. Learn and implement the steps in our guide to Troubleshoot Network Connectivity Problems on Windows 10 to fix all network-related issues by using the Windows Network Adapter troubleshooter.

Once you have completed the process, you can fix all network issues occurring in Wi-Fi networks, Ethernet connections, and internet adapters on your computer. Check if you have fixed wireless autoconfig service wlansvc is not running issue.
Method 3: Enable Wireless AutoConfig Service
The WLAN AutoConfig services have an inbuilt module that enables your computer to discover any new network. As a result of the network troubleshooting process, you may find that WLAN AutoConfig services are disabled and that’s the reason why you face Wlansvc is not running issue. So, check if this service is disabled on your device, if so start it over again by following the below-mentioned steps.
1. Hit the Windows key and type Services and click on Run as administrator.
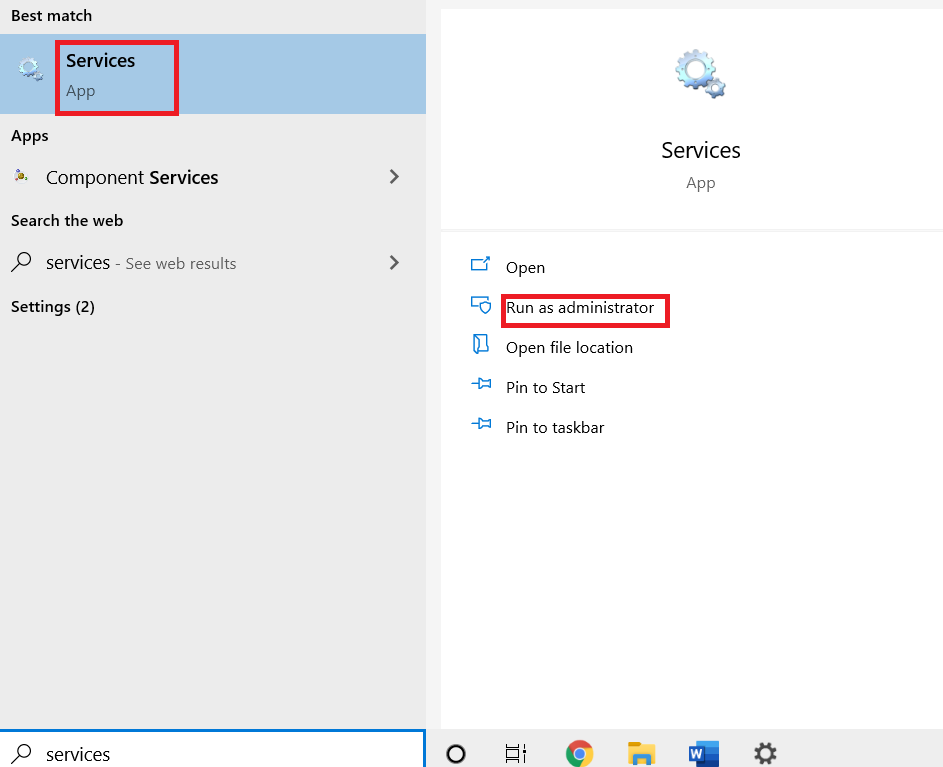
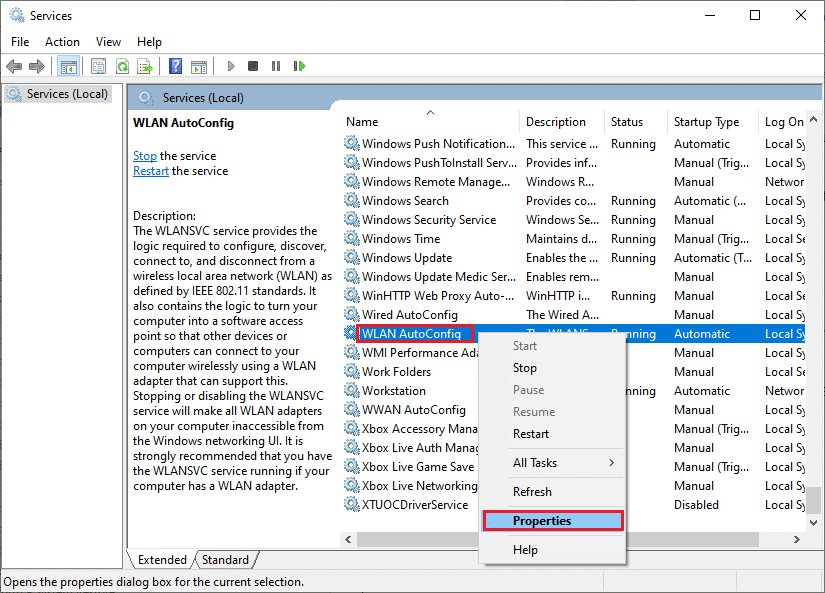
2. Scroll and search for WLAN AutoConfig Service and double-click on it.
Note: You can also right-click on WLAN AutoConfig Service and select the Properties option from the drop-down list.
3. Now, choose the Startup type as Automatic.
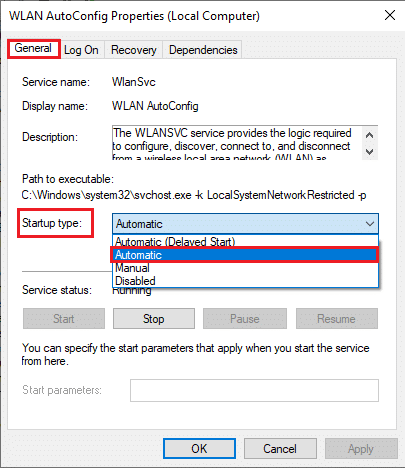
3A. When the Service status is not Running, then select the Start button.
3B. When the Service status is Running, select the Stop button for a few minutes and start it again.
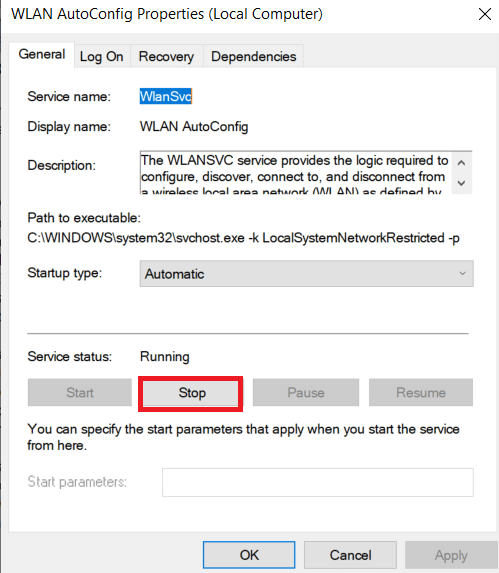
4. Finally, click on Apply > OK to save the changes. Now, you would have fixed wireless autoconfig service wlansvc is not running issue.
Method 4: Start Wlansvc Service
Apart from the Graphical User Interface method, you can enable the Wlansvc service from the command prompt also. It is possible through MS-DOS (Microsoft Disk Operating System) commands for which you must have administrative rights. These commands interact with the OS of your computer and with the software that functions with the command lines. In this guide, we have demonstrated how to start the Wlansvc service from the command prompt for Windows versions of Vista and above.
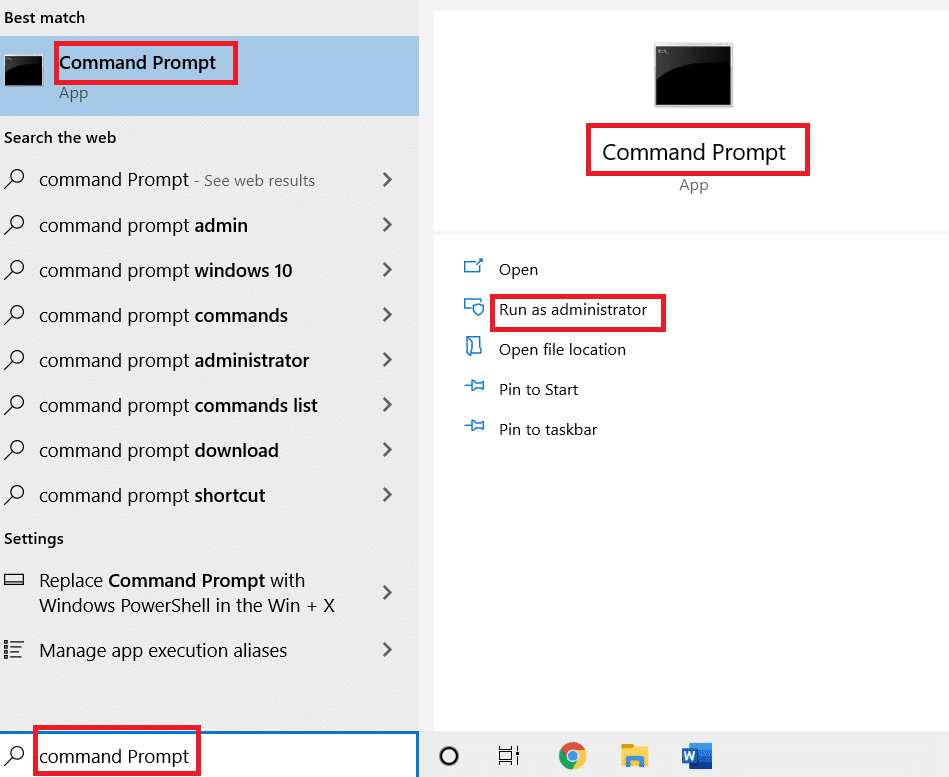
1. Press the Windows key and type Command Prompt and click on Run as administrator.
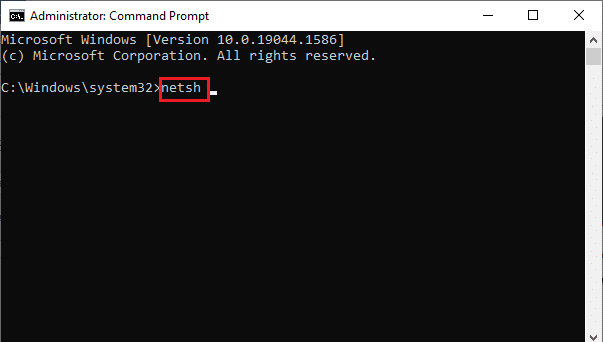
2. Now, type the following commands one by one and hit Enter key after each command.
netsh
wlan
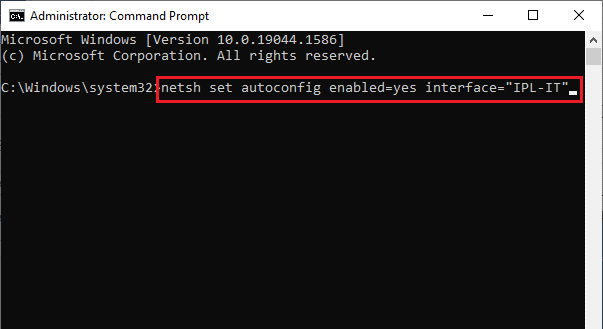
3. Then, to start the service for the wireless interface, type the following command and hit Enter key.
set autoconfig enabled=yes interface="Type the Name of Wireless Network Connection"
Note: Users are advised to type the name of the wireless connection within quotation symbols in place of Type the Name of Wireless Network Connection in the above command. Refer to the example given below.
4. Finally, check if you have fixed wireless autoconfig service wlansvc is not running issue.
Also Read: [SOLVED] Windows detected a hard disk problem
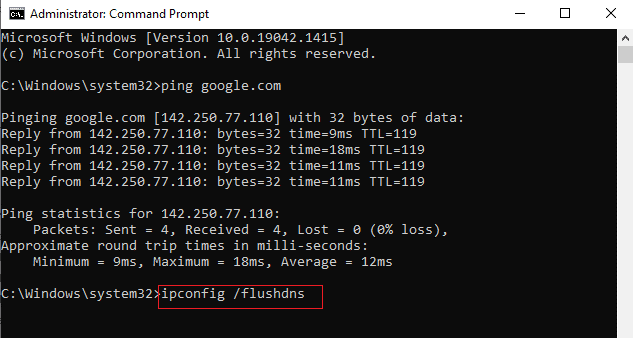
Method 5: Reset TCP/IP
TCP (Transmission Control Protocol) is mandatory for your computer since it establishes rules and standard procedures over the internet. TCP/IP protocols work in chores that are responsible for the mobility of data packets. If there is a conflict in the process, resetting the protocol along with the IP address will help you fix the wireless autoconfig service wlansvc is not running issue. Follow our guide on How to Troubleshoot Network Connectivity Problems on Windows 10 to reset TCP/IP.
After implementing the steps, check if you can fix Wlansvc not running issue or not.
Method 6: Repair Corrupt Files
If your Windows 10 computer has any corrupt or damaged system configuration files, you will face wireless autoconfig service wlansvc is not running issue. This also leads to malfunctioning of your computer thereby causing performance failure. Fortunately, you can repair these corrupt files by using the inbuilt utilities of your computer namely, System File Checker and Deployment Image Servicing and Management. Follow our guide on How to Repair System Files on Windows 10 and implement the steps as demonstrated to repair all the corrupt files on your computer.

After repairing the corrupt files by running the commands, check if you have fixed wireless autoconfig service wlansvc is not running issue.
Also Read: How to set up a VPN on Windows 10
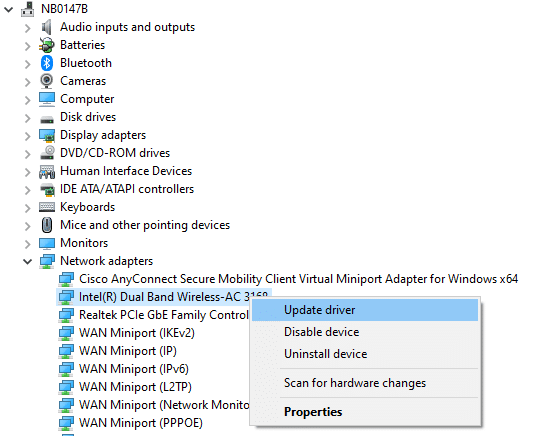
Method 7: Update WLAN Driver
Device drivers establish a connection link between the hardware and Operating System of your computer. Also, faulty or corrupt drivers lead to Wlansvc not running issue. Many users have reported that updating WLAN drivers have helped them fix the issue. You are advised to update WLAN drivers to improve the reliability of your network adapters, fix compatibility issues, and resolve the wireless autoconfig service wlansvc is not running issue. Follow our guide on How to Update Network Adapter Drivers on Windows 10 to do so.
After updating, check if you have fixed wireless autoconfig service wlansvc is not running issue.
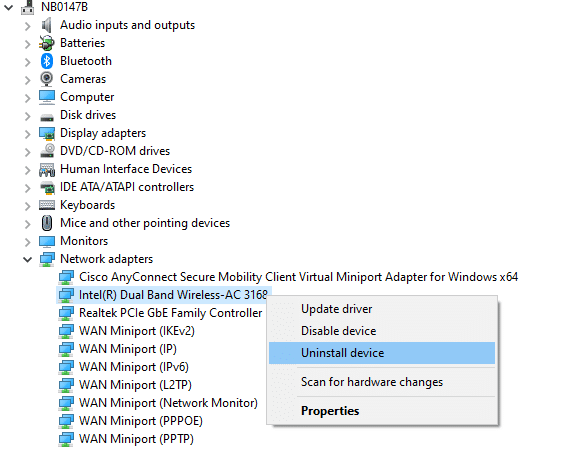
Method 8: Reinstall WLAN Driver
Incompatible drivers must be reinstalled to fix Wlansvc is not running problem. You are advised to reinstall device drivers only if you cannot attain any fix by updating them. Steps to reinstall drivers are very easy and you can do so by using a third-party application or manually. Follow our guide How to Uninstall and Reinstall Drivers on Windows 10 to reinstall drivers in your Windows 10 computer.
After reinstalling network drivers, check if you have fixed wireless autoconfig service wlansvc is not running issue.
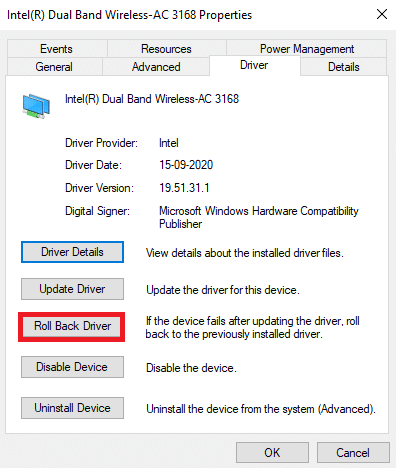
Method 9: Roll Back WLAN Drivers
When you roll back your drivers, all the current versions of the hardware device will be uninstalled and previously installed drivers will be installed on your PC. This feature will be very helpful when any new driver update does not work well with your computer. Follow the steps as instructed in our guide on How to Rollback Drivers on Windows 10 to fix the wireless autoconfig service wlansvc is not running issue.
After your Windows 10 computer has installed the previous version of drivers, check if you have fixed wireless autoconfig service wlansvc is not running problem.
Also Read: Fix Computers Not Showing Up on Network in Windows 10
Method 10: Delete Previous Windows Updates
Few Windows update components in your Windows 10 computer may cause Wlansvc not running issue. Hence to fix the problem, consider deleting previous Windows updates as instructed below.
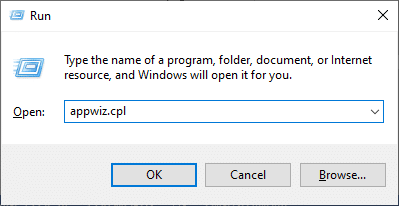
1. Press the Windows + R keys simultaneously to open the Run dialog box.
2. Type appwiz. cpl and hit Enter key to open Programs and Features.
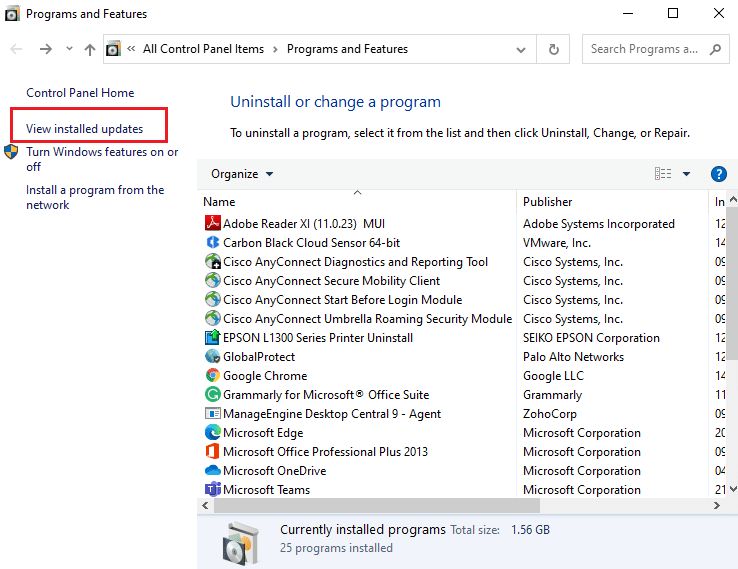
3. Click on View installed updates in the left pane.
4. Now, search for the most recent update and select the Uninstall option.
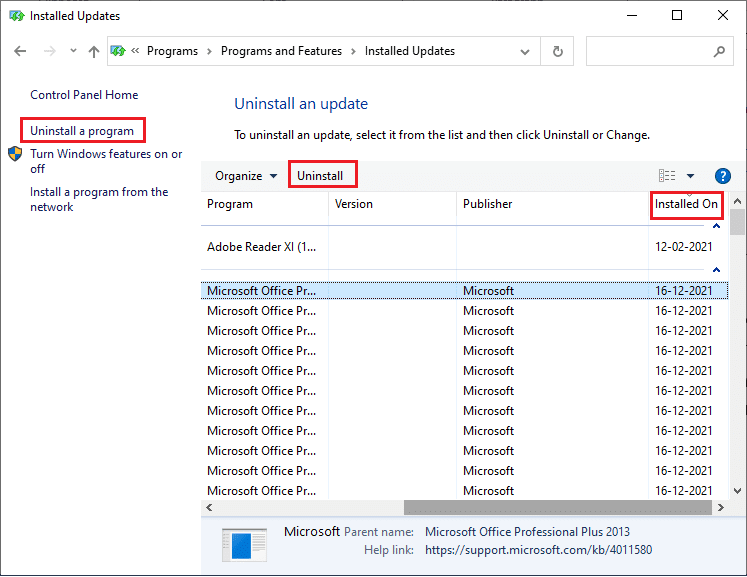
5. If there are any prompts, confirm them and restart your PC. Now, you would have fixed the problem.
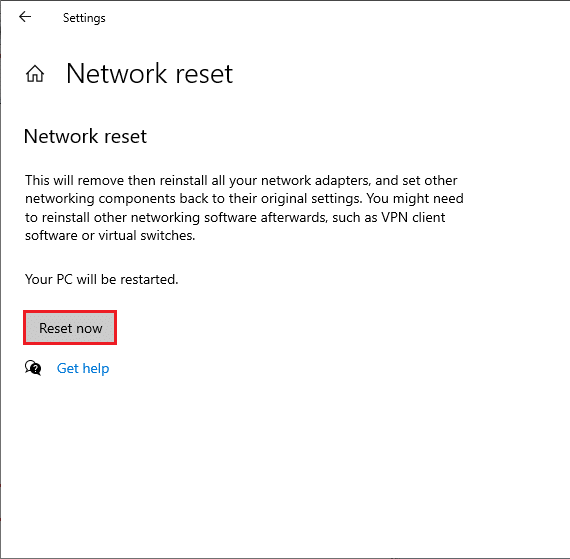
Method 11: Reset Network Settings
Despite updating WLAN drivers, and uninstalling recent updates try resetting the network settings if none of the methods have helped you fix the wireless autoconfig service wlansvc is not running issue. To do so, follow our guide on How to Reset Network Settings on Windows 10.
Method 12: Perform System Restore
There are many circumstances where the latest Windows update has broken the wireless mechanism of your computer. If the current version of your Windows 10 PC interferes with the existing architecture of network configurations, you will face the discussed problem. System Restore will bring back the computer to the version where it was working without any errors. To do so, follow our guide on How to use System Restore on Windows 10 and implement the instructions as demonstrated.

After restoring your Windows 10 PC, check if you have fixed the issue.
Also Read: Fix Ethernet Doesn’t Have a Valid IP Configuration Error
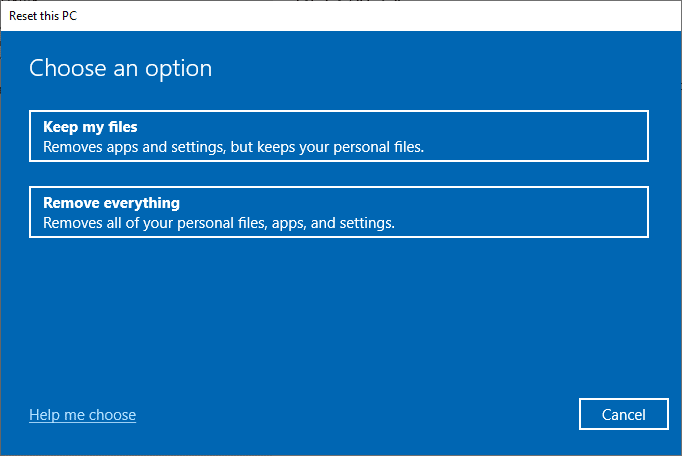
Method 13: Clean Install Windows 10
If none of the methods have helped you fix the wireless autoconfig service wlansvc is not running issue, then you need to clean install your Windows Operating System. To do so, implement the steps as instructed in our guide How to do a Clean Install of Windows 10
Recommended:
Without WLANSVC (WLAN AutoConfig) services, you could not connect to a wireless network, but now you would have fixed the wireless autoconfig service wlansvc is not running issue. Keep visiting our page for more cool tips & tricks and leave your comments below. Also, if you have any queries/suggestions regarding this article, then feel free to drop them in the comments section.