How to Repair System Files on Windows 10

Windows System Files can get corrupt due to many reasons such as incomplete Windows Update, improper shutdown, virus or malware attacks, etc, Also, a system crash or a bad sector on your hard disk can lead to corrupt files, which can prove to be deadly in the long run. So, in this article, we will discuss how to repair system files Windows 10 and run DISM & SFC scannow repair tools. Read and follow the upcoming steps carefully to repair any corrupted file on your system.
How to Repair System Files on Windows 10 PC
If you have any corrupt system files or configuration files on your PC, you will face all sorts of error codes and issues. These files lead to the malfunction of the Operating System, and you will not be able to perform tasks on your system. Read below to learn to run SFC (System File Checker) and DISM (Deployment Image Servicing and Management) utilities on your system to repair system files on Windows 10.
Note: It is advisable to run the DISM tool before executing SFC commands. The internal files from the server will be downloaded by running DISM commands and the SFC commands will replace the corrupt files with new ones.
Method I: Run DISM Tool
Here is how to repair system files on Windows 10.
Note: You must have a working internet connection to execute DISM commands properly.
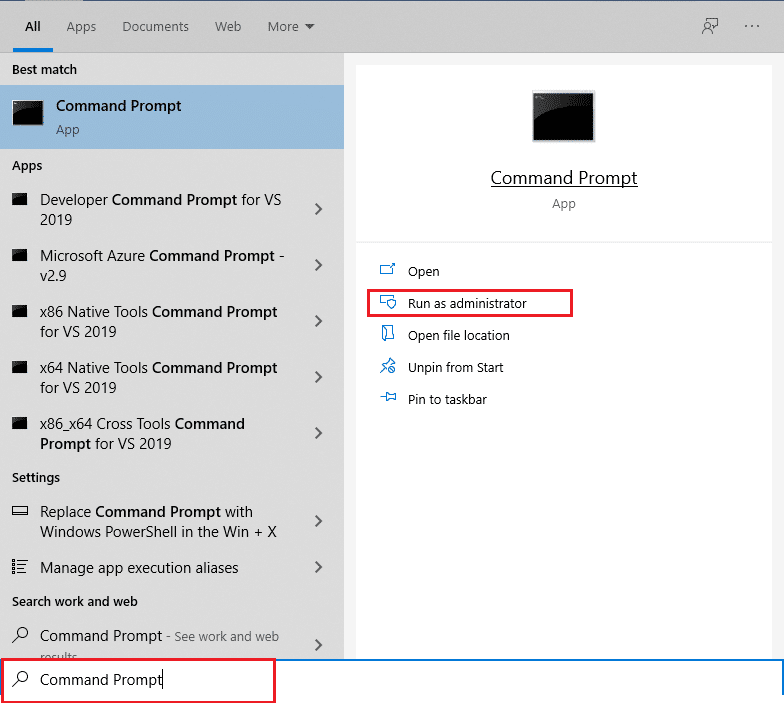
1. Hit the Windows key, type Command Prompt and click on Run as administrator as depicted below.
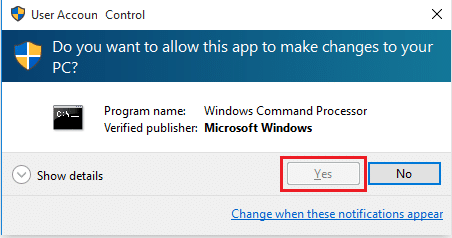
2. Click Yes in User Account Control Prompt to continue.
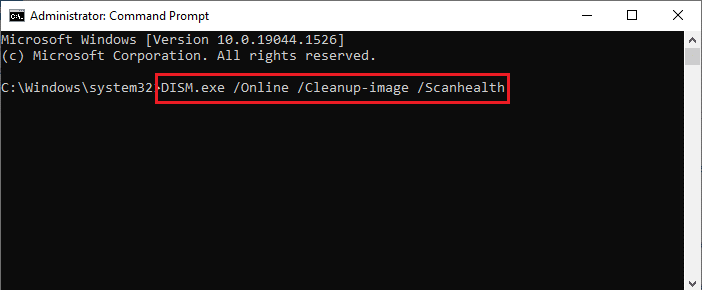
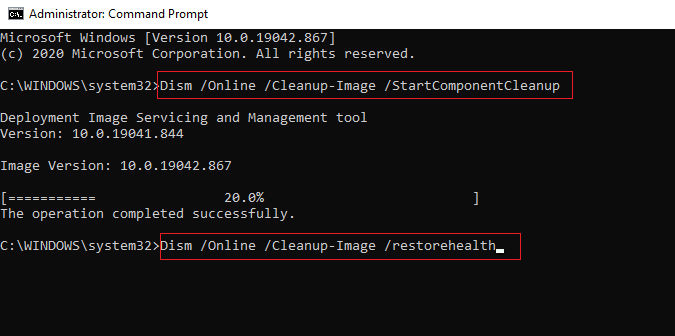
3. Type the given commands and hit the Enter key after each command.
dism.exe /Online /cleanup-image /scanhealth
dism.exe /Online /cleanup-image /startcomponentcleanup
dism.exe /Online /cleanup-image /restorehealth
4. Wait for the process to run successfully and close the window. Then, run SFC scannow repair tool as detailed below.
Also Read: How to Check Disk for Errors Using chkdsk
Method II: Run SFC scannow Command
Follow these steps to repair system files in Windows 10.
1. Launch Command Prompt with administrative privileges as earlier.
2. Type sfc /scannow and press Enter key to run the System File Checker scan as depicted below.
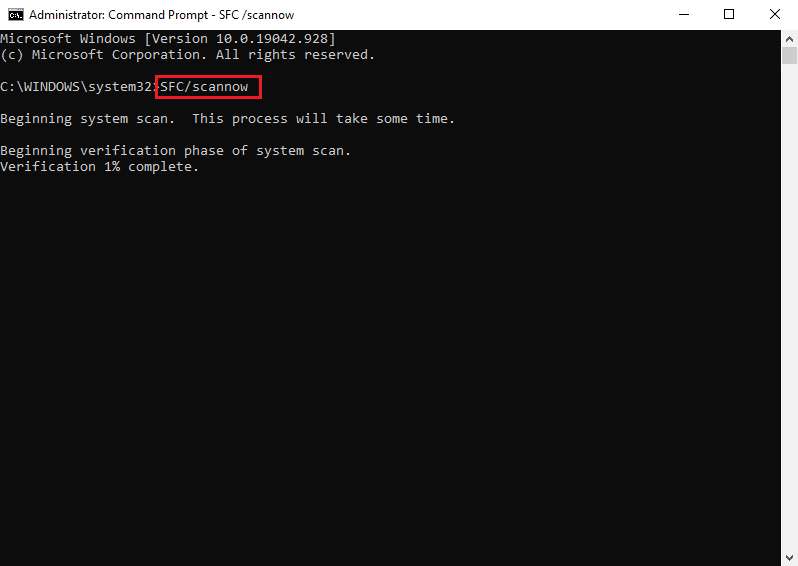
Note: A system scan will be initiated and it will take a couple of minutes to finish. Meanwhile, you can continue performing other activities but be mindful of not accidentally closing the window.
3. After completing the scan, it will show either of these messages:
4. Once the scan is finished and you receive messages 1 or 3, restart your PC.
Recommended:
This was the method explaining how to repair system files in Windows 10 with SFC scannow repair & DISM tools. This method can also be used to fix corrupted files on Windows 7. Feel free to reach out to us with your queries and suggestions via the comments section below.