Fix Hamachi VPN Error in Windows 10

Hamachi is a private network application for connecting online to a single system. It enables secure network extensions for personal and professional use. Lately, users have been seeing Hamachi VPN error Windows 10. If you are also dealing with the same problem, you are at the right place. We bring you a perfect guide to help you fix Hamachi VPN status error. But before we dive into the methods of fixing the error, let us know what exactly is this error.
How to Fix Hamachi VPN Error in Windows 10
Many reasons can cause this error in your system. They may vary from issues with your network to tunneling errors. Let us go through the most common causes of this error briefly:
- Network issues with your system can lead to VPN errors in Hamachi. Weak internet connection or inability to connect online can be a reason.
- Tunneling error is another reason behind the cause of VPN errors. The yellow color of the status icon represents a tunneling issue that blocks other computer networks from connecting/tunneling properly.
- VPN errors in Hamachi can also be a result of third-party clients. A few of these installed on your system can restrict the app from tunneling properly.
- Another reason can be an outdated or corrupt network driver.
Hamachi services create a private network virtually, creating LAN for computers with members situated remotely. This is particularly helpful for gamers who want to connect to one system while making direct links without configuration. Using Hamachi can be a real asset for mobile workers and gamers, but technical issues like Hamachi VPN error Windows 10 can be a real setback. To resolve this issue, let us go through some legitimate methods that will help you out a lot.
Method 1: Restart PC
The basic troubleshooting for any issues would be restarting your device. This would easily fix any temporary glitches. Follow the below steps.
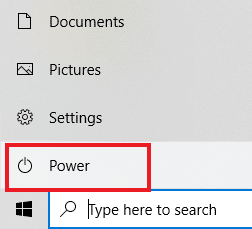
1. Click on the Windows icon at the bottom left corner.
![]()
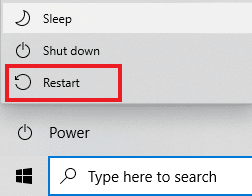
2. Click on the Power option.
3. Select Restart.
Method 2: Run Hamachi as Administrator
Running Hamachi as an administrator is another method that is widely used by Hamachi users all around the world. It is simple yet very effective. To use this method, follow the instructions below and perform the same on your system.
Note: Make sure that Hamachi is not running in the background when performing this method.
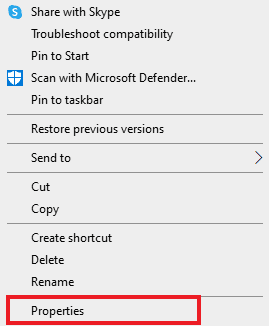
1. Right-click on the LogMeIn Hamachi shortcut on your desktop.
2. Select Properties.
3. Navigate to the Compatibility tab in it.
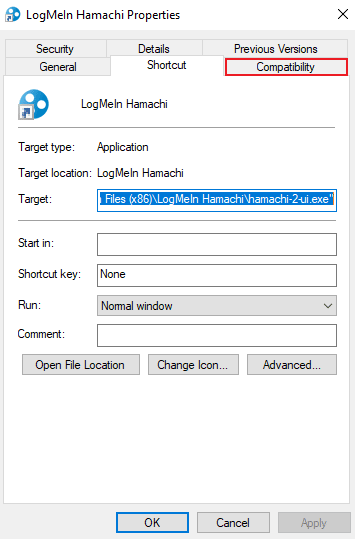
4. Check the Run this program as an administrator box.
5. Click on Apply and then OK.

Also Read: How to Install Microsoft Teredo Tunneling Adapter
Method 3: Update Hamachi Driver
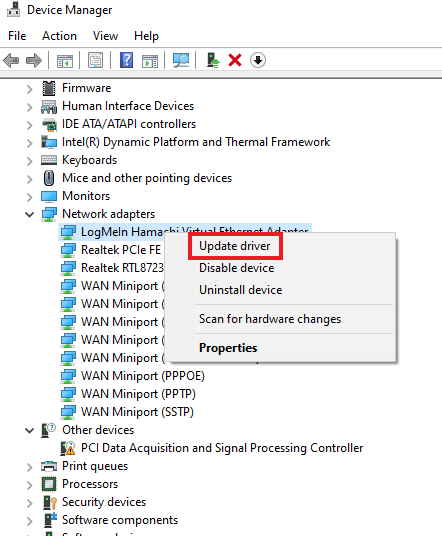
Some users have observed that an outdated Hamachi driver might also create this Hamachi VPN error. Any issues related to Hamachi drivers on Windows 10 can be resolved by updating the driver. Read our guide on How to Update Realtek HD Audio Drivers in Windows 10 and follow the similar procedure for LogMeIn Hamachi Virtual Ethernet Adapter to update it.
Method 4: Reinstall Hamachi Driver
Installing Hamachi as legacy hardware can also help if the driver is causing a VPN error on your system. To perform this method on your system, follow the instructions below:
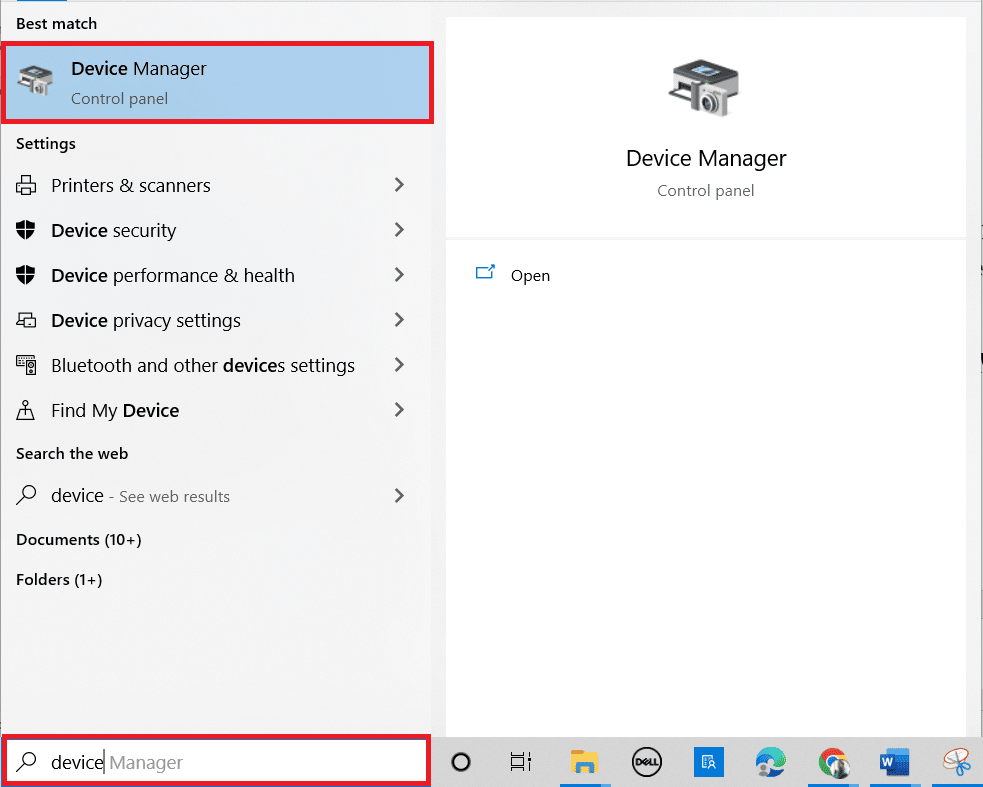
1. Press the Windows key, type Device Manager, and hit the Enter key.
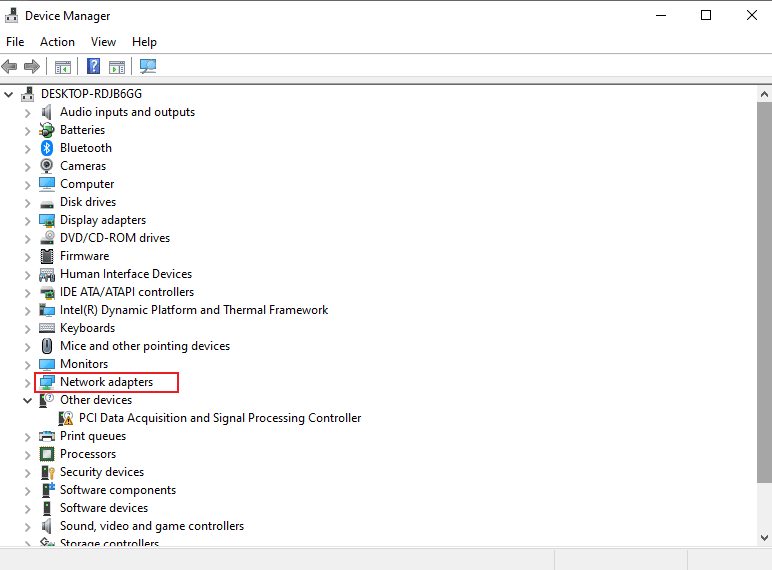
2. Double-click on Network adapters to expand a menu.
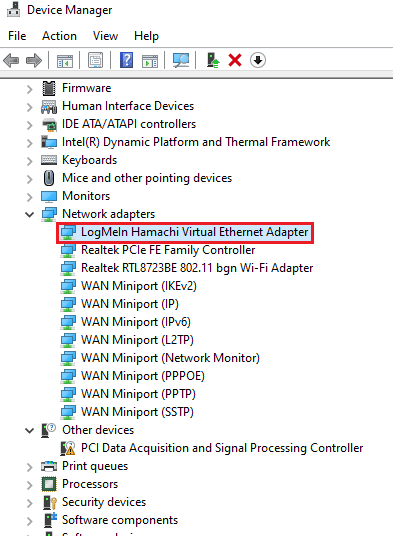
3. Right-click on LogMeIn Hamachi Virtual Ethernet Adapter.
4. Select Uninstall device.
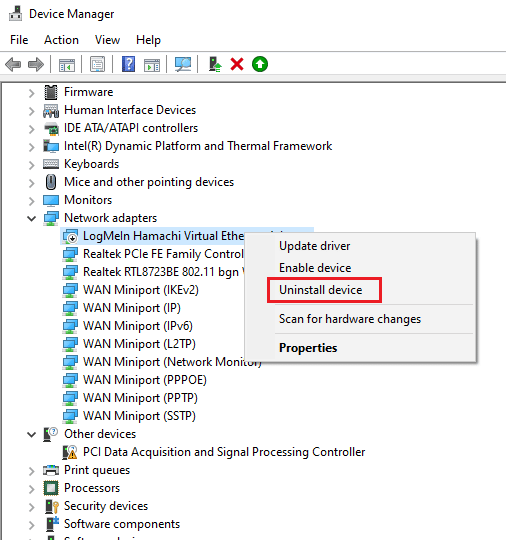
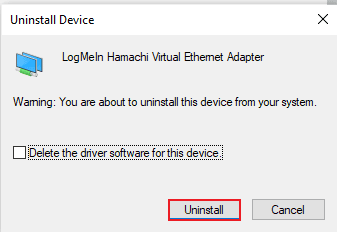
5. Click on Uninstall to confirm.
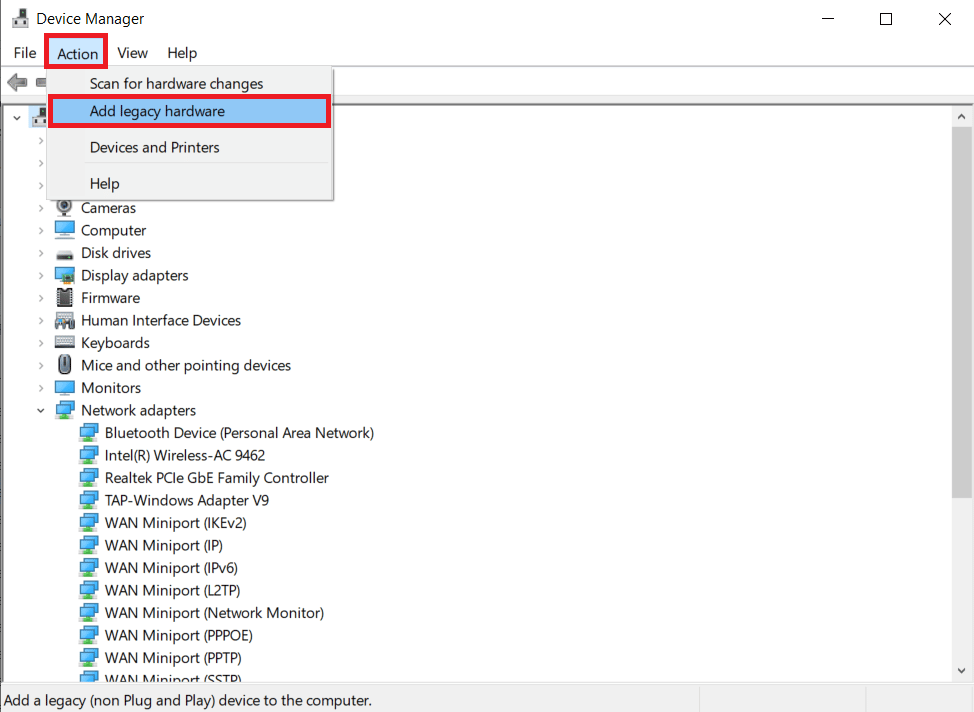
6. Then, click on Action and select Add legacy hardware from the menu.
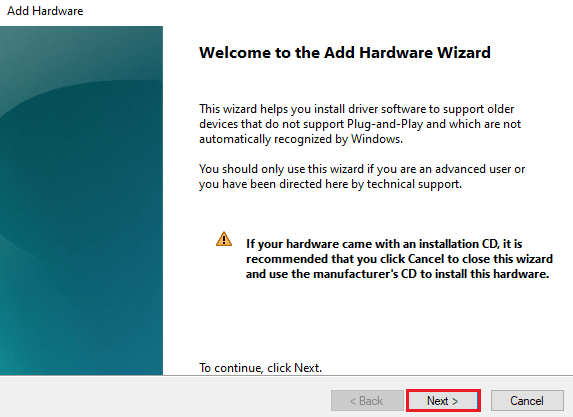
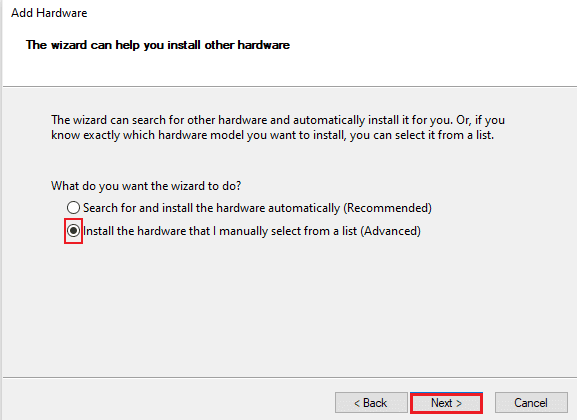
7. Click on Next > on the screen that appears.
8. Choose to Install the hardware that I manually select from a list (Advanced) option and then click on the Next > button.
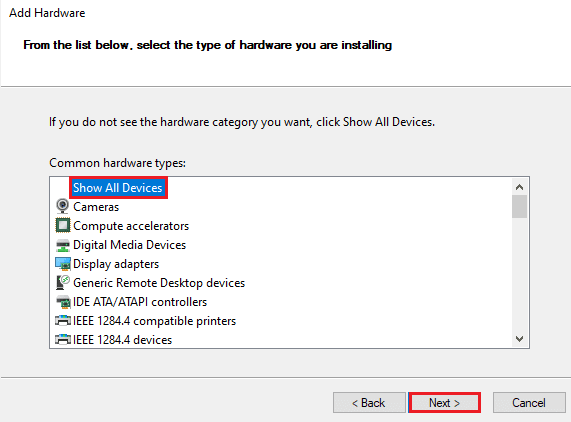
9. In the next window, select Show All Devices and click on the Next > button.
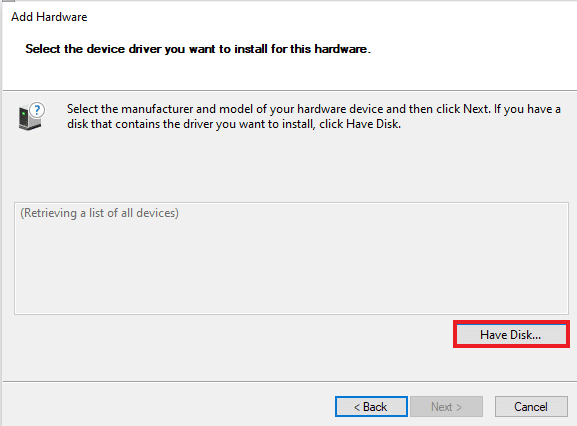
10. Click on Have Disk.
11. Now, click on Browse on the screen that appears and locate the Hamachi driver to select it.

12. Install the driver by following the on-screen instructions given on the screen.
Also Read: What is a VPN and how it works?
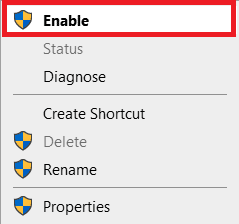
Method 5: Re-enable Hamachi Virtual Adapter
One of the first and easiest solutions to the VPN error issue is to re-enable Hamachi virtual adapter. A virtual network adapter can interfere with Hamachi working properly. Hence, the best thing to do is to disable it and re-enable it to get over the issues, if any persist.
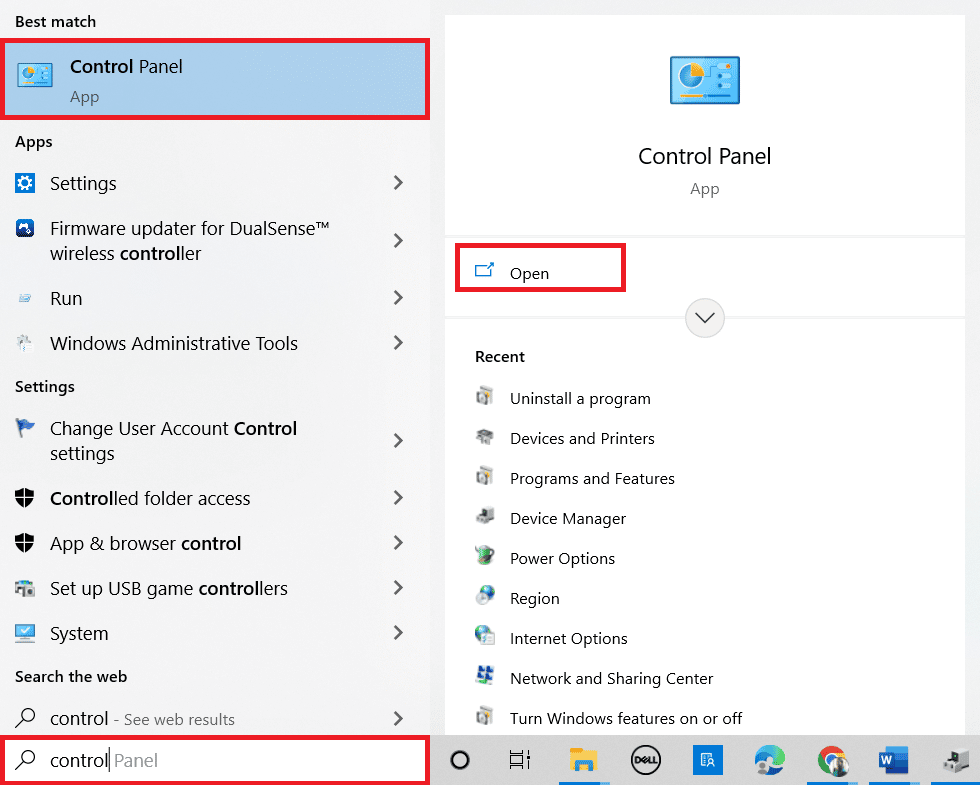
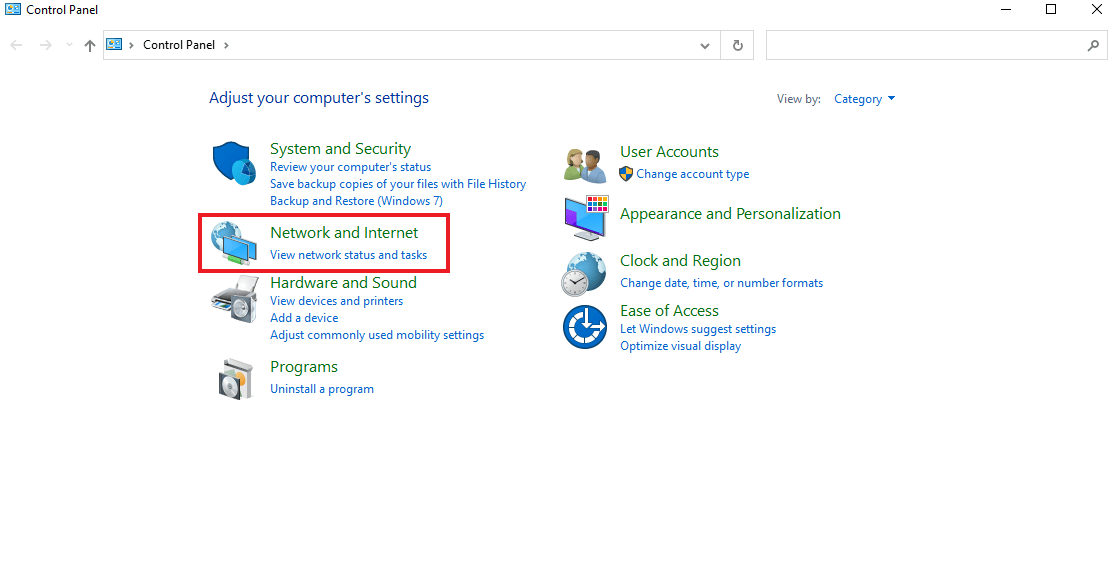
1. Hit the Windows key, type Control Panel and click on Open.
2. Set View by > Category, then click on Network and Internet on it.
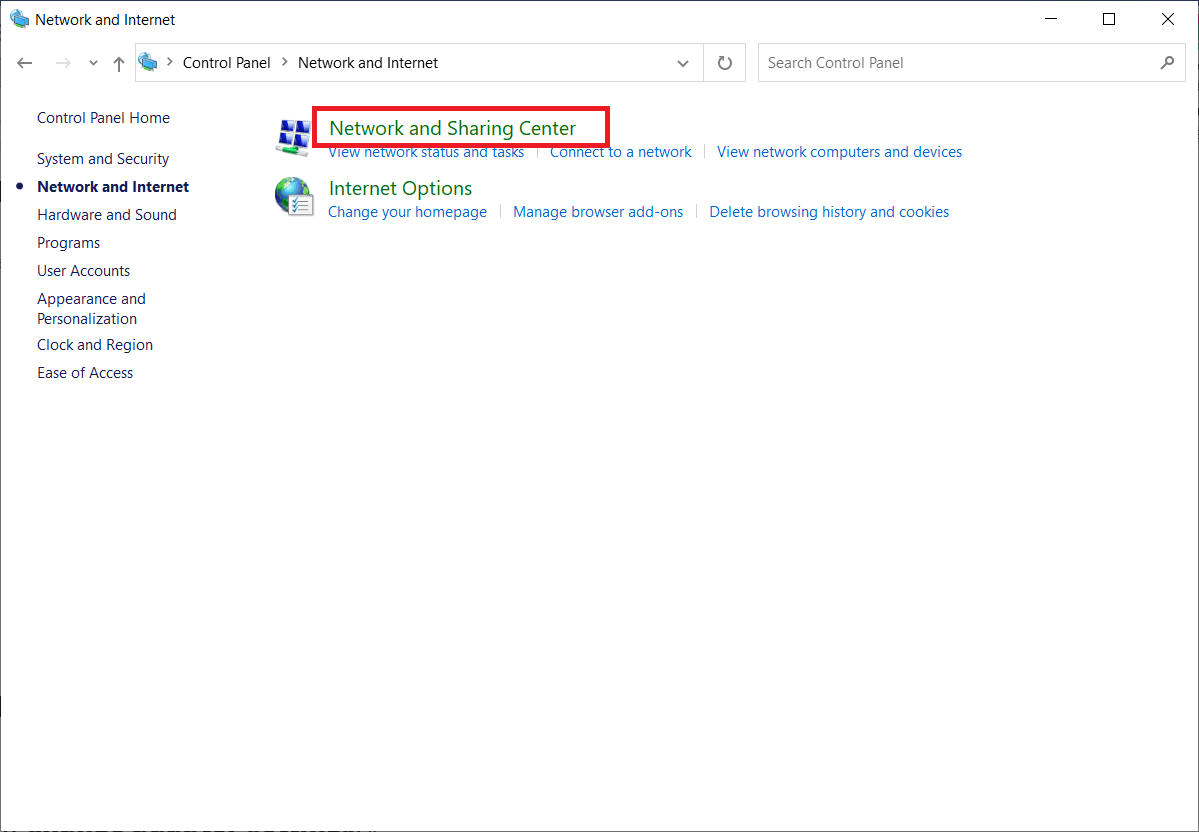
3. Click on Network and Sharing Center.
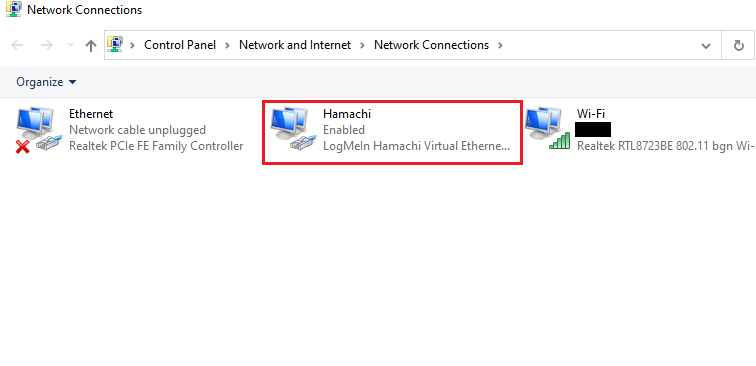
4. Next, click on Change adapter settings.

5. Right-click on the Hamachi adapter.
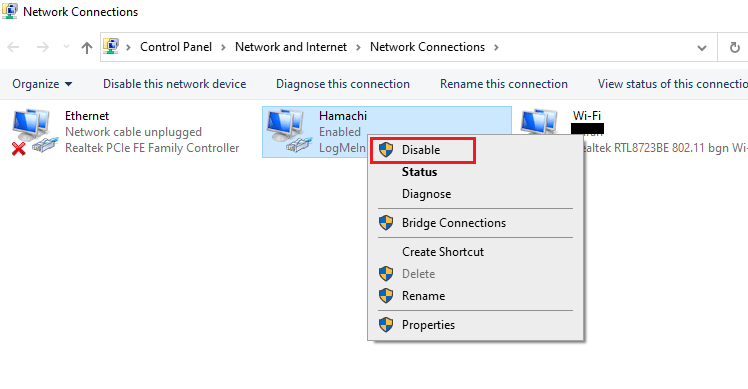
6. Select Disable.
7. Once done, right-click on Hamachi virtual network adapter and select Enable to re-enable it.
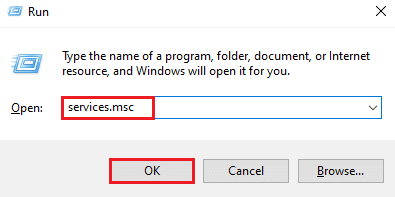
Method 6: Restart Hamachi Tunneling Service
Due to the tunneling service not being able to function properly, a Hamachi VPN status error can occur on your system. The best way to overcome it is by restarting the Hamachi tunneling service on your desktop. Follow the step-by-step instructions given below to do it on your system:
1. Launch the Run dialog box by pressing Windows + R keys simultaneously.
2. Type services.msc and click on OK to open the Services window.
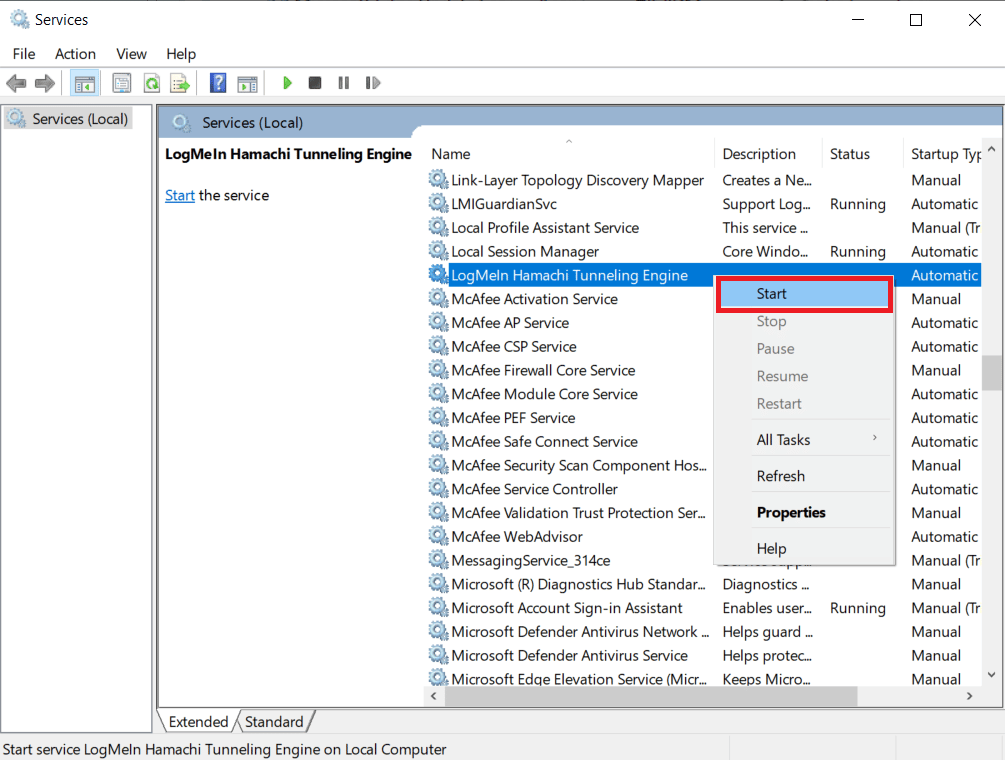
3. Locate LogMeIn Hamachi Tunneling Engine and right-click on it.
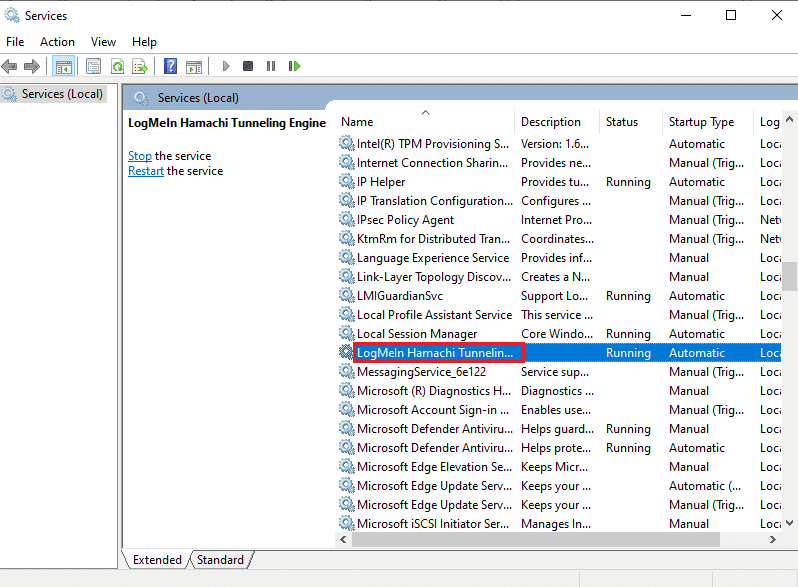
4. Select the Stop option.
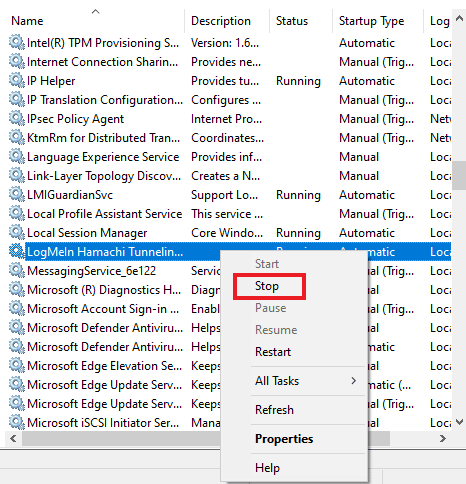
5. After some time, right-click on LogMeIn Hamachi Tunneling Engine and select Start.
Also Read: Fix Windows could not automatically detect this Network’s Proxy settings
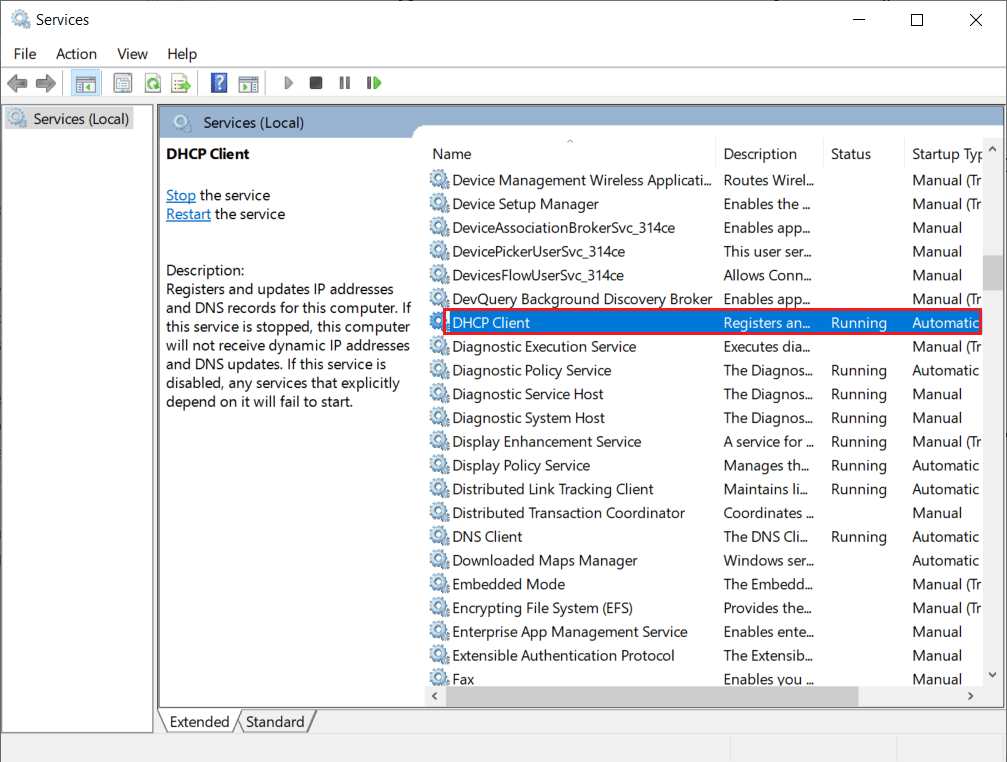
Method 7: Enable Windows Services
Similar to tunneling service on your system, you must ensure that some services are turned on. Because it might be the reason why Hamachi VPN error is showing up on your system. To do so, follow the below-mentioned steps:
1. Press Windows + R keys together to launch the Run dialog box.
2. Type services.msc and click on OK to launch the Services window.

3. Scroll down and locate Windows Management Instrumentation Service.
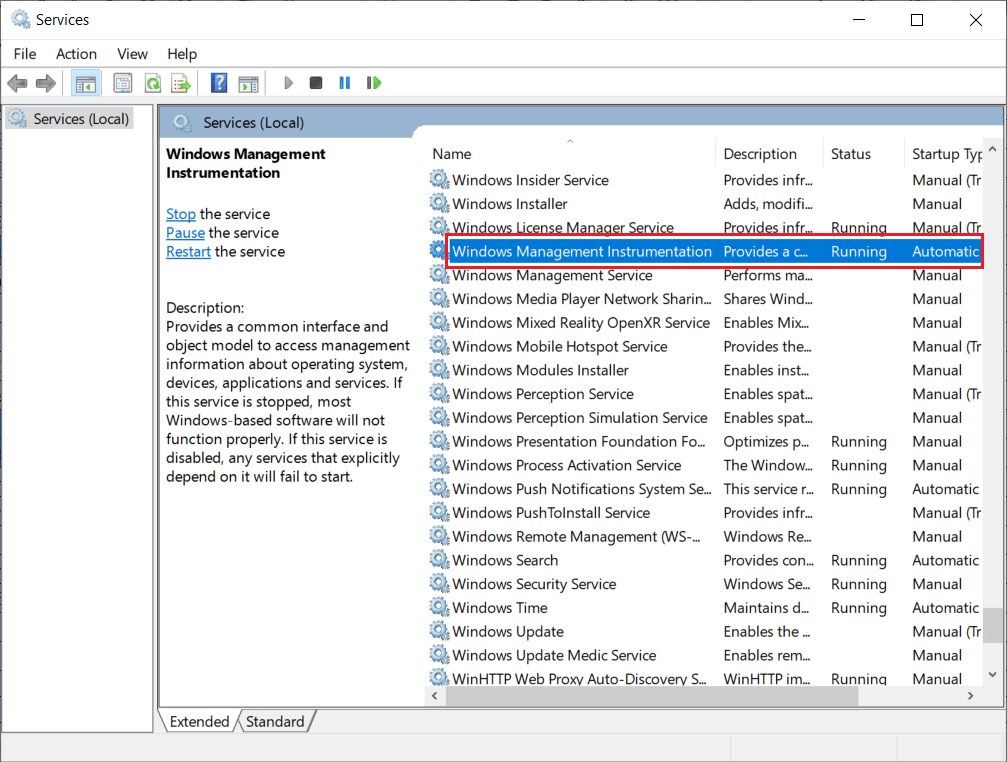
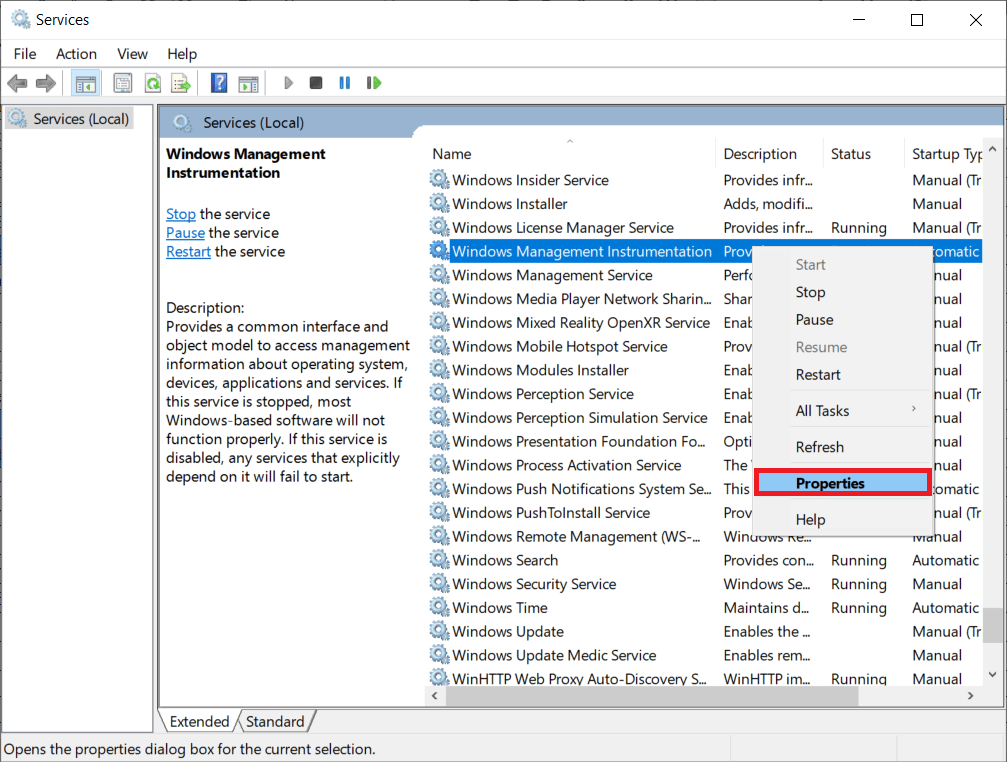
4. Right-click on it and select Properties.
5. Select the Startup type to Automatic.
Note: If the Service status is Stopped, click on the Start button. If the Service status is Running, click on Stop and Start it again.
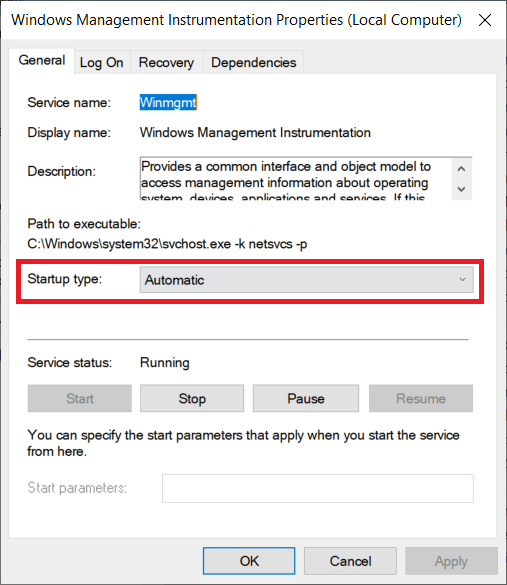
6. Click on Apply > OK to save the changes.
7. Similarly, enable the following Windows services by repeating the above steps:
- DHCP Client
- Network Connections
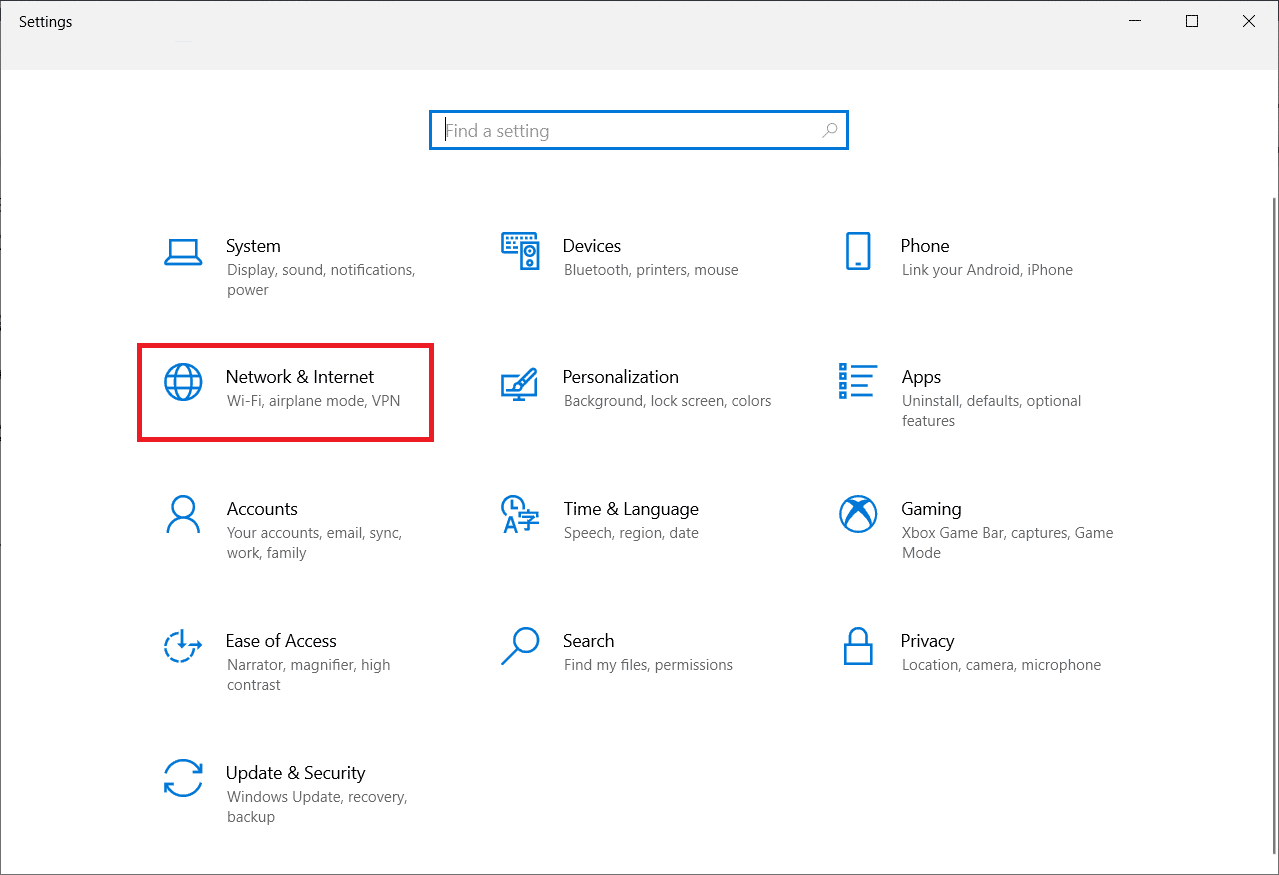
Method 8: Remove Third-party VPN Clients
Many users have been seen to face the issue of VPN error Hamachi due to conflicting software on their system. Using third-party VPN clients can sometimes cause a disturbance with Hamachi. Hence, to come over the problem, uninstalling third-party VPN clients is suggested.
1. Open Settings by pressing Windows + I keys simultaneously.
2. Select Network & Internet setting.
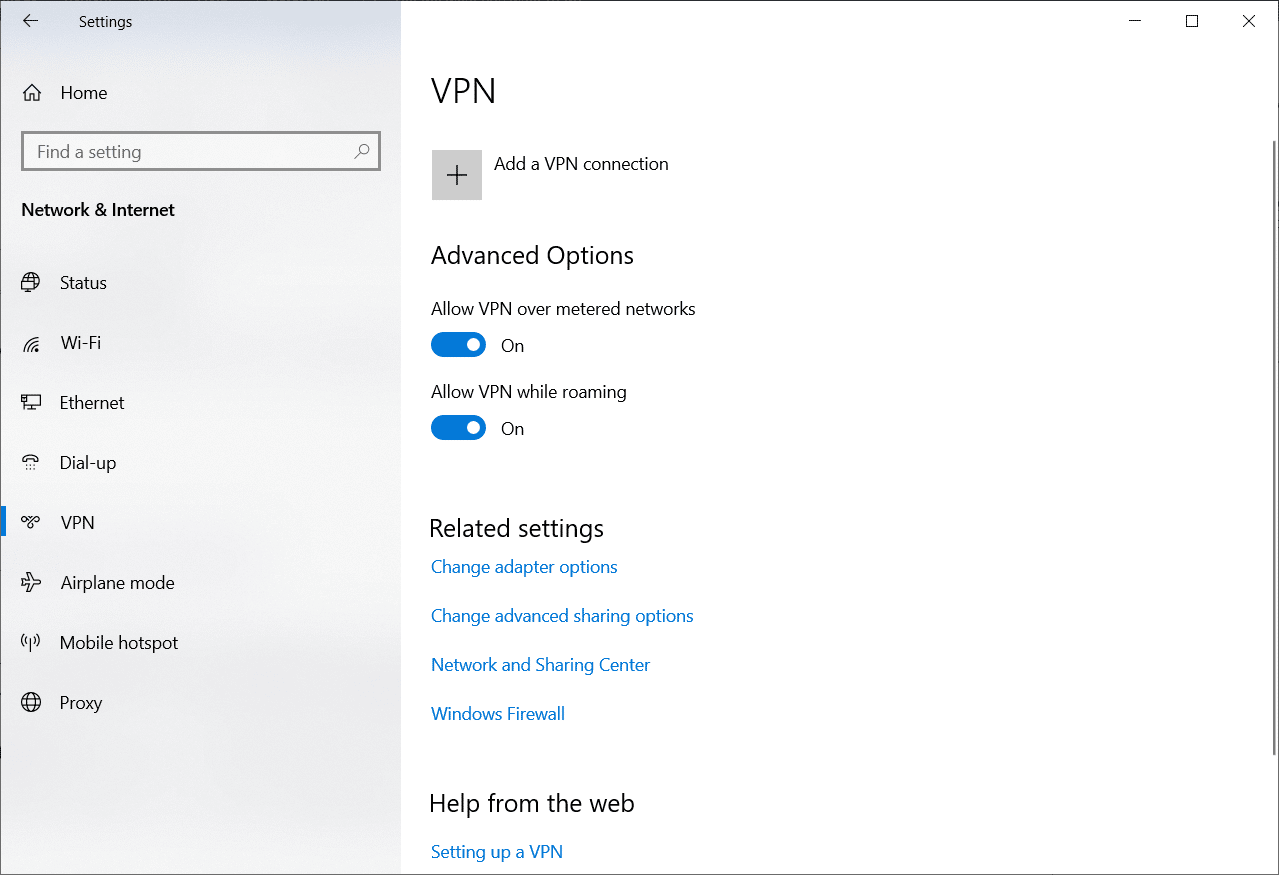
3. Click on VPN on the left pane.
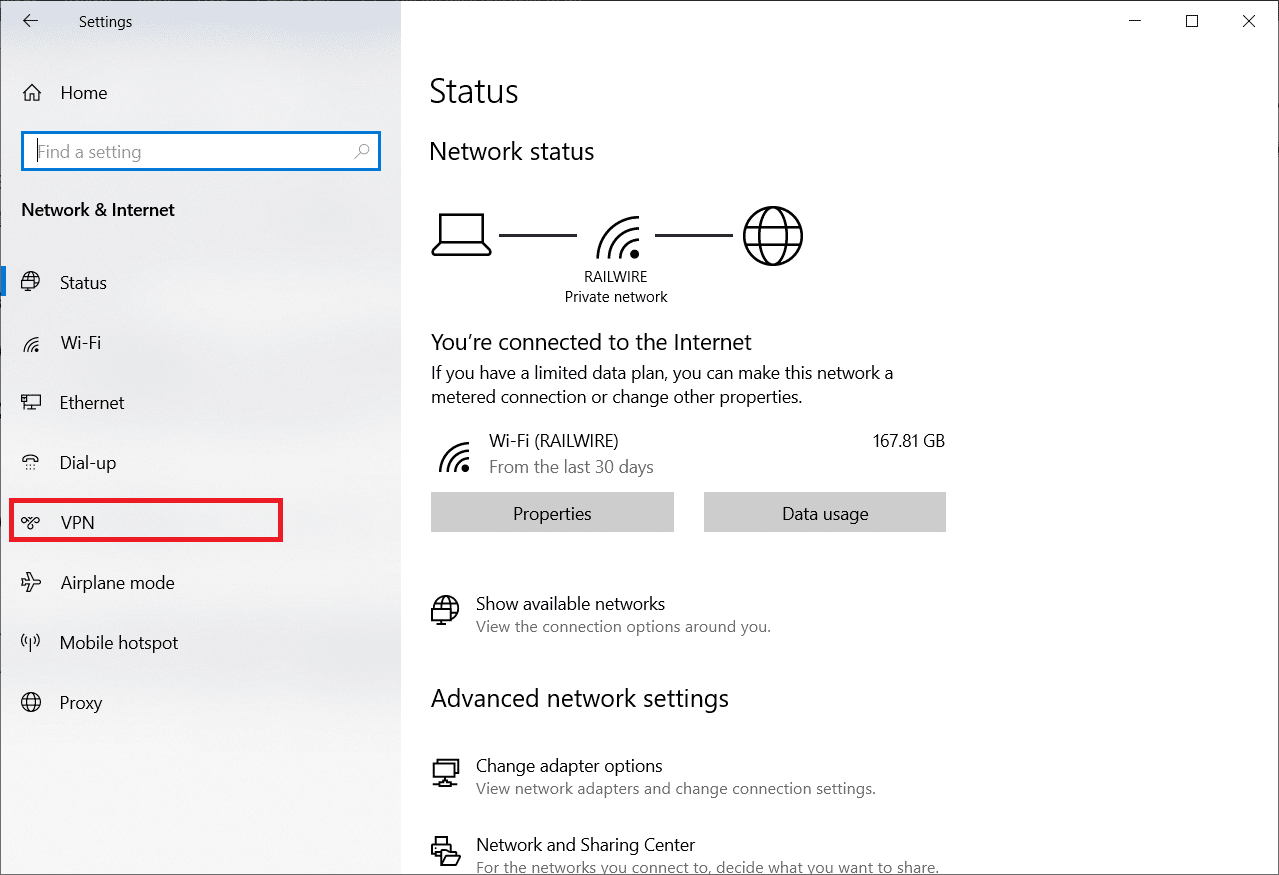
4. Remove third-party VPN clients.
5. Once removed, follow our guide on How to set up a VPN on Windows 10 to set up Hamachi VPN.
Also Read: 15 Best VPN for Google Chrome To Access Blocked Sites
Method 9: Disable Multiplexor Protocol
Microsoft Network Adapter Multiplexor Protocol has been seen creating issues in Hamachi, leading to Hamachi VPN status error. Therefore, disabling it can help the users get rid of the problem.
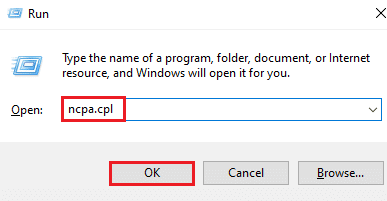
1. Launch the Run dialog box.
2. Type ncpa.cpl and click on OK to launch the Network Connections window.
3. Right-click on your local connection/Wi-Fi and select Properties.
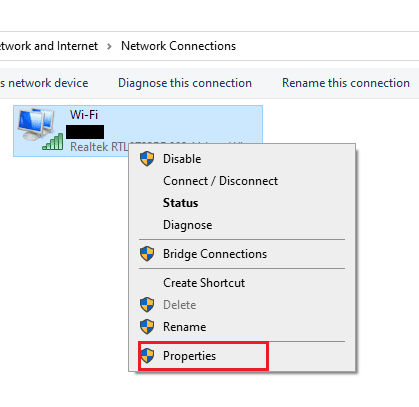
4. Uncheck the Microsoft Network Adapter Multiplexor Protocol and click on OK.

Method 10: Disable Windows Firewall (Not Recommended)
In addition to the Antivirus program, the Windows Defender Firewall might prevent access to Hamachi VPN on your PC. So, try to disable the Windows Defender Firewall as instructed in our guide How to Disable Windows 10 Firewall and follow the steps accordingly.
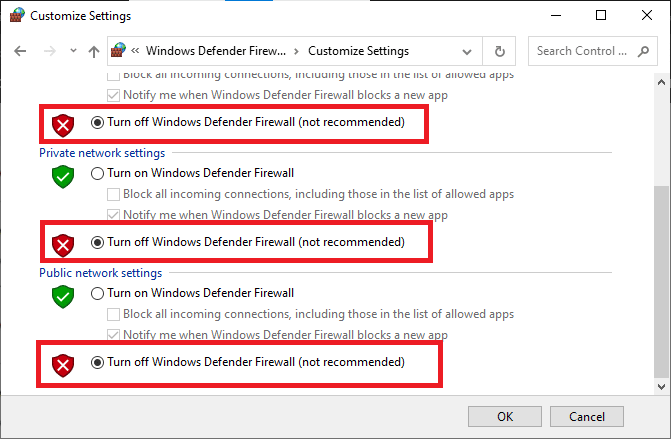
Note: Once the issue is resolved after disabling Windows Defender Firewall, ensure you re-enable the Firewall suite. A computer without a security suite is always prone to malware attacks.
Also Read: How to Uninstall McAfee LiveSafe in Windows 10
Method 11: Disable Antivirus Temporarily (If Applicable)
One other possible reason that causes the Hamachi VPN status error is the antivirus. When your antivirus program detects Hamachi files and folders as a threat, you will face several conflicts. So, read our guide on How to Disable Antivirus Temporarily on Windows 10 and follow the instructions to implement the same.
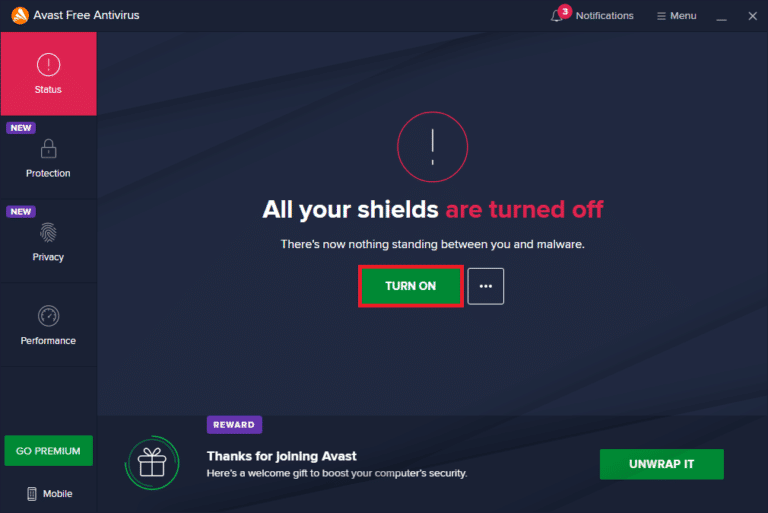
After fixing the discussed Minecraft issue on your Windows 10 PC, make sure to re-enable the antivirus program since a system without a security suite is always a threat.
Method 12: Reinstall Hamachi
If nothing works out for you, then uninstalling and then reinstalling the Hamachi app is the best way you can resolve the VPN error. To do so, follow the steps mentioned below:
1. Open Settings by pressing Windows + I keys simultaneously.
2. Click on Apps setting.
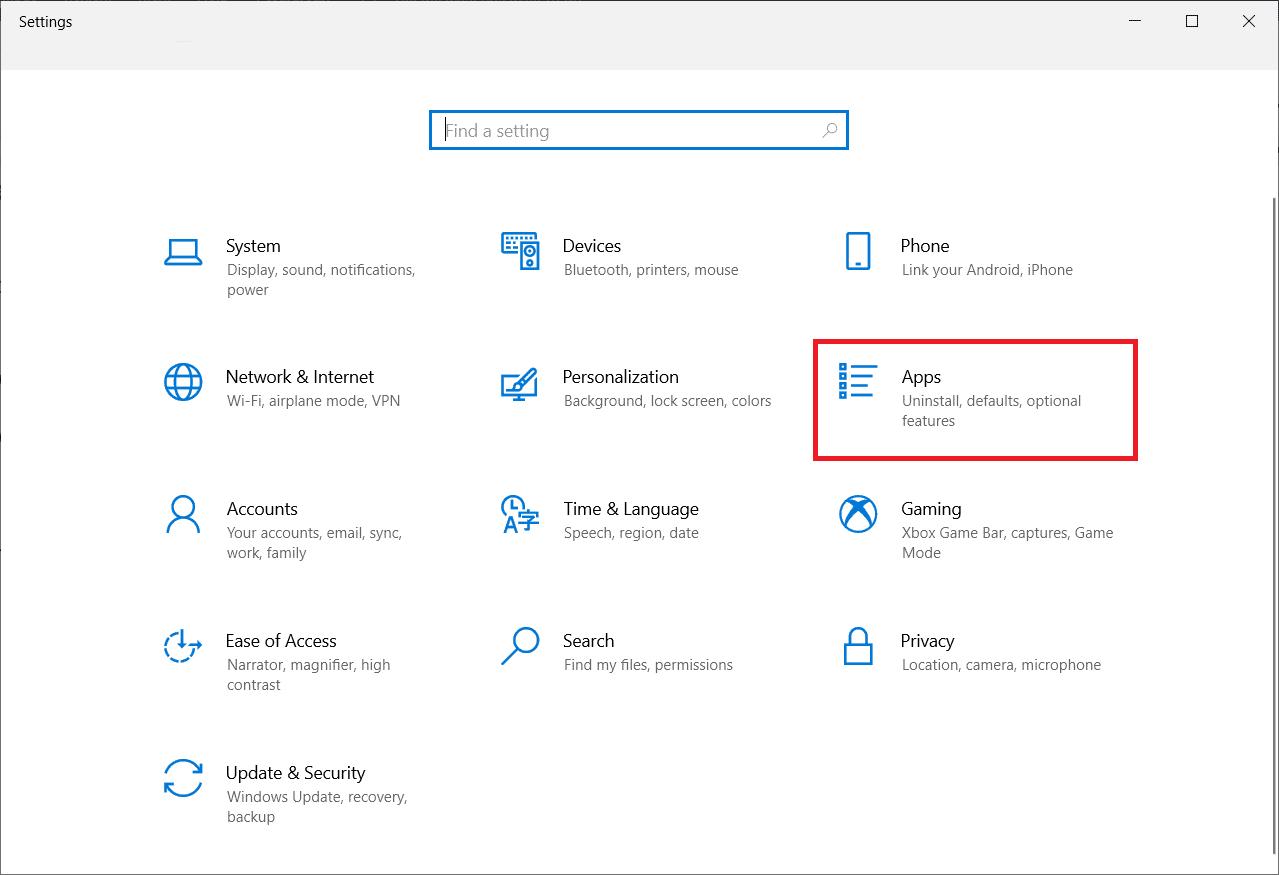
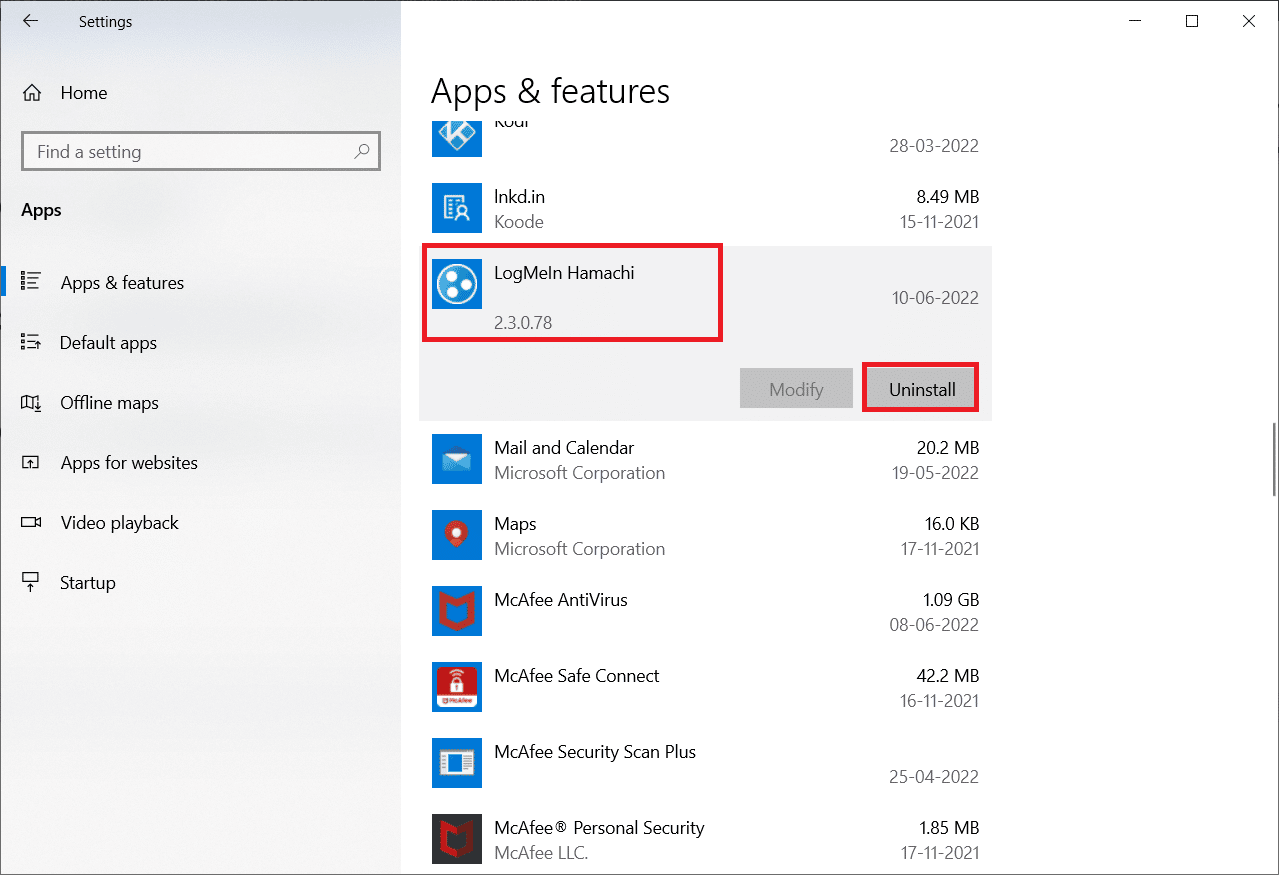
3. Select LogMeIn Hamachi and click on Uninstall.
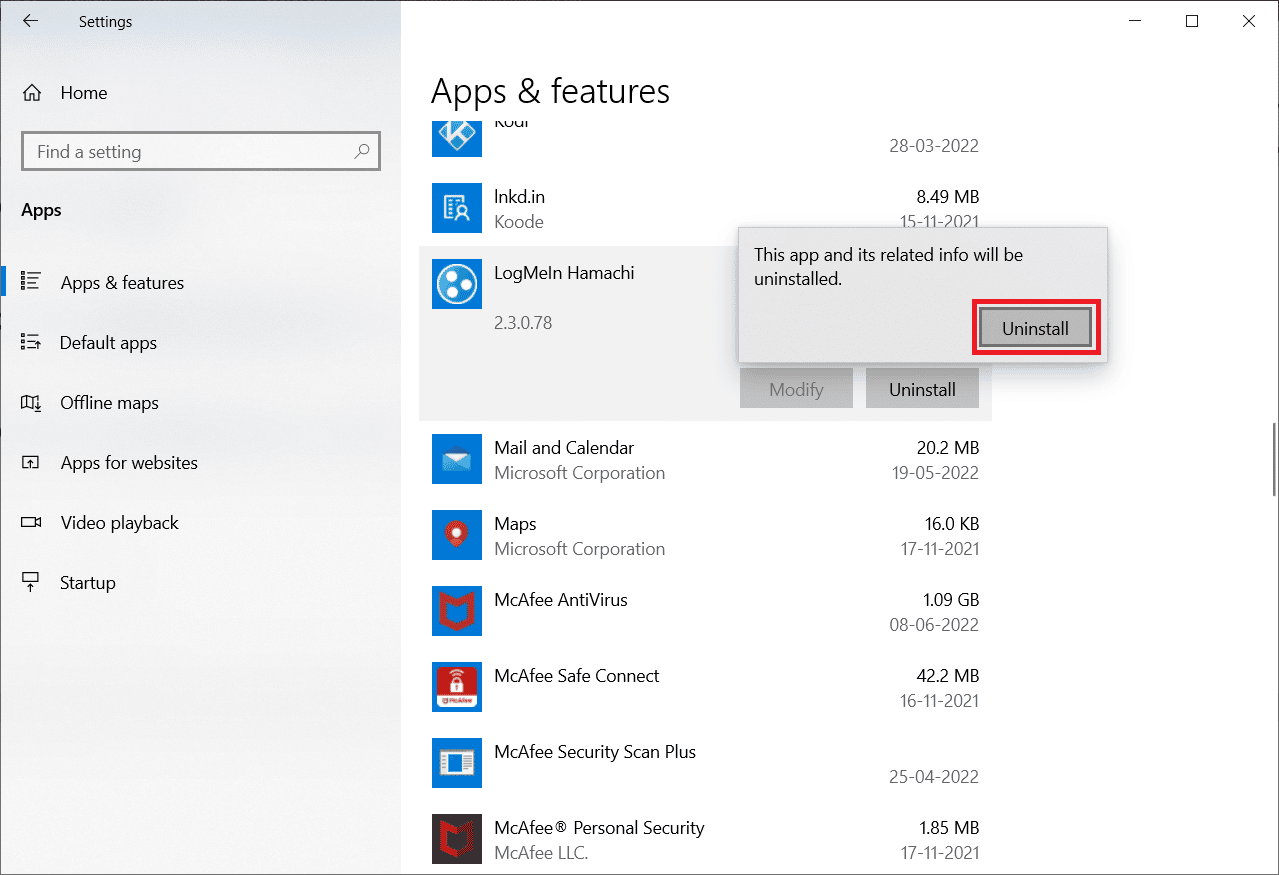
4. Then, click on Uninstall in the pop-up.
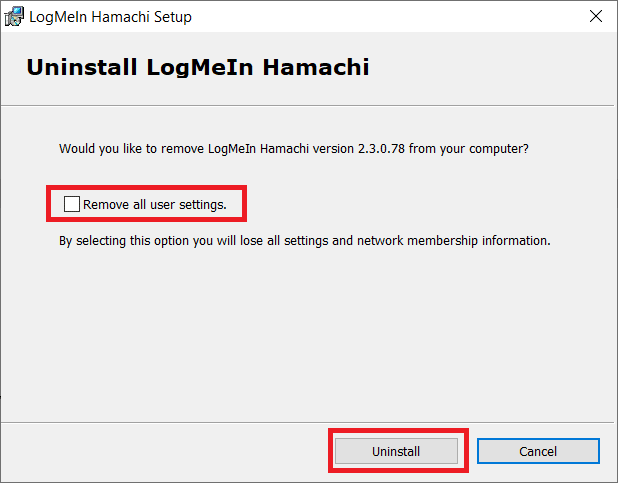
5. Click on Yes in the User Account Control prompt.
6. Select Remove all user settings and click on Uninstall.
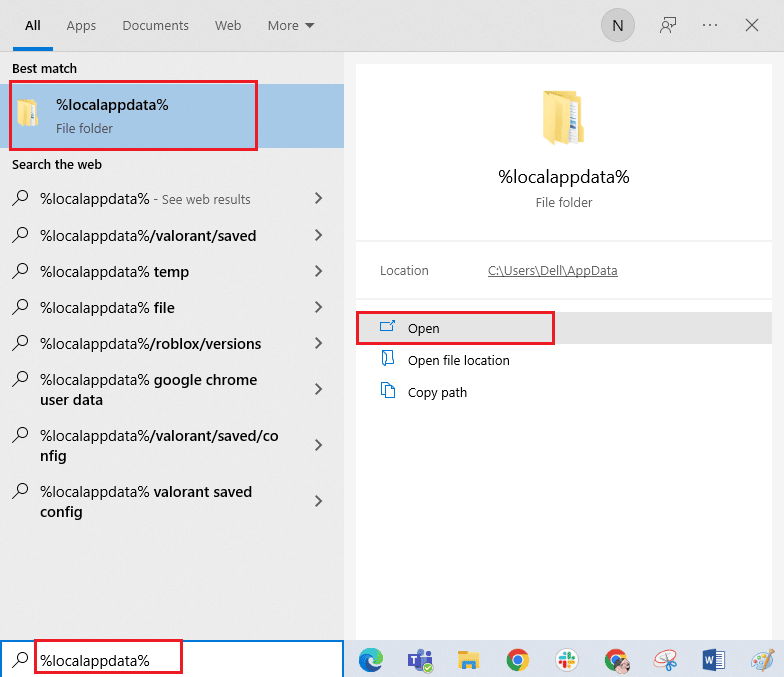
7. Hit the Windows key, type %localappdata%, and click on Open to launch AppData Local folder.
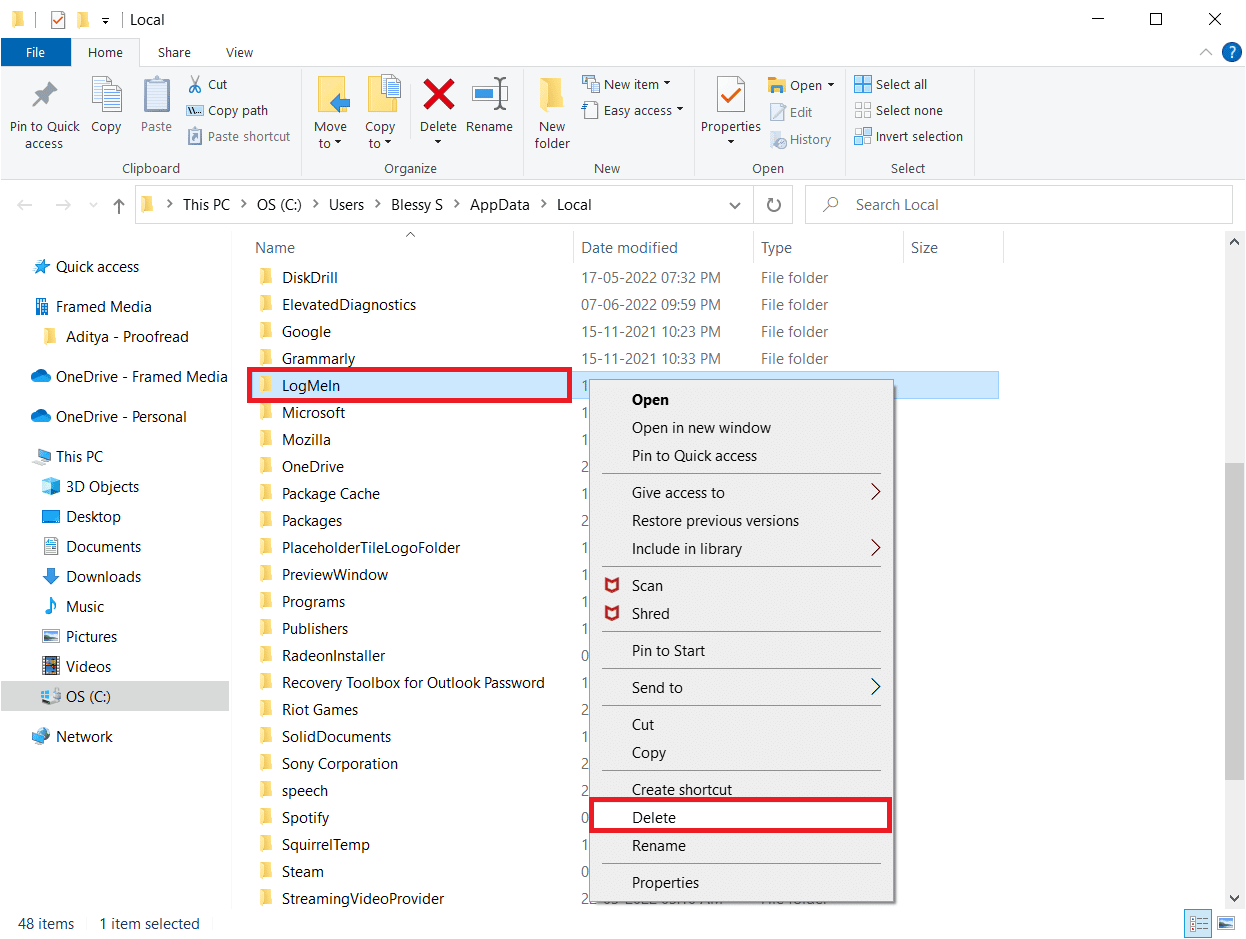
8. Right-click on the LogMeIn folder and select the Delete option.
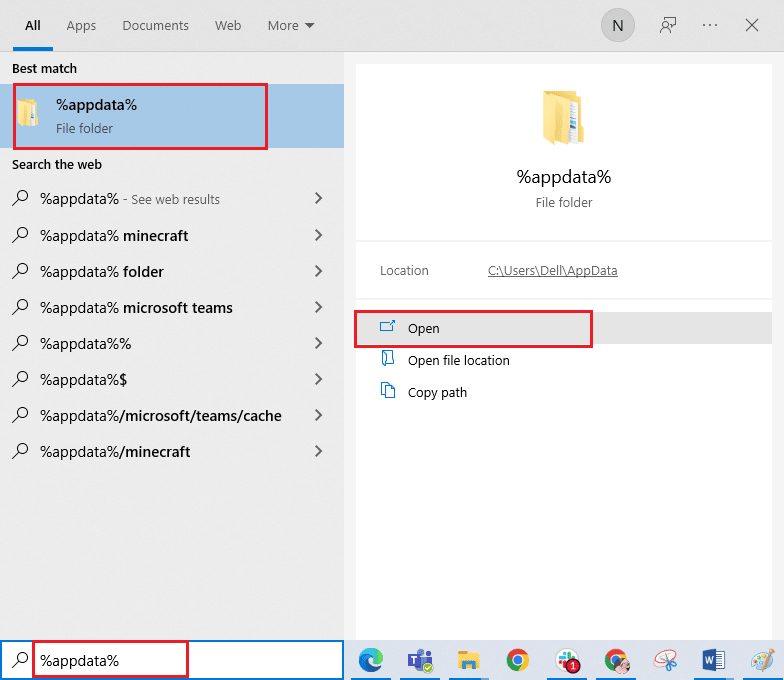
9. Again, press the Windows key and type %appdata%, then click on Open to navigate to the AppData Roaming folder.
10. Now, delete the LogMeIn folder if there are any as shown in Step 8.
11. After the uninstallation, visit the Hamachi Official site.
12. Click on the Download now button.

13. Click on the downloaded installer file at the bottom.

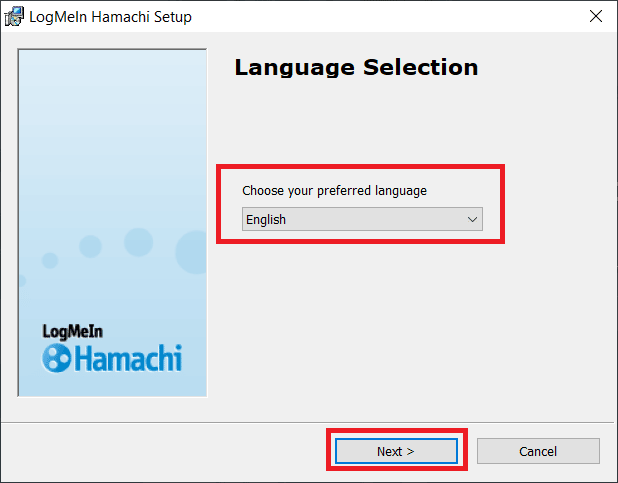
14. Choose your preferred language and click on Next > in the setup window.
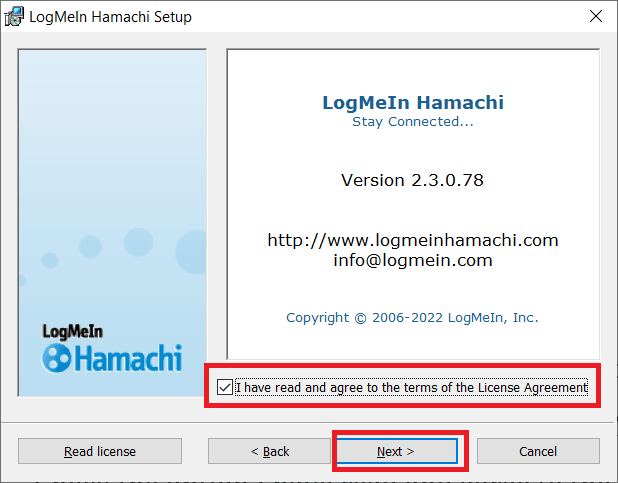
15. Check the option I have read and agree to the terms of the License Agreement and click on Next >.
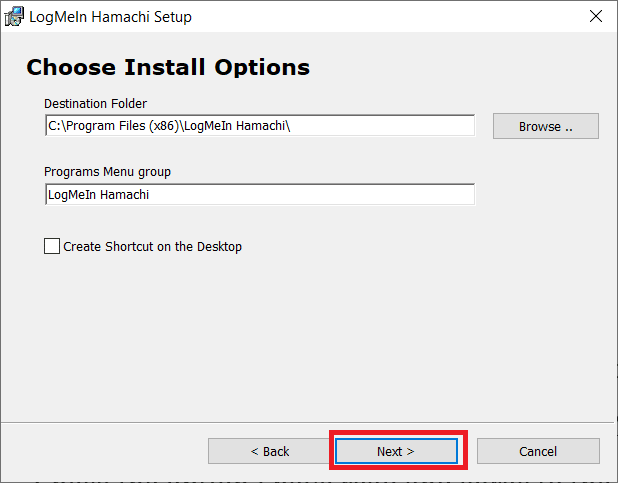
16. Next, click on Next > in the following window.
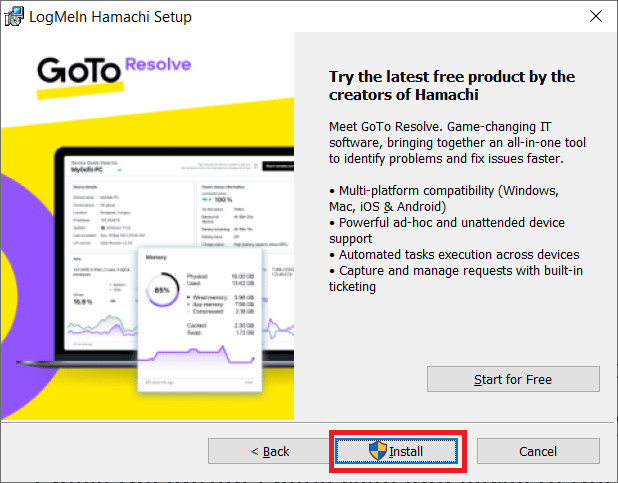
17. Then, click on Install in the next window.
18. Click on Yes in the User Account Control prompt.
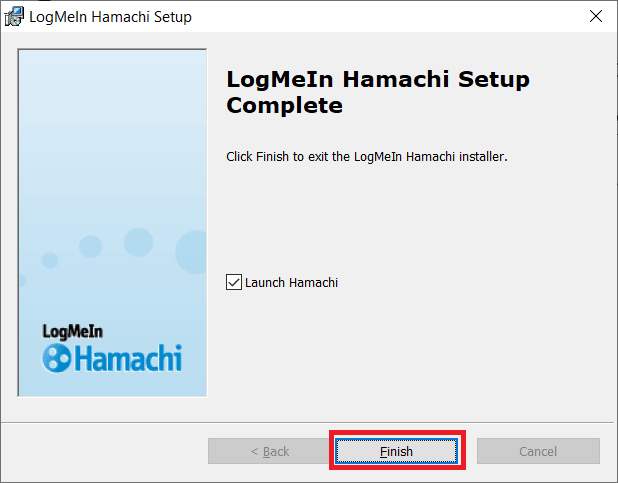
19. Now, click on Finish to complete the installation process.
Also Read: Top 10 Hamachi Alternatives for Virtual Gaming (LAN)
Method 13: Use Alternate VPN
Still, if you are unable to fix Hamachi VPN status error, you can try using an alternate VPN. Although there are so many free VPNs available over the internet, you are advised to use a reliable VPN service to enjoy premium versions and features. One of the best VPNs is NordVPN. Follow our guide on How to Get NordVPN Account Free and set up the VPN. You can also try other VPNs such as ExpressVPN, SurfShark, and Proton VPN.

Recommended:
We hope that this guide was helpful and you were able to fix Hamachi VPN error in Windows 10. Let us know which method worked the best for you. If you have any queries or suggestions, then feel free to drop them in the comments section below. Also, let us know what you want to learn next.