Connect to a Wireless Display with Miracast in Windows 10

If you want to mirror your PC screen to another device (TV, Blu-ray player) wirelessly than you can easily do so using Mircast Technology. This technology helps your PC, laptop, or tablet to project your screen to the wireless device (TV, projectors) that supports the Mircast technology. The best thing about this technology is that it allows sending up to 1080p Hd video which can get the job done.
Miracast requirements:
Graphics driver must support Windows Display Driver Model (WDDM) 1.3 with Miracast support
Wi-Fi driver must support Network Driver Interface Specification (NDIS) 6.30 and Wi-Fi Direct
Windows 8.1 or Windows 10
There are few problems with this such as compatibility or connection issues but as the technology evolves these shortcomings will long be gone. So without wasting any time let’s see How to Connect to a Wireless Display with Miracast in Windows 10 with the help of the below-listed tutorial.
Connect to a Wireless Display with Miracast in Windows 10
Make sure to create a restore point just in case something goes wrong.
Method – 1: How to check if Miracast is supported on your device
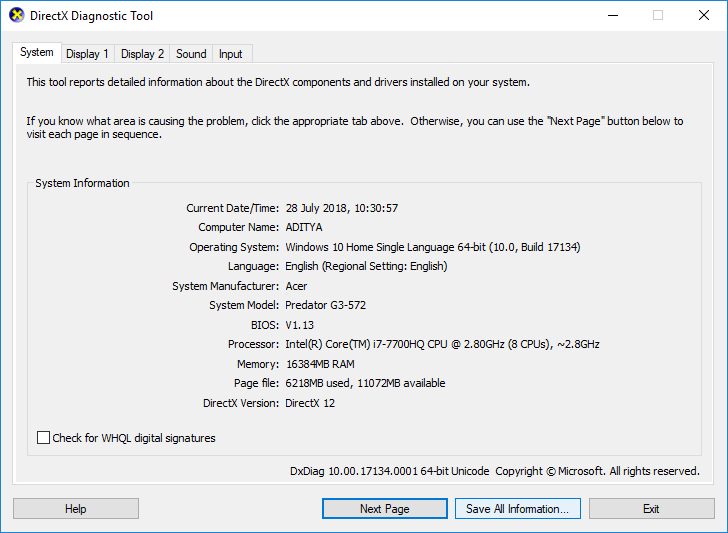
1. Press Windows Key + R then type dxdiag and hit Enter.

2. Once the dxdiag window open, click on “Save All Information” button located at the bottom.
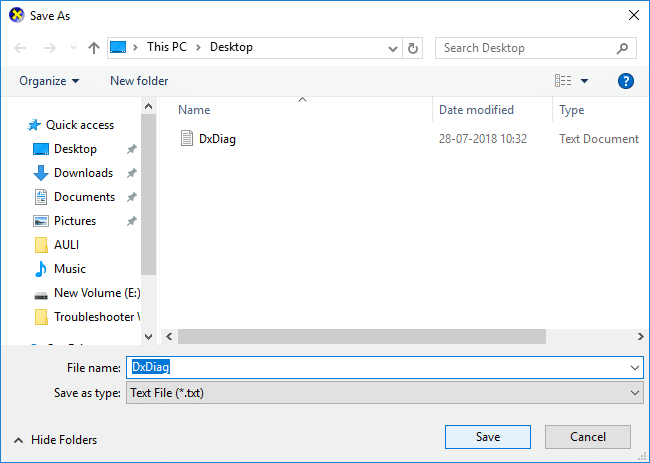
3. The save as dialog box will appear, navigate to where you want to save the file and click Save.
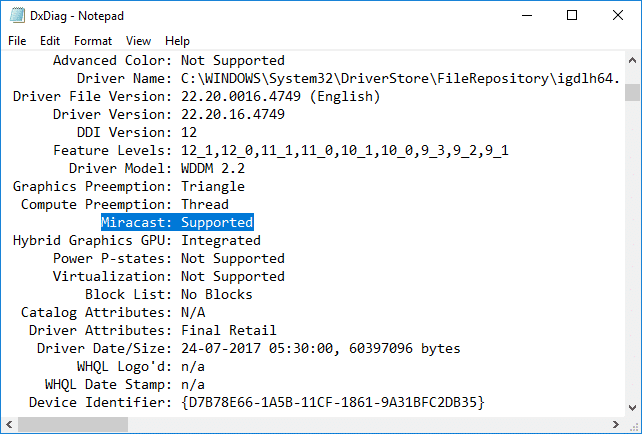
4. Now open the file which you just saved, then scroll down and look for Miracast.
5. If Mircast is supported on your device that you will see something like this:
Miracast: Available, with HDCP
6. Close everything and you can continue to set up and use Micrcast in Windows 10.
Method – 2: Connect to a Wireless Display with Miracast in Windows 10
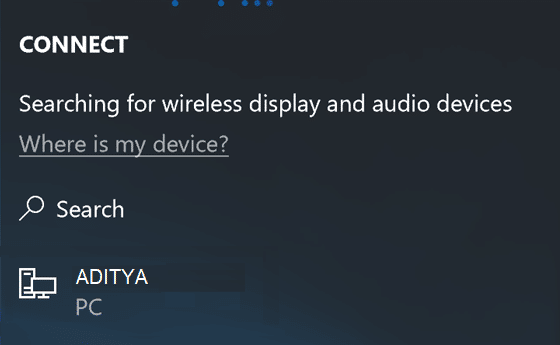
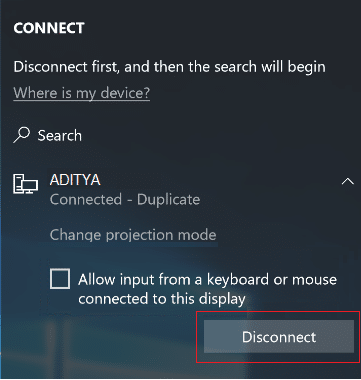
1. Press Windows Key + A to open Action Center.
2. Now click on Connect quick action button.
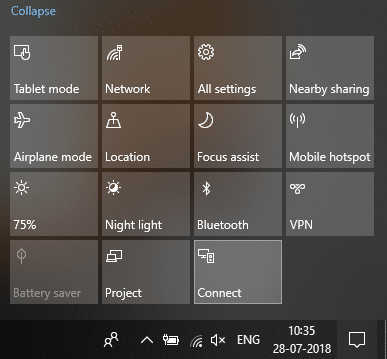
Note: You can directly access the Connect screen by pressing Windows Key + K.
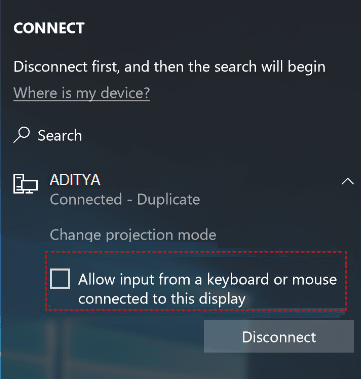
3. Wait for a few seconds in order for the device to get paired. Click on the wireless display you want to project to.

4. If you want to control your PC from the receiving device simply checkmark “Allow input from a keyboard or mouse connected to this display“.
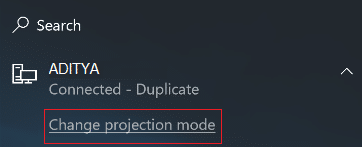
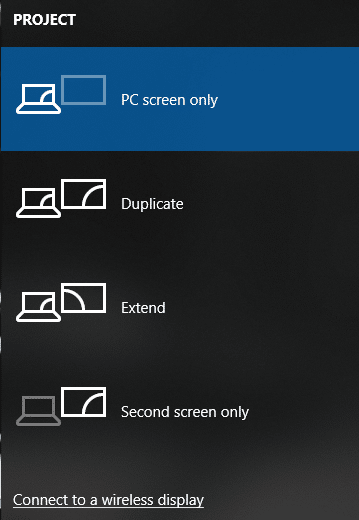
5. Now click “Change projection mode” and then choose one of the below options:
Duplicate: You’ll see the same things on both screens in Windows 10.
Extend (default) You'll see everything spread over both screens, and you can drag and move items between the two.
Second screen only You’ll see everything on the connected screen. Your other screen will be blank.
6. If you want to stop projecting then simply click on Disconnect button.
And this is how you Connect to a Wireless Display with Miracast in Windows 10 without using any third-party tools.
Method – 3: Project your Windows 10 PC to another device
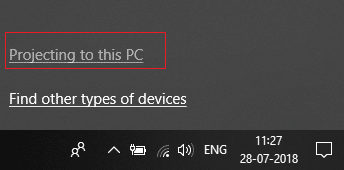
1. Press Windows Key + K then click on “Projecting to this PC” link at the bottom.
2. Now from the “Always off” drop-down select Available everywhere or Available everywhere on secure networks.
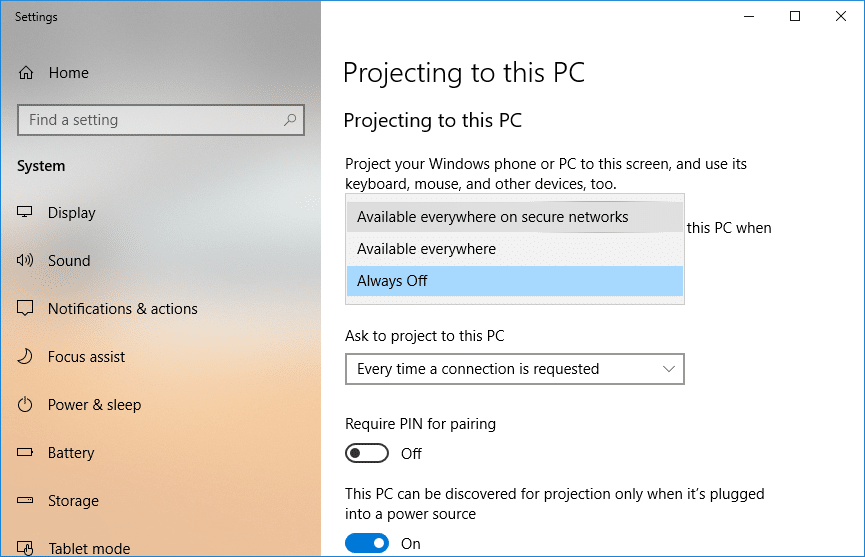
3. Similarly from “Ask to project to this PC” drop-down select First time only or Everytime connection is requested.
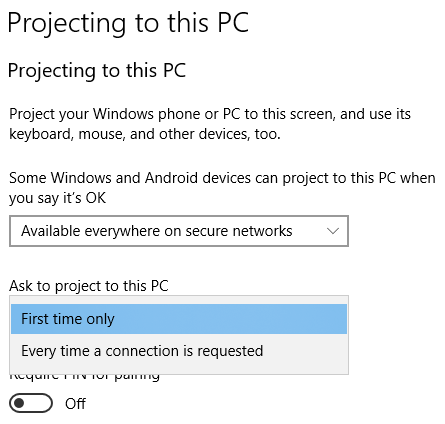
4. Make sure to toggle “Require PIN for pairing” option to OFF.
5. Next, you can decide if you want to only project when the device is plugged in or not.

6. Now click Yes when Windows 10 pops up a message that another device wants to project to your computer.
7. Finally, the Windows connect app will launch where you could drag, resize or maximize the window.
Recommended:
That’s it you have successfully learned How to Connect to a Wireless Display with Miracast in Windows 10 but if you still have any questions regarding this post then feel free to ask them in the comment’s section.