- in Windows 10 by Admin
Why Wuauserv Causes High CPU Usage and How to Fix It

Many Windows system processes are considered essential for running a safe and fully working PC. Wuauserv is arguably one of the most important—this service (also known as the Windows Update service) keeps your PC up-to-date with the latest feature releases and bug fixes.
Just like ntoskrnl.exe and other important system services, wuauserv requires priority access to your system resources from time to time. Unfortunately, this does mean that you’ll occasionally see wuauserv report high CPU usage. If that’s happening to you and you’re looking for a fix, here’s what you’ll need to do.
Why Does Wuauserv Cause High CPU Usage?
The Windows Update service (or wuauserv) is, as the name suggests, responsible for ensuring that your Windows PC is up-to-date. Urgent security and bug fixes, as well as new features and system enhancements, are made available through the Windows Update system.
Windows will usually take care of these updates without you even noticing, although you may need to fix a stuck update now and then. If processes related to wuauserv (such as wuauclt.exe) report high CPU usage in Task Manager for a sustained period, however, that could indicate issues with your PC that you’ll need to troubleshoot further.

For most people, this could point to an update that’s currently installing—you’ll just need to wait that one out. It could also point to difficulties with updates not installing properly, but you may also have corrupt system files that are causing services like wuauserv to stop working properly.
If that’s the case, you’ll need to check and repair your system files or, in a worst case scenario, consider resetting Windows 10 to factory settings. Of course, if your PC is struggling, you may need to consider upgrading your PC to give it more processing power.
Check Your Windows Update Status
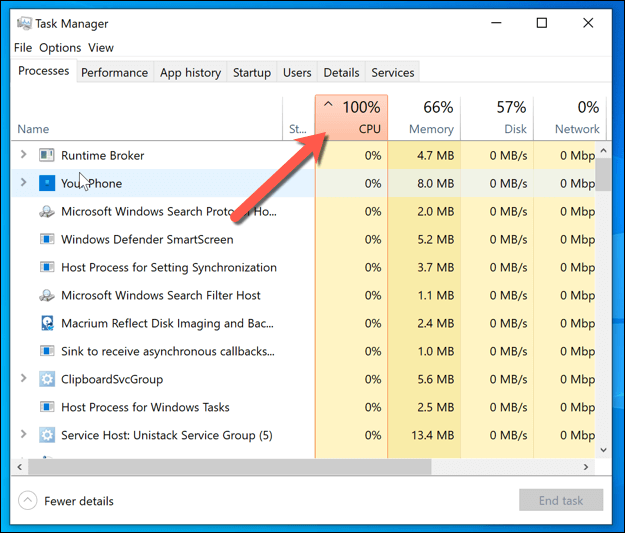
High CPU usage has a root cause—after all, it isn’t high for no reason. If wuauserv and related processes (like wuauclt.exe or svchost.exe) are reporting high CPU usage on your PC, then Windows Update is running.
The likely answer is that Windows Update is doing what it does best—downloading and installing updates. Some of the updates (especially larger feature updates) take time to download and install, requiring additional system resources to complete the process. If that’s the case, don’t panic.
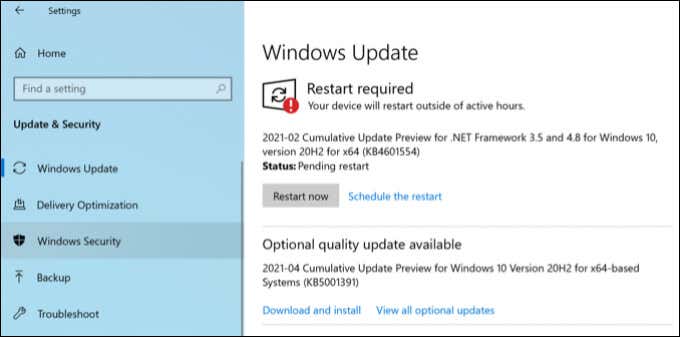
Allow Windows Update to complete the update process and, when instructed to, restart your PC to finish. You can check your Windows Update status (including whether any updates are currently being downloaded or installed) in the Windows Settings menu.
- To check this, right-click the Start menu and select Settings.

- In the Windows Settings menu, select Update & Security > Windows Update. From here, you’ll see the current status of the Windows Update service, including whether any updates are available, being downloaded, or are currently being installed.
If Windows Update is using a significant amount of your system resources without any sign of usual activity (such as downloading or installing updates), you’ll need to continue investigating a possible fix for the problem using the steps below.
Check and Repair Your System Files
Imagine your Windows installation is like an expensive carriage clock. It may look simple, but underneath, all kinds of cogs, levers, and fixtures come together to create the system you’re using.
If one of those cogs is broken or damaged, however, the whole system stops working. In this instance, the cogs that break are your system files. Corrupt system files cause problems, whether it’s general system instability (including high CPU usage) or more serious BSOD crashes and errors.
The Windows Update service is one of these cogs. If you’re seeing issues with Windows Update, you should check your system files for errors and, if they’re found, fix them. You can do this using the System File Checker tool in Windows PowerShell.
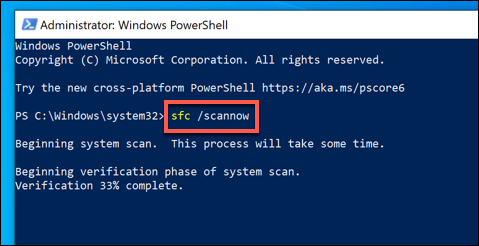
- To start, right-click the Start menu and select Windows PowerShell (Admin).

- In the PowerShell window, type /sfc scannow and select enter to run the command. This will run an integrity check on your system files, comparing it against a standard Windows installation image and resolving any corrupt files it finds automatically, but watch out for any additional on-screen instructions.
Disable Windows Update Delivery Optimization
If your local network has several Windows 10 PCs, you might notice an increase in CPU usage from the wuauserv service and related processes. This is due to the Delivery Optimization system, which helps to limit the amount of bandwidth used for Windows Update downloads by sharing the files across your network.
If you have one PC that downloads a major update, this update is automatically shared with other Windows PCs on your network using Delivery Optimization. The same system can also be used to provide updates to other internet-based devices, thanks to the peer-to-peer nature of the system.
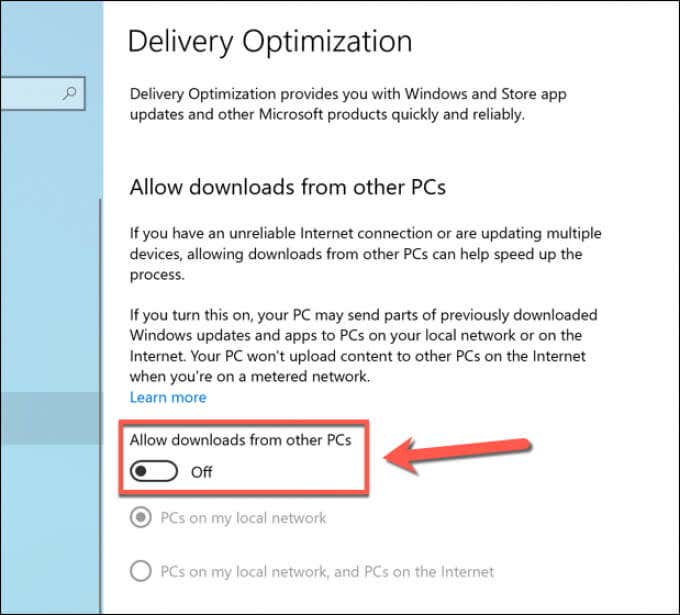
This can eat into your available internet bandwidth (including any data caps on your connection), but it can also cause spikes in your CPU usage when the content is shared with other devices. To limit this, you can stop Delivery Optimization entirely in Windows Settings.
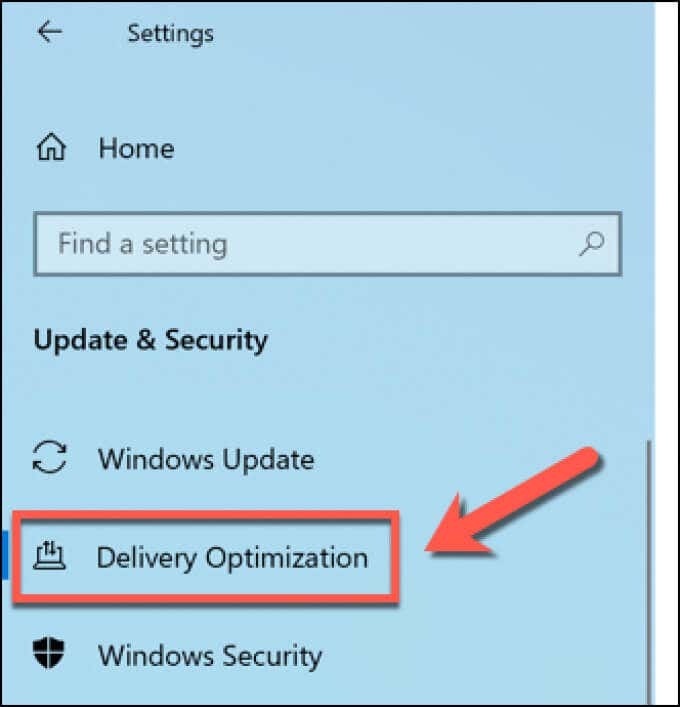
- To start, right-click the Start menu and select Settings.

- In the Windows Settings menu, select Update & Security > Delivery Optimization.
- Select the Allow downloads from other PCs slider in the Delivery Optimization menu, switching it to the Off position. Alternatively, leave the slider enabled, but choose PCs on my local network below to limit update file sharing to other Windows PCs on your local network.
Once you’ve disabled Delivery Optimization, restart your PC to ensure the changes have taken effect.
Check for Malware Using Microsoft Defender
If your PC is infected with viruses or malware, the impact on your PC could be significant. Stopping Windows Updates is one possible route for a possible malware infection to cause damage, especially as security updates can stop certain types of malware from having an impact.
If that’s the case, you’ll need to scan your PC for malware. While third-party tools are available for this, the best method is to run a boot scan of your PC using the built-in Microsoft Defender.
This fully-fledged antivirus and anti-malware solution can remove most stubborn malware infections from your PC. You can only use Microsoft Defender if you’re not already using a third-party antivirus, however. If you are, consider using that tool’s boot scanning features instead as an alternative.
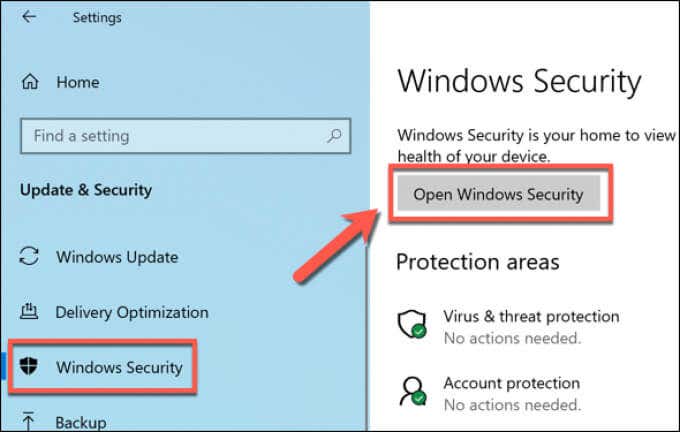
- To start, right-click the Start menu and select Settings.
- In the Settings menu, select Update & Security > Windows Security > Open Windows Security.
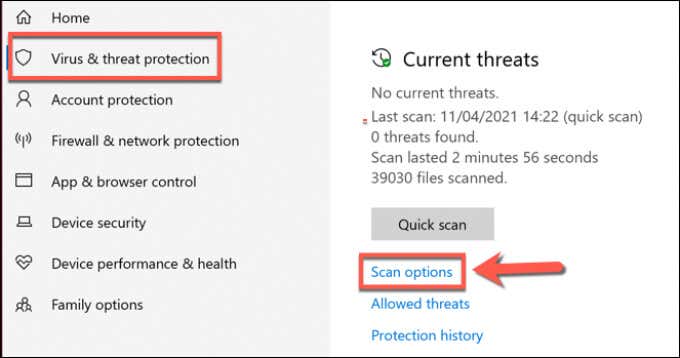
- In the Windows Security window, select Virus & threat protection > Scan options. A list of additional scanning methods for Microsoft Defender will appear below.
- Select the Microsoft Defender Offline scan option listed, then select Scan now to schedule it.
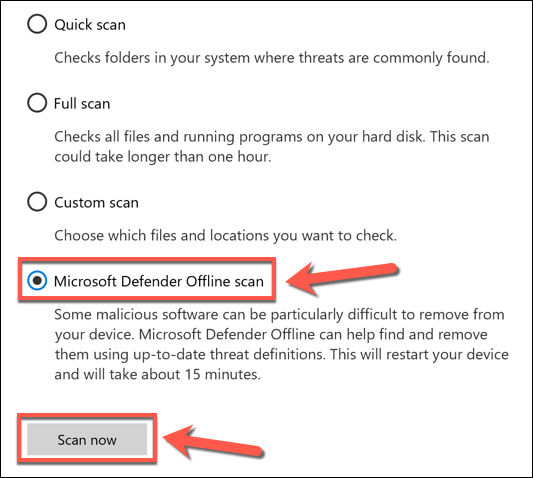
- Windows will prompt you to close any open windows, save your work, and prepare to restart. Select Scan to proceed.
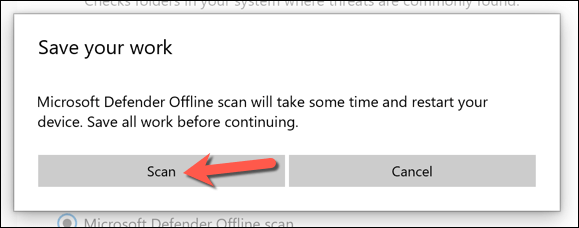
After a few moments, Windows will restart and boot into the Microsoft Defender scanning menu. Microsoft Defender will check your PC for malware—follow any additional instructions on-screen to confirm the removal, quarantine, or possible fix for any infected files that it finds.
Stop Automatic Windows Updates
While it isn’t possible to completely disable the Windows Update service and prevent updates from installing, you can stop them temporarily. Pausing these updates can allow you to troubleshoot things further, especially if a specific update is causing you problems.
- Start by right-clicking the Start menu and selecting Settings.
- In the Settings menu, select Update & Security > Windows Update. You can select to pause the Windows Update service for a week by selecting the Pause updates for 7 days option. Alternatively, select Advanced Options to choose a longer period.

- Use the Pause updates drop-down menu in Advanced Options to select a date to resume Windows updates. The change will apply automatically.
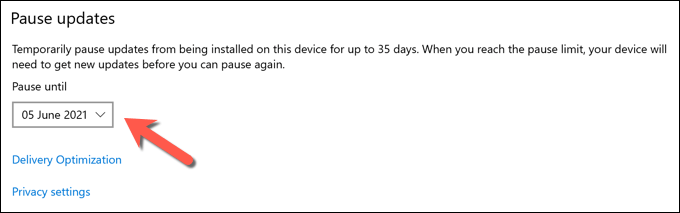
If you delay your updates using the Advanced Options menu, you’ll need to install the missed updates once the date passes before you can repeat the process.
Keeping Windows 10 Updated
If the wuauserv service is causing high CPU usage on your PC, it probably points to some overdue system maintenance. Windows Update is part of that process, but if an update seems troublesome, you may need to stop the Windows Update installation to investigate and resolve any underlying issues first.
You can also think about keeping your device drivers updated automatically using Windows Update or a third-party app, although certain components (including your graphics card) may require you to download the latest drivers manually. If you’re worried about out-of-date software, you can also update your apps automatically.