How to Fix Icons on Desktop
Many of us with a large number of Desktop icons would set them in various preferred locations on our Windows desktop. Such as daily needed folders in the bottom right corner or crucial excel and word files in the top right corner. Over time, more desktop icons were added, and we were accustomed to their default placement. Sometimes, your Desktop icons rearrange themselves and you will have a lot of trouble remembering and rearranging them back to their original positions. This is due to the Auto Arrange feature. We bring to you a helpful guide that will teach you how to fix icons on Desktop and disable Desktop icons auto arrange.
![]()
How to Fix Icons on Windows 10 Desktop
Windows 10 is incapable of remembering the location of Desktop icons. If your icons are put in different sections of your desktop, yet when you restart your PC, they will automatically reorganize to some preset format. Thus, you will encounter the problem of Desktop icons rearrange themselves in Windows 10.
We recommend that you create a backup of your desktop icon locations so that you can restore them if they get scrambled again. You can use any trusted third-party app to do so.
Why are My Desktop Icons Shuffled?
- When you change screen resolutions particularly when playing games and then re-adjust the previous resolution, Windows automatically relocates the icons.
- This might also happen while adding a new secondary monitor.
- When you add a new desktop icon, it may cause the icons to rearrange and organize themselves in Name or Date order.
- If you have a habit of turning off your display when you leave your desk, turning the screen back on will cause the desktop icons to reorganize.
- This commonly occurs when the Explorer.exe process in Windows 10 restarts.
- It is also possible that the video card is not working properly. Screen resolutions might be changed at random due to a defective video card driver. All of the icons on the desktop will blend when the screen resolution changes.
Method 1: Disable Desktop Icons Auto Arrange
You may modify the icons by dragging them to the desired positions. But the most accurate way is to disable Auto arrange icons feature, as follows:
1. Right-click on an empty space on your Desktop.
2. Hover to the View option.
3. Now, uncheck the following options.
- Auto arrange icons
- Align icons to grid
Note: These options are only available when you keep shortcut icons on your desktop background.
![]()
Once you have positioned your icons where you want them, your desktop icons rearrange themselves problem will be fixed.
Also Read: Fix Windows 10 Taskbar Icons Missing
Method 2: Disallow Themes to Change Desktop Icons
By default, Windows allows themes to go helter-skelter with the desktop icons. If your theme is responsible for this, you may disable and prevent themes from altering icon positions by following the instructions below:
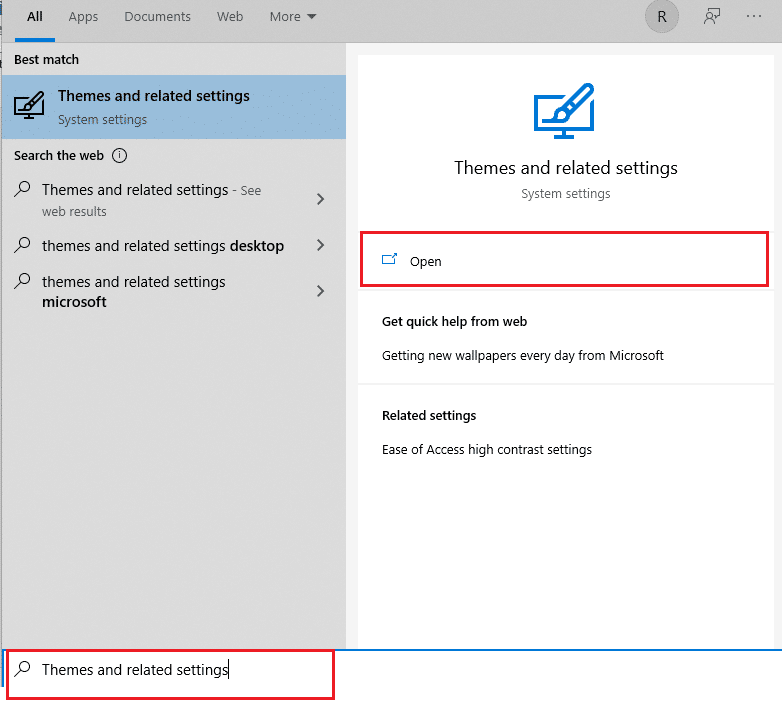
1. Press the Windows + Q keys simultaneously to open the Windows Search menu.
2. Type Themes and related settings and click Open on the right pane.
3. On the right side of the screen, choose the Desktop icon settings option under Related Settings, as shown.
![]()
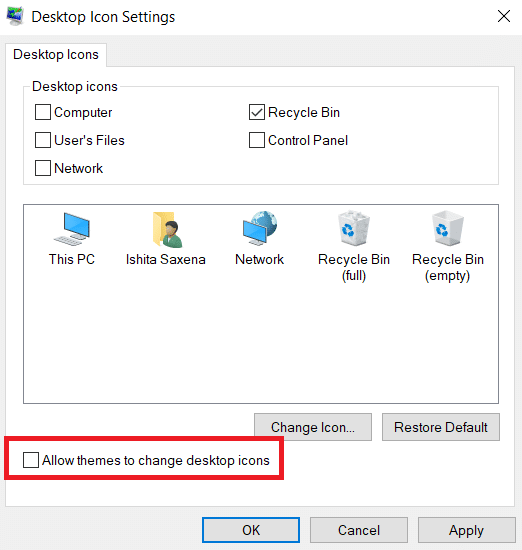
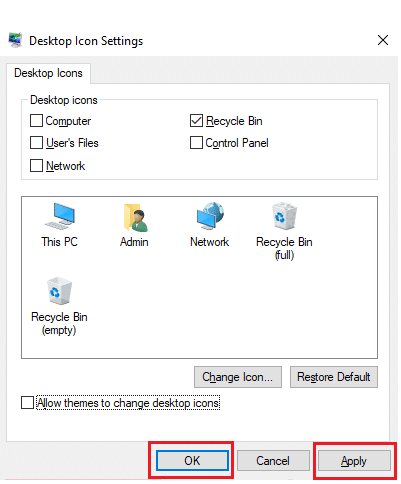
4. Uncheck the box next to Allow themes to change desktop icons.
5. Click Apply to save changes and click OK to exit.
6. If the icons are not rearranging right away, restart your PC. This will resolve Desktop icons auto arrange problem.
Also Read: How to Add Show Desktop Icon to Taskbar in Windows 10
Method 3: Rebuild Icon Cache
IconCache is a database file that stores icon copies on your Windows PC. If this file becomes damaged in any way, you must recreate it. Here’s how to fix icons on Desktop by rebuilding the icon cache files:
1. Firstly, save all your work and close all running applications and/or folders.
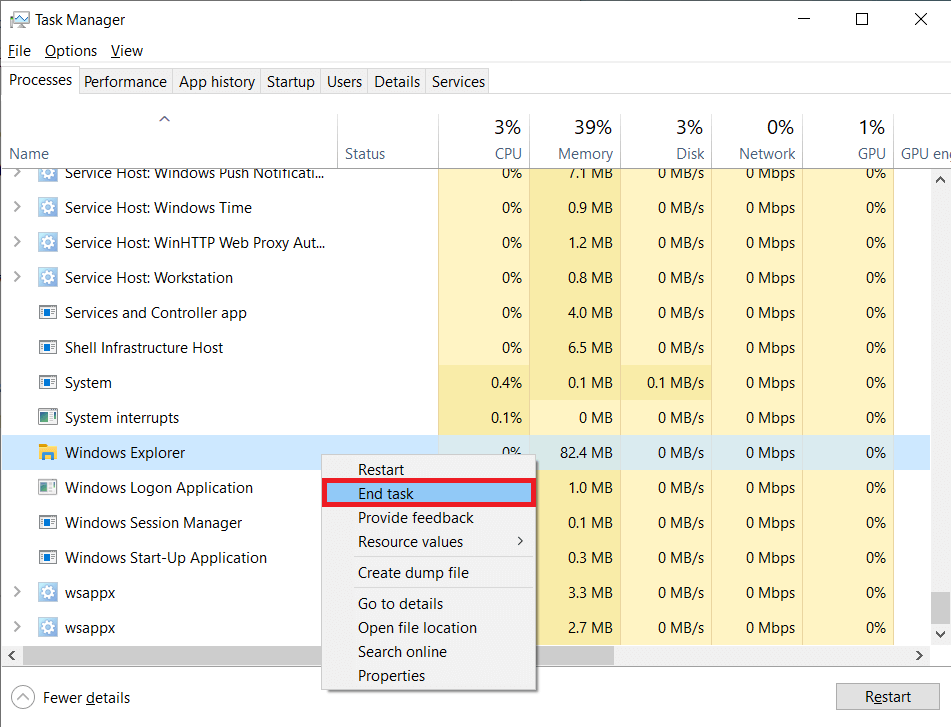
2. Press Ctrl + Shift + Esc keys simultaneously to open Task Manager.
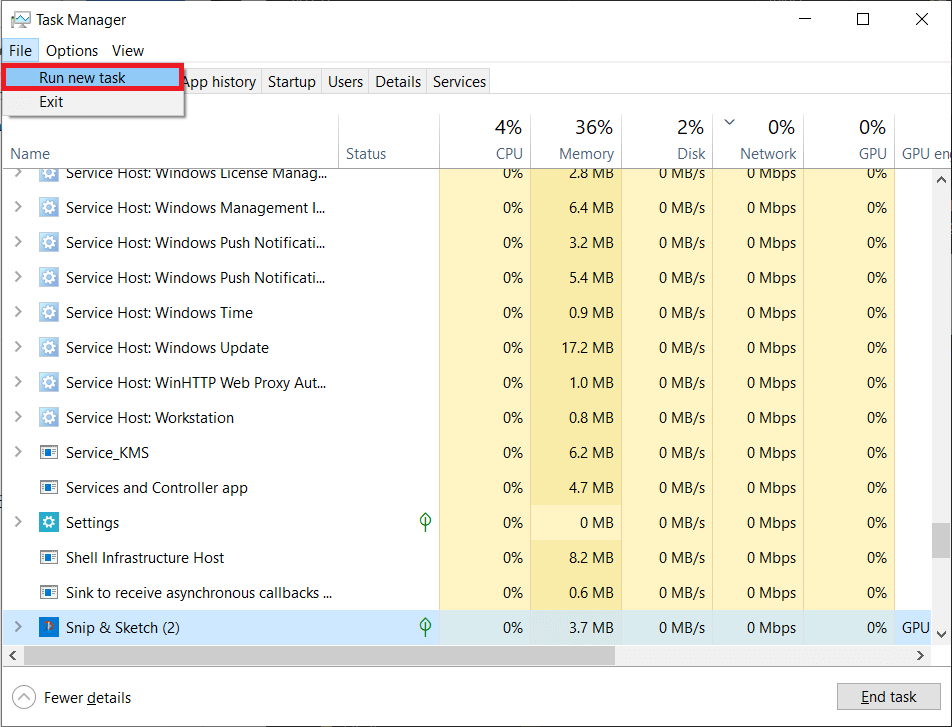
3. Right-click on Windows Explorer and select End Task, as illustrated below.
4. Click File then click on Run new task, as shown.
5. Type cmd.exe and click on OK to launch Command Prompt.

6. Type the following commands and hit Enter after each to delete existing icon cache:
CD /d %userprofile%AppDataLocal
DEL IconCache.db /a
EXIT
![]()
7. Finally, type the command given below and press the Enter key to rebuild icon cache.
cd /d %userprofile%AppDataLocalMicrosoftWindowsExplorer attrib –h iconcache_*.db del iconcache_*.db start explorer
Note: Change %userprofile% with your profile name.
![]()
Also Read: How to Restore Missing Recycle Bin Icon in Windows 11
Method 4: Change Registry Key
If the icons continue to be rearranged by default, try changing the registry key with the key listed below.
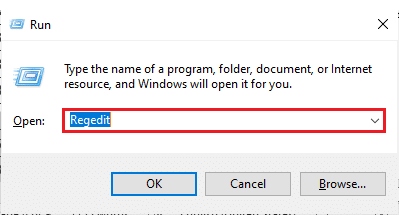
1. Press Windows key + R keys together to open Run dialog box.
2. Type Regedit and hit Enter key to launch Registry Editor.
3A. If you are running the 32-bit version of Windows 10, go to this location path.
HKEY_CLASSES_ROOTCLSID{42aedc87-2188-41fd-b9a3-0c966feabec1}InProcServer32
3B. If you are running a 64-bit version of Windows 10, use the below path.
HKEY_CLASSES_ROOTWow6432NodeCLSID{42aedc87-2188-41fd-b9a3-0c966feabec1}InProcServer32
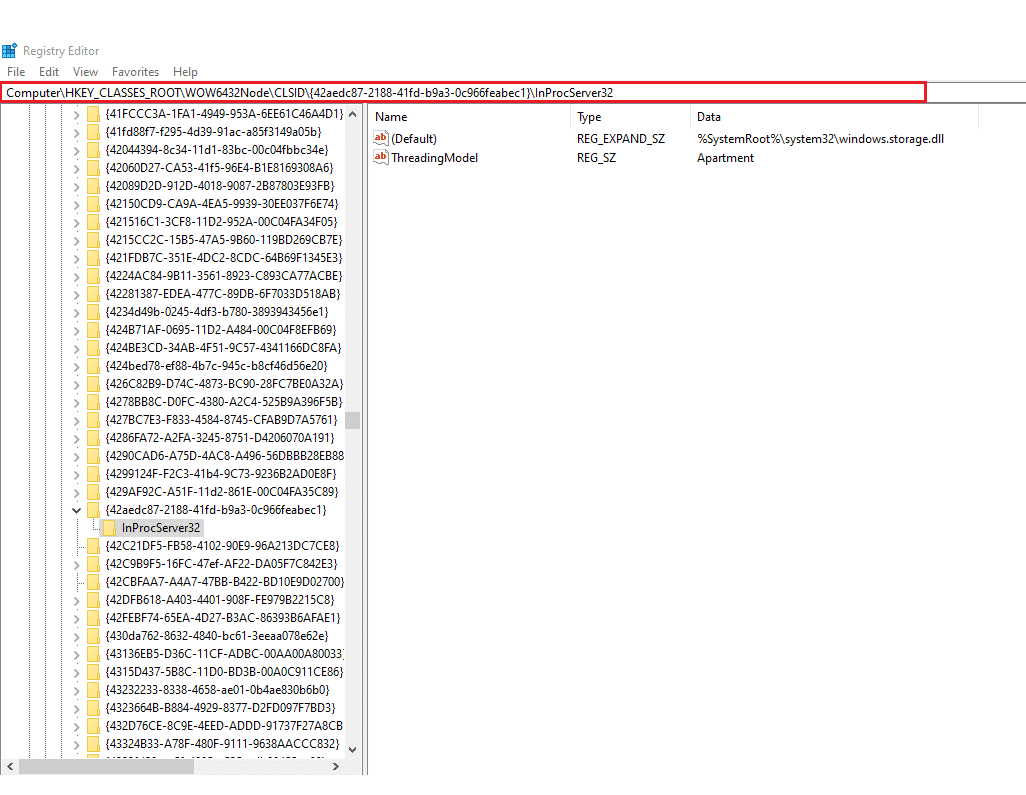
4. Double-click the (Default) key & enter the following value in the Value data field.
%SystemRoot%system32windows.storage.dll
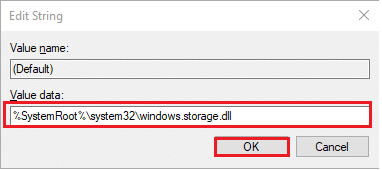
5. Click OK to save these changes.
6. For the modifications to take effect, restart your PC.
Also Read: How to Change Desktop Icons on Windows 11
Frequently Asked Questions (FAQs)
Q1. How can I organize my desktop icons?
Ans. Right-click a vacant place on the Desktop and select Organize icons to arrange icons by name, type, date, or size. Select the command that indicates how you want the icons to be arranged (by Name, by Type, and so on). Alternately, click Auto Arrange if you want the icons to be sorted automatically.
Q2. Why do the icons on my desktop rearrange themselves?
Ans. When you run some apps (particularly PC games), the screen resolution changes. When this happens, Windows re-arranges the desktop icons to accommodate the new screen size. The screen resolution may change after you finish the game, but the icons will have already been rearranged. The same may happen when you add a new monitor or reboot your PC.
Q3. What is the best way to arrange my desktop?
Ans. To keep your desktop tidy, consider utilizing folders. To make a folder, right-click the Desktop and choose New > Folder, then give it a name of your choice. Items & Icons may be dragged and dropped into the folder.
Recommended:
We hope that you were able to address how to fix icons on Windows 10 Desktop and how to disable Desktop icons auto arrange issues. Let us know which method you found to be the most effective. Reach out to us via the comments section below.