The NVIDIA Graphics Processing Unit (GPU) uses a software driver called NVIDIA Driver. It acts as a communication link between the device and the Windows operating system. This software is necessary for the proper functionality of hardware devices. All the gaming performances in the system are optimized by a software called GeForce Experience. Although, not all computer systems would require this software for gameplay. This application often runs in the background if installed. In such cases, it is suggested to disable NVIDIA GeForce Experience for the smooth operation of your computer. We bring a perfect guide on how to disable or uninstall the NVIDIA GeForce Experience on Windows 10.

How to Disable or Uninstall NVIDIA GeForce Experience
Let us now discuss various ways via which you can disable or uninstall the NVIDIA GeForce Experience.
How to Disable NVIDIA GeForce Experience
Steps For Windows 8 and Windows 10:
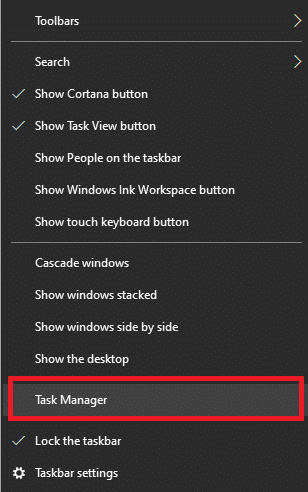
1. Launch Task Manager using any of these options:
- Type task manager in the search bar & open it from search results.
- Right-click on the Taskbar and select Task Manager.
- Press Ctrl + Shift + Esc keys together
2. In the Task Manager window, click on the Startup tab.

3. Now, search and select NVIDIA GeForce Experience.
4. Finally, click on the Disable button and restart your PC to save changes.
Steps For Windows Vista and Windows 7:
1. On the far left of the Windows Taskbar, click on the Type here to search icon.
2. Type ms config as your search input and hit Enter.
3. Task Manager window will pop up. Here, click on the Startup tab.
4. Now right-click on NVIDIA GeForce Experience and select Disable.
5. Finally, Reboot the system to save changes.
Note: Some versions of NVIDIA GeForce Experience are not available in the start-up menu. If this happens to you, then try reinstalling NVIDIA GeForce Experience.
Also Read: Fix GeForce Experience Won’t Open in Windows 10
How to Uninstall NVIDIA GeForce Experience
Method 1: Uninstall Using Control Panel
1. Press the Windows key + S to bring up the search and type Control Panel. Click on Open as depicted in the below picture.

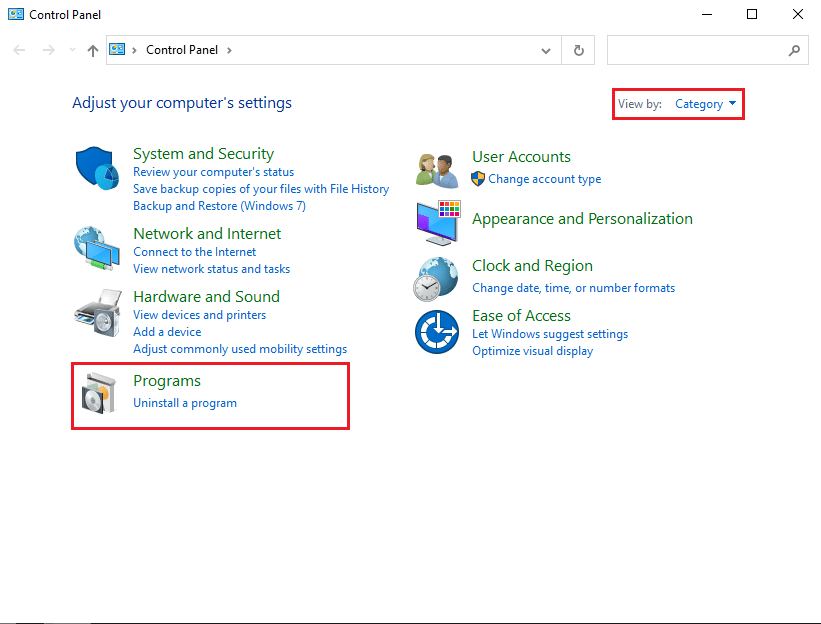
2. Now click on Uninstall a Program under Programs.
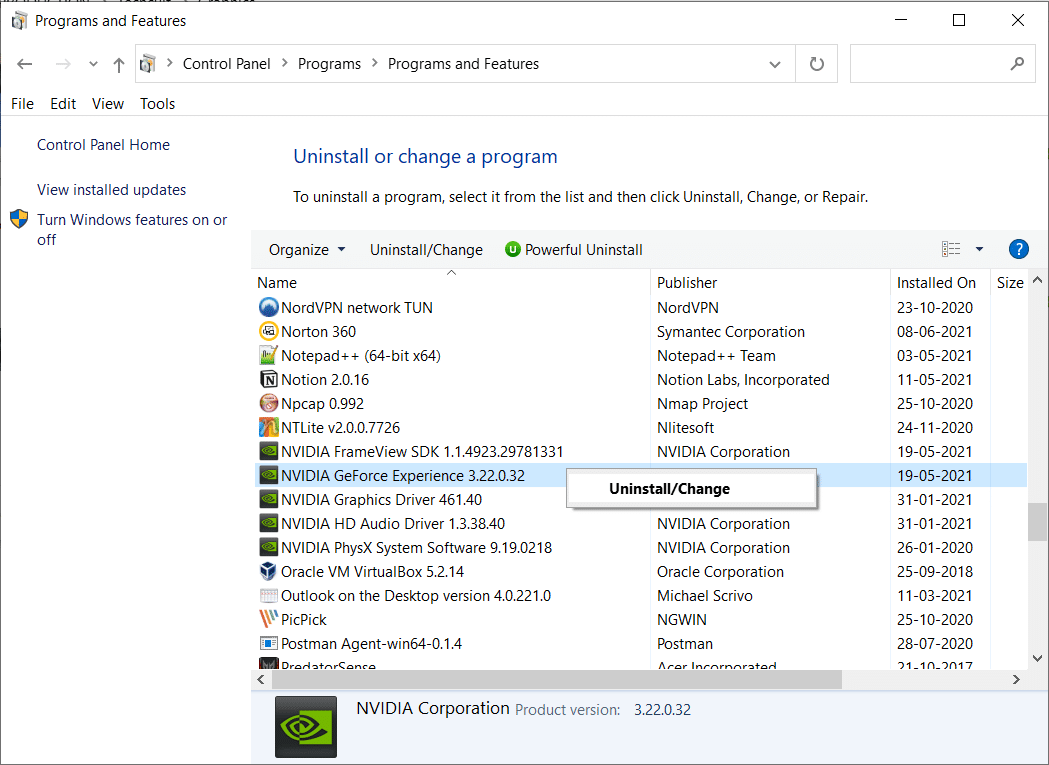
3. Here you will find various NVIDIA components. Make sure to right-click on them one at a time and select Uninstall.
Note: Uninstall all the NVIDIA components in order to uninstall NVIDIA GeForce Experience.
4. Restart your computer to save changes.
5. Download and Install GeForce Experience on your computer.
Note: This step will install all the latest versions of GeForce, along with its missing drivers.
Method 2: Uninstall Using Services Settings
1. Press Windows Key + R together to open the Run dialog box.
2. Type services.msc and click OK. By doing so, the Services window will open.

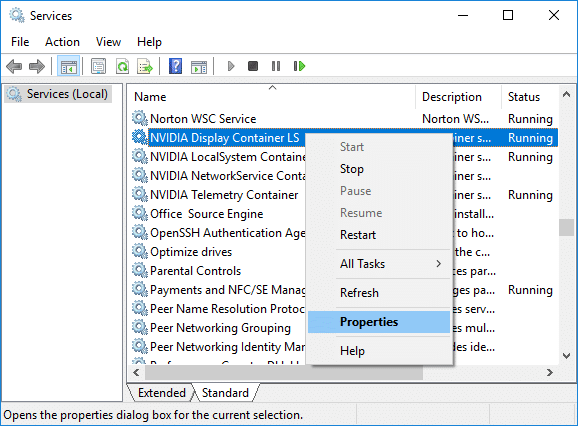
3. Scroll down and search for NVIDIA Display Container LS. Right-click on it and select Properties.
4. In the Properties window, select Disabled from the Start type drop-down.
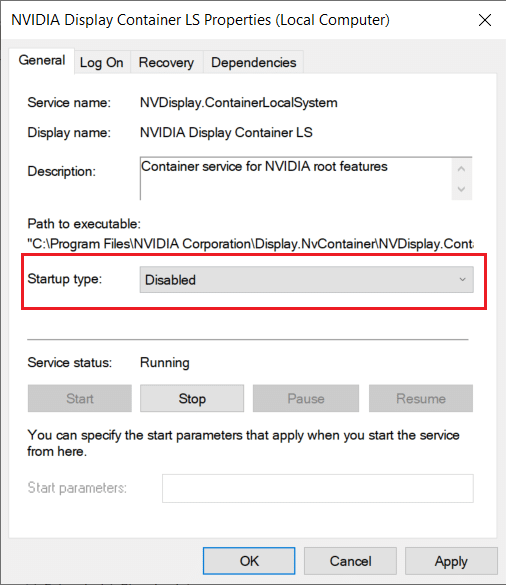
5. Now, click on Apply followed by OK.
6. Restart your system to save these changes.
Note: If you want to bring the settings back to normal, set the Startup Type to Automatic and click on Apply.
Recommended:
We hope this guide was helpful and that you were able to disable or uninstall NVIDIA GeForce Experience. If you have any queries/comments regarding this article, then feel free to drop them in the comments section.