How to Add Text in Photoshop

add text in Photoshop
There are many reasons why Photoshop is one of the most preferred photo editors. It is super versatile, feature-rich, powerful, and quite accessible due to its intuitive interface. Likewise, there are many things that you can do using Photoshop, from basic photo editing to professional or advanced levels. There can be quite a steep learning curve when it comes to advanced photo editing.
However, there are quite several very useful basic photo editing techniques. You may be looking for information on basic photo editing, like how to edit existing text in photoshop. In this case, you have come to the right place. Skills like knowing how to change text in Photoshop and more can be very helpful. You can learn all these basic Photoshop skills in little time. This article has covered all the information you need regarding how to add text in Photoshop and how do I resize font in Photoshop.
See Also:
How to use split-screen multitasking on a Samsung Galaxy phone
How to Hide My IP Address Without VPN
How to Add Text in Photoshop
Read this article till the end to learn the steps demonstrating how to add text in Photoshop in a detailed manner using the pictures for better understanding.
How to Add Text in Photoshop?
Let’s see the steps to add text in Adobe PS:
1. Open the Adobe Photoshop application on your PC or laptop.
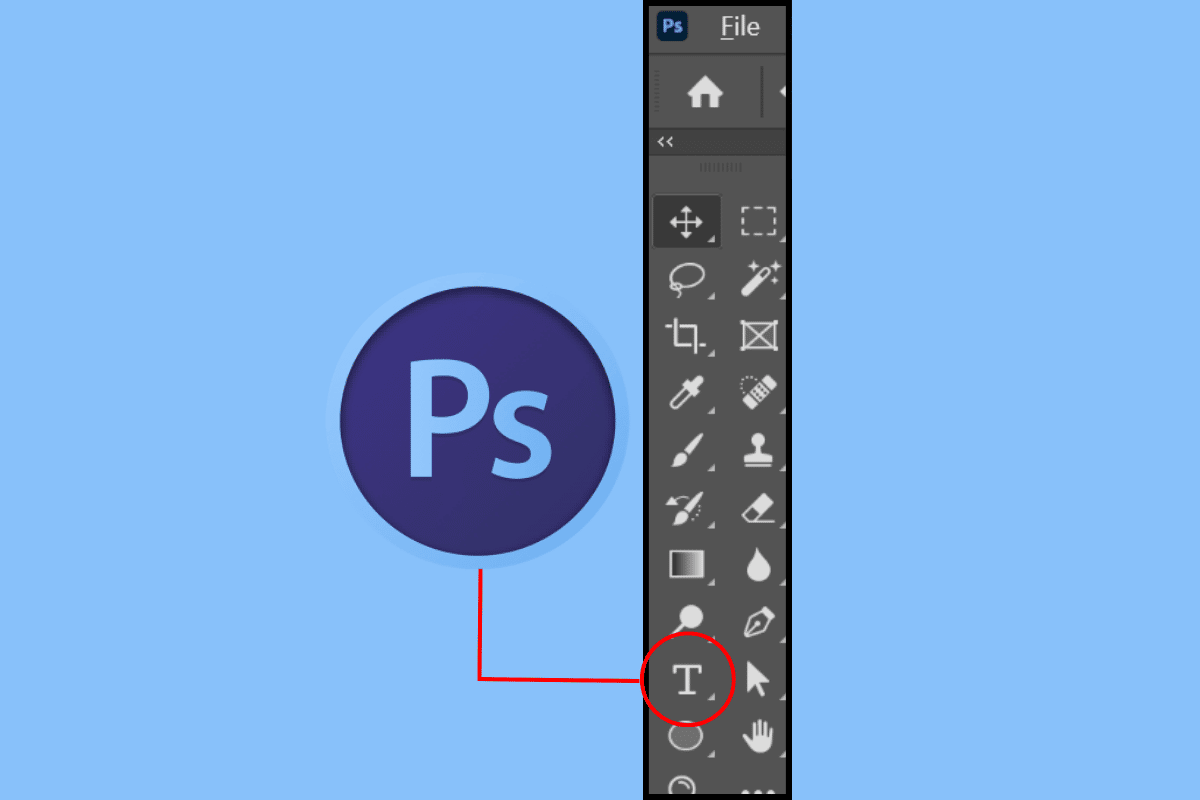
2. Press the T key on your keyboard to select the Text tool.
3A. Click on the image or canvas for a single line of text.
3B. Or drag a rectangle onto the canvas for a paragraph of text.
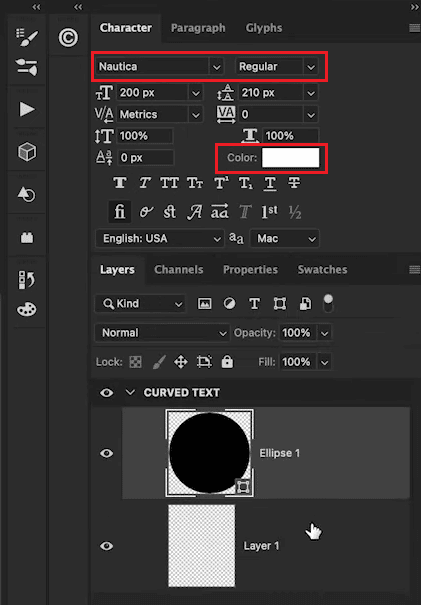
4. Select the desired font and font color from the Character tab.
5. Type the desired text in the text box.
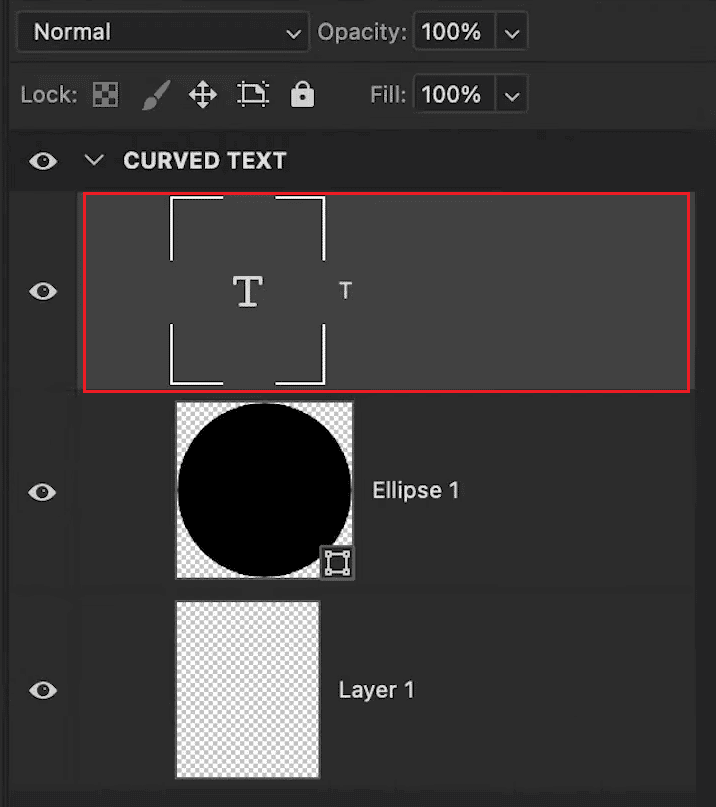
Note: You can view the text layer in Expert mode by pressing the F11 key.
6. Press the Esc key or click on the Commit (✓) option to save the changes to the text layer.
Note: You can also use the Enter key on the number keypad, select a different editing tool or click outside the textbox onto the image.
Also Read: Which to Use Adobe Photoshop vs Illustrator?
How to Edit Existing Text in Photoshop?
After finding out how to add text in Photoshop, it is also important to know different skills including editing existing text. Here is a step-by-step guide on how you can do this:
1. Press the T key to select the Text tool and type in the desired text.
2. Click on the text and press Ctrl + A keys to highlight the text.
Note: macOS users can use the shortcut keys Command + A.
3. Go to the top settings bar to get different edit options for changes.
Note: You can change the font, color, size, and alignment of the text.
4. Finally, press the Esc key to save the changes.
How to Change the Text in Photoshop?
Read and follow the steps mentioned above to change the text in Adobe PS.
What are the Types of Text Editing in Photoshop?
There are different text editing that you can do in Photoshop.
- Change Type of Text
- Change Text Color
- Adjust Font Size
- Change Text Alignment
- Underline Text
How to Select Text in Photoshop?
1. Select the Type Tool (T) and select the text layer in the Layers tab.
2. Select a word by double-clicking it.
Note: You can Triple-click to select the entire line, Quadruple-click to select a paragraph, and click five times to select all text.
3. Alternatively, select the Move tool in the toolbar.
4. Double-click the text to select.
How Do I Resize Font in Photoshop?
After finding out how to select text in Adobe PS, it can be also helpful to know how to resize a font. You can resize your font by following the steps below:
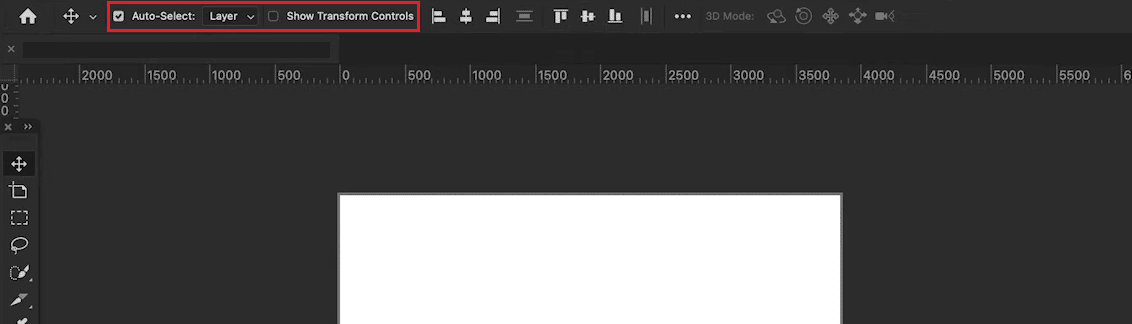
1. Select the Move tool (V).
2. Go to the options bar and mark the Auto-Select checkbox.
3. Set the Auto-Select field to Layer and mark the Show Transform Controls checkbox.
4. Select the text layer in the Layers tab.
5. Click and drag the anchor points inward or outward to resize.
Note: Use the Shift key to lock the aspect ratio. Also, use the Alt key on Windows and Option on Mac to stretch text.
Also Read: How to Add Text to Instagram Reels
How to Find And Replace Text in Photoshop?
After adding text in Photoshop and learning how to change text in photoshop, you may want to replace it. In this case, knowing how to find and replace a text is important. You can learn the step-by-step process below.
1. Select the desired text layer from the Layer tab in the right pane.
2. Go to Edit > Find And Replace Text.
3. Type or paste the text to find and replace in the box.
4. Click Find Next to begin the search.
Frequently Asked Questions (FAQs)
Q1. Is it possible to add text in Photoshop?
Ans. Yes, it is possible to add text in Adobe PS.
Q2. Is it possible to edit existing text in Photoshop?
Ans. Yes, you can make edits to existing text in Photoshop.
Q3. Can you resize text in Photoshop?
Ans. Yes, it is possible to resize text in Adobe PS.
Q4. Can you change the font in Photoshop?
Ans. Yes, you can change the font type in Photoshop.
Recommended:
We hope that you learned about how to add text in Photoshop and resize font. Feel free to reach out to us with your queries and suggestions via the comments section below. Also, let us know what you want to learn about next.
There are two main ways to add text in Photoshop: using the Horizontal Type Tool and the Vertical Type Tool. Here’s a breakdown of both methods:
Using the Horizontal Type Tool (for standard text):
-
Select the Horizontal Type Tool:
- Look for the tool icon that resembles a capital “T” in the Tools panel on the left side of the Photoshop workspace.
- You can also press the “T” key on your keyboard as a shortcut.
-
Click on Your Canvas:
- Click where you want the text to appear on your image. A blinking cursor will appear at that point.
-
Type Your Text:
- Simply start typing your desired text.
-
Format Your Text (Optional):
- While your text is still selected (indicated by a box around it), you can access the Character panel (Window > Character) or the Paragraph panel (Window > Paragraph) at the top of the workspace.
- These panels allow you to change the font, size, color, alignment, and other text formatting options.
-
Move and Resize Your Text (Optional):
- With the Move tool (looks like an arrow) selected, you can click and drag the text box to reposition it on your canvas.
- You can also drag the corners or sides of the text box to resize the overall text area.
Using the Vertical Type Tool (for vertical text):
-
Select the Vertical Type Tool:
- Look for the tool icon that resembles a capital “T” bent vertically in the Tools panel.
- You can hold down the “T” key on your keyboard and choose the Vertical Type Tool from the pop-up menu.
-
Click on Your Canvas:
- Click where you want the vertical text to start on your image. A blinking cursor will appear at that point.
-
Type Your Text:
- Start typing your desired text. The text will automatically appear vertically.
-
Format Your Text (Optional):
- Similar to the Horizontal Text Tool, you can format the vertical text using the Character and Paragraph panels.
-
Move and Resize Your Text (Optional):
- The same principles for moving and resizing with the Move tool apply to vertical text as well.
Additional Tips:
- You can add multiple text boxes to your image by using the Text tool repeatedly.
- Photoshop offers various text effects like drop shadows, bevels, and outer glows. You can explore these options in the Layer Style menu (double-click the text layer in the Layers panel).
- Consider using pre-made text styles for a quick and easy way to enhance your text. These can be found in the “Layer Style” menu under the “Text Effects” category.
By following these steps and exploring the formatting options, you can effectively add and customize text in your Photoshop projects.