Fix WiFi Is Not Connecting After Sleep or Hibernation

Fix WiFi Is Not Connecting After Sleep or Hibernation: If you have recently upgraded to Windows 10 then you might be experiencing this issue where your Windows doesn’t automatically connect to your WiFi network after waking up from Sleep or Hibernation. In order to again connect to your Wireless network, you may need to reset WiFi Adapter or even restart your PC. In short, the Wi-Fi was not working after resuming from sleep or hibernation.
There can be numerous causes because of which this issue occurs such as WiFi Adapter drivers are not compatible with Windows 10 or they somehow got corrupted during the upgrade, The Wi-Fi switch is OFF or the Airplane switch is ON etc. So without wasting any time let’s see how to actually Fix Wifi Is Not Connecting After Sleep or Hibernation with the below-listed troubleshooting steps.
Fix WiFi Is Not Connecting After Sleep or Hibernation
Make sure to create a restore point just in case something goes wrong.
Method 1: Disable then Re-Enable your WiFi
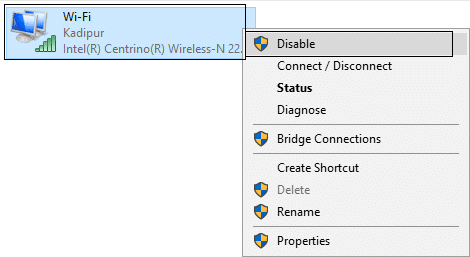
1.Press Windows Key + R then type ncpa.cpl and hit Enter.

2.Right-click on your wireless adapter and select Disable.
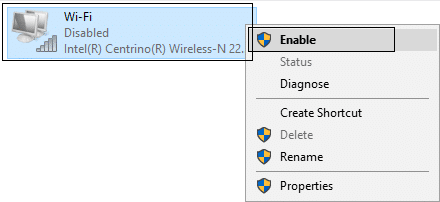
3.Again right-click on the same adapter and this time choose Enable.
4.Restart your and again try to connect to your wireless network and see if the issue is resolved or not. Read How to Troubleshoot Network Connectivity Problems on Windows 10. Read How to Troubleshoot Network Connectivity Problems on Windows 10.
Method 2: Uncheck Power Saving Mode for Wireless Adapter
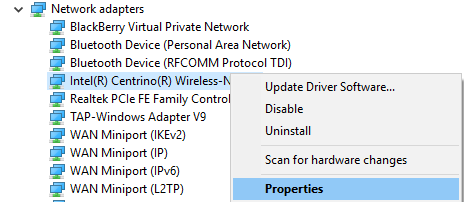
1.Press Windows Key + R then type devmgmt.msc and hit Enter.

2.Expand Network adapters then right-click on your installed network adapter and select Properties.
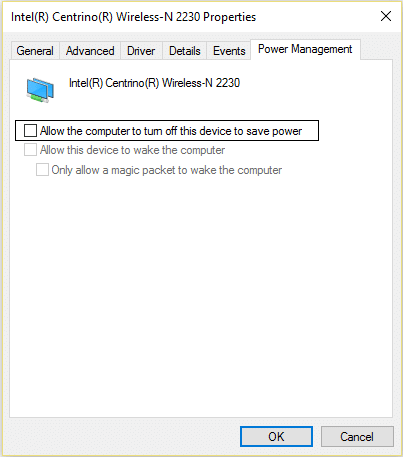
3.Switch to Power Management Tab and make sure to uncheck “Allow the computer to turn off this device to save power.“
4.Click Ok and close the Device Manager.
5.Now press Windows Key + I to open Settings then Click System > Power & Sleep.
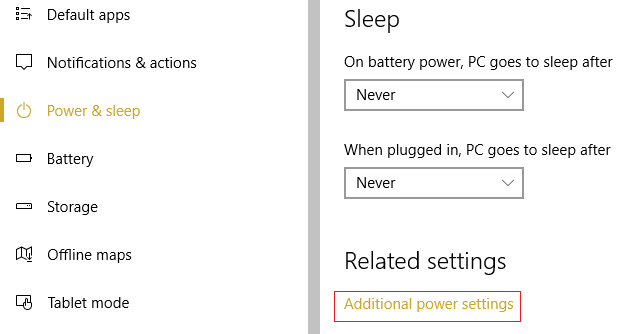
6.On the bottom click Additional power settings.
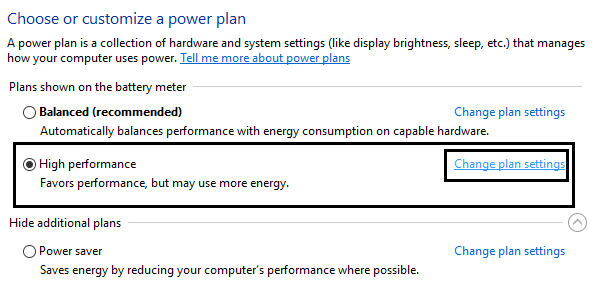
7.Now click “Change plan settings” next to the power plan which you use.
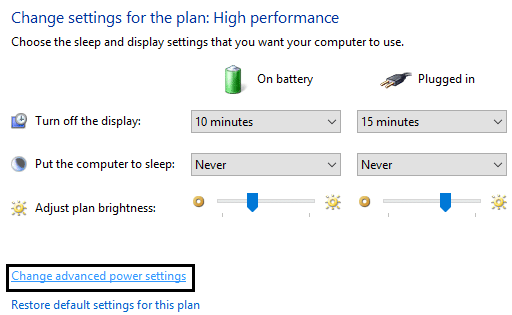
8.At the bottom click on “Change advanced power settings.“
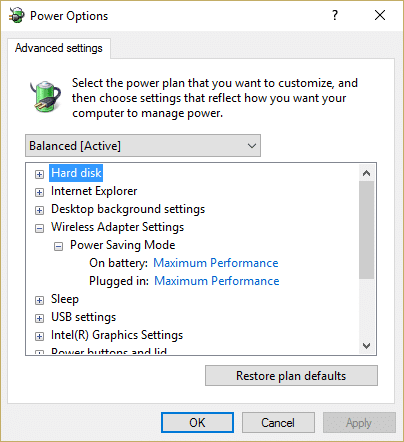
9.Expand Wireless Adapter Settings, then again expand Power Saving Mode.
10.Next, you will see two modes, ‘On battery’ and ‘Plugged in.’ Change both of them to Maximum Performance.
11.Click Apply followed by Ok. Reboot your PC to save changes. This would help you Fix WiFi Is Not Connecting After Sleep or Hibernation but there are other methods to try if this one fails to do its job.
Method 3: Roll Back Network Adapter Drivers
1.Press Windows Key + R then type devmgmt.msc and hit Enter to open Device Manager.
2.Expand Network Adapter and then right-click on your Wireless Adapter and select Properties.
3.Switch to Driver tab and click on Roll Back Driver.
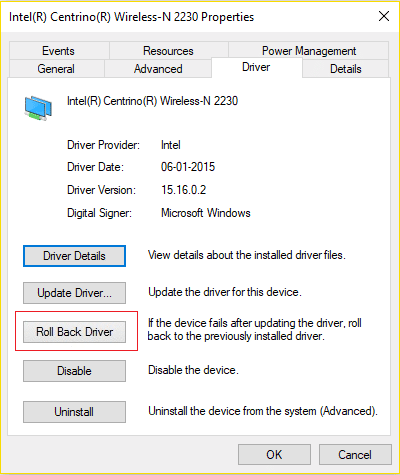
4.Choose Yes/OK to continue with driver roll back.
5.After the rollback is complete, reboot your PC.
See if you’re able to Fix WiFi Is Not Connecting After Sleep or Hibernation, if not then continue with the next method.
Method 4: Update Network Adapter Drivers
1.Press Windows key + R and type “devmgmt.msc” in Run dialogue box to open device manager.
2.Expand Network adapters, then right-click on your Wi-Fi controller(for example Broadcom or Intel) and select Update Drivers.

3.In the Update Driver Software Windows, select “Browse my computer for driver software.“

4.Now select “Let me pick from a list of device drivers on my computer.“

5.Try to update drivers from the listed versions.
6.If the above didn’t work then go to manufacturers website to update drivers: https://downloadcenter.intel.com/
7.Reboot to apply changes.
Method 5: Load Default settings in BIOS
1.Turn off your laptop, then turn it on and simultaneously press F2, DEL or F12 (depending on your manufacturer) to enter into BIOS setup.

2.Now you’ll need to find the reset option to load the default configuration and it may be named as Reset to default, Load factory defaults, Clear BIOS settings, Load setup defaults, or something similar.

3.Select it with your arrow keys, press Enter, and confirm the operation. Your BIOS will now use its default settings.
4.Again try to log in with the last password you remember into your PC.
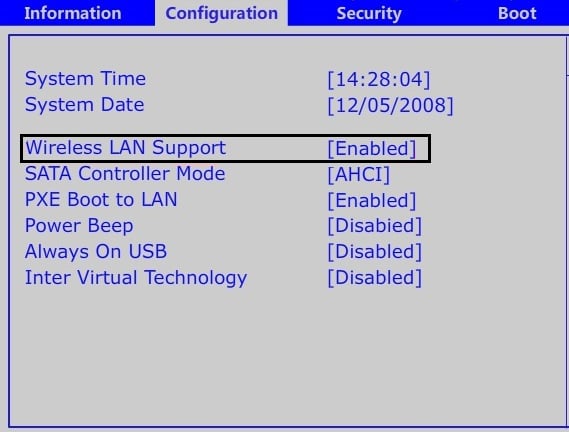
Method 6: Enable WiFi from BIOS
Sometimes none of above steps would be useful because the wireless adapter has been disabled from BIOS, in this case, you need to enter BIOS and set it as default, then log in again and go to “Windows Mobility Center” through Control Panel and you can turn the wireless adapter ON/OFF.
This should help you Fix WiFi Is Not Connecting After Sleep or Hibernation problem easily, if not then continue.
Method 7: Uninstall Network Adapter Drivers
1.Press Windows Key + R then type “devmgmt.msc” and hit Enter to open Device Manager.
2.Expand Network Adapters and find your network adapter name.
3.Make sure you note down the adapter name just in case something goes wrong.
4.Right-click on your network adapter and uninstall it.

5.If ask for confirmation select Yes.
6.Restart your PC and try to reconnect to your network.
7.If you’re not able to connect to your network then it means the driver software isn’t automatically installed.
8.Now you need to visit your manufacturer’s website and download the driver from there.

9.Install the driver and reboot your PC.
By reinstalling the network adapter, you can Fix WiFi Is Not Connecting After Sleep or Hibernation issue.
Method 8: Workaround the Problem
1.Type powershell into Windows Search then right-click on PowerShell then select Run as Administrator.
2.Type the following command into cmd and hit enter:
Get-NetAdapter
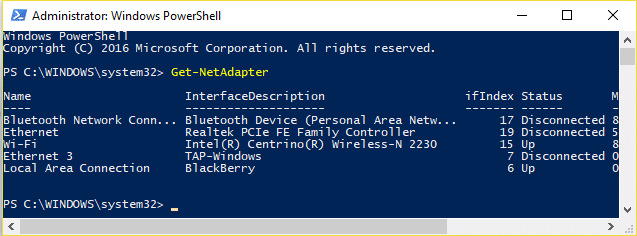
3.Now note down the value under InterfaceDescription next to the Wi-Fi, for example, Intel(R) Centrino(R) Wireless-N 2230 (Instead of this you will see the name of your Wireless Adapter).
4.Now close the PowerShell window then right-click in an empty area on the Desktop and then select New > Shortcut.
5.Type the following into the “Type the location of the item” field:
powershell.exe restart-netadapter -InterfaceDescription ‘Intel(R) Centrino(R) Wireless-N 2230’ -Confirm:$false
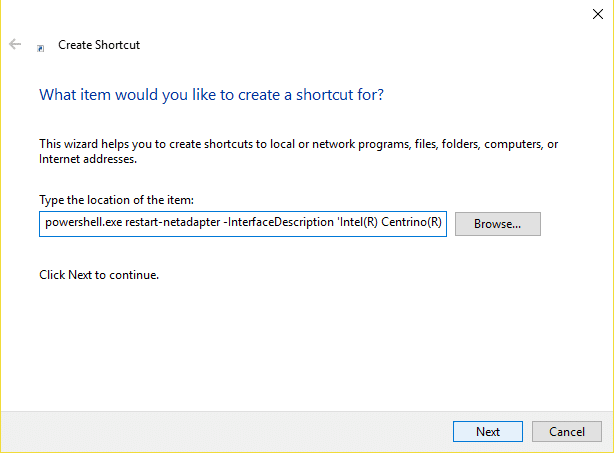
Note: Replace “Intel(R) Centrino(R) Wireless-N 2230” with the value you find under InterfaceDescription which you noted in step 3.
6.Then click Next and type some name for example: Reset Wireless and click Finish.
7.Right-click on the shortcut you just created and select Properties.
8.Switch to Shortcut tab then click Advanced.
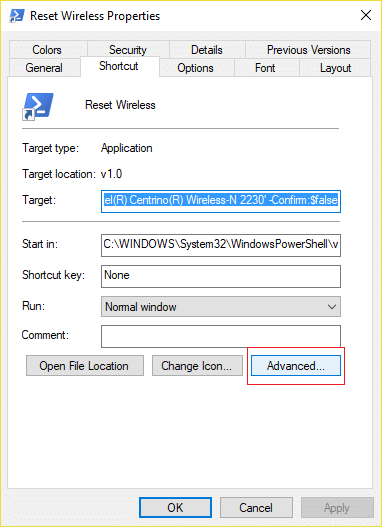
9.Check mark “Run as administrator” and click OK.
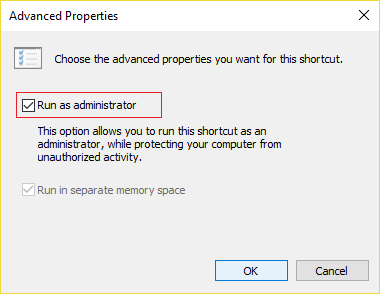
10.Now click Apply followed by OK.
11.Right-click on this shortcut and select Pin to Start and/or Pin to Taskbar.
12.As soon as the issue arises you could double click on the shortcut from Start or Taskbar to fix the problem.
Recommended for you:
That’s it you have successfully Fix WiFi Is Not Connecting After Sleep or Hibernation but if you still have any questions regarding this post then feel free to ask them in the comment’s section.