How to Use Before and After Scan on Instagram

Users of iOS and Android smartphones can shoot images, start sharing tales, add effects, and text other users directly via the Instagram app. Instagram is a Menlo Park, California-based social networking site for sharing images and videos. Instagram users can choose to adjust the privacy settings for their accounts, which makes it necessary for them to personally approve any new follow requests. Users can upload photos and video reels, follow other users’ accounts, and tag photos with specific locations. You can use different effects on Instagram to modify your content before you upload it to your feed for others to see and react to. If you are someone looking for tips about the before after scan effect, we bring you a helpful guide that will teach you how to use the scan filter on Instagram.
How to Use Before and After Scan on Instagram
You will get to know how to use the before after scan on Instagram further in this article. Keep reading to learn more about it in detail.
What is Instagram Reel?
In August 2020, Instagram introduced Reels, a brand-new feature, as part of its response to a change in the use of social media. The objective was to outcompete other video-sharing services on the market. Reels are captivating videos that allow you to creatively tell your brand’s story, educate your audience, and draw in new clients. Reels invites you to create entertaining films that you can upload to Instagram and share with friends or anybody else. You can use new editing features, soundtracks, and artistic tools to record and edit multi-clip videos.
What is the Before and After Scan?
The before and after scan is an effect on Instagram that you can use to create a comparative post in the form of a story or reel. It is one of many effects available on the Instagram effects library and can be easily accessed through the mobile app for both Android and iOS users. You will need two pictures, one before and one after.
What is the Scan Filter on Instagram?
Your purported twin or more attractive half is revealed when you use the scan filter on Instagram. However, before you assume the before and after filter on Instagram handles everything for you, remember that as a user you can add a picture of your favorite celebrity instead of an old photo too. The idea is to make a post that shows your glow-up transformation from then to now, or a funny post that can make everyone’s day in an instant!
Also Read: What is Facebook Wave Feature?
How to Use the Before and After Filter on Instagram?
You can use the before and after scan filter by following these steps:
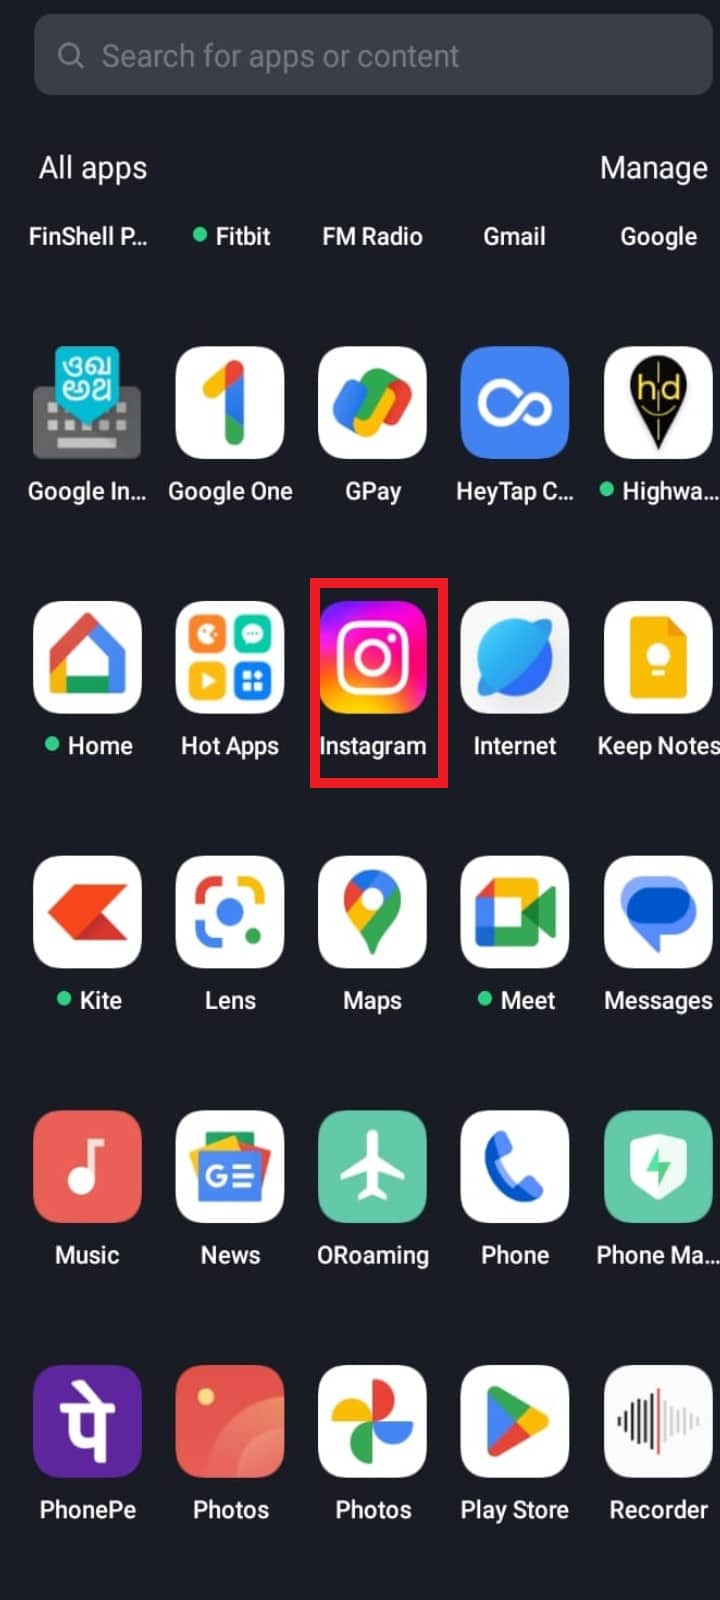
1. Open the Instagram application on your Android or iOS devices.
Note: Make sure you are logged into your account.
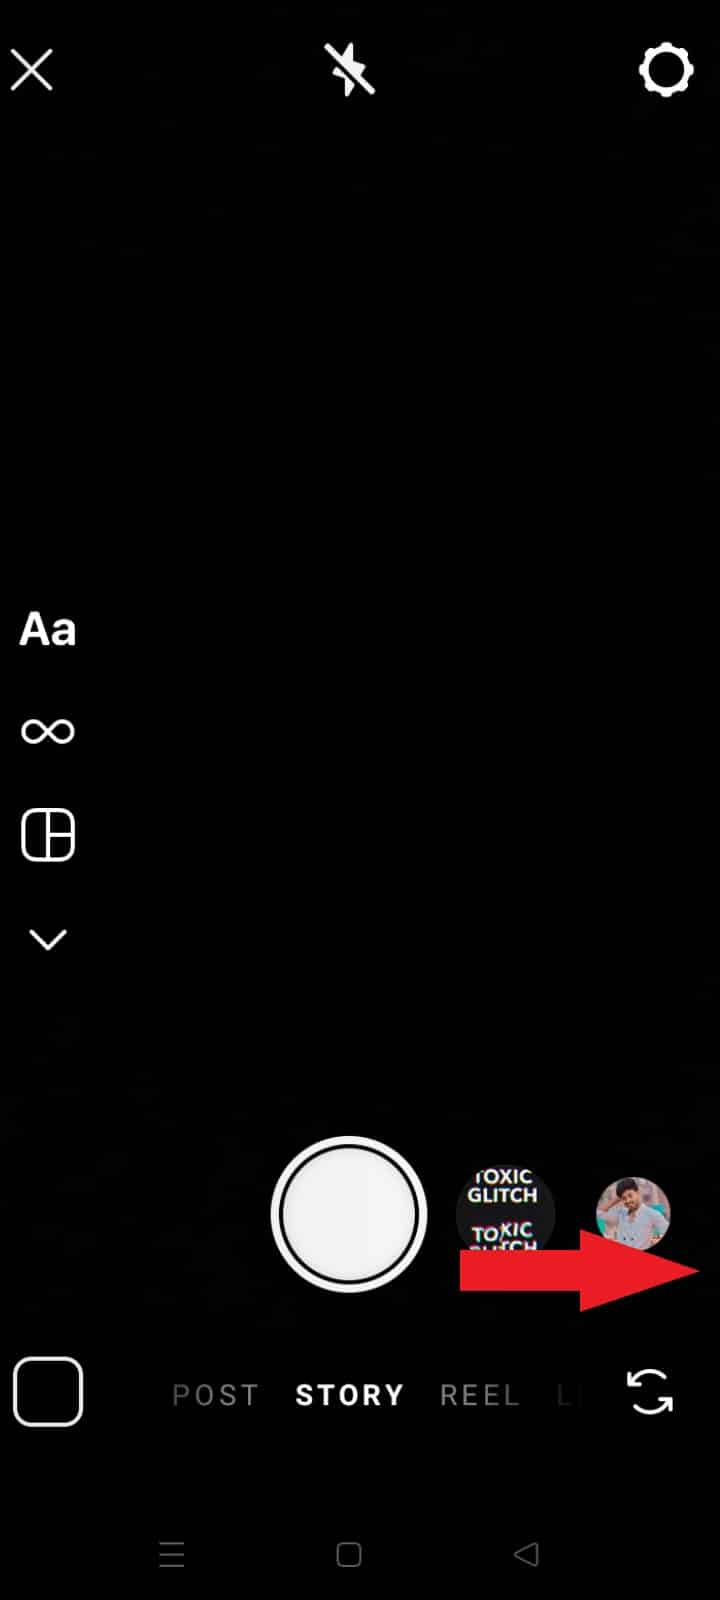
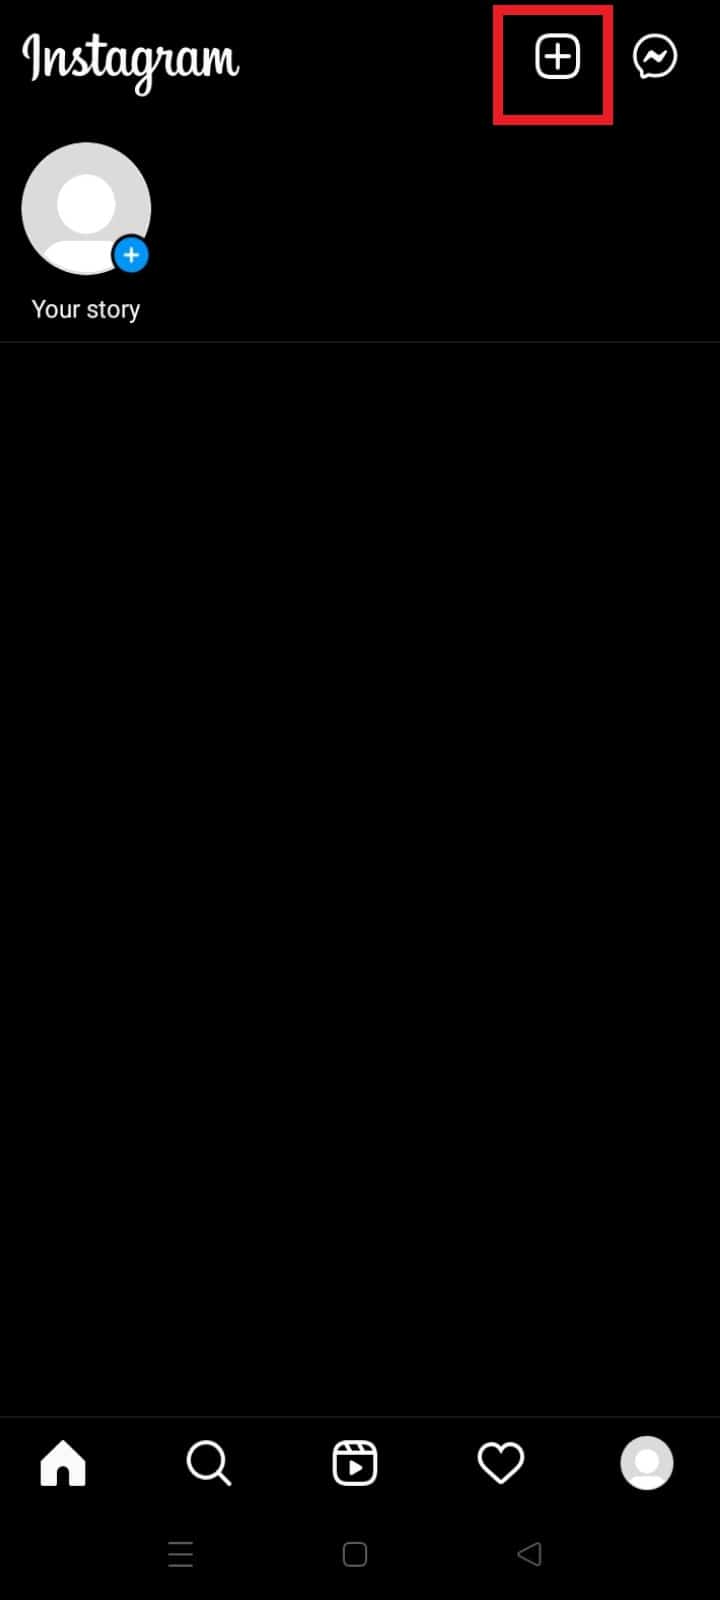
2. Tap on Your story from the top bar.
![]()
3. Swipe across the list of filters available as presets on your screen till you reach the end of the list.
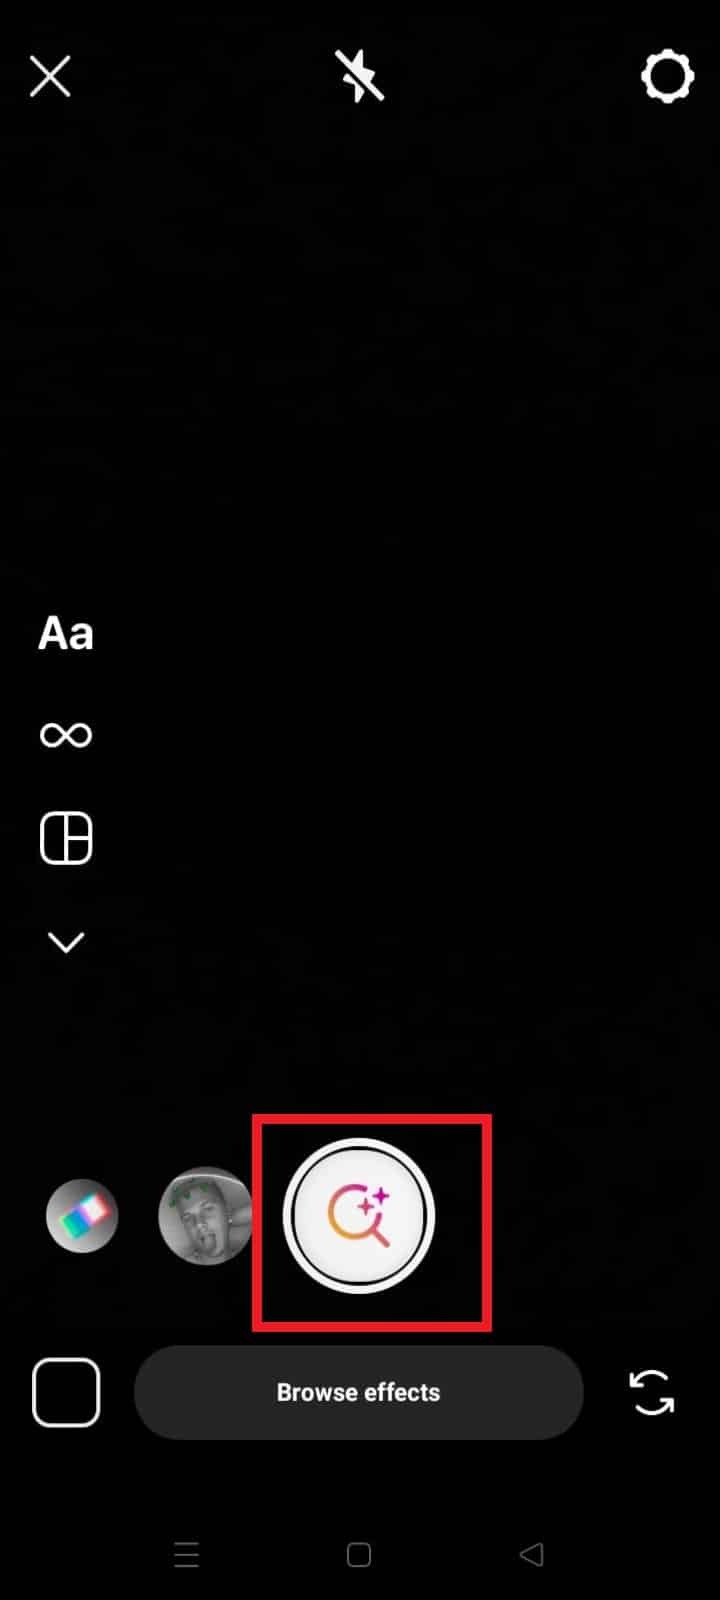
4. At the end of the list, tap on the Browse effects icon.
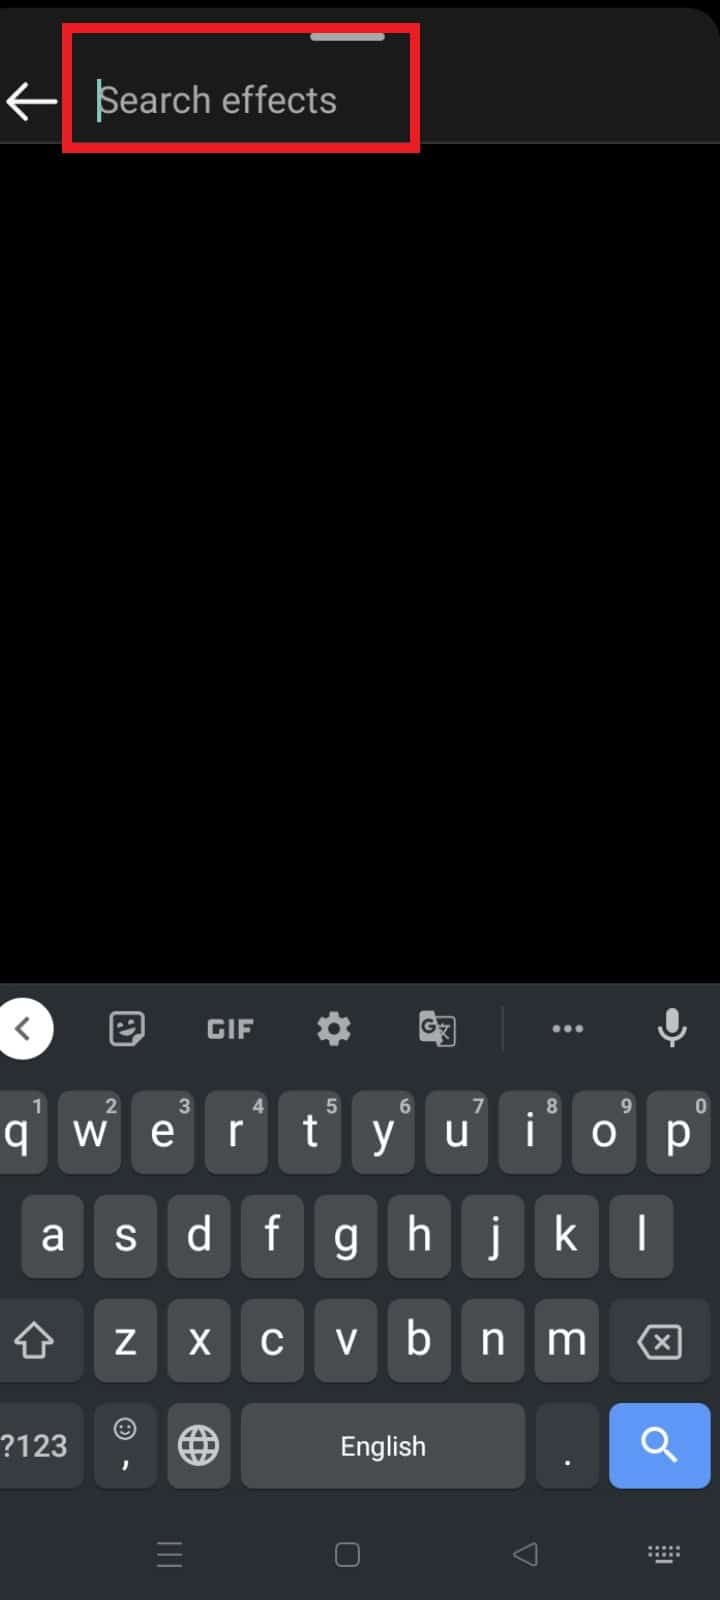
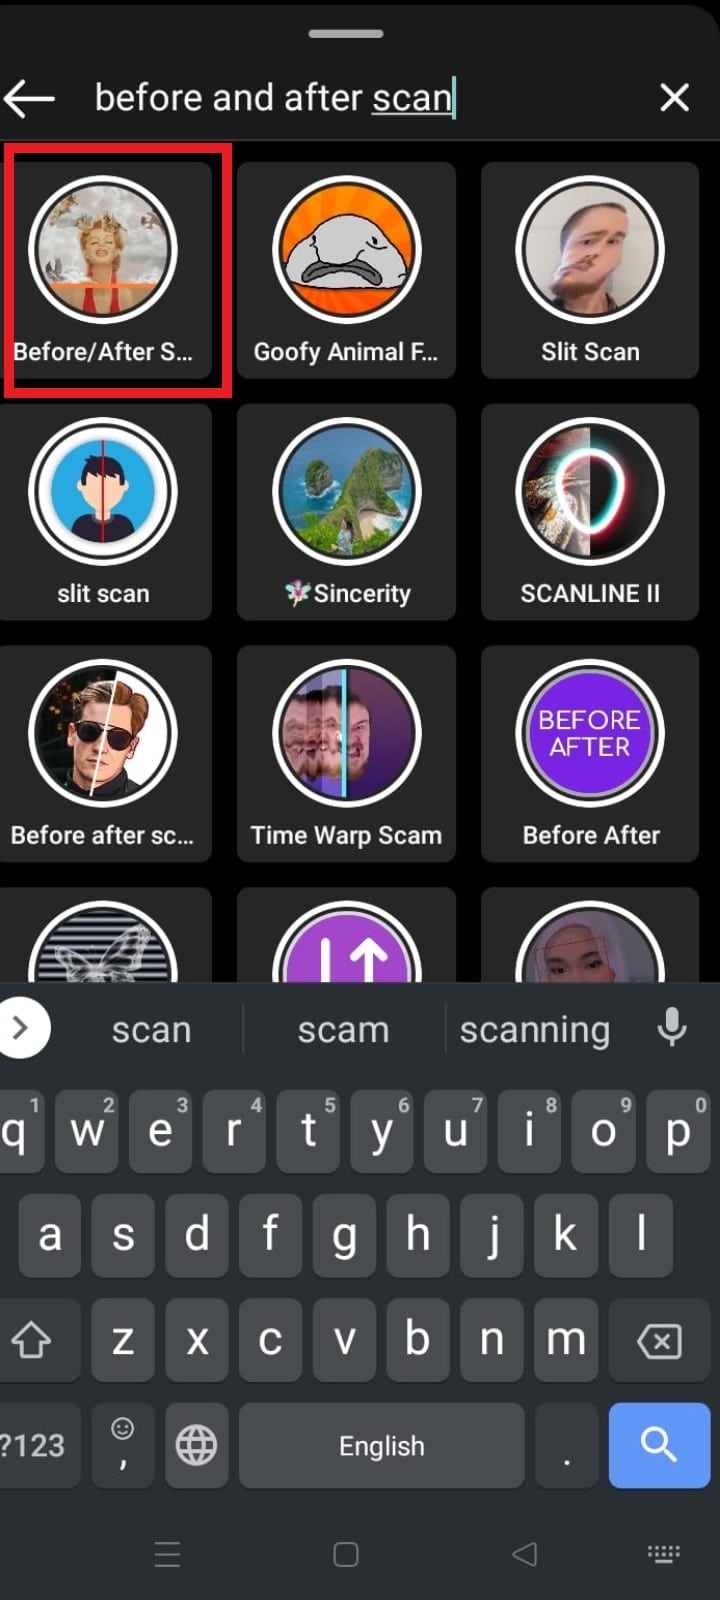
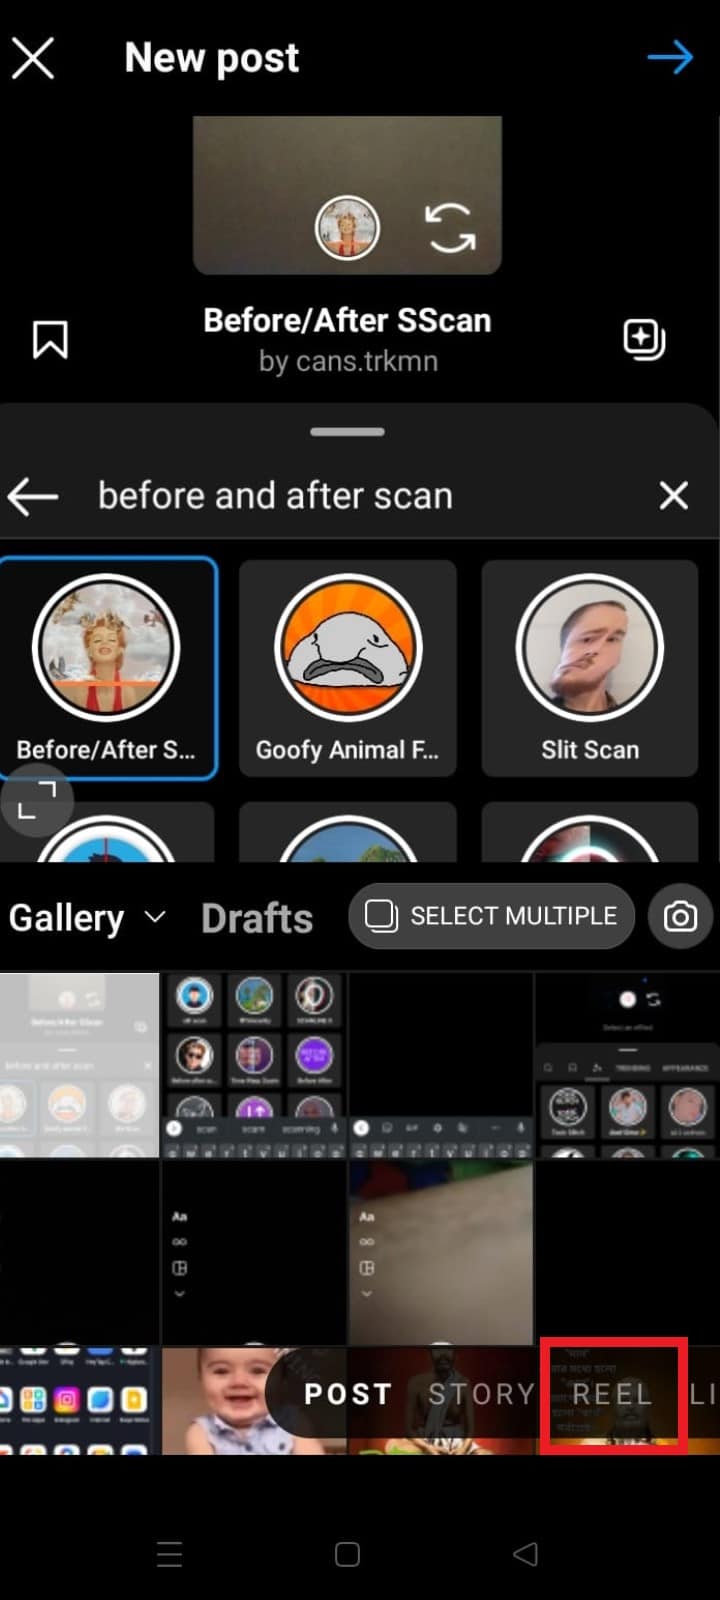
5. Tap on the search icon from the left corner.

6. Tap on the search bar and enter before and after scan.
7. Select the Before/After Scan filter, as shown below.
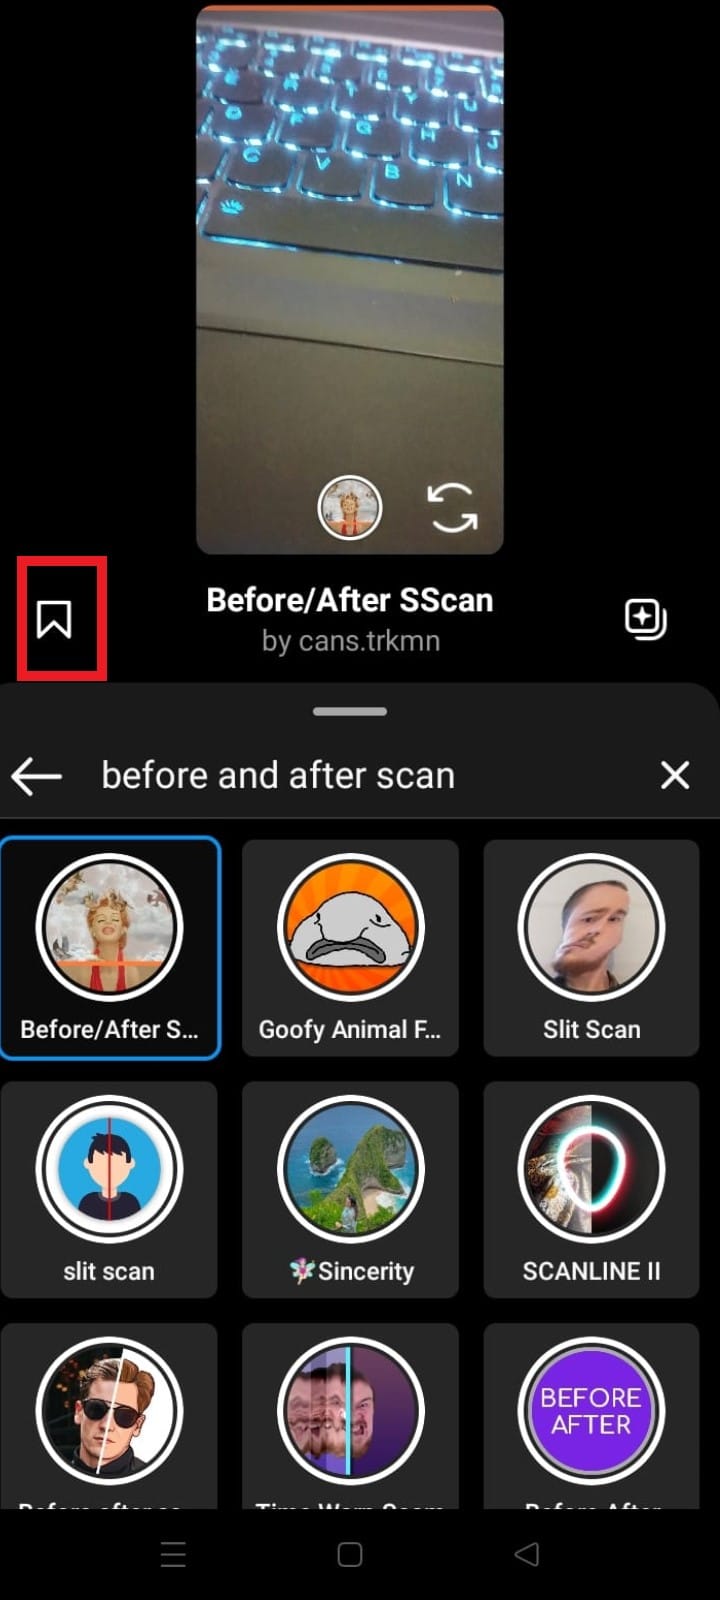
8. Tap on the save icon to save the filter to your Instagram account.
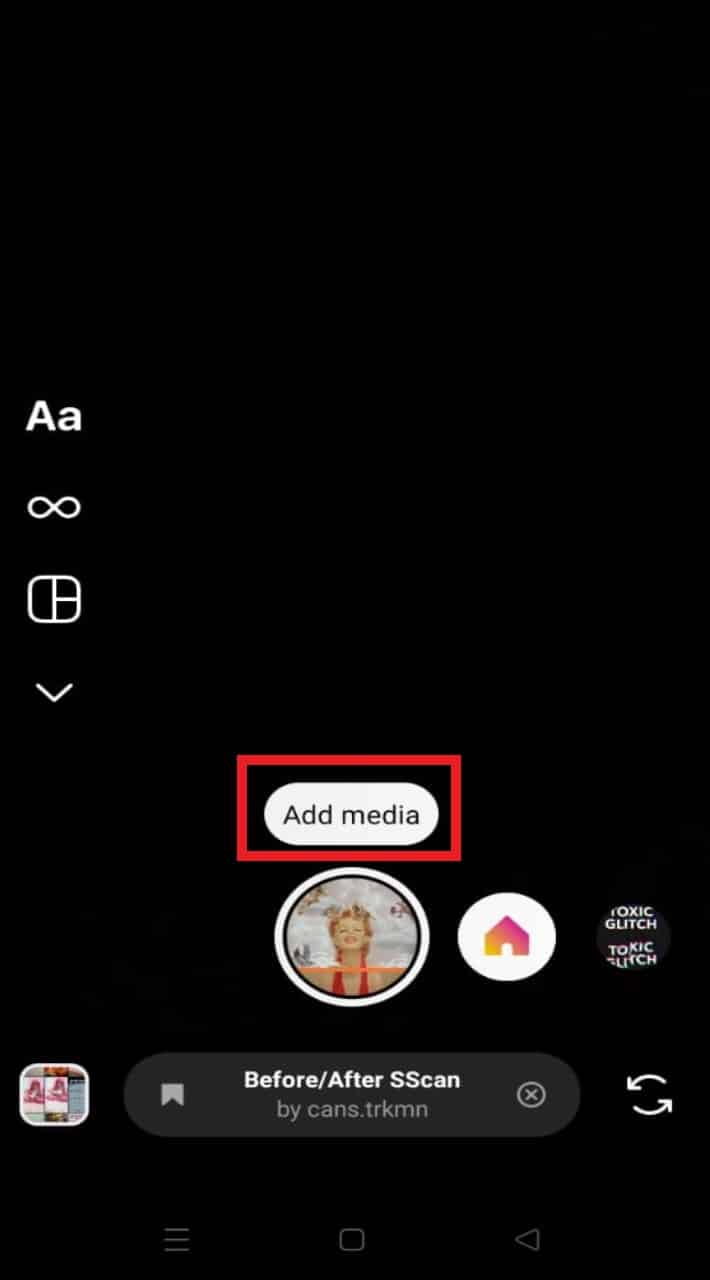
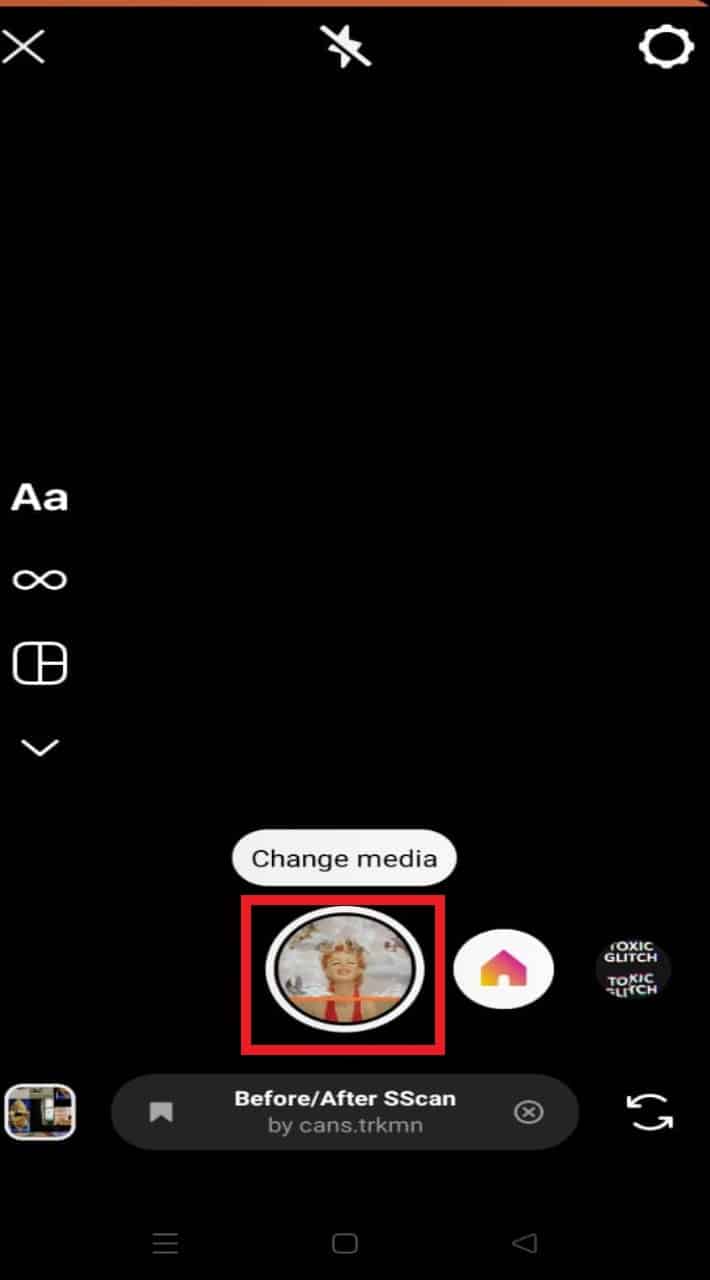
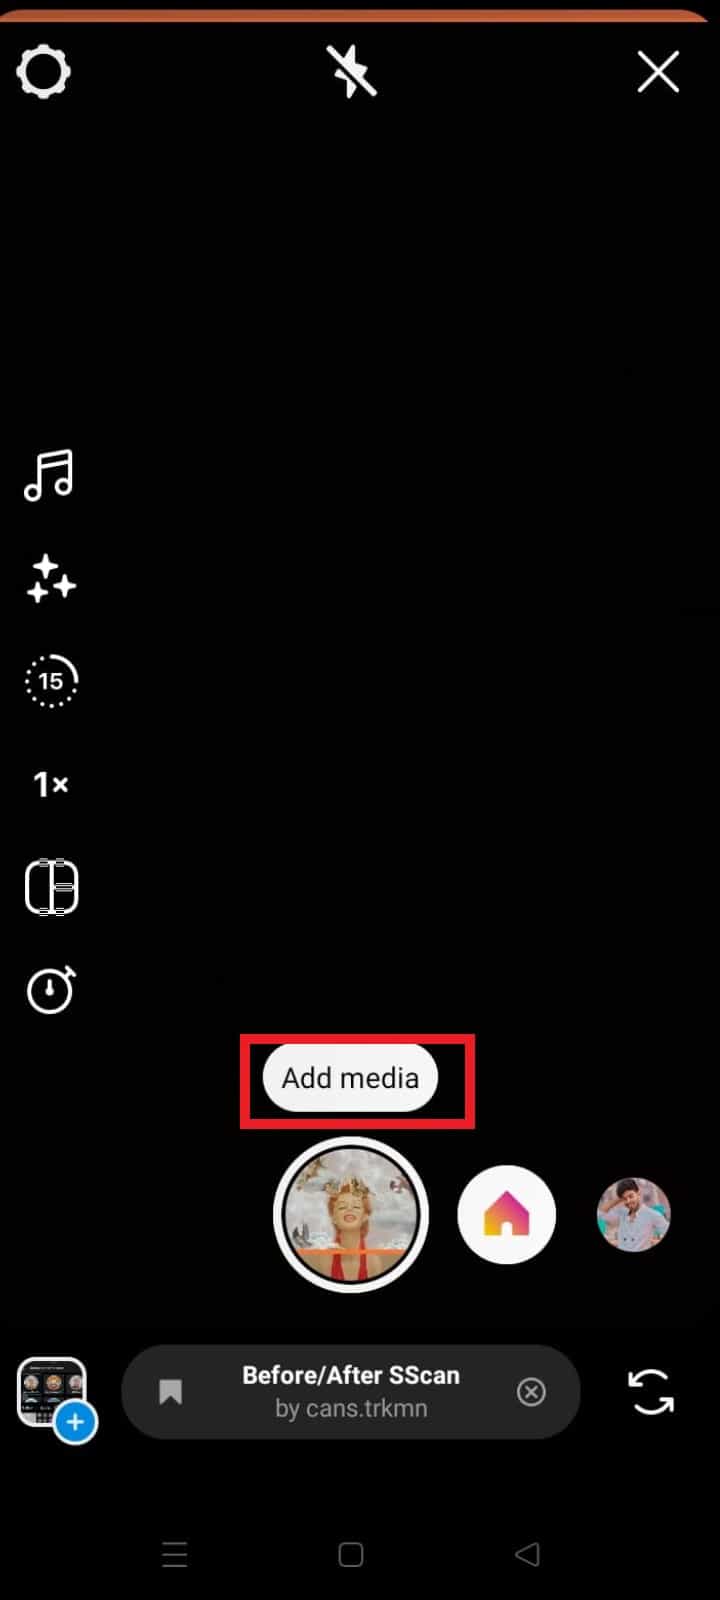
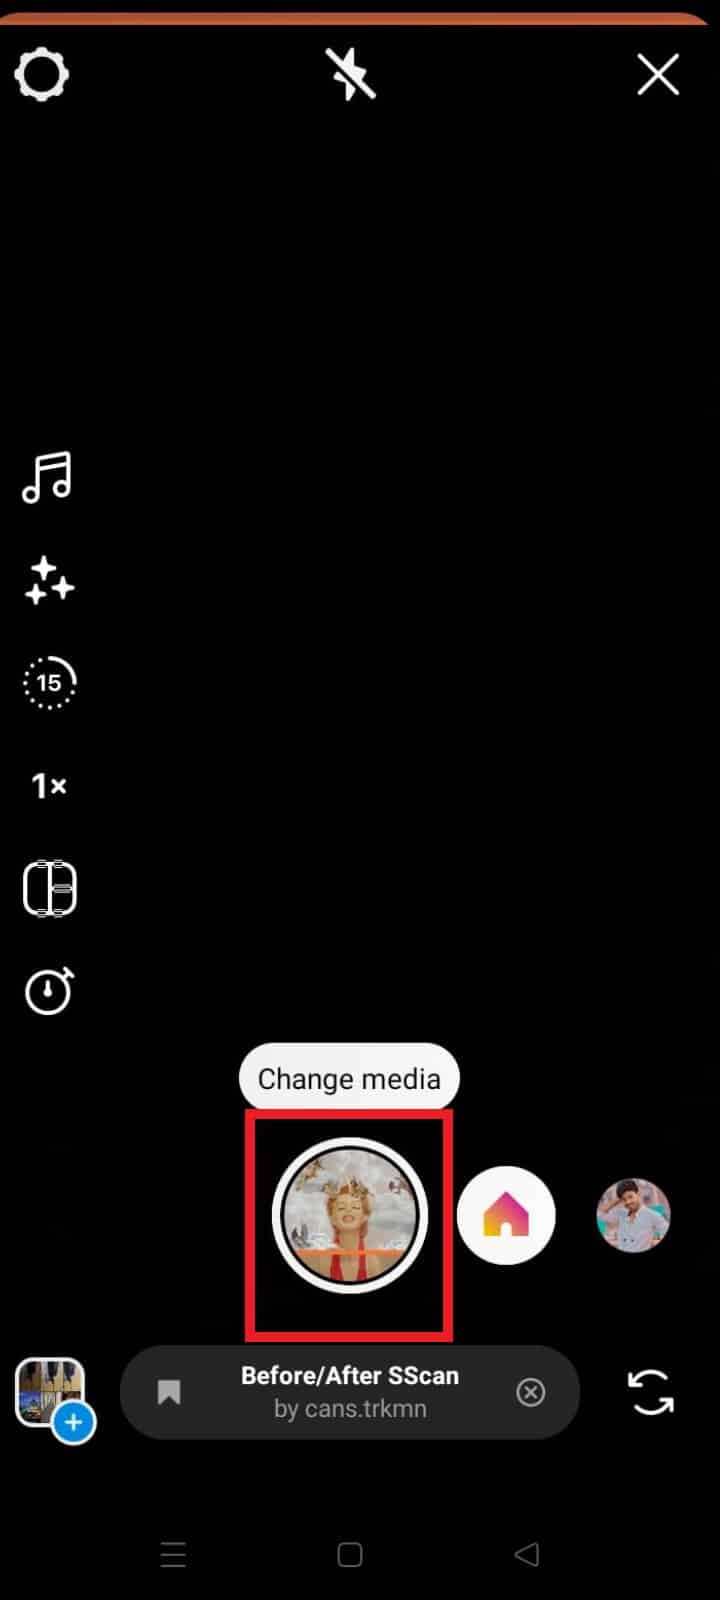
9. Now, tap on Add media.
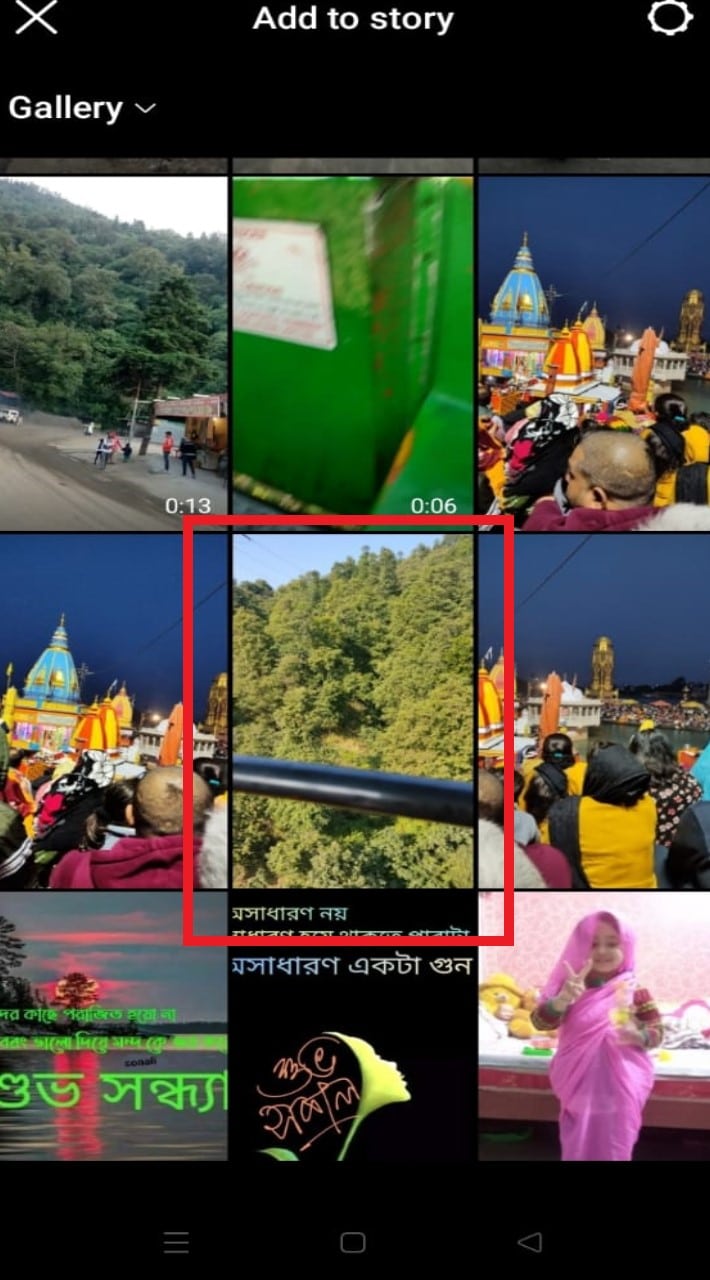
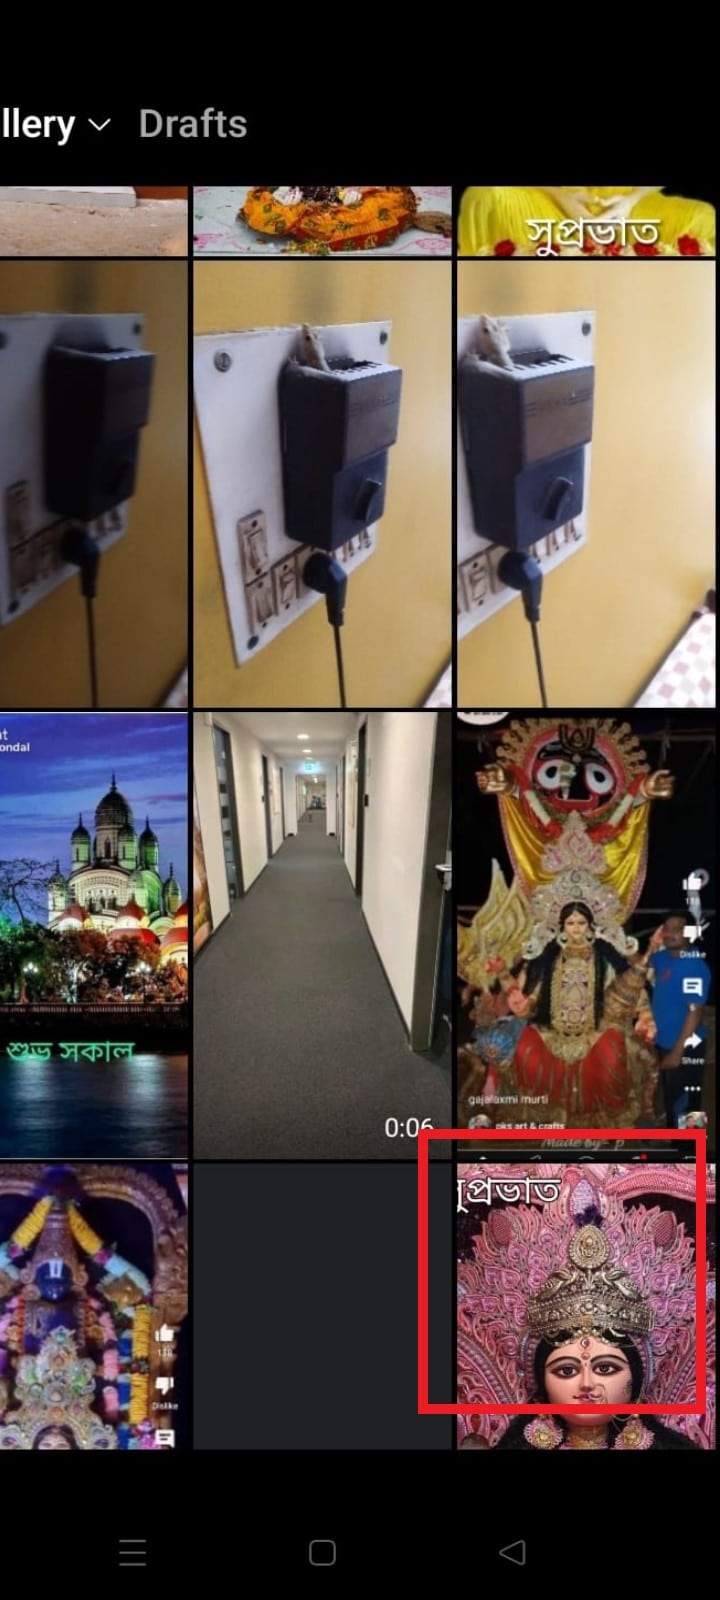
10. Choose the desired picture that you would like to use from your gallery.
11. Now, tap and hold the filter button till the circle reaches completion.
12. You will see a preview of your story with the two pictures and music. Tap on the > icon to continue.
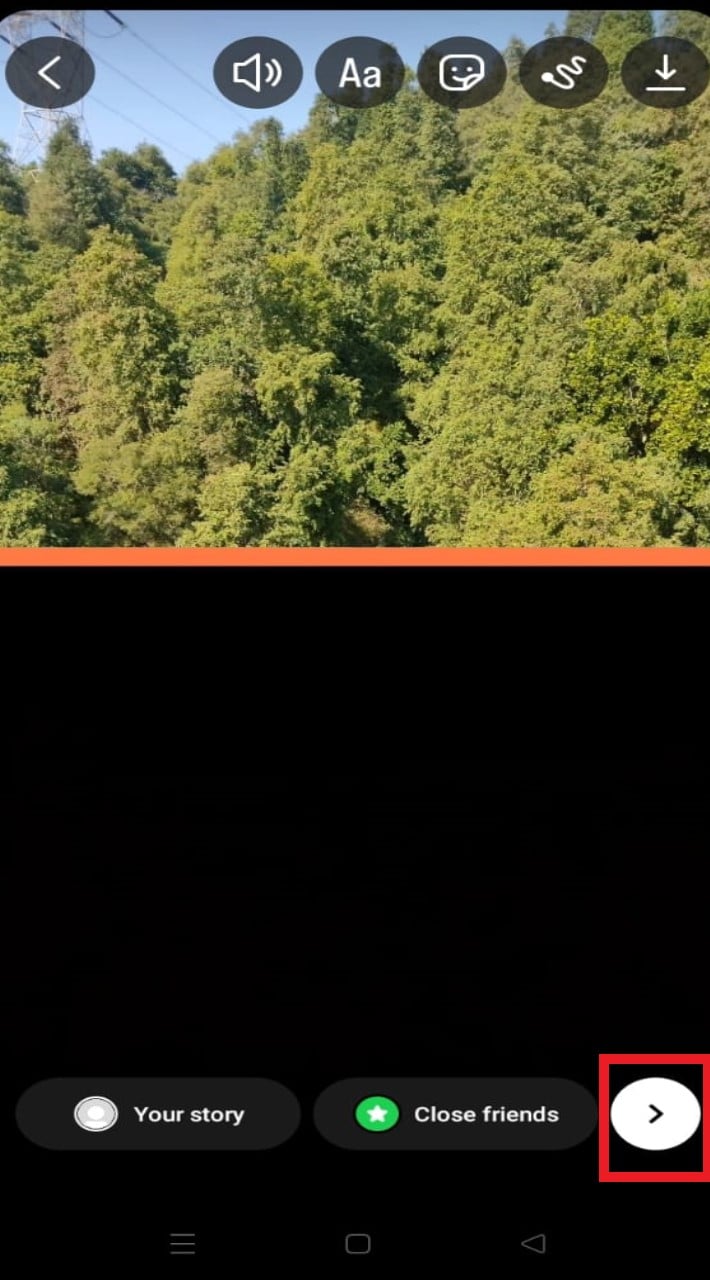
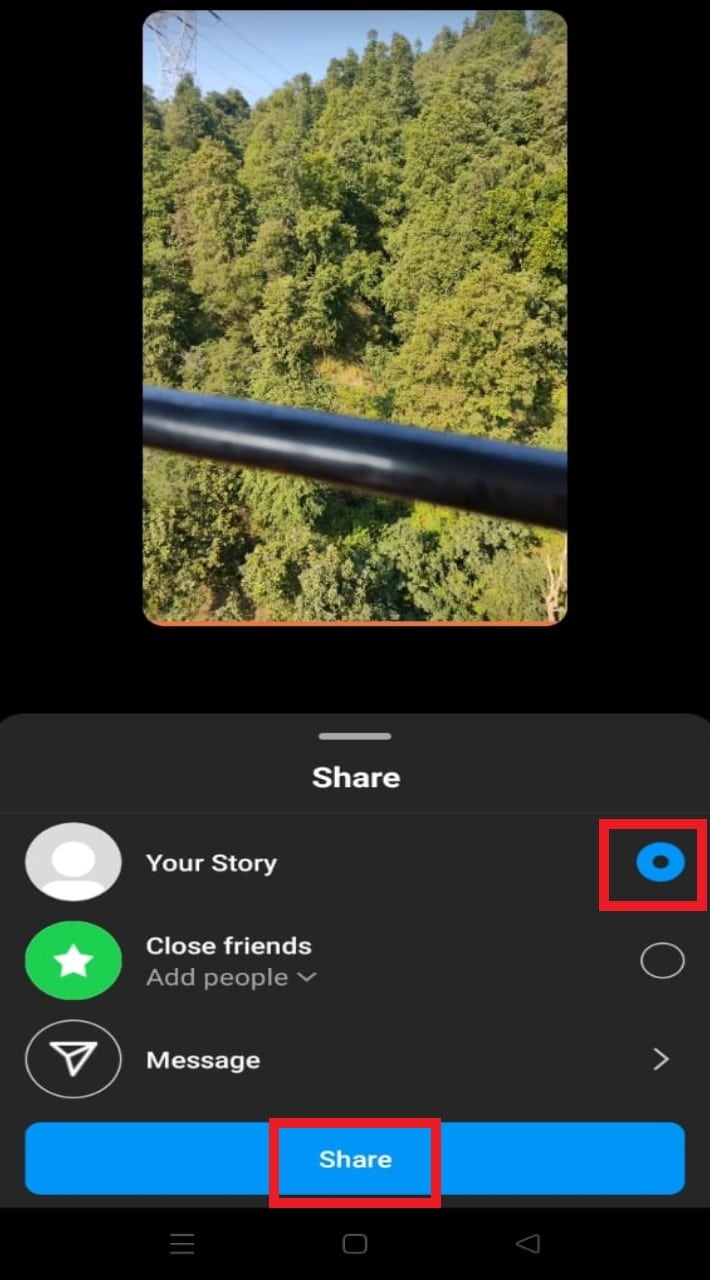
13. Tap on Your Story or Close friends.
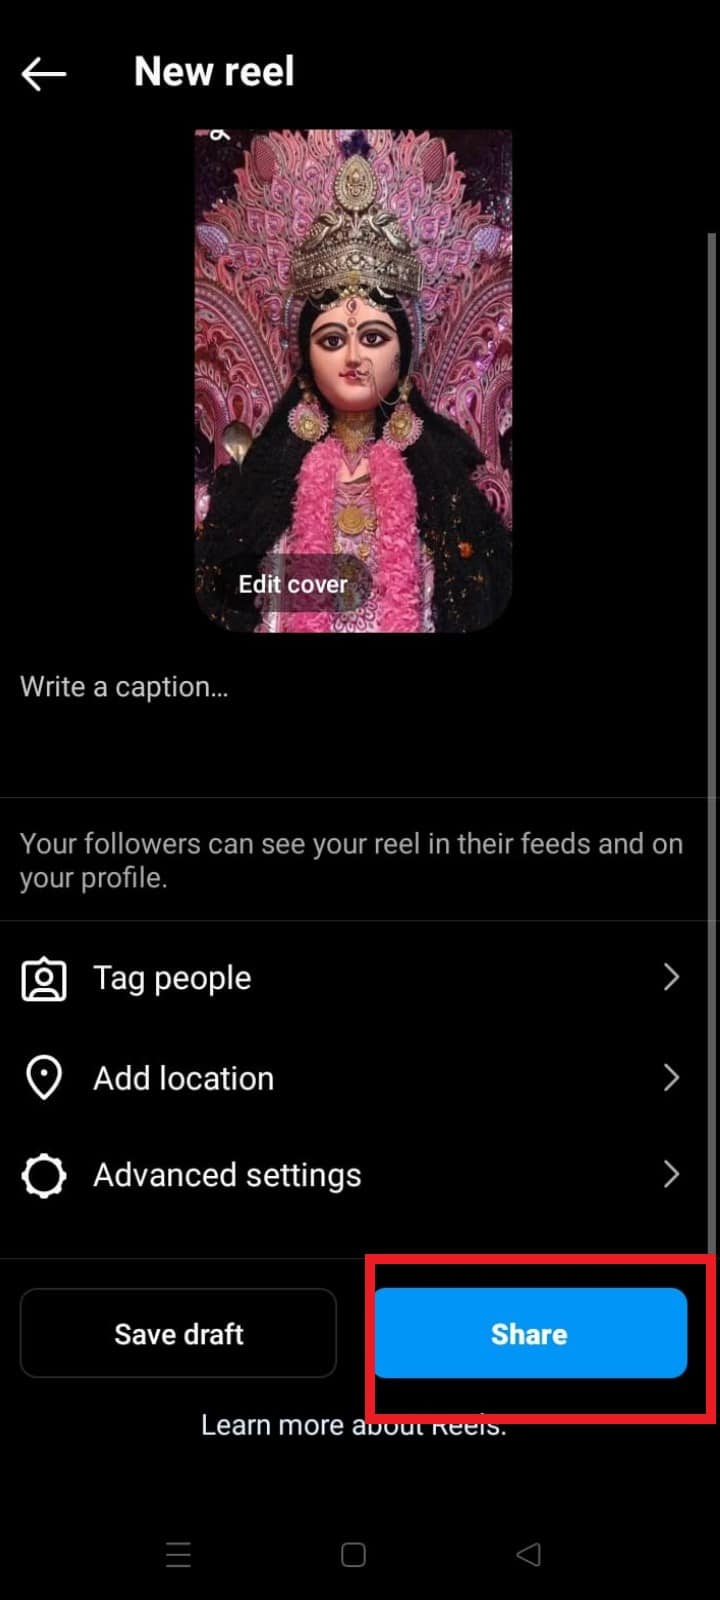
14. Then, tap on Share to share the story with the selected option.
This is how to use before after scan on Instagram.
Also Read: How to Get Hair Color Filter on Instagram
How Do You Do Before and After Reels on Instagram? How Do You Make Before and After Videos?
You can easily use the before and after filter for your Instagram reels. The steps to achieve this are given below, just follow along sequentially:
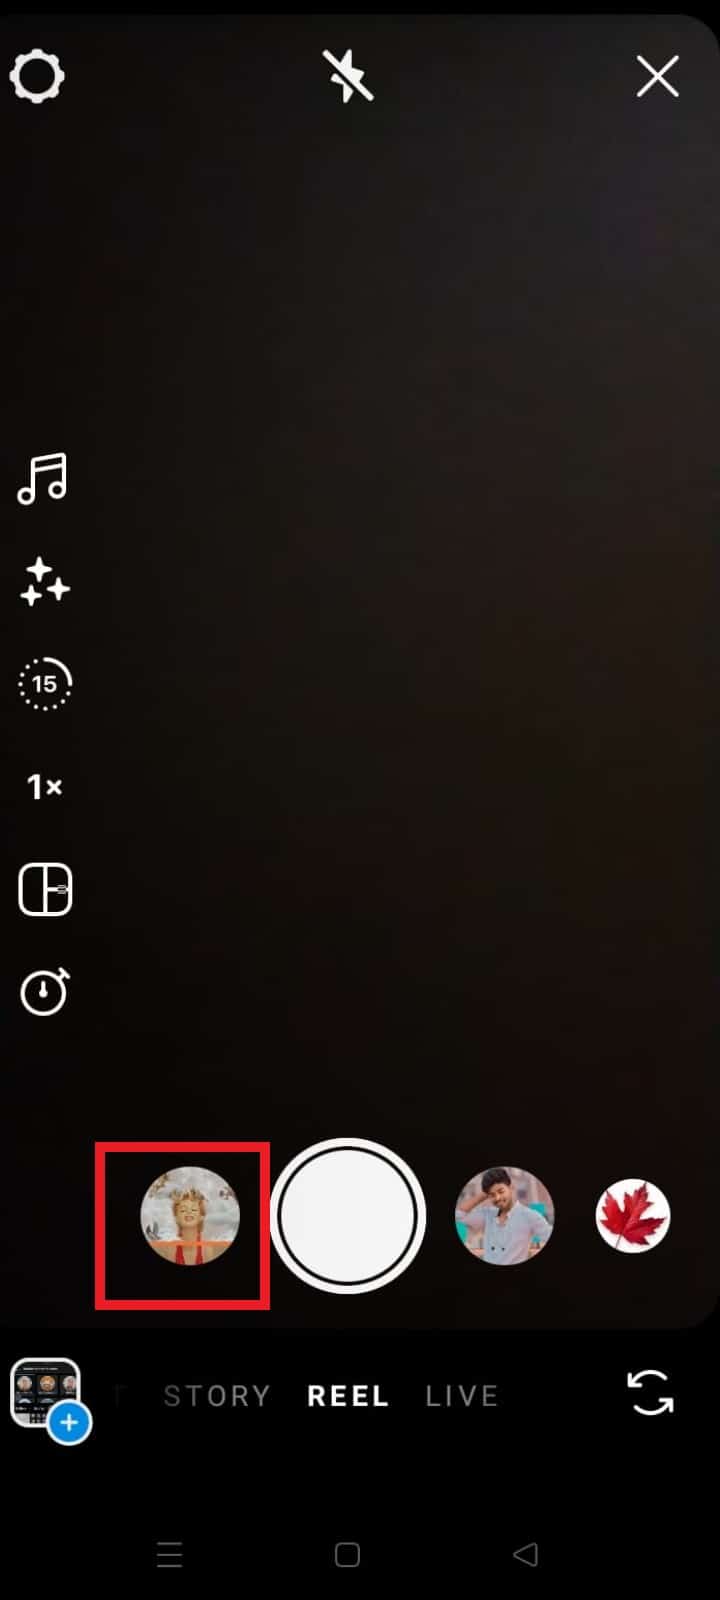
1. Open Instagram on your device.
2. Tap on the plus (+) icon from the top of your screen.
3. Tap on REEL.
4. Tap on the before and after filter.
Note: If you have not saved this filter already, follow the steps mentioned in the above heading to do that.
5. Tap on Add media.
6. Browse your phone media and tap on the desired picture you would like to use.
7. Tap and hold the filter button to make the reel.
Note: Please make sure that you tap the button long enough so the picture you have chosen can cover the entire screen.
8. Tap on Next.
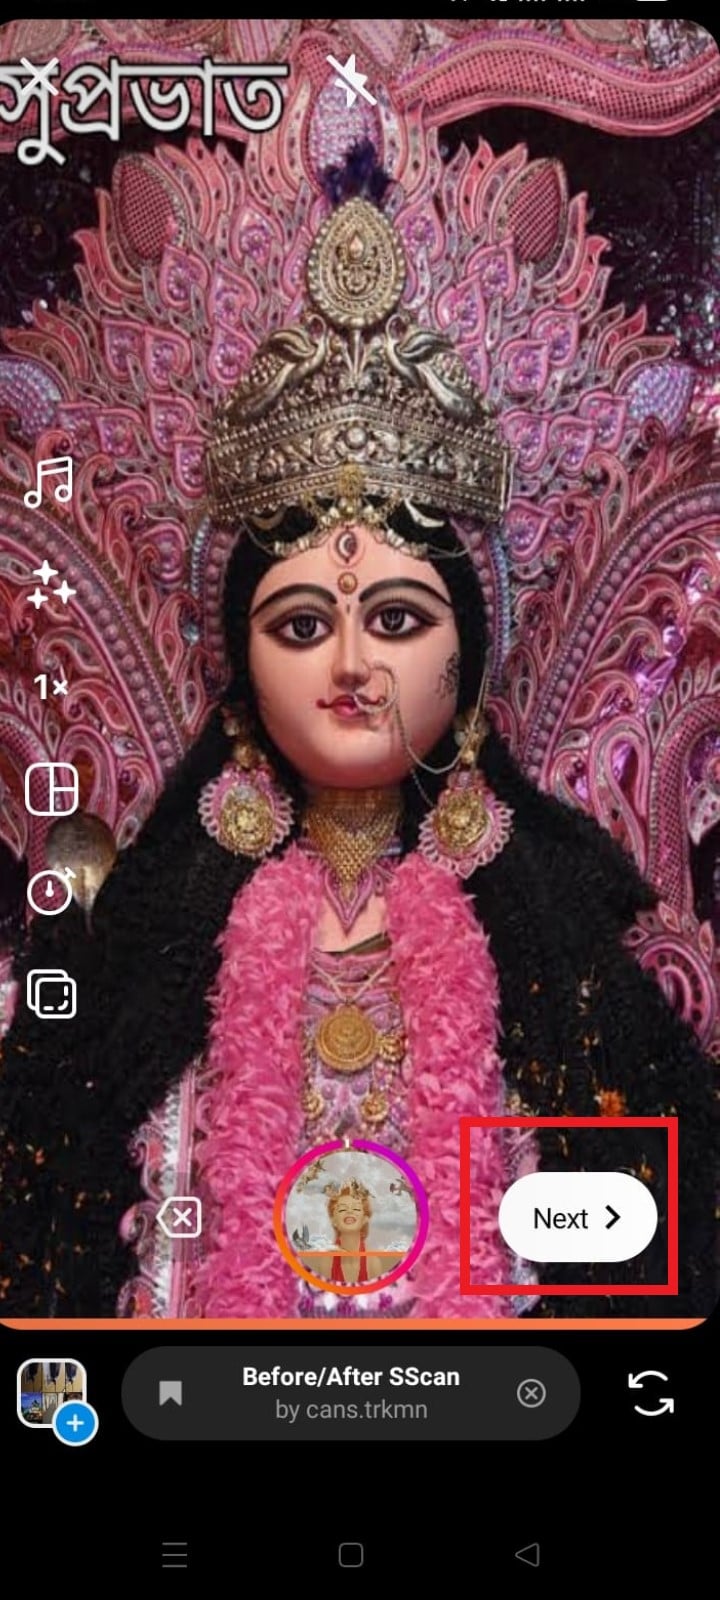
9. Here you can see a preview of your before and after reel. Tap on Next >.
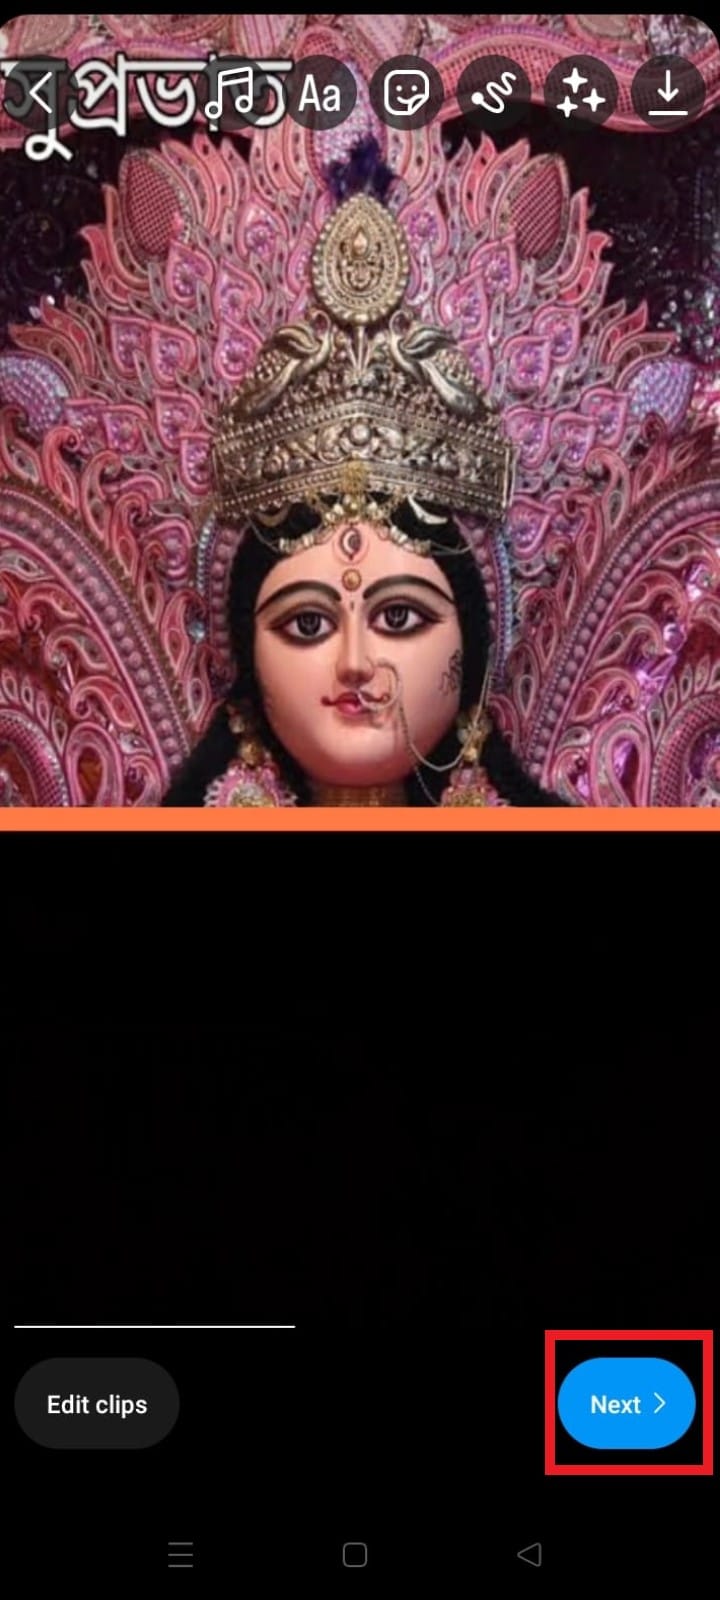
10. Make the desired changes and edits and tap on Share to upload the reel to your Instagram feed.
How does the Before After Scan Instagram Filter Work?
You can add Instagram filters as overlays to your images to enhance their aesthetic appeal. These filters might help you save time and money when it comes to creating a consistent theme that advertises your company. Instagram filters use a form of augmented reality to add new effects to your posts and stories, and the before after scan works in the same way too. For example, if you have been going to the gym regularly and you have started noticing significant changes, this filter can help you make a great piece of content to showcase your progress to your followers.
Why Can’t I Use Before and After Filter on Instagram?
Instagram has a wide array of filters for everyone to use, and all of them can be easily accessed through the mobile app. Usually, if you are not a new Instagram user, you might not see the latest trending filters available in your region right away when you open the app to make a story or a reel. This is why we have included steps to find the before and after filter from the Browse effects section. Once you have saved the filter, you can use it even after closing the app. There is probably a problem if the effect isn’t present on your Instagram profile even after you have followed all the steps mentioned before. The reasons might be:
- Faulty app cache and data
- Outdated app
- Haven’t signed into your account to see the saved filter
Recommended:
We hope that this guide was helpful and you were able to learn how to use before after scan on Instagram. Feel free to reach out to us with your queries and suggestions via the comments section below. Also, let us know what you want to learn about next.