
Sometimes, a program you install sets itself as the default program that launches specific file types, other times you simply wish to open a specific file type with a different program (for example, a .JPG file that can be opened with Paint, Windows Photo Viewer or IrfanView). In this tutorial, we will learn how to change the default program a file opens with in Windows 7.
And don’t panic! It’s extremely easy and anybody can do it, even if you are not the techy-type of person. Just follow the quick step by step instructions below and you’ll immediately be able to change the default program any type of file opens with in Windows 7.
1. First, browse to the file type you want to change the default opener for – in this tutorial I will use a .JPG file, but you can follow these steps for any type of file.
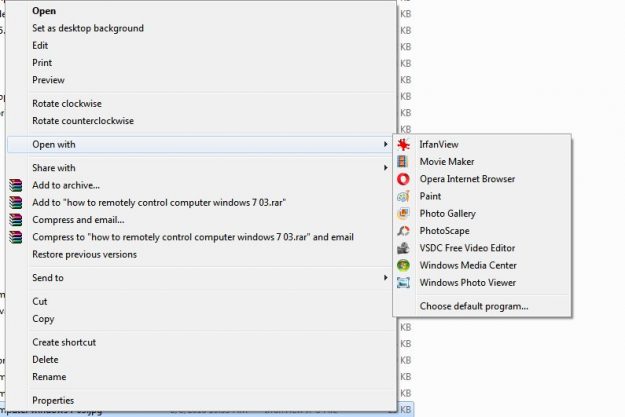
2. Next, right click on that file and click on “Open with“. If there are already more programs that can handle that file extension, as in my case, a new window will appear and you’ll have to click on “Choose default program“:
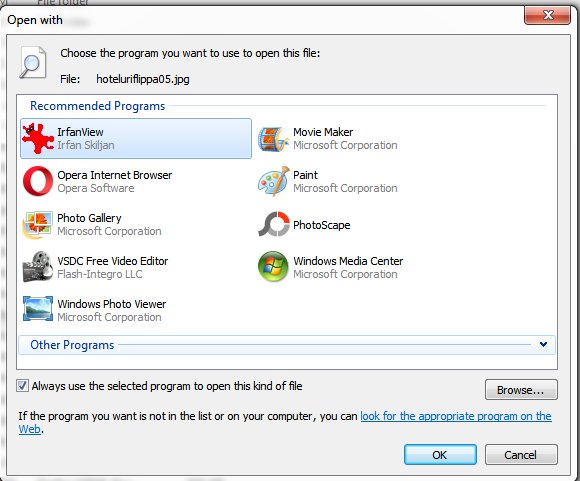
3. In the new window, first click on the small arrow pointing downwards near the “Other programs” section and see if the program you want to open the file type with is listed there. If it is not, click on the Browse button and select the program from its install location. Make sure to have the “Always use the selected program to open this kind of file” option checked, and click OK:
4. Congratulations! The file has now been opened with the program you have chosen and all files with the same extension will now be opened with the same program. It was extremely easy, hopefully!