Fix Caps Lock Stuck In Windows 10

After the latest Windows 10 update, users are experiencing a pesky issue with the Caps lock and Num lock keys. These keys are getting stuck on the keyboard, with Caps lock getting stuck the most in Windows 10 systems. Imagine your Caps lock get stuck, and you are forced to write everything in uppercase letters, including your email address or website names. You may manage with Virtual Keyboard for some time, but that’s not a permanent solution. This issue needs to be resolved at the earliest. Through this guide, you will learn why your Caps lock gets stuck and solutions to fix the Caps lock is stuck in Windows 10 issue.
How to Fix Stuck Caps Lock Key in Windows 10
Why is Caps lock stuck in Windows 10?
These are the reasons why your Caps lock got stuck with the latest Windows 10 update:
1. Outdated keyboard driver: Mostly, users experience issues with Caps lock when they are using an older version of the keyboard driver on their system.
2. Damaged key/keyboard: It is possible that you may have broken or damaged the Caps lock key on your keyboard, and this is causing the Caps to lock to get the stuck problem.
We have compiled a list of all possible methods that you can try to fix stuck Caps Lock in Windows 10 issue.
Method 1: Check for Broken Keyboard
Most of the time, the key sticking problem is not with your operating system but your keyboard itself. There are chances that your Caps lock or the Num lock keys are broken or damaged. It would help if you took your keyboard/laptop to the authorized service center to get it repaired or replaced, depending on the severity of the damage.
Method 2: Restart your computer
Sometimes, a simple reboot can help you fix minor issues such as a Caps lock or Num lock stuck on your keyboard. Hence, the first troubleshooting method to fix stuck Caps lock in Windows 10 system is restarting your computer.
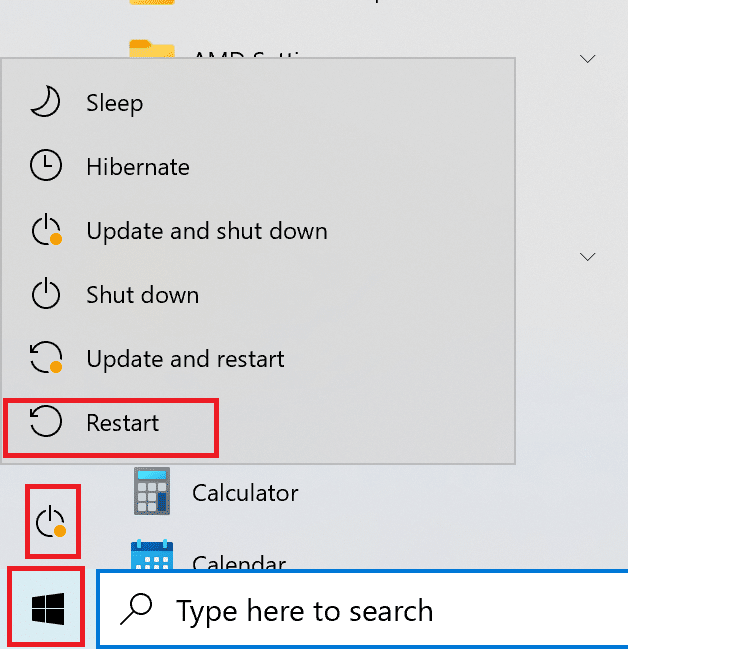
1. Press the Windows key on the keyboard to open the Start menu.
2. Click on Power, and select Restart.
Also Read: Enable or Disable Caps Lock Key in Windows 10
Method 3: Use Advanced Key Settings
To fix Caps lock stuck in Windows 10 problem, many users modified the Advanced key settings on their computer and benefitted from it. Here is how you can do it:
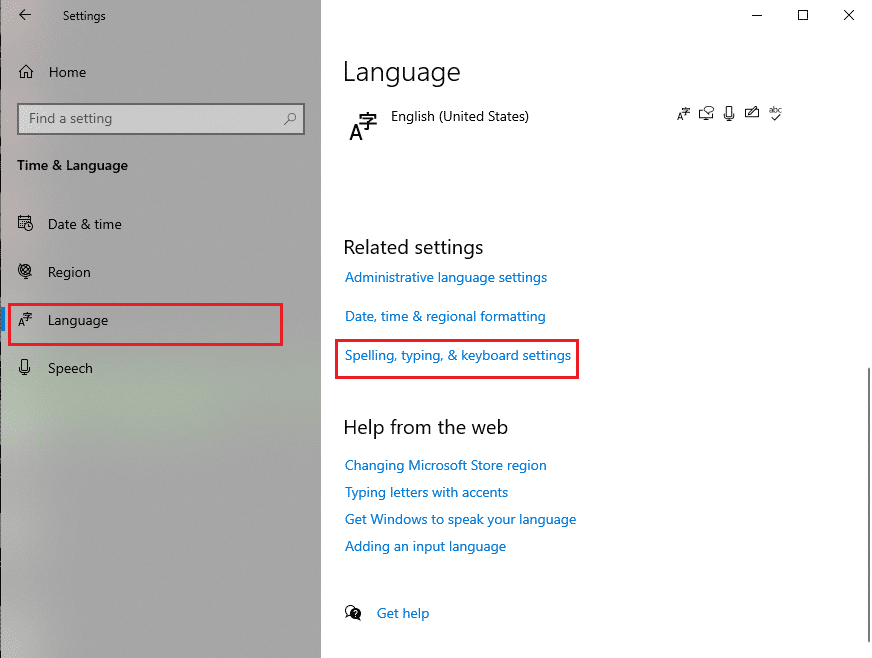
1. Press Windows + I keys together to launch the Settings app. Here, click on Time and Language, as shown.

2. Click the Language tab from the panel on the left.
3. Under Related settings on the top-right side of the screen, click the Spelling, typing, and keyboard settings link. Refer to the given pic.
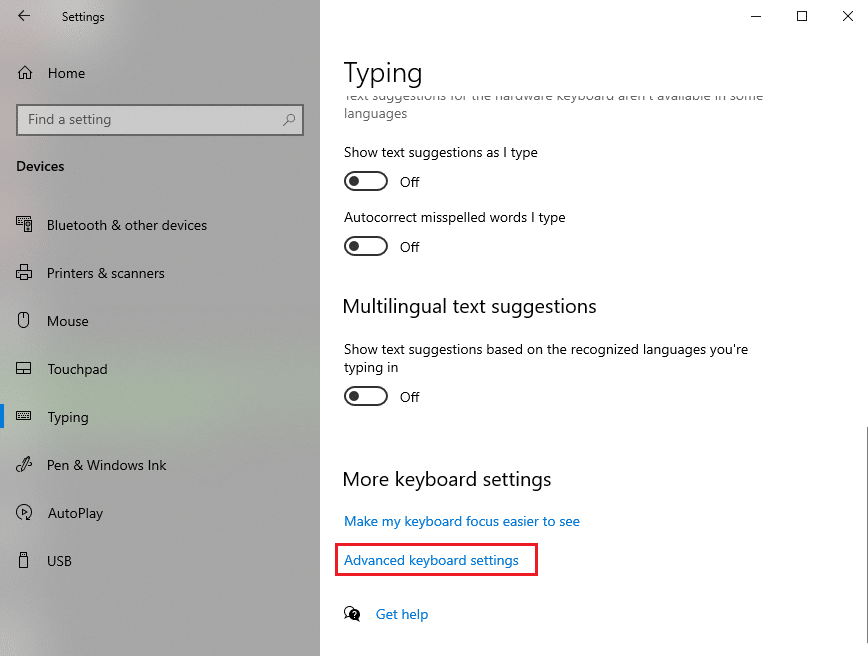
4. Scroll down to locate and click on Advanced keyboard settings, as shown below.
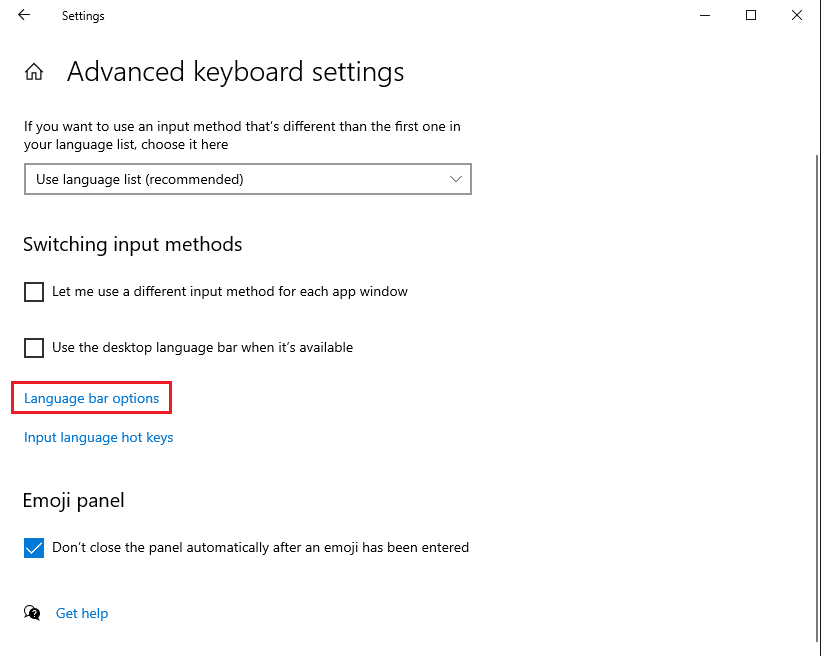
5. Click the Language bar options link under Switching input methods, as depicted.
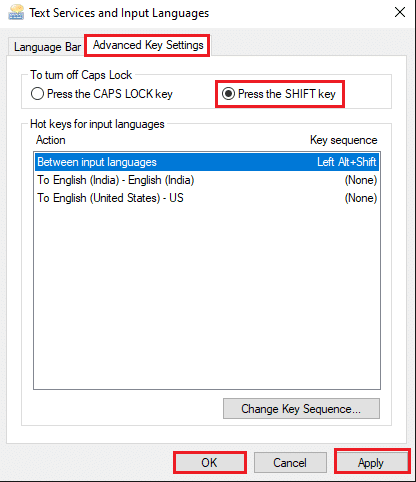
6. A new window will appear on the screen. Go to the Advanced key settings tab from the top.
7. Now, select the Press the SHIFT key to replace the keyboard settings for Caps lock.
8. Lastly, click on Apply and then OK to save the new changes. Refer to pic below for clarity.
After changing the keyboard settings, restart your computer. Here onwards, you will use the Shift key on your keyboard to turn off the Caps lock.
This method will not completely fix the stuck Caps lock issue, but you will be able to take care of urgent work for the time being.
Method 4: Use On-screen Keyboard
Another provisional solution to the stuck Cap lock keys on your keyboard is using the on-screen keyboard. This will fix the Num lock stuck in Windows 10 systems temporarily till you get the keyboard fixed.
Follow these simple steps to use the on-screen keyboard:
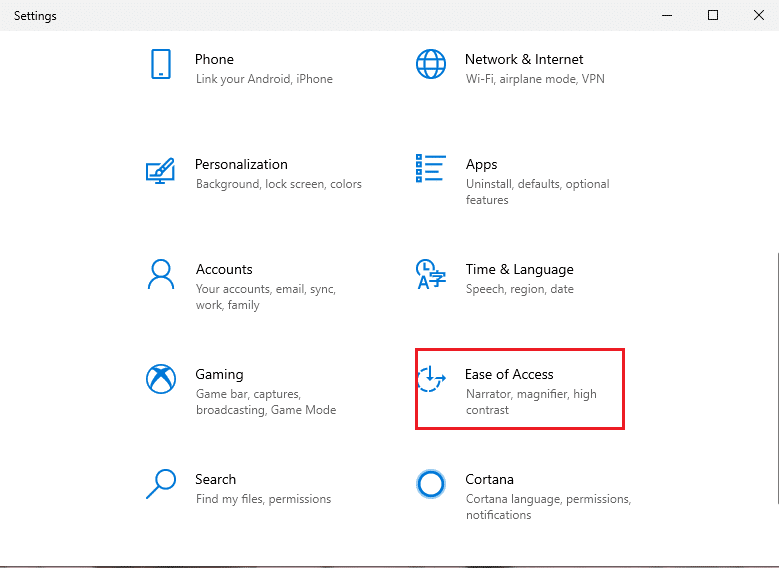
1. Launch Settings as instructed in the previous method.
2. Go to the Ease of Access section.
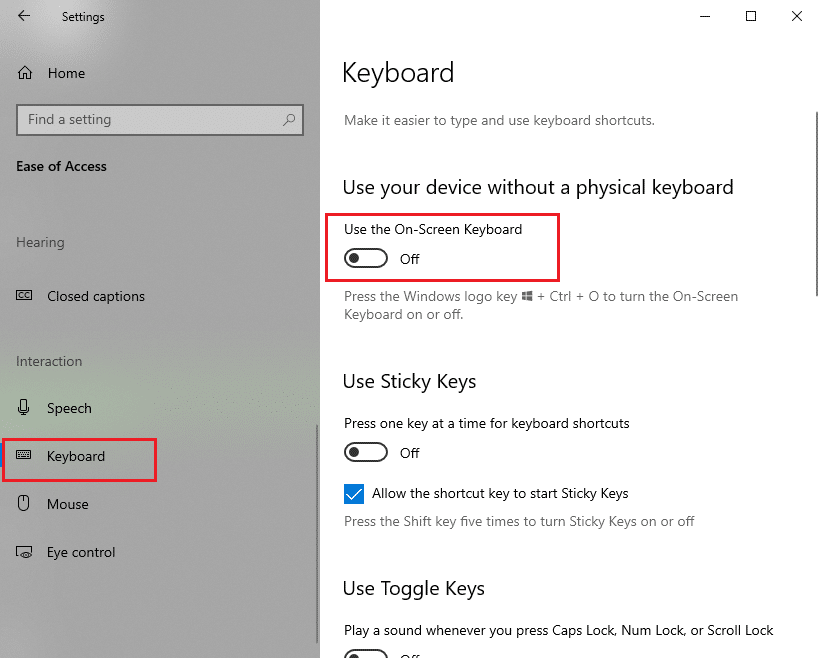
3. Under the Interaction section in the left pane, click on Keyboard.
4. Here, turn on the toggle for the option titled Use the on-screen keyboard, as depicted.
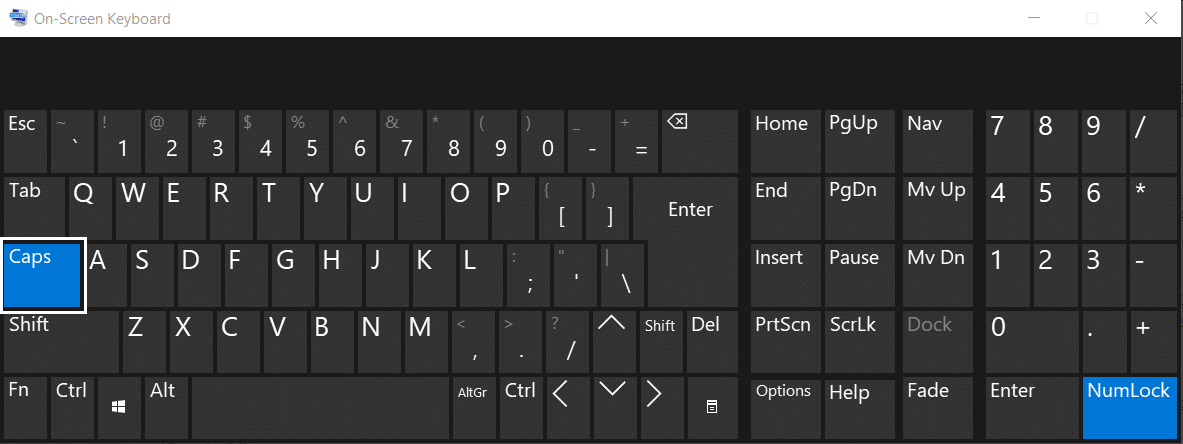
5. Finally, the virtual keyboard will pop up on your screen, where you can click the Caps lock key to turn it off.
Also Read: Enable or Disable On-Screen Keyboard
Method 5: Update your Keyboard Driver
If you are using an outdated version of the keyboard driver on your system, then you might face issues with the Caps lock keys getting stuck. Hence, updating your keyboard driver to the latest version can help you fix the Caps lock stuck in Windows 10 issue. Follow the given steps to do so:
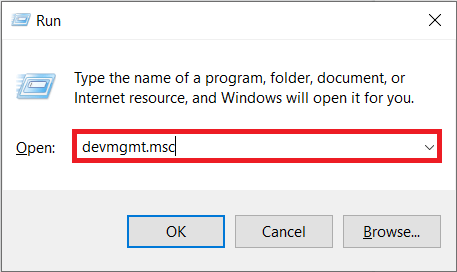
1. Open the Run dialog box by pressing the Windows + R keys on your keyboard.
2. Here, type devmgmt.msc and hit Enter, as shown.
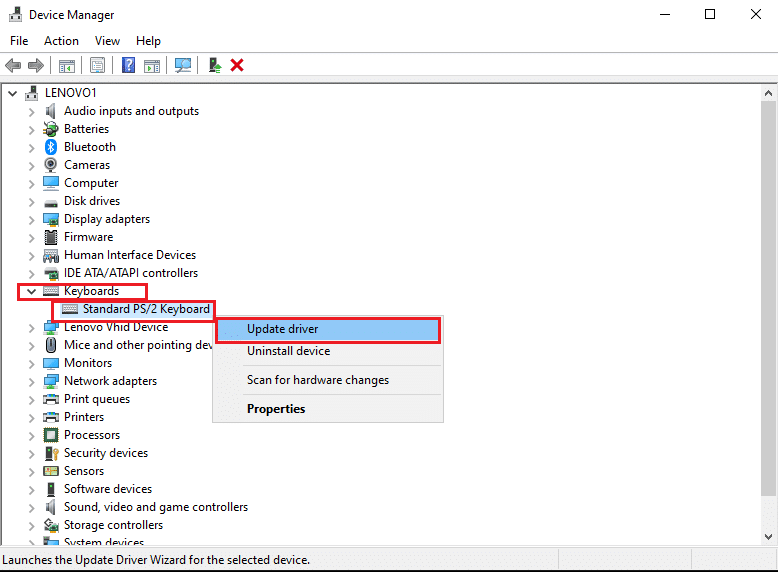
3. The Device Manager window will appear on your screen. Locate and double-click on the Keyboards option to expand it.
4. Now, right-click on your keyboard device and select Update Driver, as depicted below.
5. Select Search automatically for drivers in the new window that pops up. Refer to the given pic.

6. Your Windows 10 PC will automatically check for the latest updates and update your keyboard driver to the most recent version.
7. Restart your computer and check whether the Caps lock key functions properly or not.
Recommended:
We hope that you find our guide to be helpful and you could fix Caps lock stuck in Windows 10 issue. Let us know which method worked for you. If you have any queries/suggestions, let us know in the comments below.