Disable USB Selective Suspend Setting in Windows 10

Disable USB Selective Suspend Setting in Windows 10: USB Selective Suspend Feature allows you to put your USB devices in a very low power state mode when they are not actively in use. Using the USB Selective Suspend feature Windows can save power and increase system performance. This feature only works if the driver for the USB device supports Selective Suspend, otherwise it won’t work. Also, this is how Windows is able to avoid data loss and driver corruption in external USB devices such as Hard disk or SSD.
As you can see there are many advantages of using the USB Selective Suspend feature in Windows 10, but sometimes this feature is the cause of many USB errors such as USB device not recognized, Device Descriptor Request Failed, etc. In such cases, you need to disable USB Selective Suspend Setting in order to fix the USB errors.
What is the USB Selective Suspend feature?
Although we have already gone through the basic explanation of this feature, but here we will see what is USB Selective Suspend feature according to Microsoft:
“The USB selective suspend feature allows the hub driver to suspend an individual port without affecting the operation of the other ports on the hub. Selective suspension of USB devices is especially useful in portable computers since it helps conserve battery power. Many devices, such as fingerprint readers and other kinds of biometric scanners, only require power intermittently. Suspending such devices, when the device is not in use, reduces overall power consumption.”
Should you Enable or Disable USB Selective Suspend Setting
Well, you should definitely enable USB Selective Suspend feature as it helps in improving the battery life of your PC. Many USB devices such as printers, scanners, etc are not actively in use throughout the day, so these devices will be put in low power mode. And more power would be available to your active USB devices.
Now you should Disable USB Selective Suspend Setting in Windows 10 if you’re facing USB errors such as USB device not recognized. Also, if you’re unable to put your PC to sleep or hibernate mode then this is because some of your USB ports are not suspended and again you need to disable USB Selective Suspend feature in order to fix this issue.
So far, we have covered everything regarding USB Selective Suspend feature, but we still haven’t discussed how to actually enable or disable USB Selective Suspend Setting. Well, that being said let’s see How to Disable USB Selective Suspend Setting in Windows 10 with the help of the below-listed guide.
Disable USB Selective Suspend Setting in Windows 10
Make sure to create a restore point just in case something goes wrong.
1.Right-click on the battery icon on Taskbar and select Power Options.
![]()
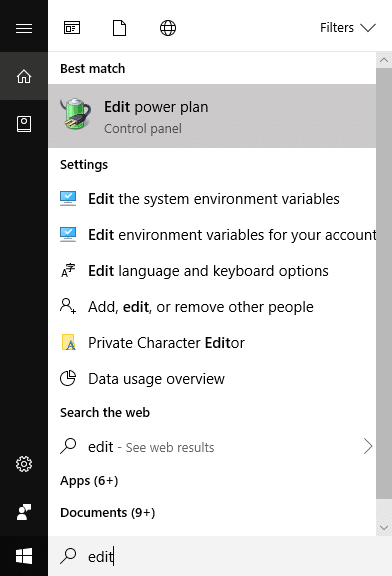
Note: You could also type power plan in Windows Search and then click on “Edit Power Plan” from the search result.
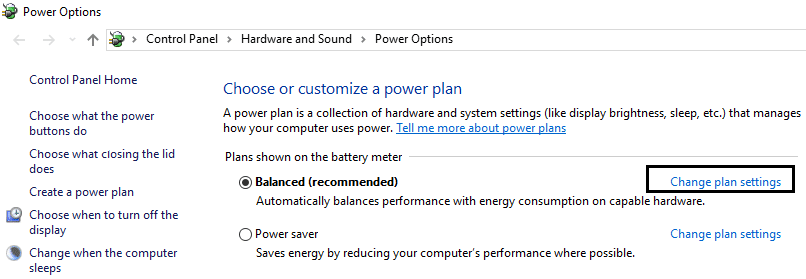
2.Click on Change plan settings next to your currently active Power Plan.
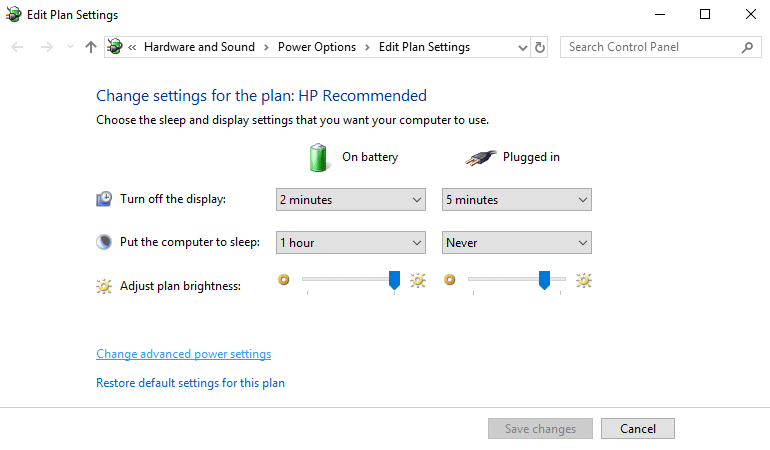
3.Now click on “Change advanced power settings” link.
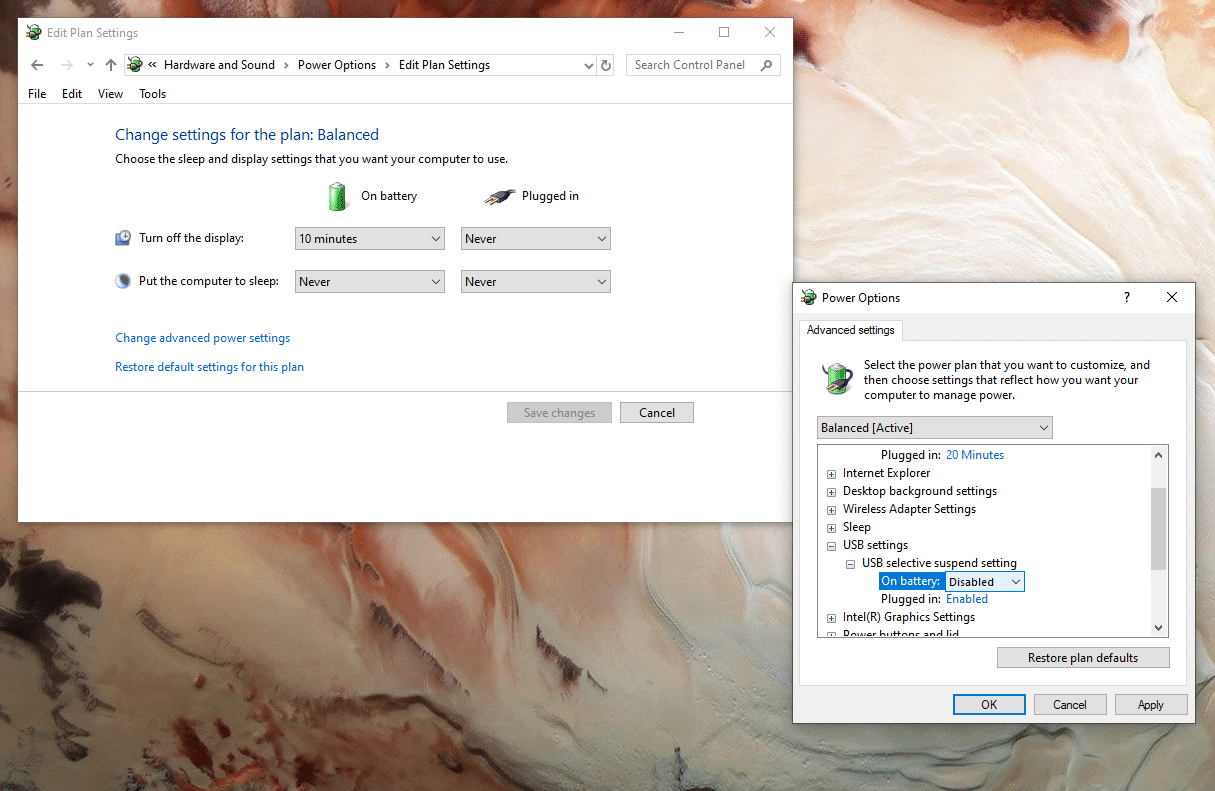
4.Find USB settings and then click on the Plus (+) icon to expand it.
5.Under USB settings you will find USB selective suspend setting.
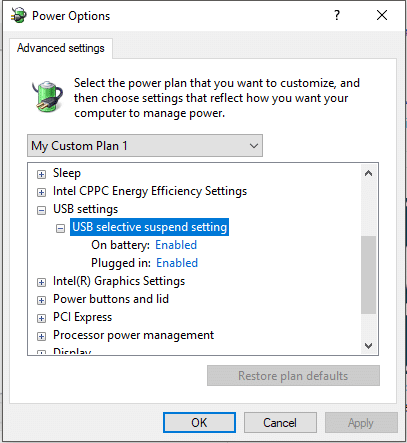
6.Expand USB selective suspend settings and select Disabled from the drop-down.
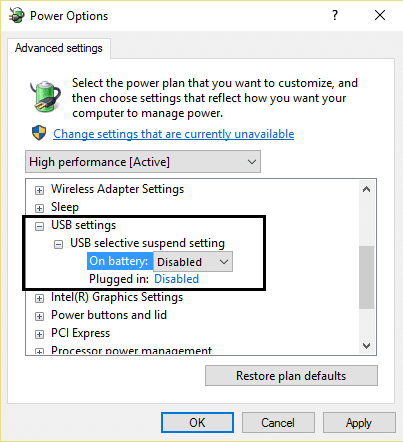
Note: Make sure it is set to disable for both “On Battery” and “Plugged in”.
7.Click Apply followed by OK.
8.Reboot your PC to save changes.
Once you have followed the above steps, Windows 10 will no longer put USB devices into low power state mode. While the above steps are followed in Windows 10 but you can follow the same steps to Disable USB Selective Suspend Setting in Windows 7 and Windows 8.1.
Still having problems?
If you’re still facing USB errors or if your USB device is still having power or sleep issues then you disable power management for such USB devices.
1.Press Windows Key + R then type devmgmt.msc and hit Enter to open Device Manager.

2.Expand Universal Serial Bus controllers and connect your USB device which is having issues.
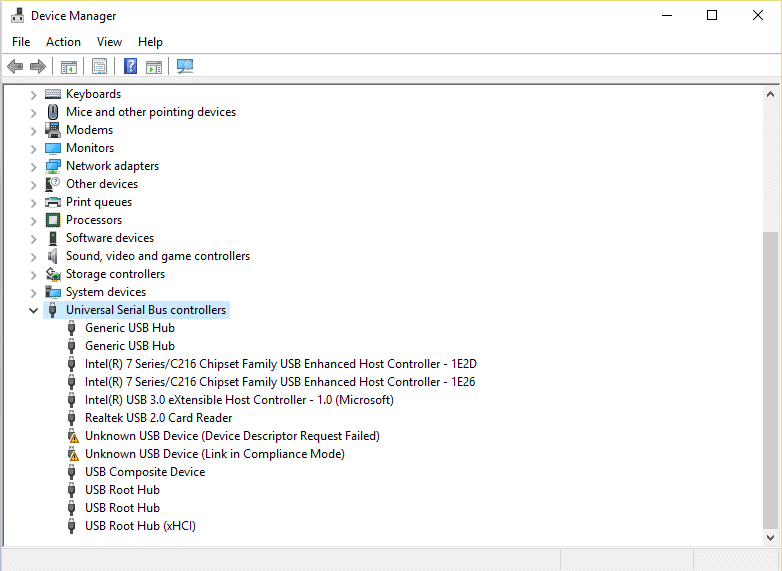
3.If you can’t identify your plugged in USB device then you need to perform these steps on every USB Root Hubs and controllers.
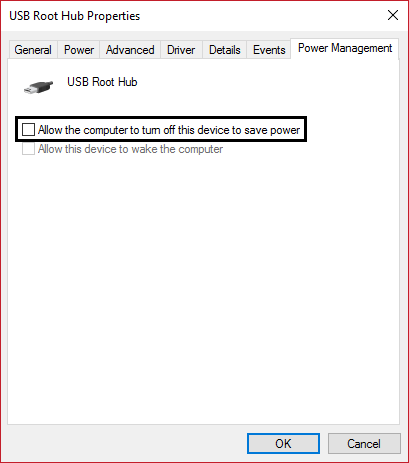
4.Right-click on the Root Hub and select Properties.
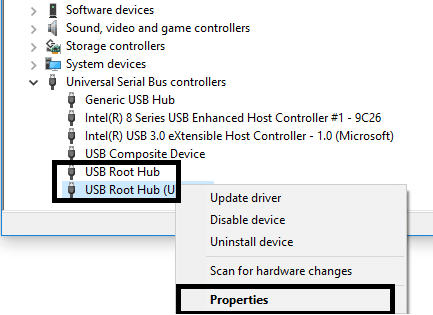
5.Switch to the Power Management tab and uncheck “Allow the computer to turn off this device to save power“.
6.Repeat the above steps for the other USB Root Hubs/controllers.
Recommended:
That’s it you have successfully learned How to Disable USB Selective Suspend Setting in Windows 10, but if you still have any questions regarding this tutorial then please feel free to ask them in the comment’s section.