Fix Computers Not Showing Up on Network in Windows 10

Sharing files with other PCs connected to the same network has become a lot easier than before. Earlier, one would either upload the files to the cloud and share the download link or physically copy the files in a removable storage media such as a USB drive and pass it on. However, these ancient methods are no longer required as your files can now be shared via a few easy clicks using the network file sharing functionality in Windows 10. Having said that, you may often find it difficult to connect to other Windows PCs in the same network. We will be explaining several methods to fix computers not showing up on network & Windows 10 network sharing not working issues in this article.
How to Fix Computers Not Showing Up on Network in Windows 10
Computers not showing up on network is a common issue while trying to connect with other PCs. If you are also having this problem then, do not worry! You can check out our guide on How to Setup Network Files Sharing on Windows 10 to learn to connect to other PCs in your network and share files.

Reasons for Windows 10 Network Sharing Not Working Issue
This problem primarily arises when:
- you try to add a new PC to your network.
- you reset your PC or network sharing settings entirely.
- new Windows updates (Versions 1709, 1803 & 1809) are bug-ridden.
- network discovery settings are incorrectly configured.
- network adapter drivers are corrupt.
Method 1: Enable Network Discovery and File Sharing
Issues with sharing files over a network are bound to occur if the network discovery feature is disabled in the first place. As the name suggests, this feature allows your PC to discover other PCs and devices connected to the same network.
Note: Network discovery is turned on, by default, for private networks like home & workplace networks. Also, it is disabled, by default, for public networks such as airports and cafes.
Hence, to resolve this issue, enable network discovery and file sharing through the following steps:
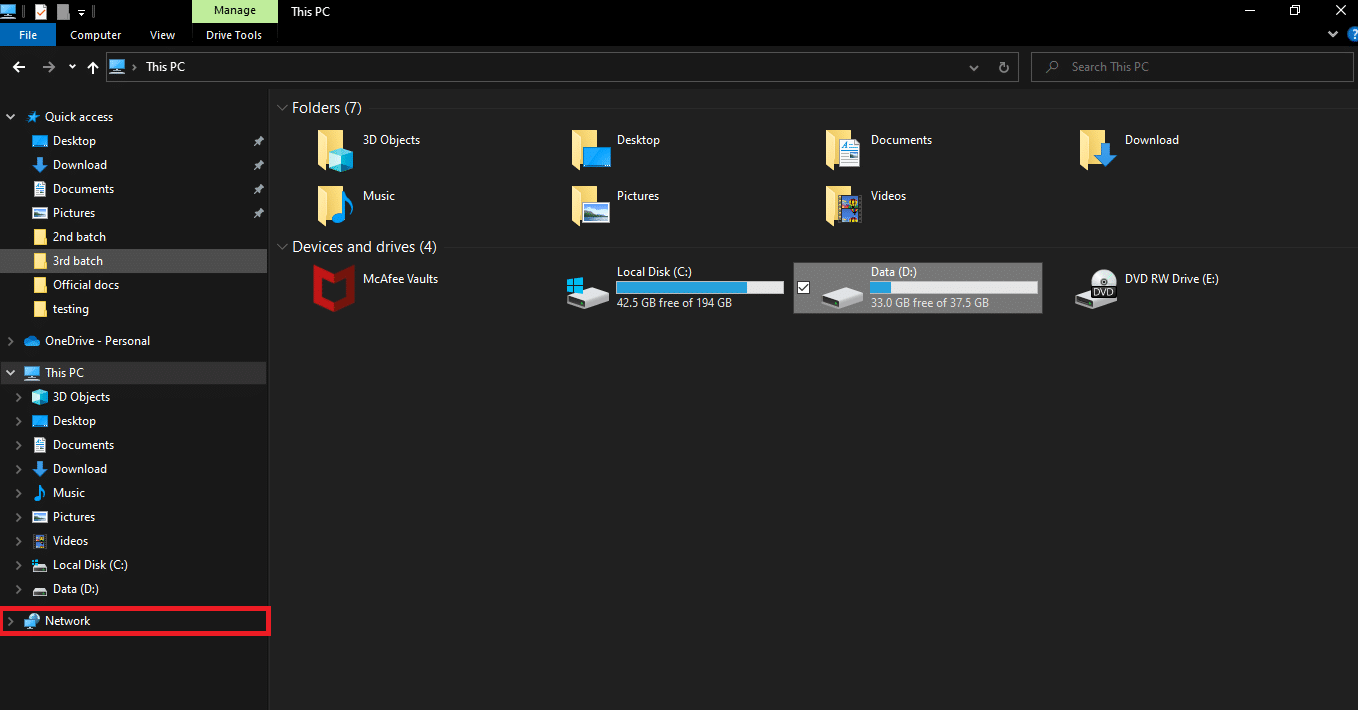
1. Press Windows + E keys simultaneously to open File Explorer.
2. Click on the Network in the left pane as shown.
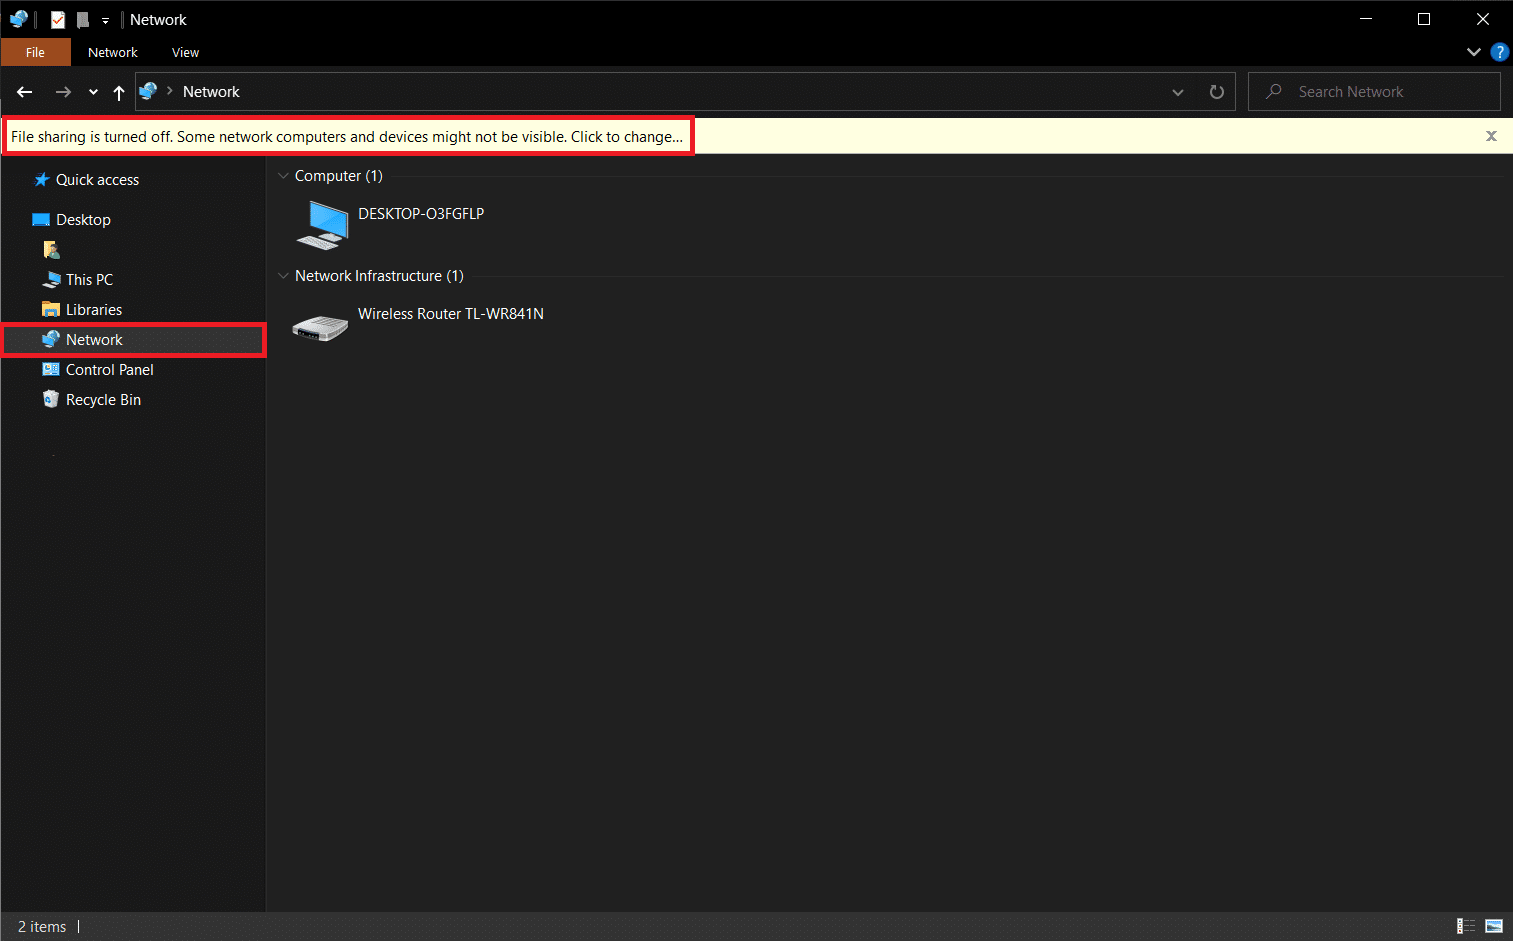
3. If the File Sharing feature is disabled, an alert message will appear at the top of the window stating: File sharing is turned off. Some network computers & devices might not be visible. Click on change… Thus, click on the pop-up.
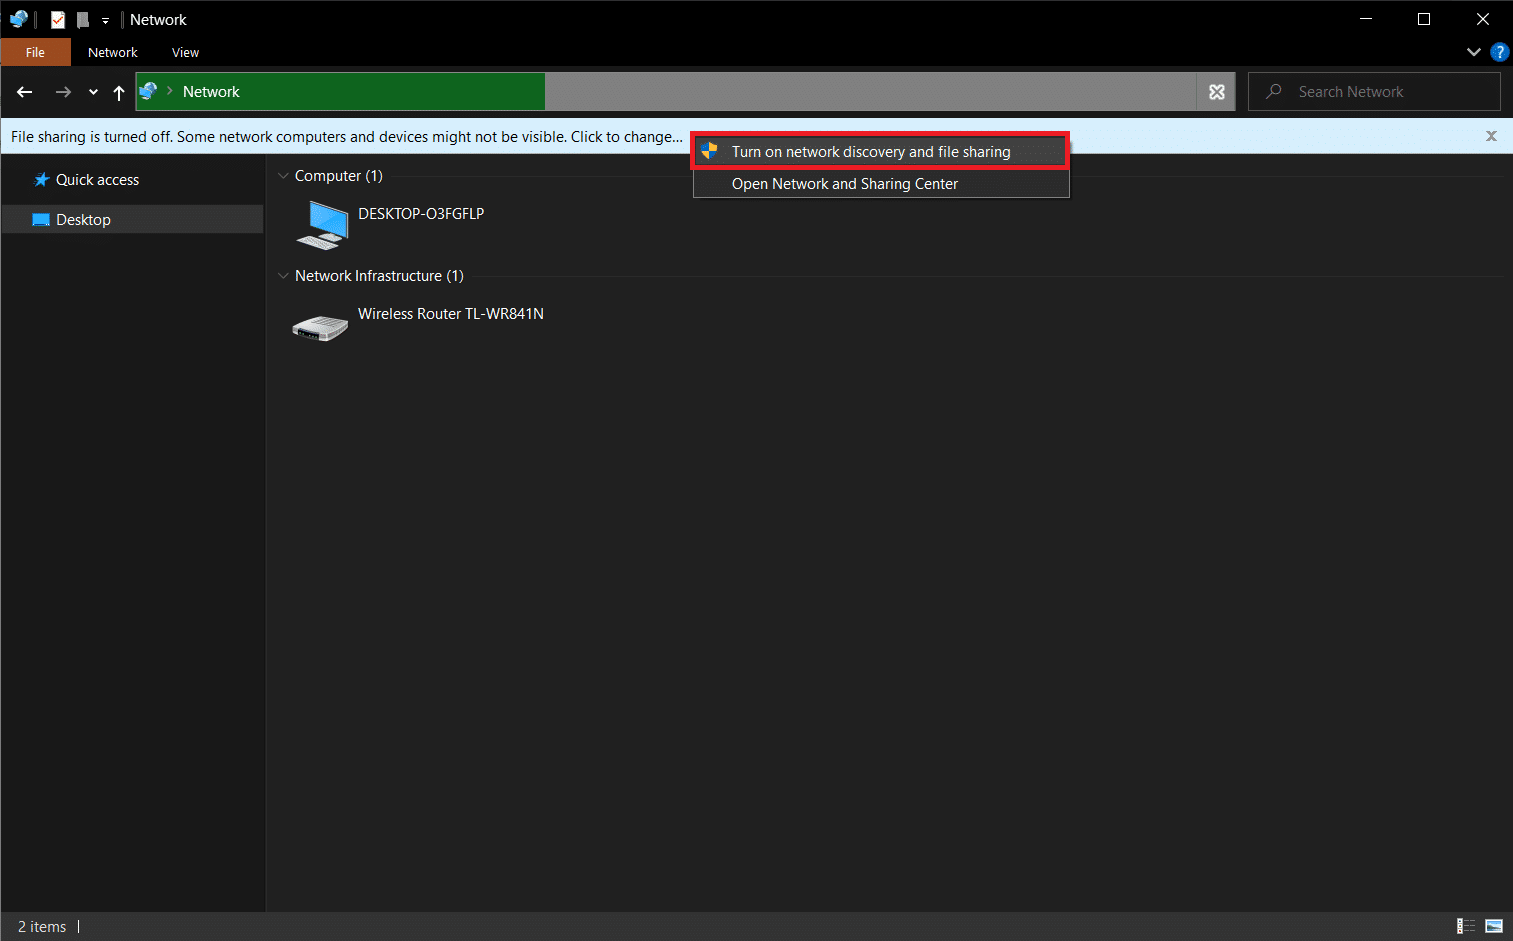
4. Next, select Turn on the network discovery and file sharing option, as depicted below.
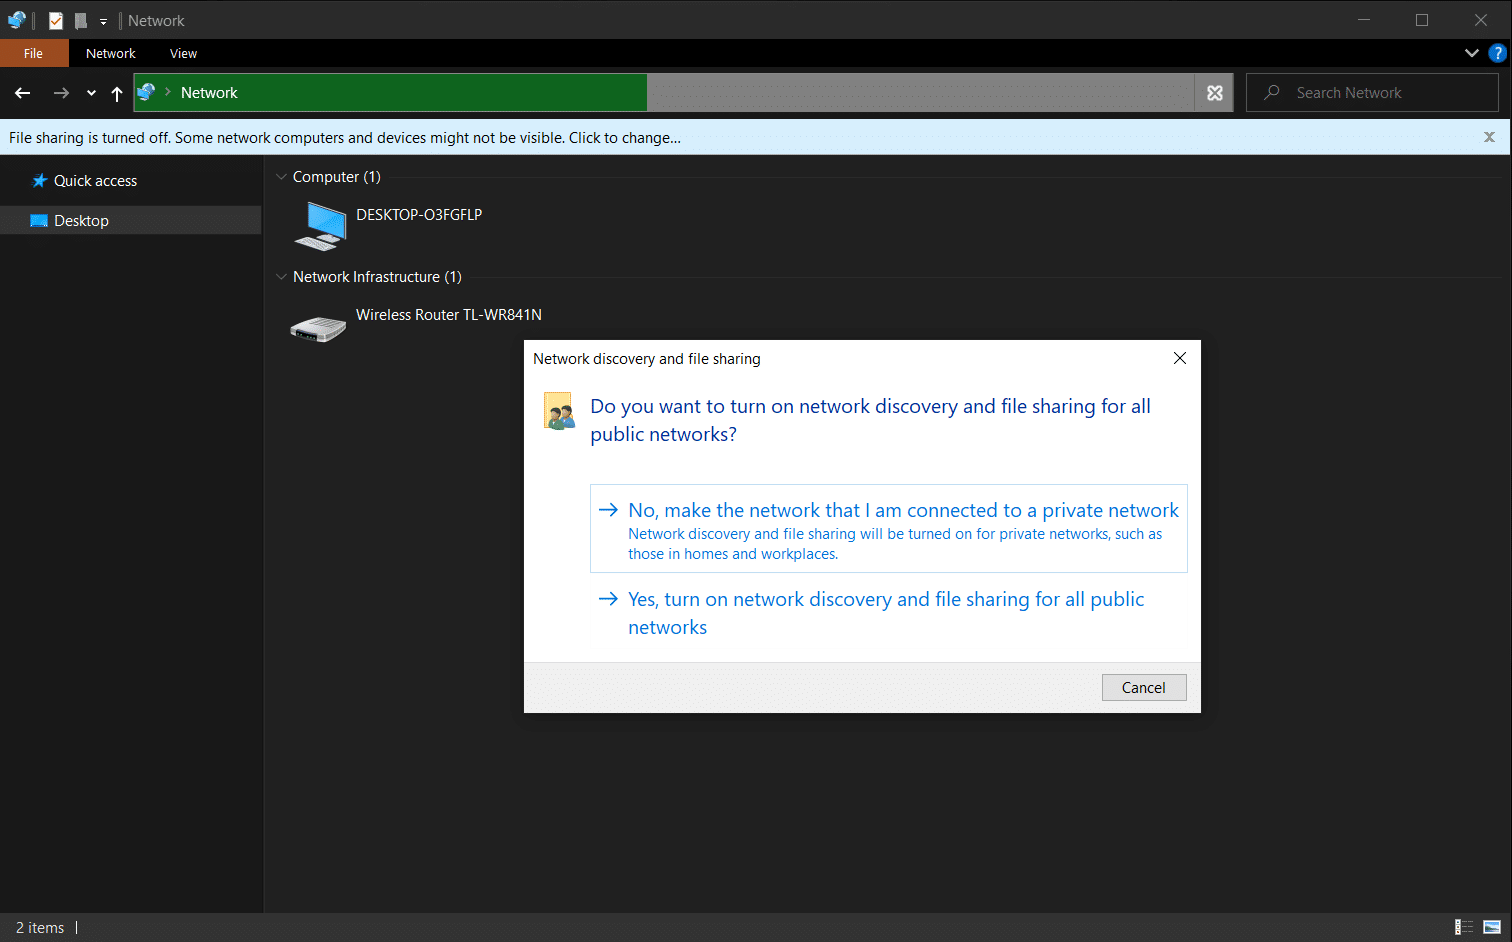
5. A dialog box inquiring Do you want to turn on network discovery and file sharing for all public networks? will pop up. Choose the appropriate option.
Note: You should steer away from enabling network discovery and file sharing for all public networks and only enable it if an absolute necessity arises. If you aren’t sure which option to choose, simply click on No, make the network that I am connected to a private network.
6. Refresh the Network page or reopen File Explorer. All the PCs connected to this network will be listed here.
Also Read: Fix Family Sharing YouTube TV Not Working
Enabling network discovery will allow you to see other PCs. However, you may encounter network sharing not working problems if the share settings aren’t set appropriately. Follow the below instructions carefully to fix computers not showing up on network issue.
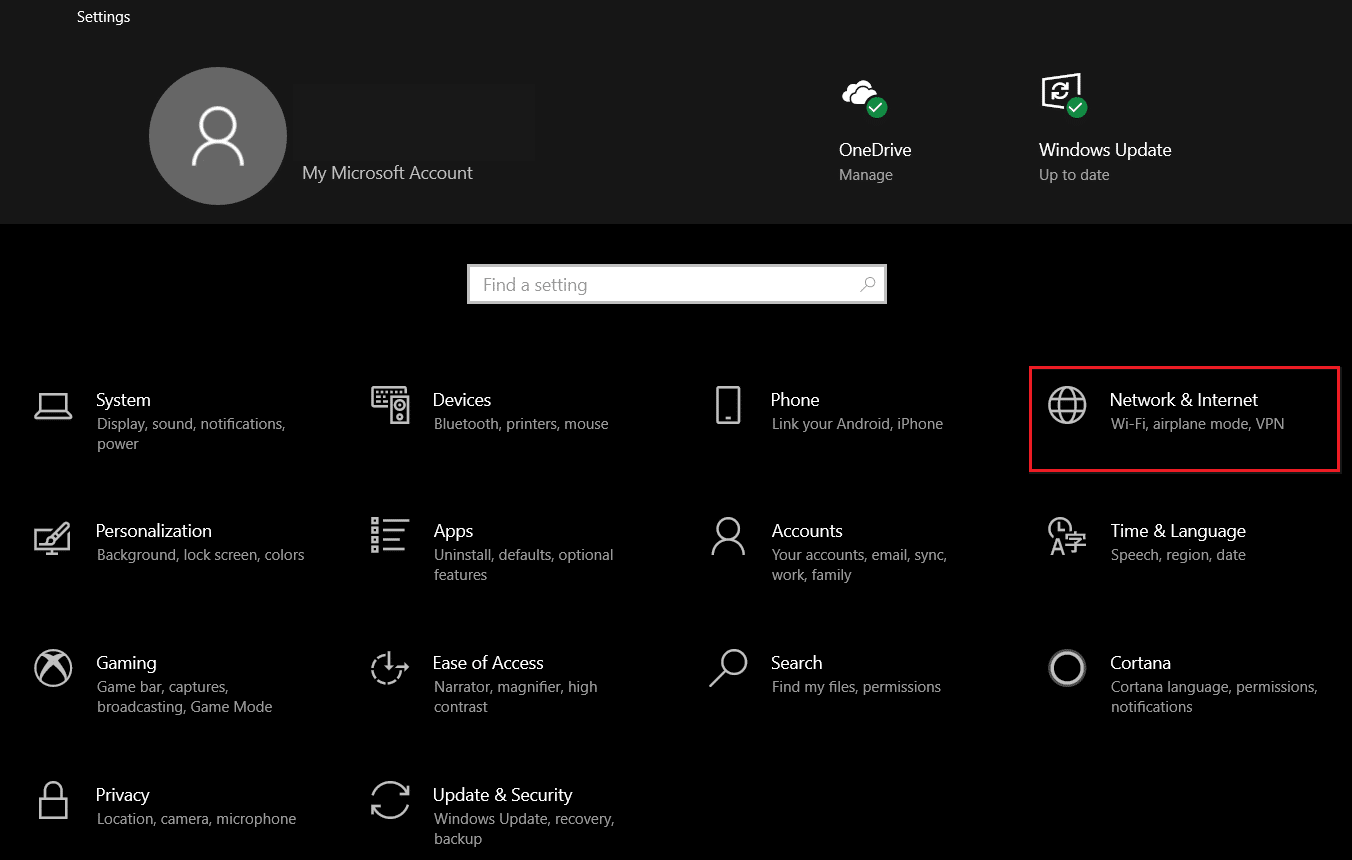
1. Hit the Windows + I keys simultaneously to open Windows Settings.
2. Click on the Network & Internet settings, as shown.
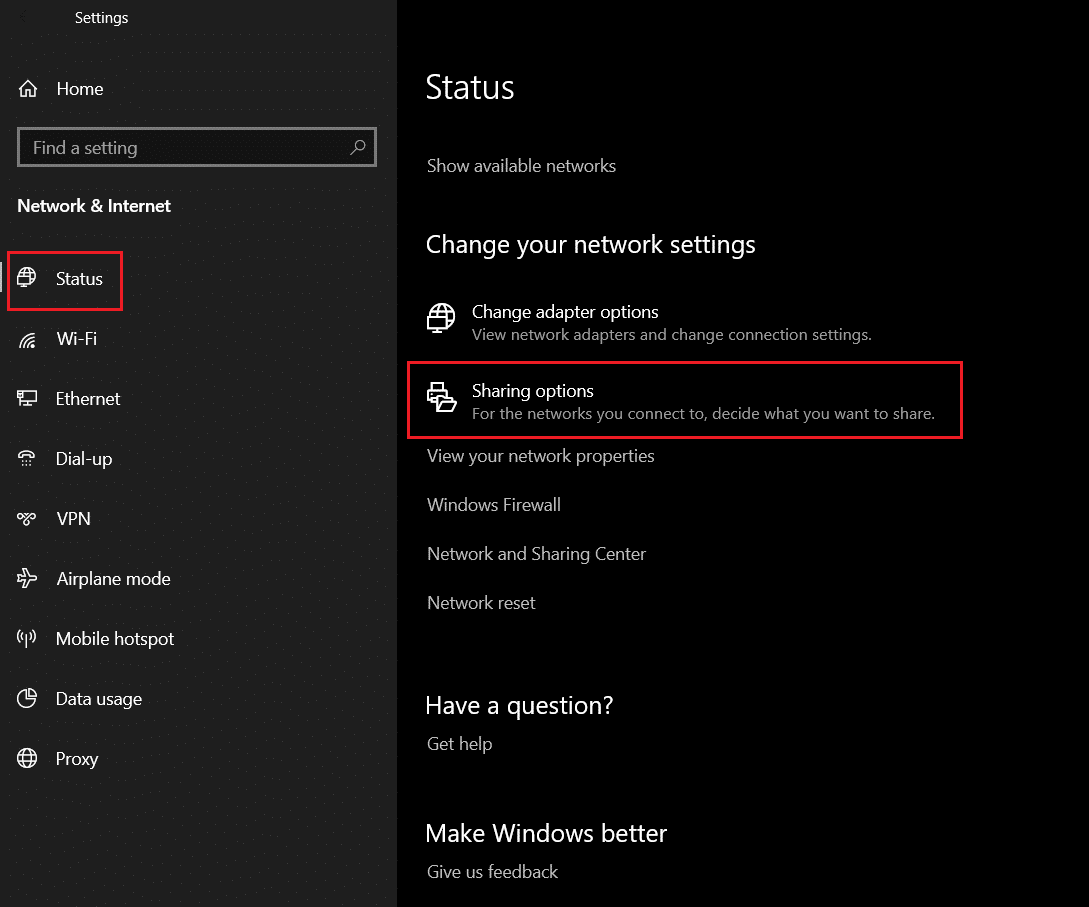
3. Scroll down and click Network and Sharing Center under Advanced network settings on the right pane.
4. Expand the Private (current profile) section and select Turn on network discovery.
5. Check the box titled Turn on automatic setup of network-connected devices, as depicted.
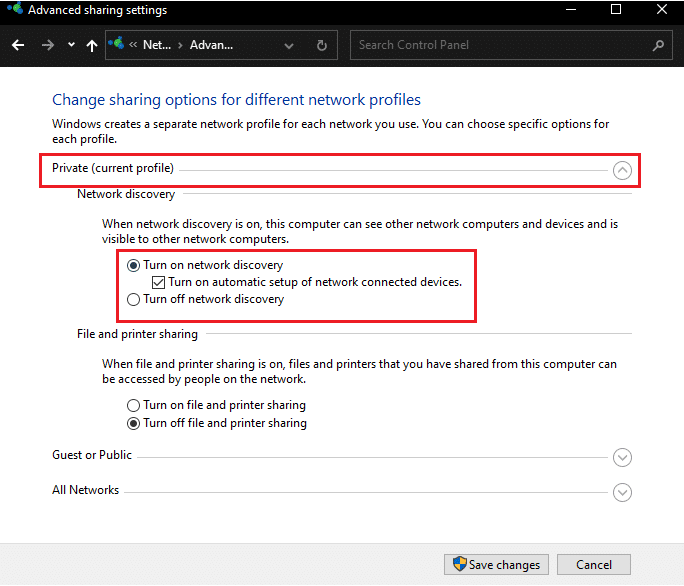
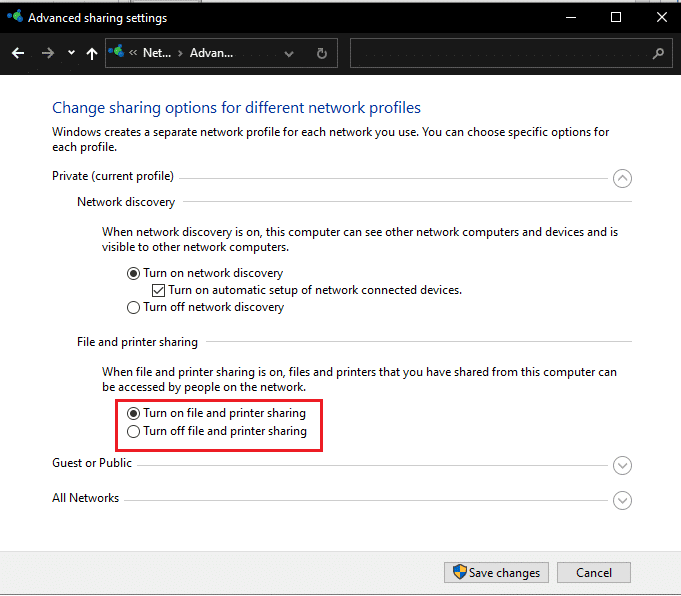
6. Next, select Turn on file and printer sharing feature to enable it in the File and printer sharing section.
7. Now, expand the All Networks section.
8. Select Turn on sharing so anyone with network access can read and write files in Public folders option for Public folder sharing as shown highlighted below.
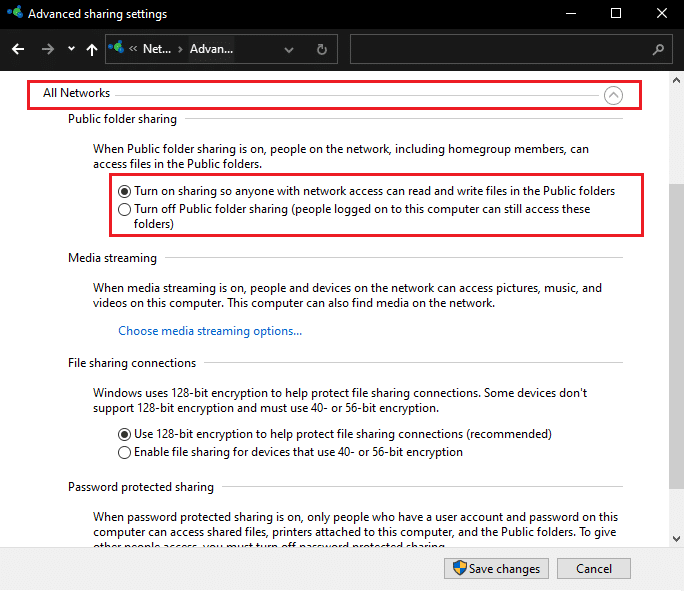
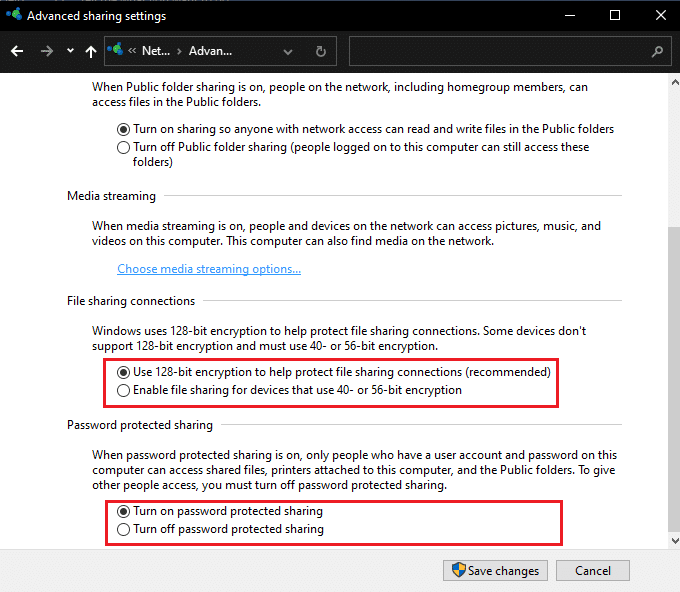
9. Also select Use 128-bit encryption to help protect file sharing connections(recommended) for File sharing connections
10. And choose Turn on password protected sharing option in Password protected sharing for additional security.
Note: If there are older devices in the network or yours is one, choose to Enable sharing for devices that use 40-bit or 56-bit encryption options instead.
11. Finally, click the Save changes button to bring them into effect, as shown.
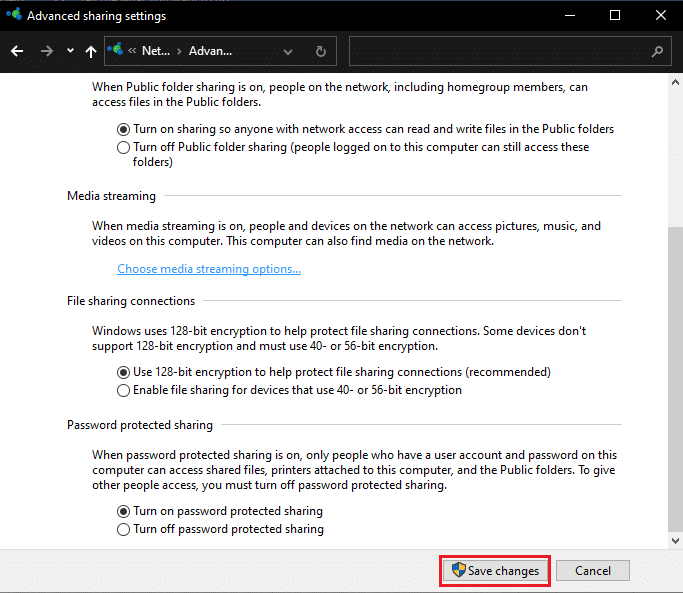
Windows 10 network sharing not working problem should be solved now.
Note: If you trust all the devices in the network and would like everyone to access the files, feel free to choose to Turn off password-protected sharing in Step 10.
Also Read: How to Encrypt a Folder in Windows 10
Method 3: Enable Required Discovery Related Services
Function Discovery Provider Host and Function Discovery Resource Publication are two services responsible for making your PC visible or discoverable to other PCs & devices in the network. If the services have stopped running in the background or are glitching, you will experience problems with discovering other systems and with sharing of files. Follow the steps listed below to fix computers not showing up on network & Windows 10 network sharing not working issues by enabling the related services.
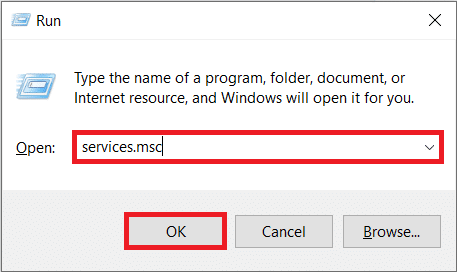
1. Hit Windows + R keys simultaneously to open Run dialog box.
2. Type services.msc and click on OK to open the Services application.
3. Locate and find Function Discovery Provider Host service. Right-click on it and choose Properties, as shown.
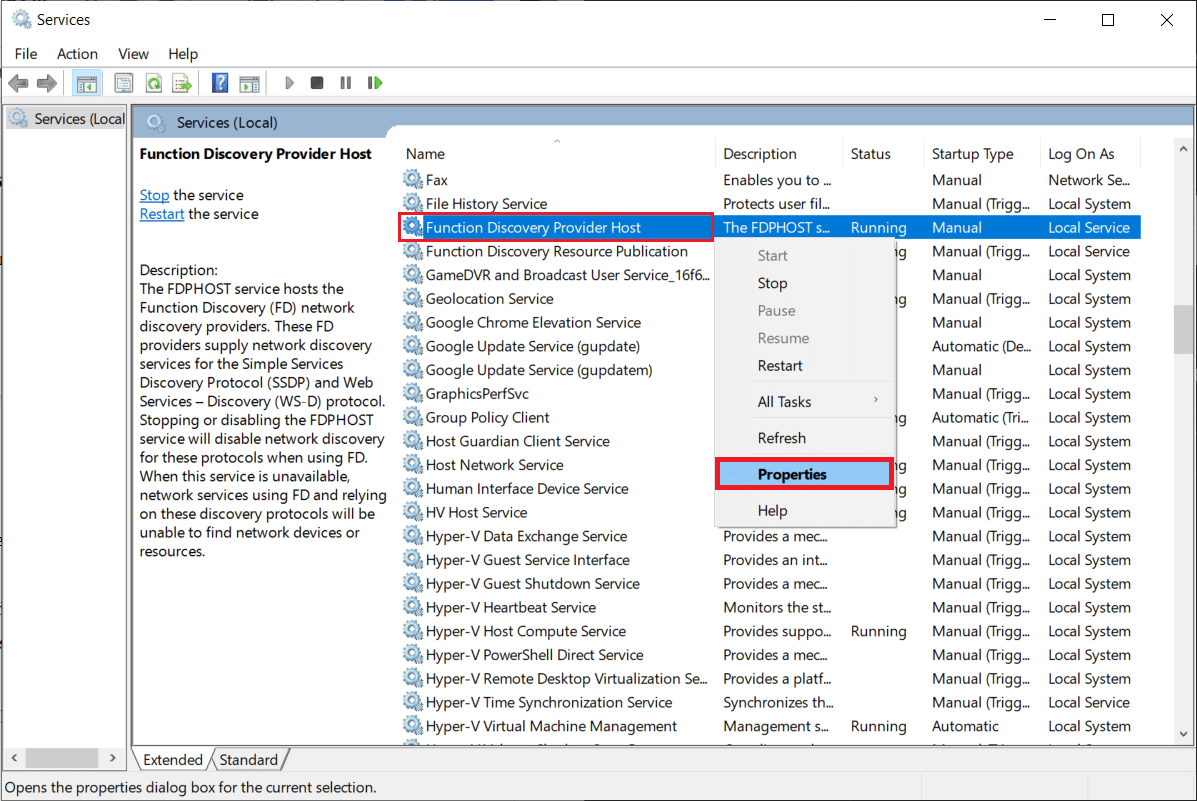
4. Under the General tab, select the Startup type as Automatic.
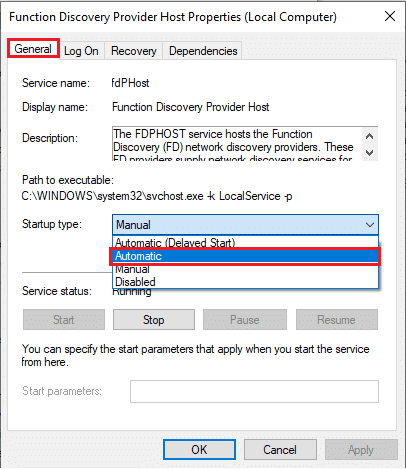
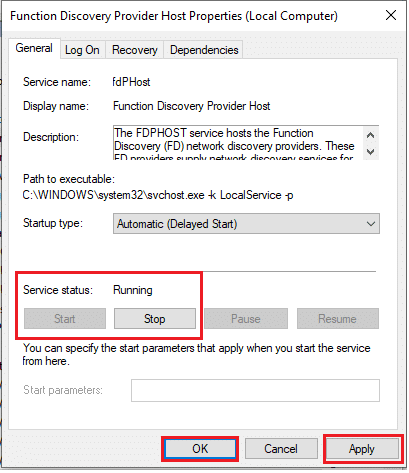
5. Also, ensure that the Service status reads Running. If not, click on the Start button.
6. Click on Apply to save changes and click OK to exit, as depicted.
7. Next, right-click on Function Discovery Resource Publication (FDResPub) service and choose Properties, as earlier.
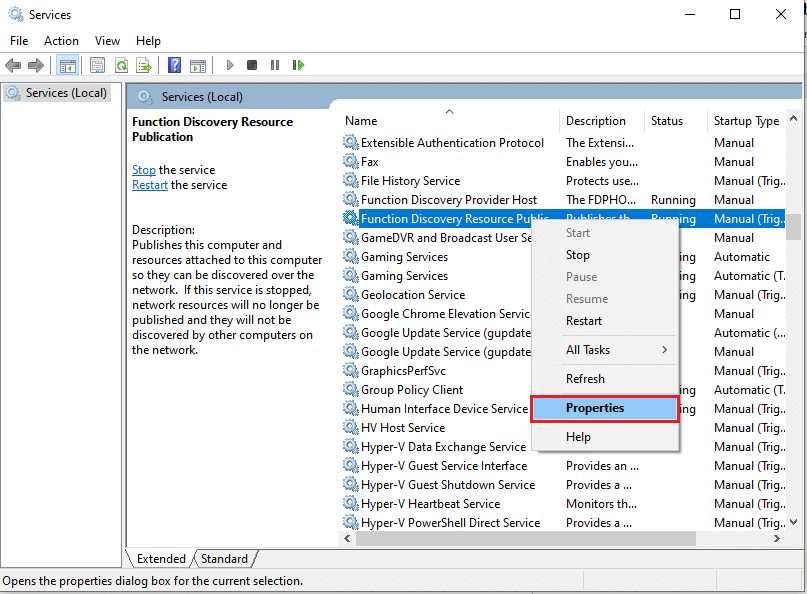
8. In the General tab, click Startup type: drop-down and choose Automatic (Delayed Start), as illustrated below.
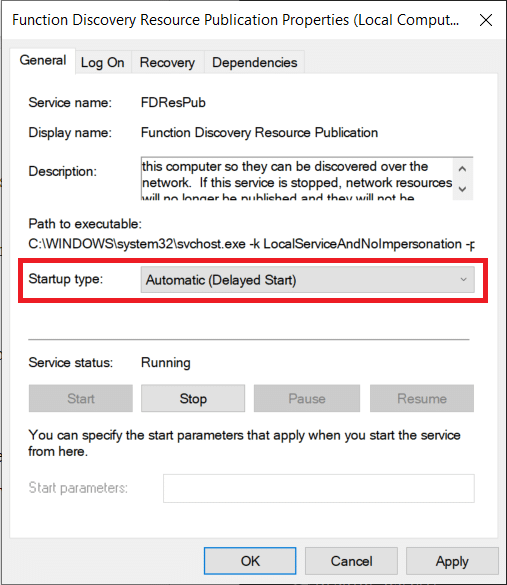
9. Click on Apply > OK to save the changes.
10. Similarly, set the Startup types of SSDP Discovery and UPnP Device Host services to Manual as well.
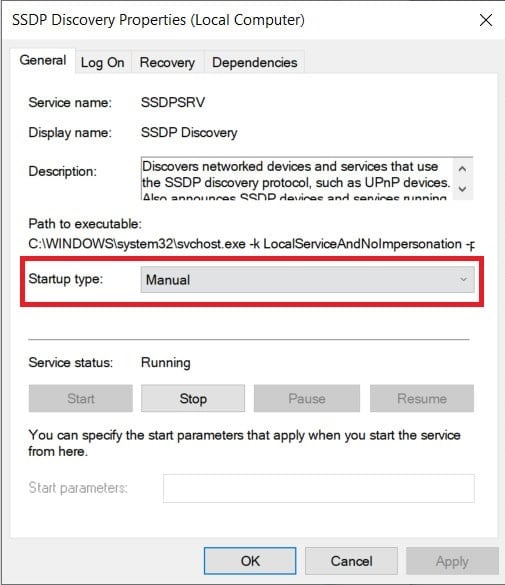
11. Click on Apply > OK to save individual changes and lastly, restart your Windows 10 desktop/laptop.
Also Read: How to Enable or Disable A Service in Windows 11
Method 4: Enable SMB 1.0/CIFS File Sharing Support
Server Message Block or SMB is the protocol or set of rules that determine how data is transmitted. It is used by Windows 10 operating systems to transfer files, share printers, and communicate with one another. While the jury is still out on the use of SMB 1.0 and protocols are considered secure, switching on the feature might hold the key to solving computers not showing up on network problem at hand.
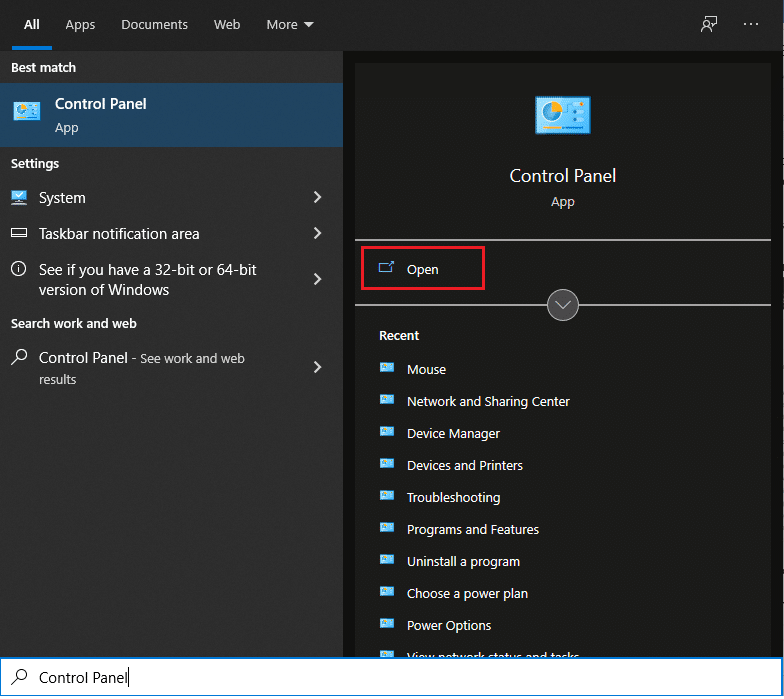
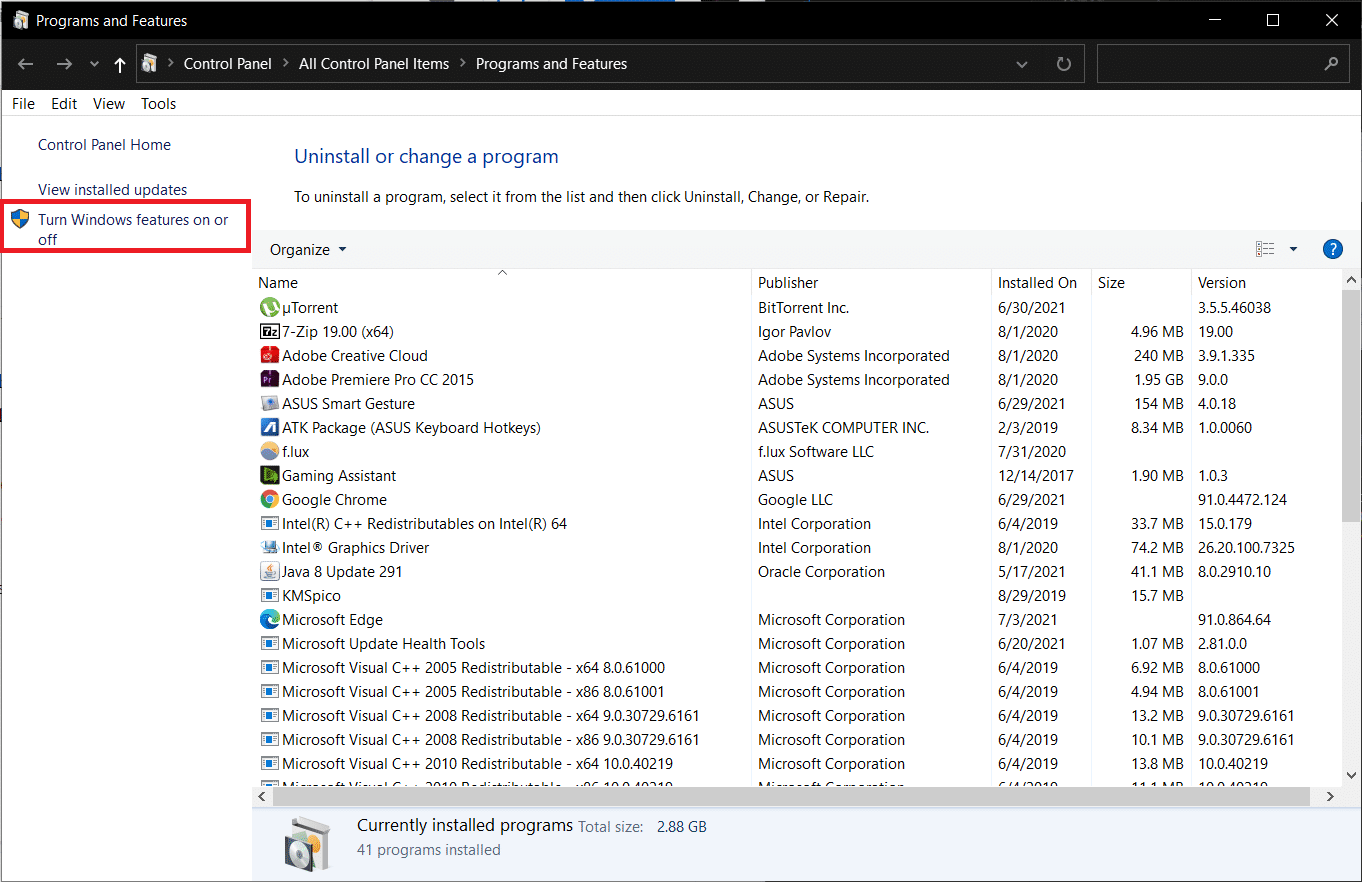
1. Click on Start and type Control Panel, click Open in the right pane
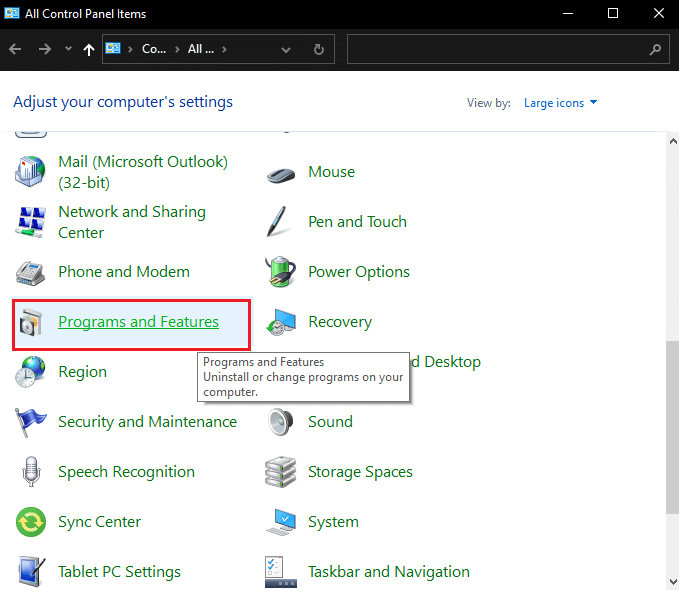
2. Set View by > Large icons and click on the Programs and Features option.
3. On the left pane, click on the Turn Windows features on or off as shown.
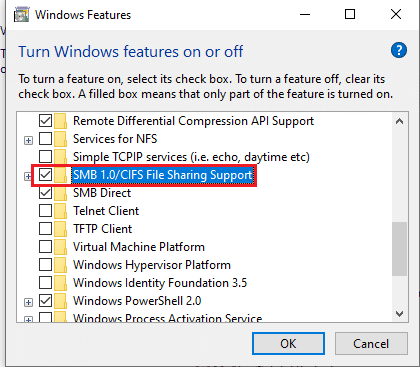
4. Scroll down and locate SMB 1.0/CIFS File Sharing Support. Ensure the box next to is checked.
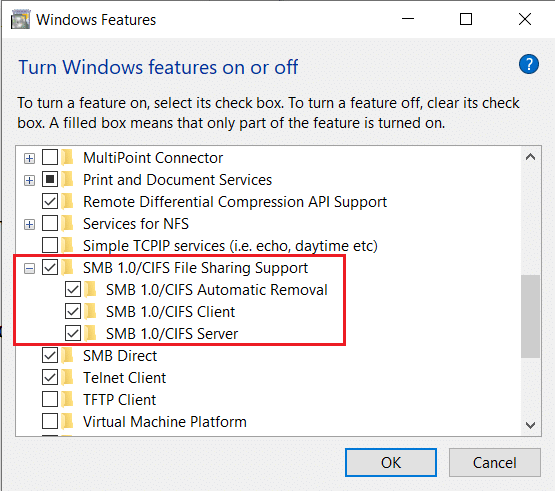
5. Check the boxes for all the given sub-items shown highlighted:
- SMB 1.0/CIFS Automatic Removal
- SMB 1.0/CIFS Client
- SMB 1.0/CIFS Server
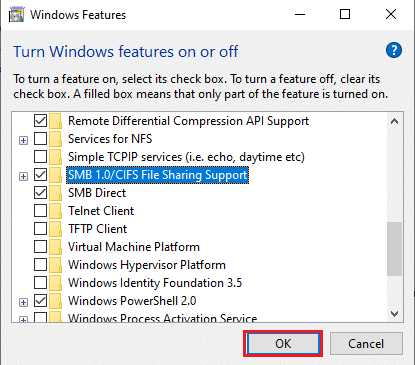
6. Click on Ok to save and exit. Reboot the system if requested.
Also Read: Fix Ethernet Doesn’t Have a Valid IP Configuration Error
Method 5: Allow Network Discovery Through Firewall
Windows Defender Firewall and unnecessarily strict antivirus programs are often the culprits behind several connectivity issues. The Firewall, in particular, is designated to the task of regulating connectivity & network requests sent to and fro from your PC. You will need to manually allow the Network Discovery functionality through it to view other network computers and resolve Windows 10 network sharing not working issue. This can be done in two ways.
Option 1: Through Windows Settings
Follow the steps below to allow network discovery through Windows Firewall via Settings app:
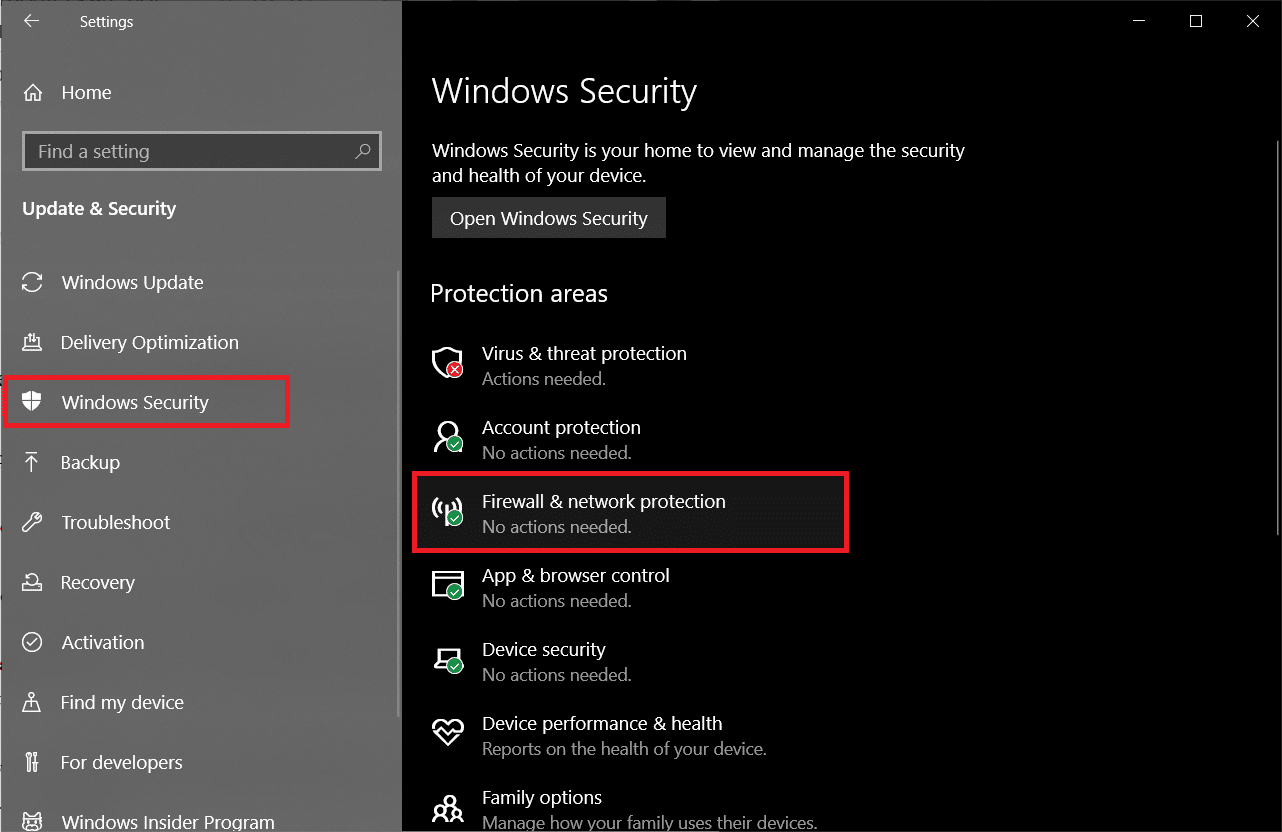
1. Press Windows + I to open Settings and click on Update & Security, as shown.

2. Navigate to the Windows Security tab and click on Firewall & network protection in the right pane.
3. In the following Window, click on Allow an app through the firewall as depicted.
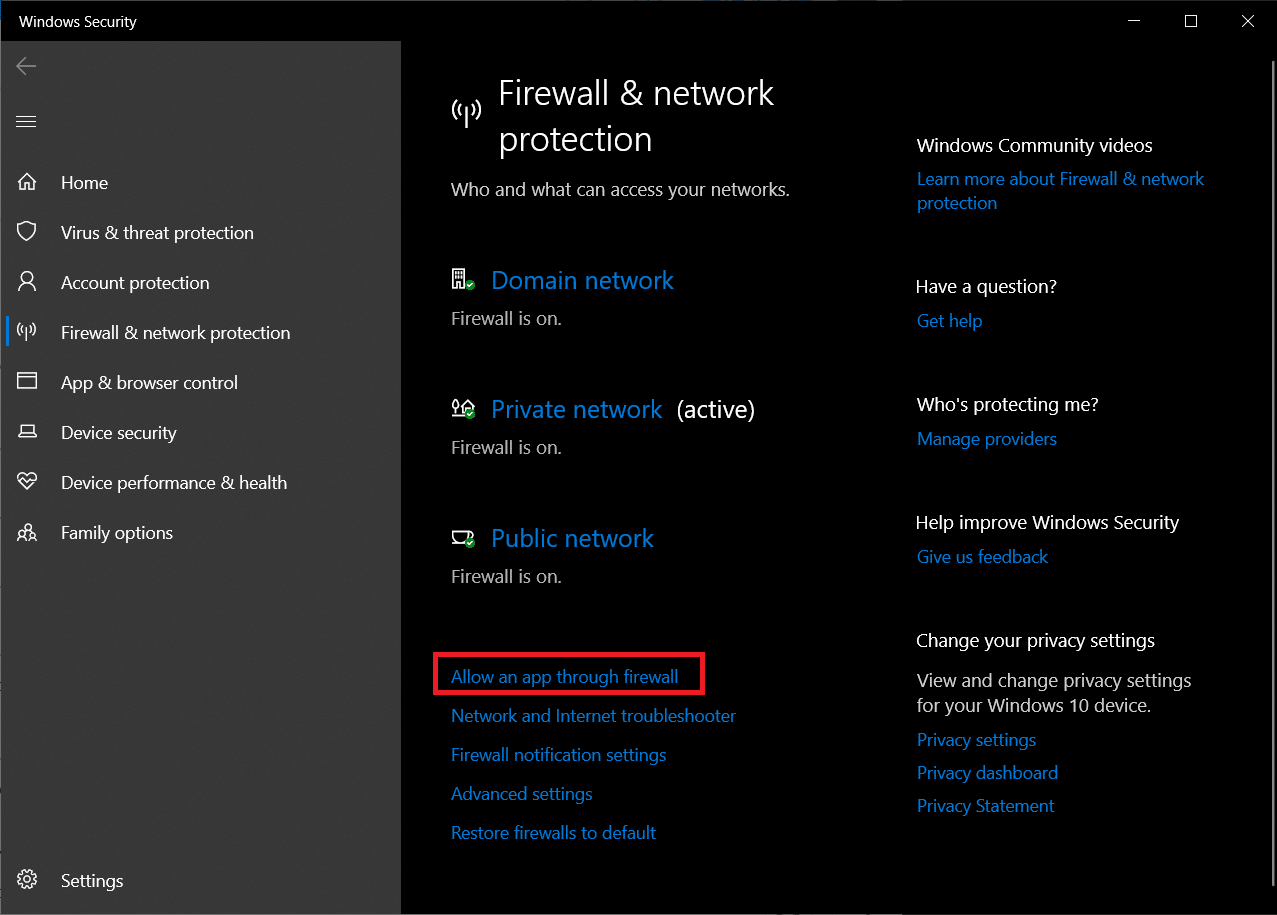
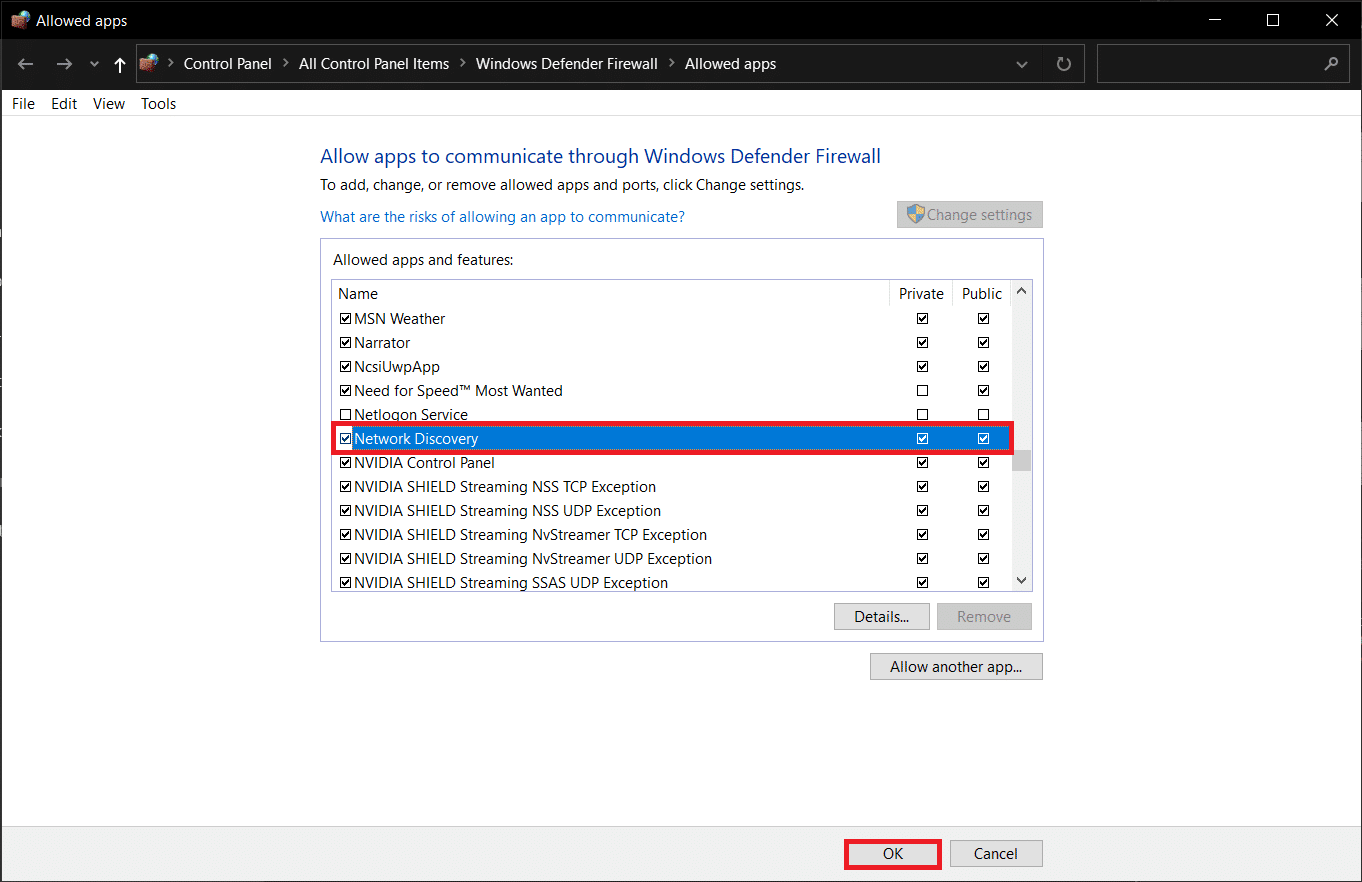
4. Next, click the Change Settings button to unlock the Allowed apps and features list and make modifications to it.
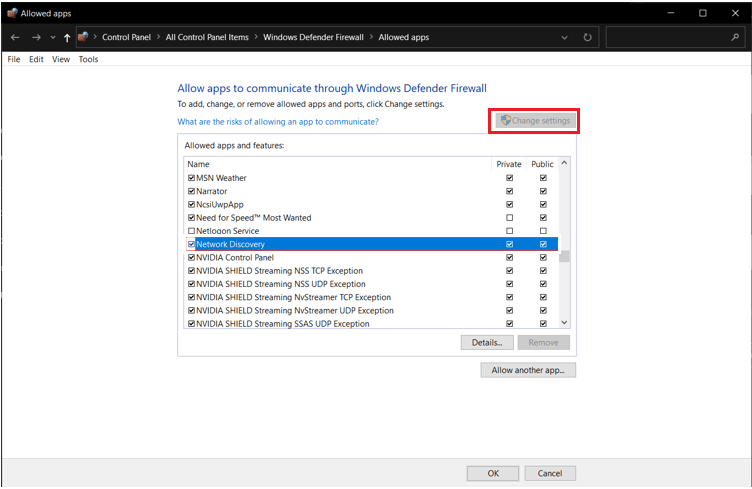
5. Find Network Discovery and carefully check the box Private as well as Public columns pertaining to the feature. Then, click on OK.
Option 2: Through Command Prompt
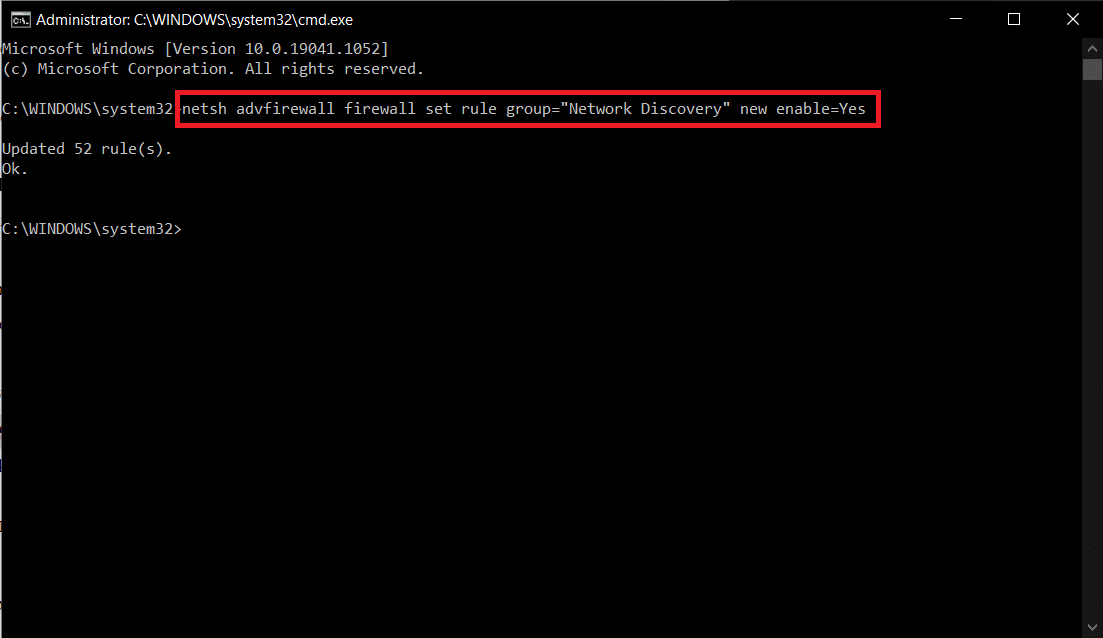
You can avoid the above hassle of digging into multiple windows by simply executing the following line in Command Prompt & possibly, fix computers not showing up on network issue.
1. Hit the Windows key, type command prompt and click on Run as administrator, as shown.
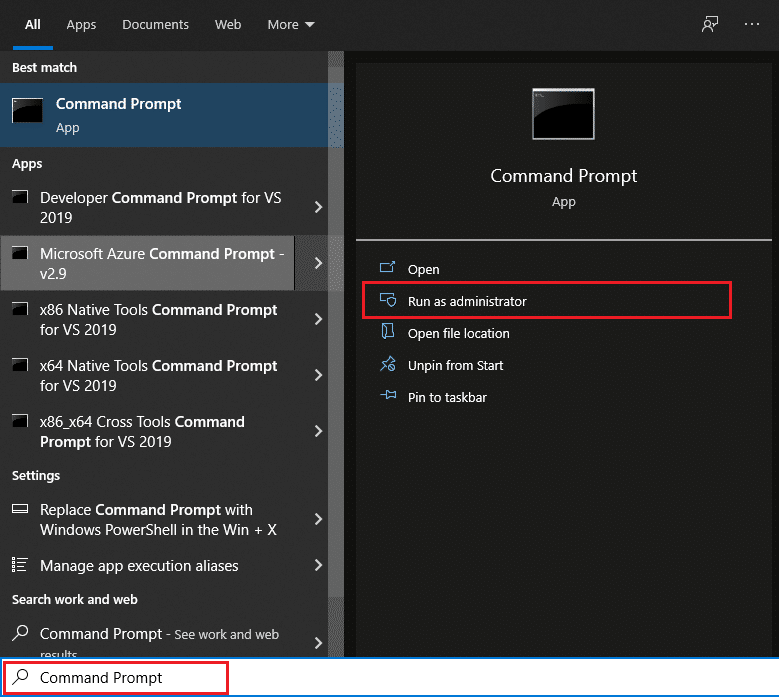
2. Type the given command and press the Enter key.
netsh advfirewall firewall set rule group="Network Discovery" new enable=Yes
Also Read: How to Enable Calculator Graphing Mode in Windows 10
Method 6: Reset Network Settings
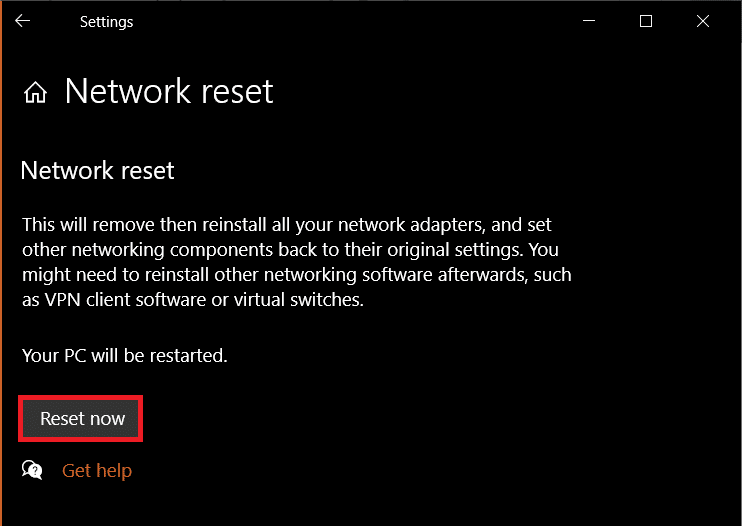
If all the above methods were followed accurately, you can be rest assured that network file sharing has been properly configured. Issues with the network itself may be prohibiting the computer from viewing other connected systems. In such cases, resetting all related items should fix Windows 10 network sharing not working issue. This too, can be achieved in two ways.
Option 1: Through Windows Settings
If you are more comfortable with graphical interfaces instead of command-line applications, then you can reset your network through Windows Settings, as follows:
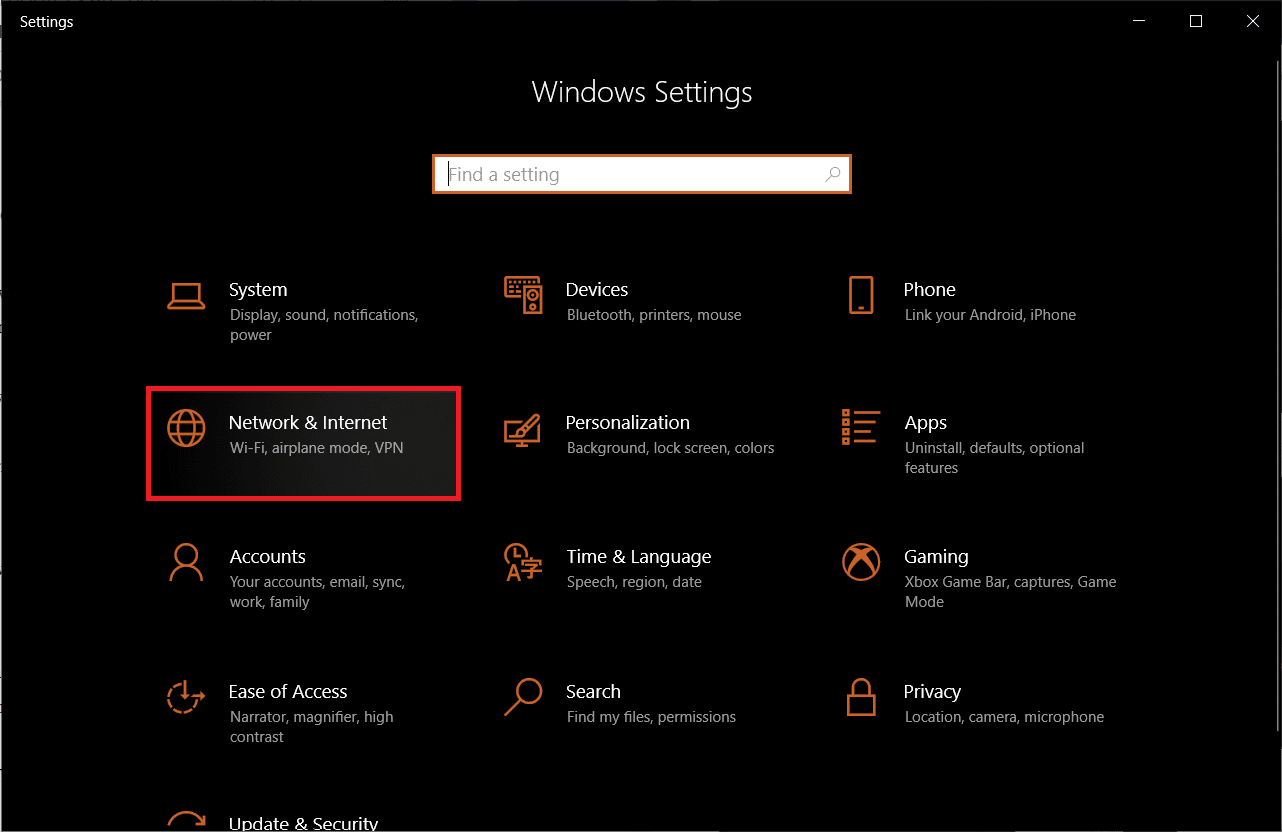
1. Launch Windows Settings and navigate to Network & Internet.
2. Click on Network Reset > Reset Now button, as depicted.
Option 2: Through Command Prompt
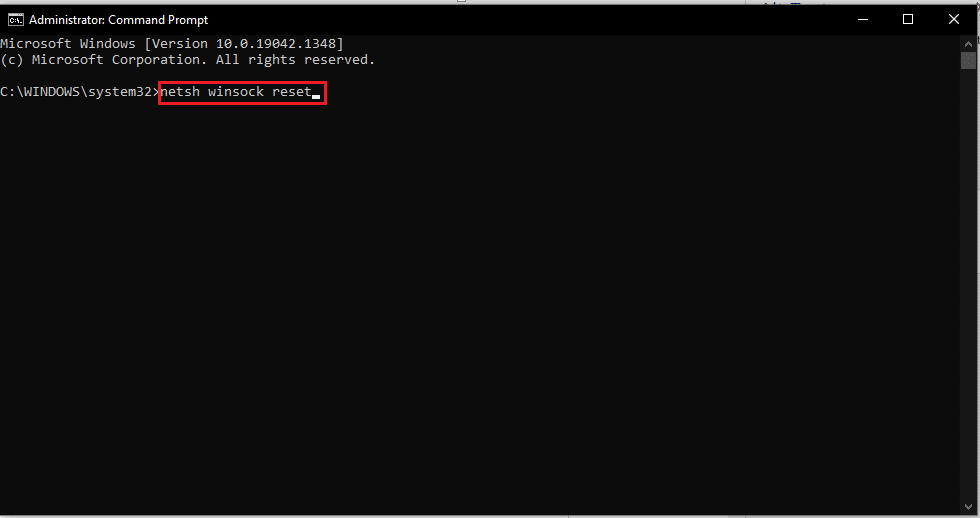
Follow the given steps to reset network settings through Command Prompt:
1. Launch Command Prompt as Administrator as earlier.
2. Execute the below set of commands one after the other.
netsh winsock reset
netsh int ip reset
ipconfig /release
ipconfig /renew
ipconfig /flushdns
Method 7: Reinstall Network Driver
You can take the reset process a step further by reinstalling the network adapter drivers and letting Windows install the latest ones. Here’s how to fix computers not showing up on network by reinstalling your network driver:
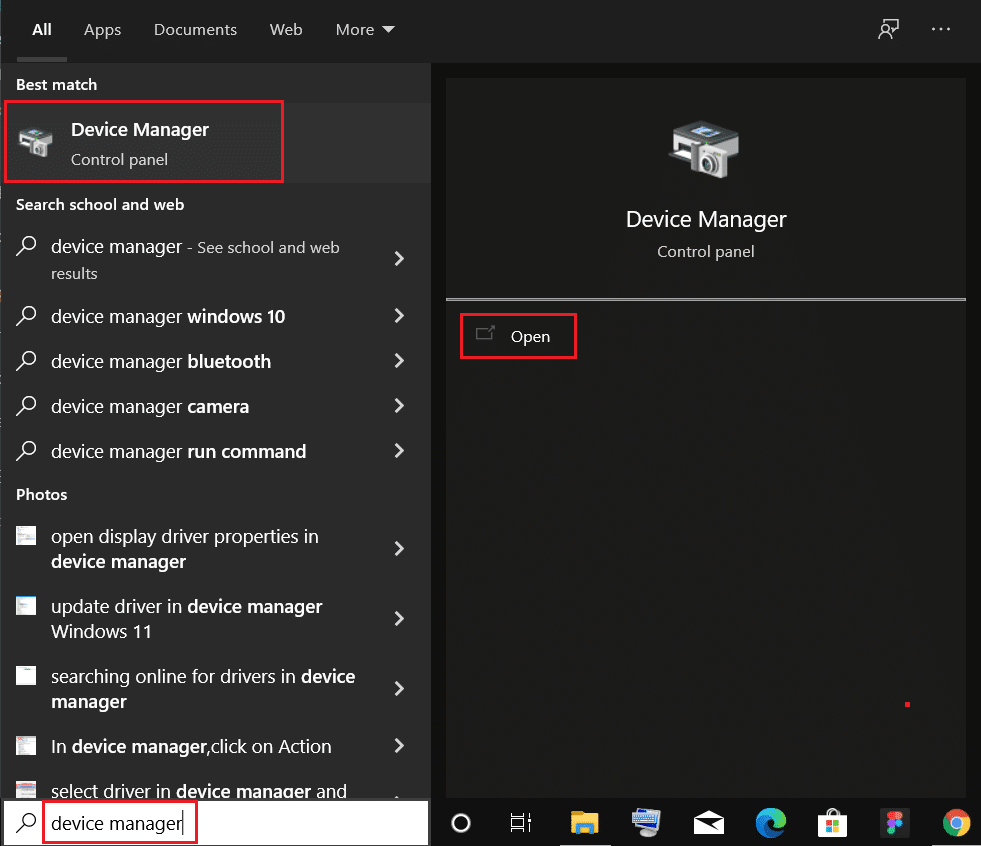
1. Press the Windows key, type device manager and click on Open.
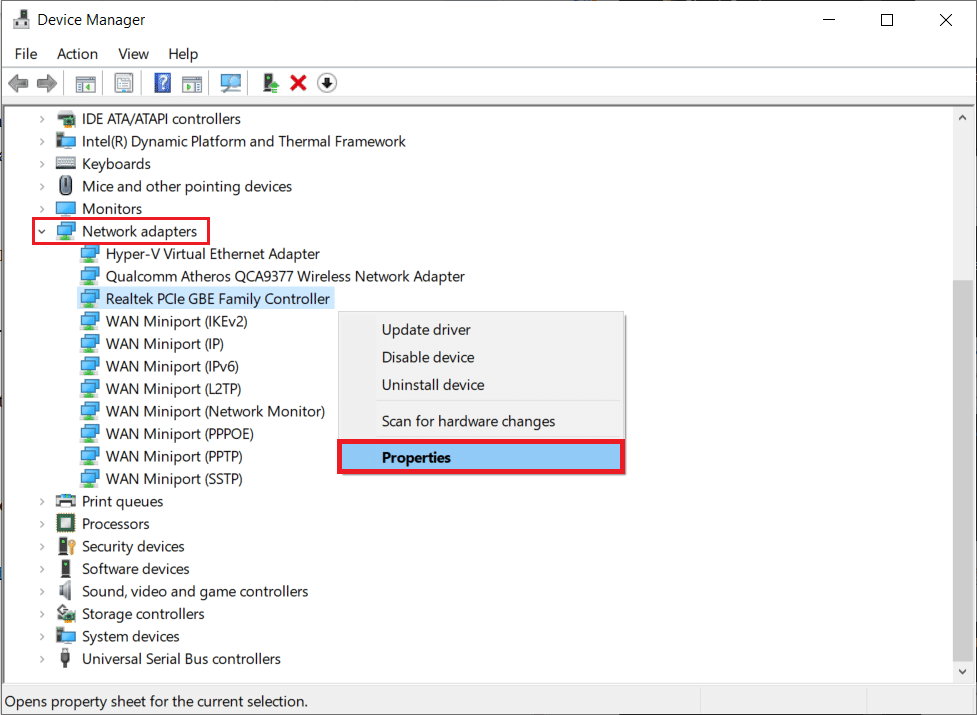
2. Double-click to expand Network adapters category.
3. Right-click on your network adapter driver (e.g. Realtek PCIe GBE Family Controller) and choose Properties, as depicted.
4. Go to the Driver tab, click on Uninstall Device, as shown.
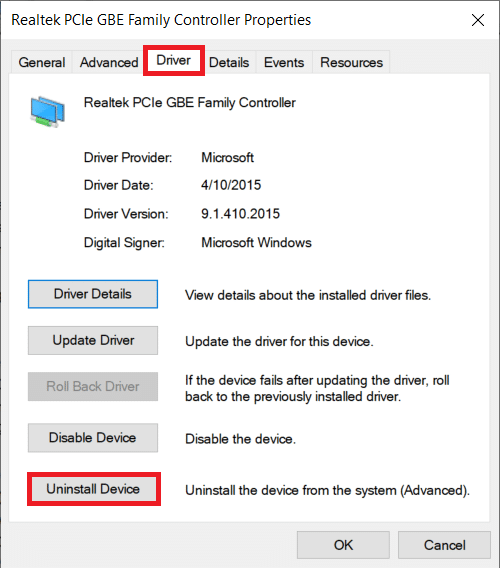
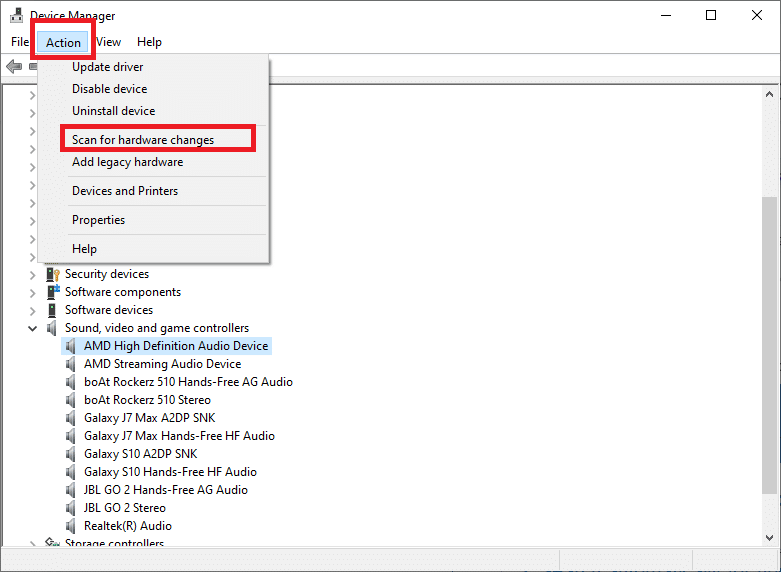
5. Click on Uninstall in the confirmation prompt after checking the Delete the driver software for this device option.
6. Now, restart your PC.
7. Windows will install the drivers automatically when you restart. If not, click Action > Scan for hardware changes as illustrated below.
Also Read: How to Fix Microphone Too Quiet on Windows 10
Pro Tip: How to Access Other PCs in your Network
Before we get started with the solutions, if you are in a hurry and looking for a quick workaround to transfer files in Windows, then you can follow the given steps:
1. Press Windows + E keys together to launch File Explorer.
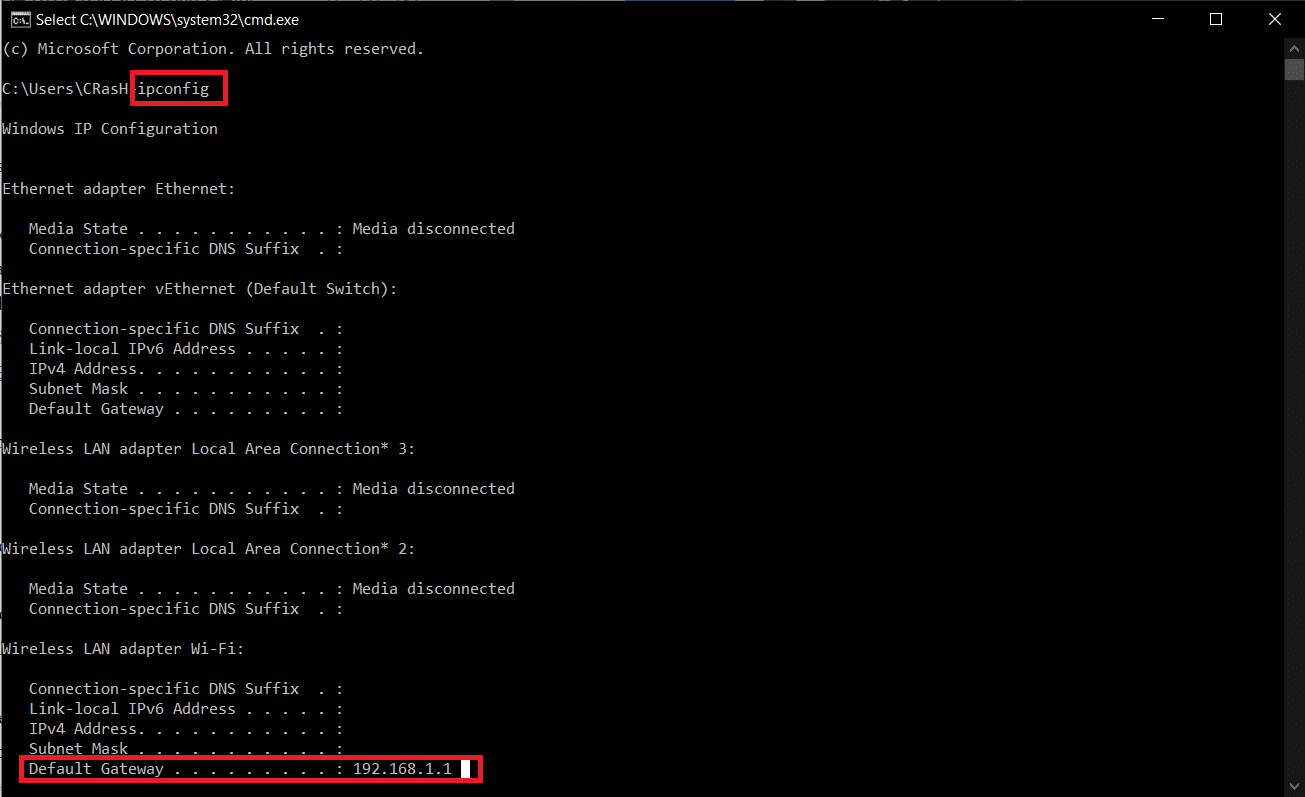
2. Go to Network and type followed by the PC’s IP address in the File Explorer address bar.
For example: If the PC IP address is 192.168.1.108, type 192.168.1.108 and press Enter key to access that computer.

Note: To find out the IP address, execute ipconfig in Command prompt and check Default Gateway address entry, shown highlighted.
Frequently Asked Questions (FAQs)
Q1. How do I make my computer visible on a network?
Ans. To make your computer visible on the network, you will need to enable Network Discovery. Launch Control Panel and go to Network and Sharing Center > Change advanced sharing settings > Private > Turn on network discovery.
Q2. Why can’t I see all devices on my network?
Ans. You will be unable to see other devices on your network if network discovery is disabled, FDPHost, FDResPub, and other related services are malfunctioning, or there are issues with the network itself. Follow the solutions listed above to resolve it.
Recommended:
Hopefully, computers not showing up on network issue in your Windows 10 system has now been resolved. Sharing files over the network can be a complicated process. Also, if you have any queries/suggestions regarding this article, then feel free to drop them in the comments section and do not hesitate to get in touch with us if you require any further assistance.