Network Adapter Driver Issues? If you’re facing limited internet connectivity or no internet access then the problem is caused because of Network Adapter drivers got corrupted, outdated, or incompatible with Windows 10. Network Adapter is a network interface card built into the PC that connects a computer to a computer network. Basically, the network adapter is responsible for connecting your PC to the internet and if the network adapter drivers are not up to date, or somehow got corrupt then you will face network connection problems. Read How to Troubleshoot Network Connectivity Problems on Windows 10..
When you update or upgrade to Windows 10 sometimes the network driver becomes incompatible with the new update and hence you start facing network connection issues such as limited internet connectivity etc. So without wasting any time let’s see How to Fix Network Adapter Driver Issues on Windows 10 with the help of the below-listed troubleshooting guide. This guide will also help if you’re trying to install a network card, uninstalling or updating network adapter drivers, etc.
Fix Network Adapter Driver Issues on Windows 10
Make sure to create a restore point just in case something goes wrong.
Method 1: Disable then Re-Enable Network Adapter
Try disabling the network card and enabling it again to fix the issue. To disable and enable network card,
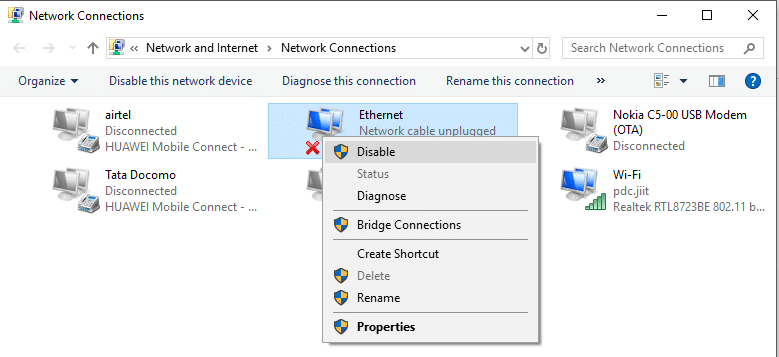
1.In the search field located on your taskbar, type ncpa.cpl and press Enter.
2.In the Network Connections window, right-click on the network card that has the issue and select Disable.
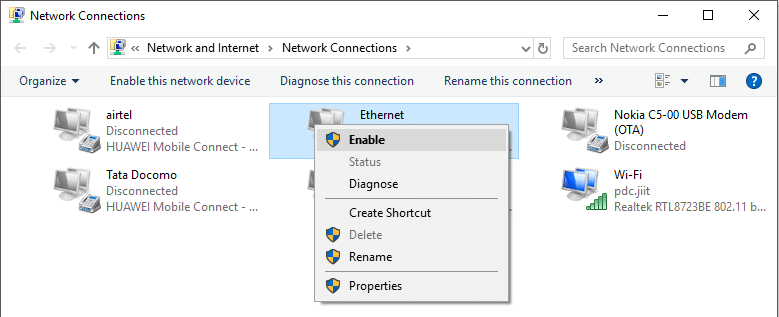
3.Right-click again on the same network card and select ‘Enable’ from the list.
Method 2: Run Network Adapter Troubleshooter
1.Press Windows Key + I to open Settings then click on Update & Security.
![]()
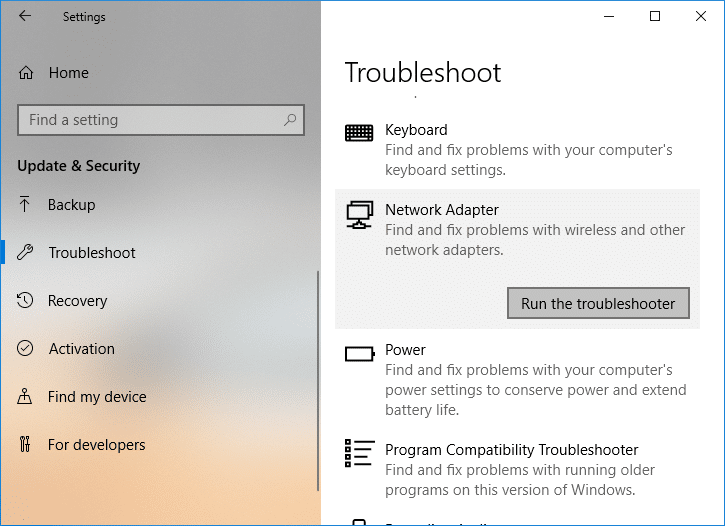
2.From the left-hand menu select Troubleshoot.
3.Under Troubleshoot click on Internet Connections and then click Run the troubleshooter.

4.Follow further on-screen instructions to run the troubleshooter.
5.If the above didn’t fix the issue then from the Troubleshoot window, click on Network Adapter and then click on Run the troubleshooter.
5.Reboot your PC to save changes and see if you’re able to fix Network Adapter Driver issues.
Method 3: Flush DNS and Reset Winsock Components
1.Right-click on Windows Button and select “Command Prompt(Admin).“

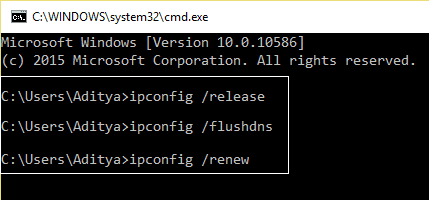
2.Now type the following command and press Enter after each one:
ipconfig /release
ipconfig /flushdns
ipconfig /renew
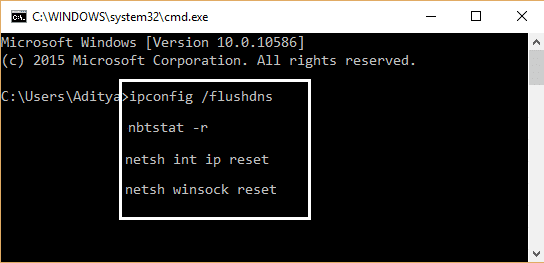
3.Again open Command Prompt and type the following and hit enter after each one:
ipconfig /flushdns
nbtstat –r
netsh int ip reset
netsh winsock reset
4.Reboot to apply changes. Flushing DNS seems to Fix Network Adapter Driver Issues on Windows 10.
Method 4: Reset Network Connection
1.Press Windows Key + I to open Settings then click on Network & Internet.

2.From the left-hand menu select Status.
3.Now scroll down and click on Network reset at the bottom.

4.Again click on “Reset now” under Network reset section.

5.This will successfully reset your network adapter and once it is complete the system will be restarted.
Method 5: Update Network Adapter Drivers
Outdated drivers are also one of the common reasons for Network Adapter Driver issues. Simply download the latest drivers for your network card to fix this problem. If you have recently updated your Windows to a newer version, this is one of the most probable causes. If possible, use the manufacturer update app like HP Support Assistant to check for driver updates.
1.Press Windows key + R and type “devmgmt.msc” in Run dialogue box to open device manager.

2.Expand Network adapters, then right-click on your Wi-Fi controller(for example Broadcom or Intel) and select Update Drivers.

3.In the Update Driver Software Windows, select “Browse my computer for driver software.“

4.Now select “Let me pick from a list of device drivers on my computer.“

5.Try to update drivers from the listed versions.
6.If the above didn’t work then go to the manufacturer’s website to update drivers: https://downloadcenter.intel.com/
7.Reboot to apply changes.
Method 6: Uninstall Network Adapter Completely
1.Press Windows Key + R then type “devmgmt.msc” and hit Enter to open Device Manager.
2.Expand Network Adapters and find your network adapter name.
3.Make sure you note down the adapter name just in case something goes wrong.
4.Right-click on your network adapter and select Uninstall.

5.If ask for confirmation select Yes.
6.Restart your PC and Windows will automatically install the default drivers for the Network adapter.
By reinstalling the network adapter, you can get rid out of the Network Adapter Driver Issues on Windows 10.
Method 7: Change Power Management Setting for Network Adapter
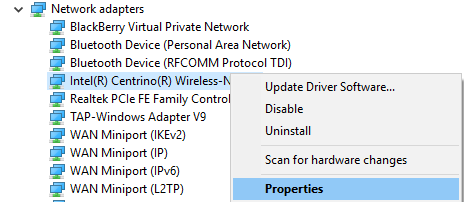
1.Press Windows Key + R then type devmgmt.msc and hit Enter.
2.Expand Network adapters then right-click on your installed network adapter and select Properties.
3.Switch to Power Management Tab and make sure to uncheck “Allow the computer to turn off this device to save power.“
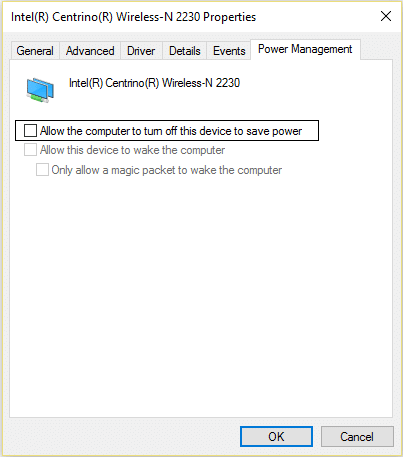
4.Click Ok and close the Device Manager.
5.Now press Windows Key + I to open Settings then Click System > Power & Sleep.
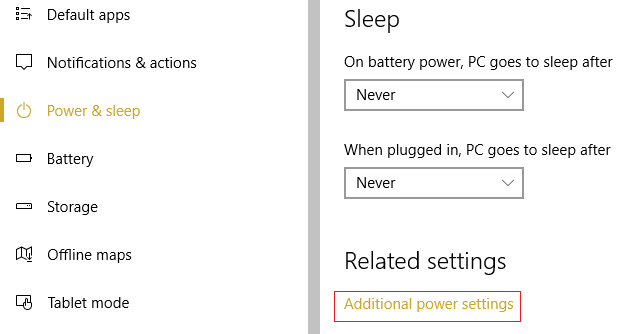
6.On the bottom click Additional power settings.
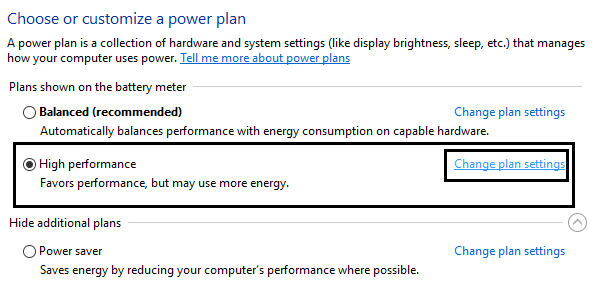
7.Now click “Change plan settings” next to the power plan which you use.
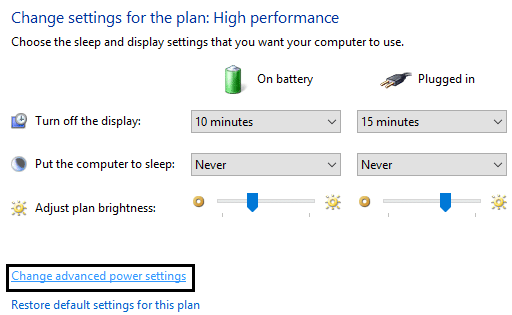
8.At the bottom click on “Change advanced power settings.“
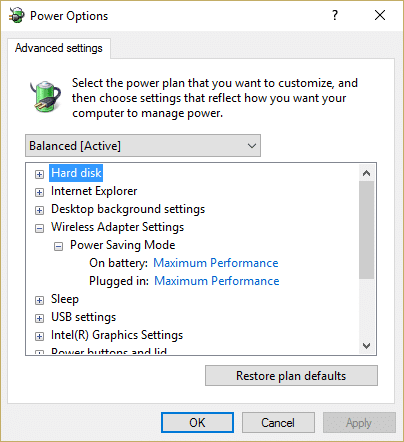
9.Expand Wireless Adapter Settings, then again expand Power Saving Mode.
10.Next, you will see two modes, ‘On battery’ and ‘Plugged in.’ Change both of them to Maximum Performance.
11.Click Apply followed by Ok. Reboot your PC to save changes.
Method 8: Roll Back to Previous Network Adapter Driver
1.Press Windows Key + R then type devmgmt.msc and hit Enter to open Device Manager.
2.Expand Network Adapter and then right-click on your Wireless Adapter and select Properties.
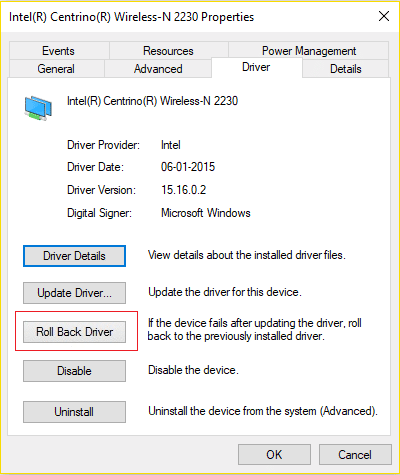
3.Switch to Driver tab and click on Roll Back Driver.
4.Choose Yes/OK to continue with driver roll back.
5.After the rollback is complete, reboot your PC.
See if you’re able to Fix Network Adapter Driver Issues on Windows 10, if not then continue with the next method.
Method 9: Temporarily Disable Antivirus and Firewall
Sometimes the Antivirus program can cause the Network Adapter Driver issue and in order to verify this is not the case here, you need to disable your antivirus for a limited time so that you can check if the error still appears when the antivirus is off.
1.Right-click on the Antivirus Program icon from the system tray and select Disable.

2.Next, select the time frame for which the Antivirus will remain disabled.

Note: Choose the smallest amount of time possible for example 15 minutes or 30 minutes.
3.Once done, again try to connect to the WiFi network and check if the error resolves or not.
4.Press Windows Key + R then type control and hit Enter to open Control Panel.

5.Next, click on System and Security.
6.Then click on Windows Firewall.

7.Now from the left window pane click on Turn Windows Firewall on or off.

8.Select Turn off Windows Firewall and restart your PC.
Again try to connect to the WiFi network and see if you’re able to resolve the Network Adapter Driver issues.
Method 10: Reinstall TCP/IP
If none of the methods work for you, you will have to reset the TCP/IP stack. A corrupted Internet Protocol or TCP/IP may prevent you from accessing the internet. You can reset TCP/IP using the command prompt or by using a Microsoft utility directly. Go to the following site to know more about the utility.
Recommended:
I hope the above steps were able to help you Fix Network Adapter Driver Issues on Windows 10 but if you still have any questions regarding this guide or Network Adapter then feel free to ask them in the comment section.