How to Make Background Transparent in MS Paint?

Have you ever been in a situation where you had to copy certain parts of an image onto another? You surely must have been; whether while creating a meme to send on the group chat or for any other project. This is done by first creating a transparent image/background that can take up the effect of any background it is placed on. Having transparent details is an essential part of any graphic design process, especially when it comes to logos and stacking multiple images onto one another.
The process of creating a transparent image is actually quite simple and can be done via a variety of applications. Earlier, complicated and advanced software like Adobe Photoshop had to be used to create transparency with tools like masking, selection, etc. But what most people don’t know is, transparent images can also be created with something as simple as MS Paint and MS Paint 3D, first of which is available on all Windows Operating Systems. Here, a specific combination of tools is used to highlight the regions on the original image while the rest turns into a transparent background.
How to Make Background Transparent in MS Paint?
Method 1: Make Background Transparent Using MS Paint
Microsoft Paint has been a part of Microsoft Windows since its inception. It is a simple raster graphics editor that supports files in Windows bitmap, JPEG, PNG, GIF, and single-page TIFF format. Paint is primarily used for creating images by drawing on a blank white canvas, but also cropping, resizing, selecting tools, skewing, rotating to further manipulate the image. It is a simple, lightweight, and user-friendly tool with lots of potentials.
Making the background transparent is really easy in MS Paint, just follow the below-mentioned steps.
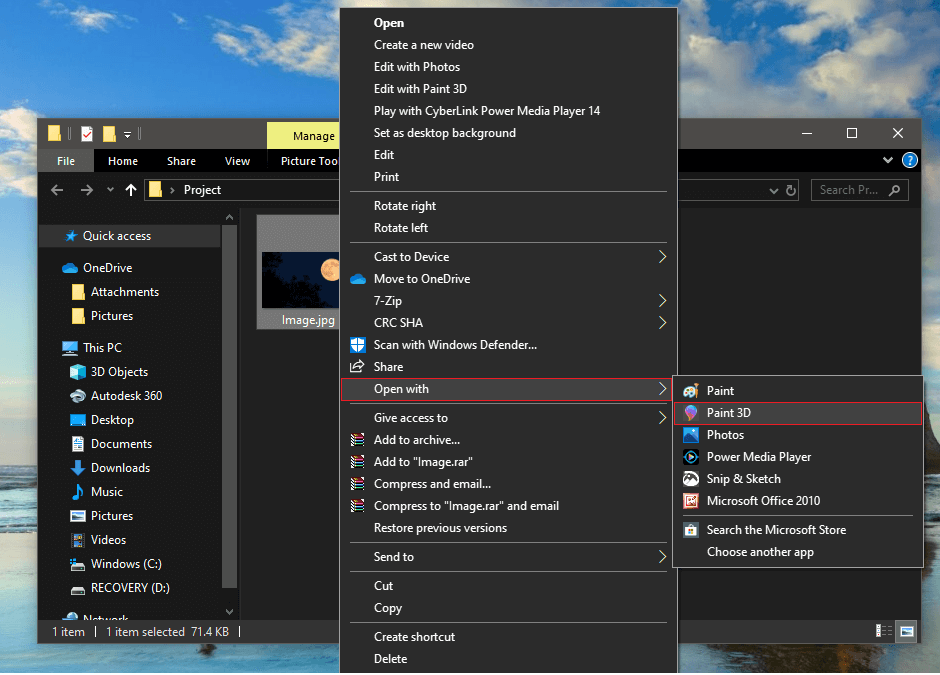
1. Right-click on the required image, scroll through the ensuing menu, and hover your mouse on top of ‘Open with’ to launch a sub-menu. From the sub-menu, select ‘Paint’.
Alternatively, open MS Paint first and click on the ‘File’ menu located on the top right then click on ‘Open’ to browse through your computer and choose the required picture.
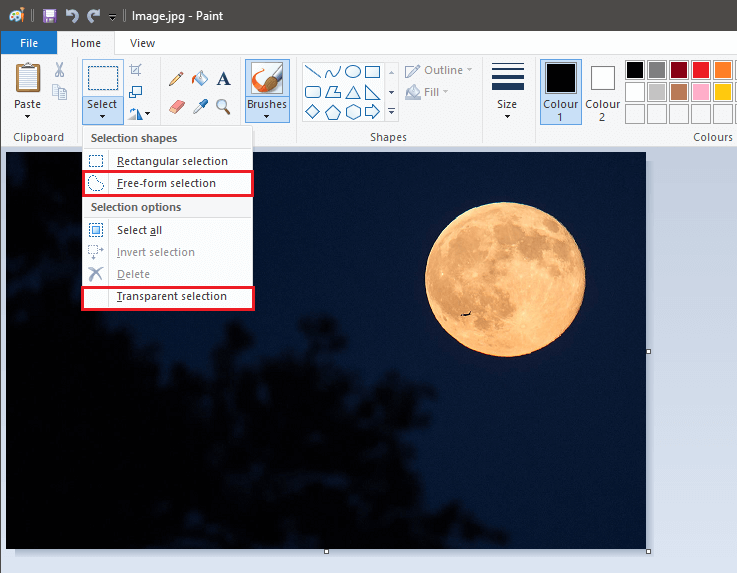
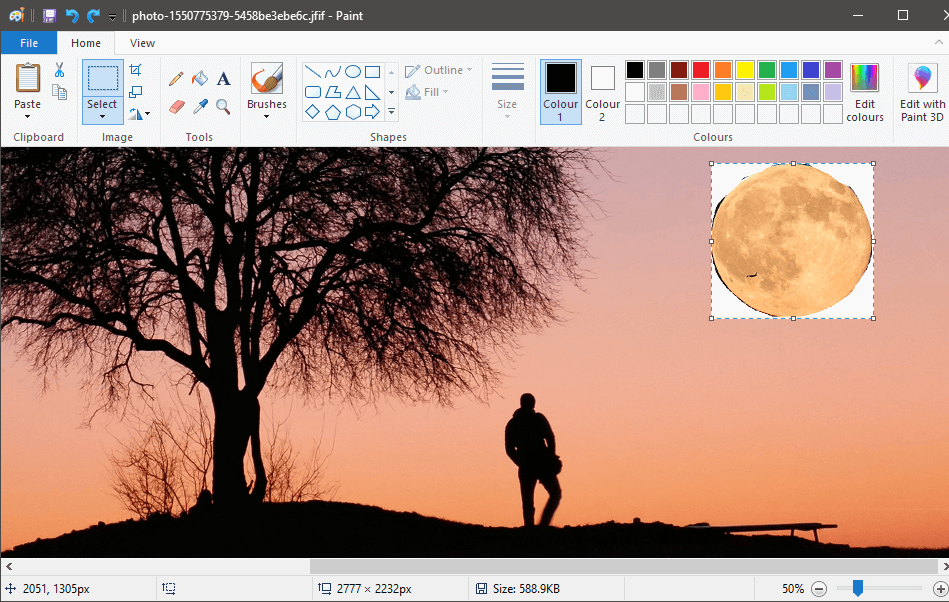
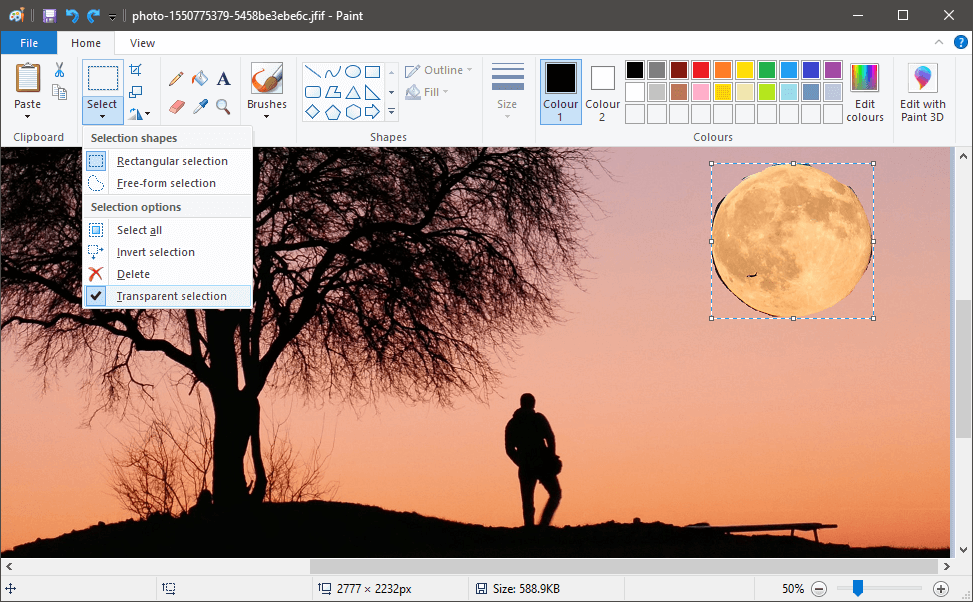
2. When the selected image opens up in MS Paint, look toward the top-left corner, and find ‘Image’ options. Click on the arrow icon located under ‘Select’ to open selection options.
![]()
3. In the drop-down menu, first, enable the ‘Transparent Selection’ option. Choose whichever shapes fit best between ‘Rectangle Selection’ and ‘Free-form Selection’. (For Example: To select the moon, which is a circular entity, free-form is a viable option.)
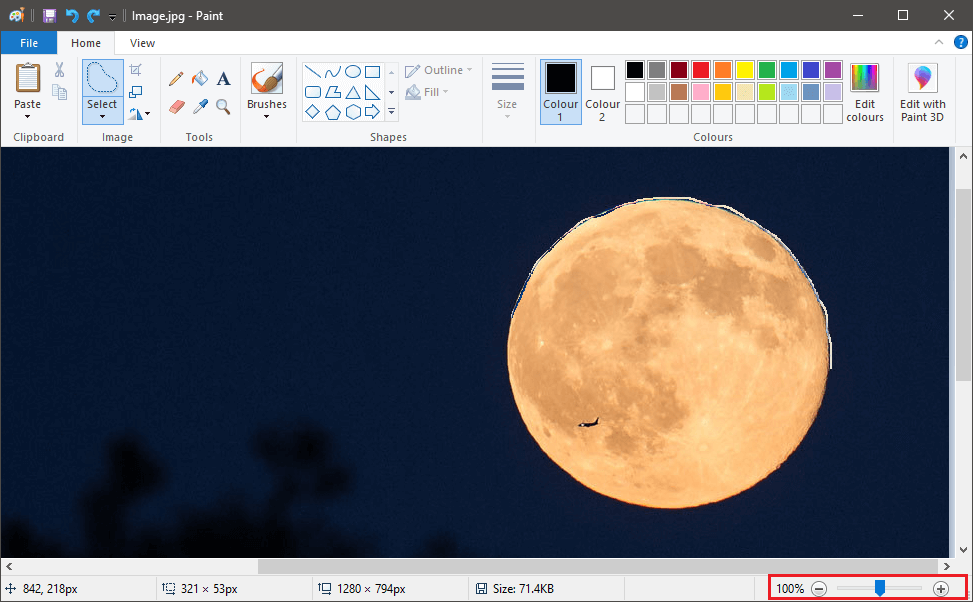
4. At the bottom-right corner, find the ‘Zoom in/out’ bar and adjust it in a way that the required object covers most of the available on-screen area. This helps in creating a space to make an accurate selection.
5. Slowly and carefully trace the outline of the object using your mouse while holding the left mouse button.
6. Once the start and the endpoint of your tracing meet, a dotted rectangular box will appear around the object and you would be able to move your selection.
7. Right-click on your selection and select ‘Cut’ in the menu or you can simply press ‘CTRL + X’ on your keyboard. This will make your selection disappear, leaving just white space behind.

8. Now, repeat Step 1 to open the image you want your selection to be combined within MS Paint.
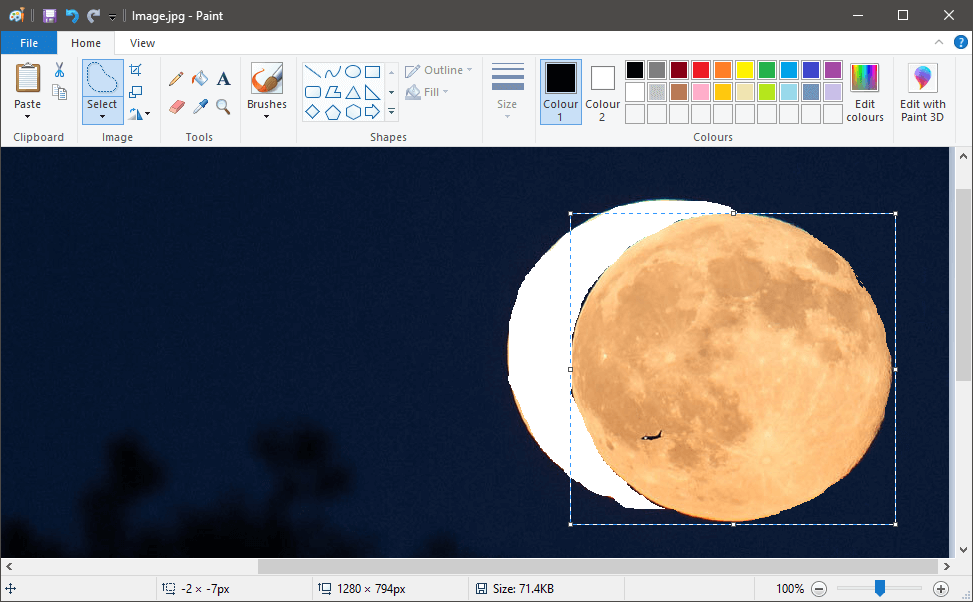
9. Press ‘CTRL+V’ to paste the previous selection onto the new image. Your selection will appear with a noticeable white background surrounding it.
10. Go to ‘Image’ settings again and click on the arrow under Select. Enable ‘Transparent Selection’ once again and the white background will disappear.
11. Adjust the position and size of the object as per your requirements.
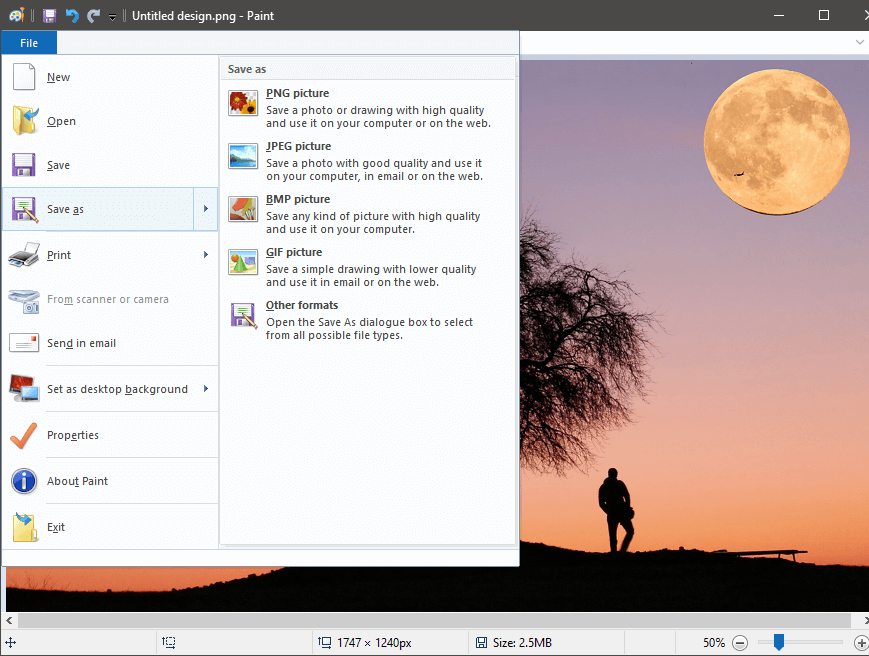
Once satisfied, click on the File menu in the top-left corner and click on ‘Save as’ to store the picture.
Always remember to change the filename while saving to avoid confusion.
Also Read: How to Convert PNG to JPG without Losing Quality
Method 2: Make Background Transparent Using Paint 3D
Paint 3D was introduced by Microsoft in 2017 along with several others through the Windows 10 Creators Update. It combined features of Microsoft Paint and 3D Builder applications into a lightweight and user-friendly application. One of the main aspects being Remix 3D, a community where one can edit, import, and share digital ideas and objects.
Making the background transparent is easier in Paint3D than MS Paint because of its Magic Select tool.
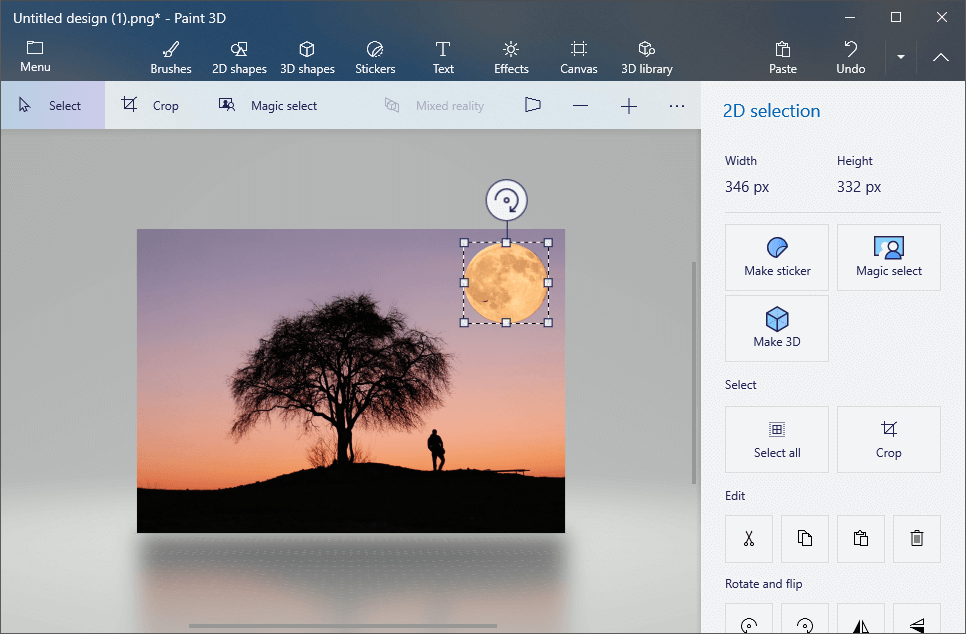
1. Open the picture in Paint 3D by right-clicking on the image and selecting the appropriate software. (Right-click > Open with > Paint 3D)
2. Adjust the picture according to scale and convenience.
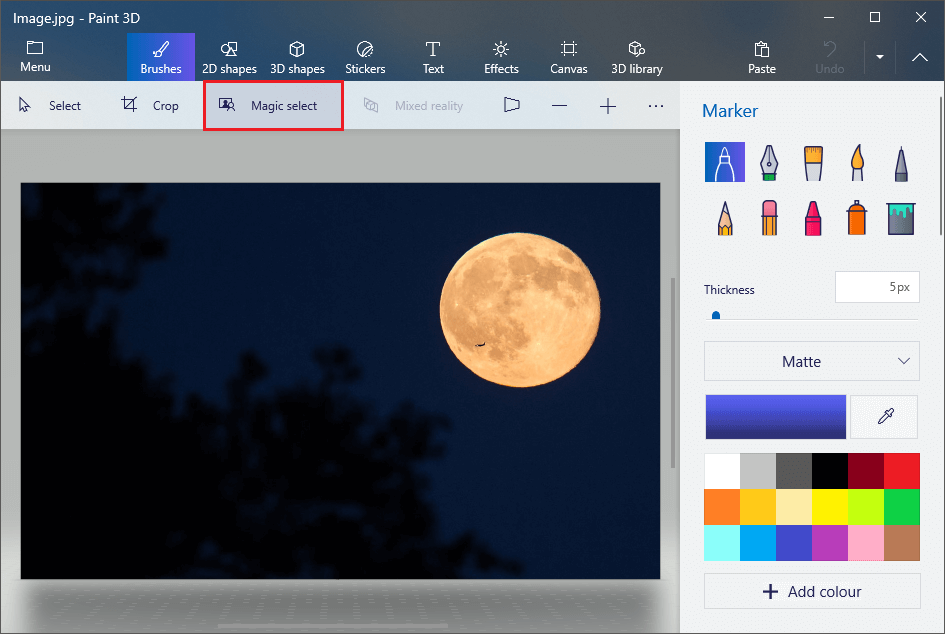
Tap on ‘Magic Select’ located on top.
Magic selection is an advanced but fun tool with a lot of potentials. With its advanced learning technology, it can remove objects in the background. But here, it lends its hand in making an accurate selection thus drastically reducing the time and energy spent, especially when one is dealing with complex shapes.
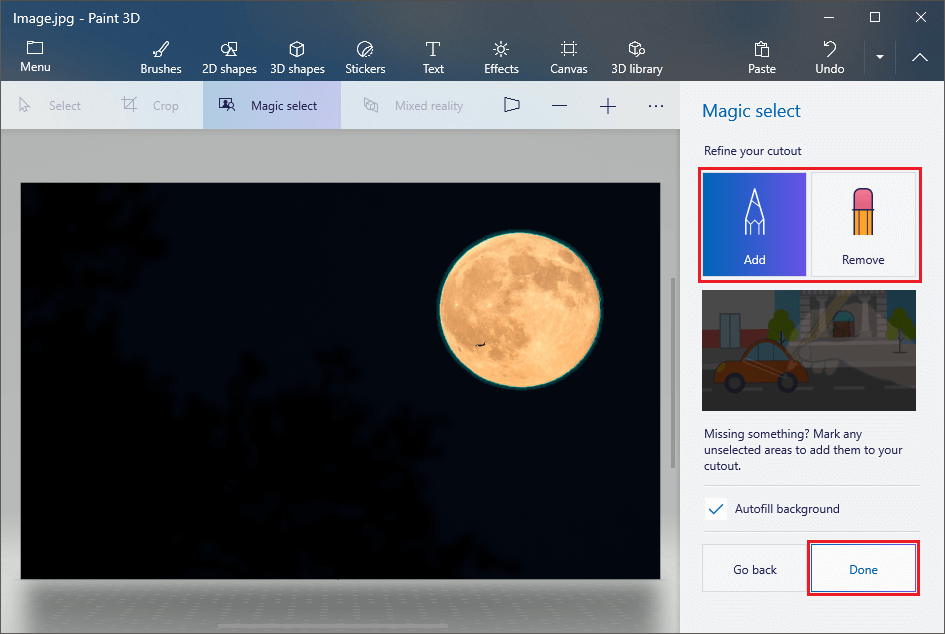
3. Once the tool is selected, translucent borders will appear. Manually bring them closer so that only the object needed is highlighted while everything else is left in the dark. Once satisfied with the selection, press ‘Next’ located in the tab to the right.

4. If there are any errors in the selection, they can be fixed at this stage. You can refine your selection by adding or removing areas by using the tools located on the right. Once you are satisfied with the selected area, tap on ‘Done’ located in the bottom.
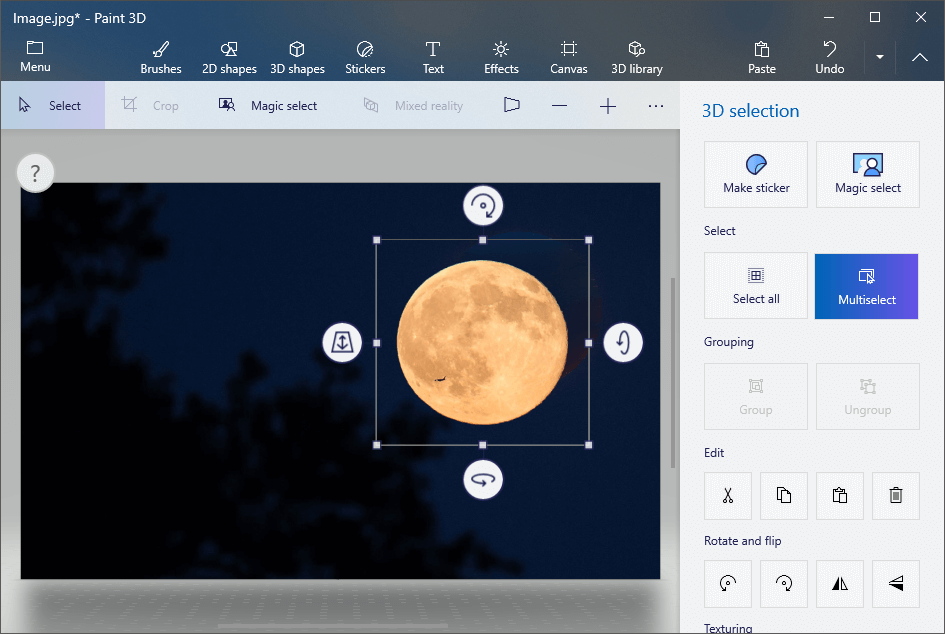
5. The selected object will pop-up and can be moved around. Hit ‘CTRL + C’ to copy the particular object.
6. Open another image in Paint 3D by following Step 1.
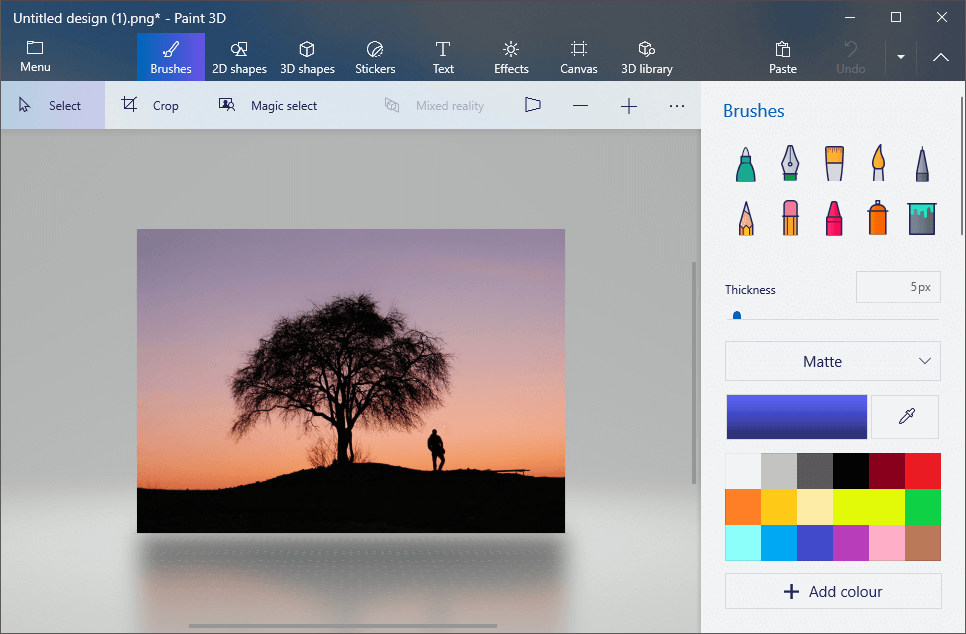
7. Press ‘CTRL + V’ to paste your previous selection here. Adjust the size and location of the object as per your requirements.
8. Once you are pleased with the final image, click on ‘Menu’ located on the top left and proceed to save the image.
Recommended: 3 Ways to Create a GIF on Windows 10
How to save a picture with a transparent background?
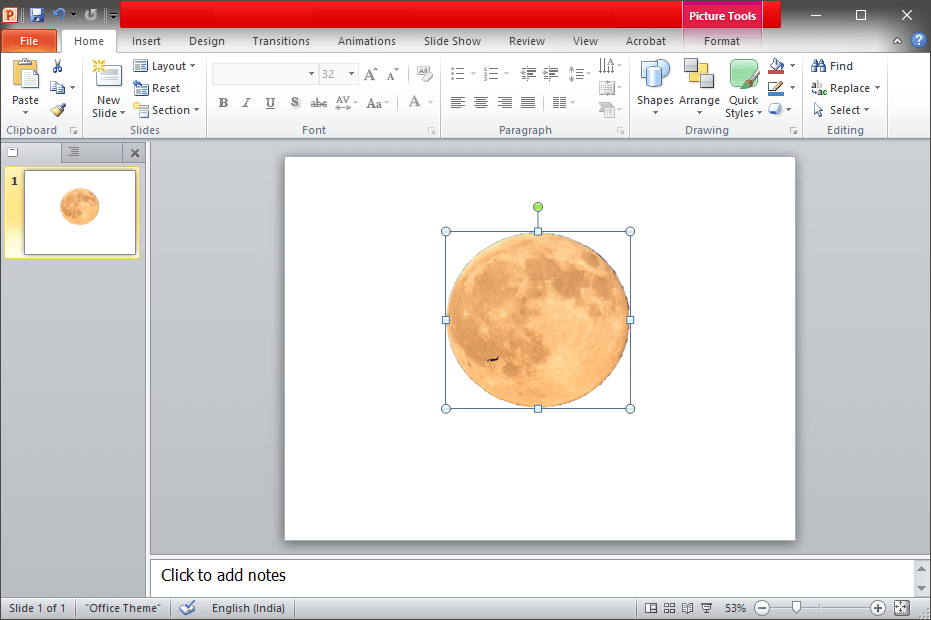
To save a picture with transparent background, we will be using MS Paint or Paint 3D along with some assistance from Microsoft Powerpoint.
1. Either in MS Paint or Paint 3D, select the object needed by following the steps mentioned above and then press ‘CTRL + C’ to copy the selected object.
2. Open Microsoft Powerpoint and in a blank slide and hit ‘CTRL+V’ to paste.
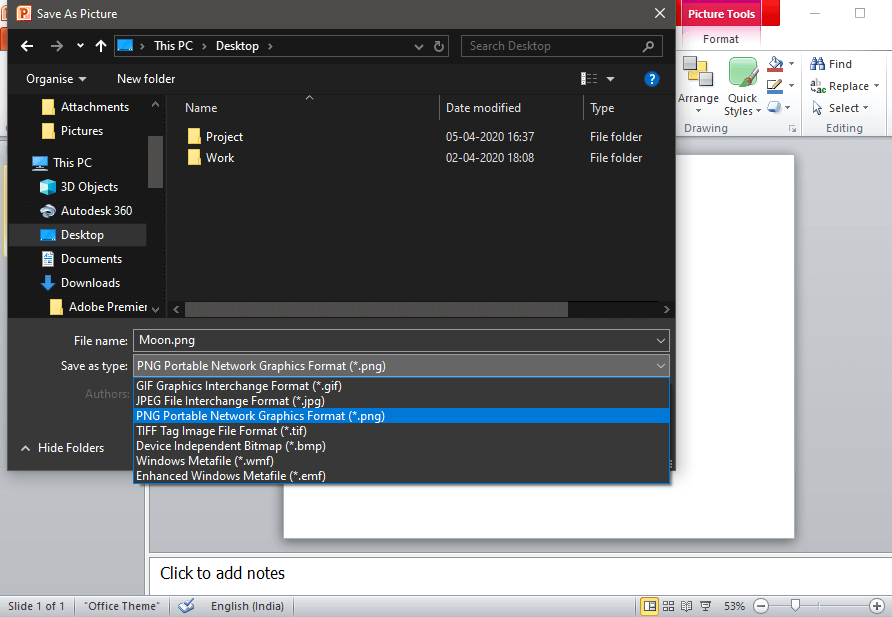
3. Once pasted, right-click on the object and click on ‘Save as Picture’.
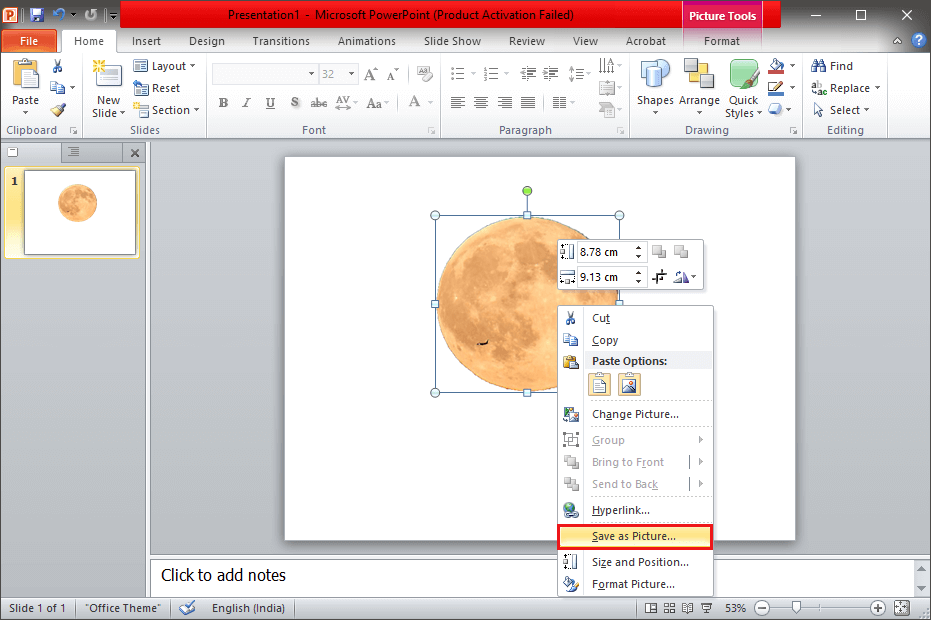
4. Make sure to change Save as type to ‘Portable Network Graphics’ also known as ‘.png’ file while saving.
If the above methods, i.e, using Paint and Paint 3D to make transparent images seem too much of a hassle then you could also try using online converters such as Free Online Photo Editor | Transparent Background or Make transparent background images online – free online tool to create transparent images.