The Ultimate Guide to Manage Your Facebook Privacy Settings

How to Manage Your Facebook Privacy Settings: Facebook is a great platform for connecting with friends and colleagues and sharing your happy life moments with them in the form of pictures and videos. You can connect to different people, share your opinions and keep yourself updated with things going on around you. Facebook is loved for what it does but with all this data it has, it raises a whole lot of privacy concerns. You can’t trust anyone with your personal data, can you? That too, in the ever-growing cybercrime cases! It is, no doubt, really important to pay attention to what happens with all the stuff you post on Facebook, for example, who can see it or who can like it and what all details in your profile are visible to people. Fortunately, Facebook does provide many privacy settings so that you secure your data according to your needs. Handling these privacy settings may be confusing but it is possible. Here’s a guide to how you can manage your Facebook privacy settings and control what is done with your data.

Now before moving on to handling the privacy settings, you can go through Facebook’s very easy ‘Privacy Check-up’. Going through this check-up will allow you to review how your shared information is being handled currently and you can set up the most basic privacy options here.
WARNING: It’s Time to Manage Your Facebook Privacy Settings (2019)
Privacy Check-up
To check-up your current privacy settings,
1.Login to your Facebook account on the desktop.
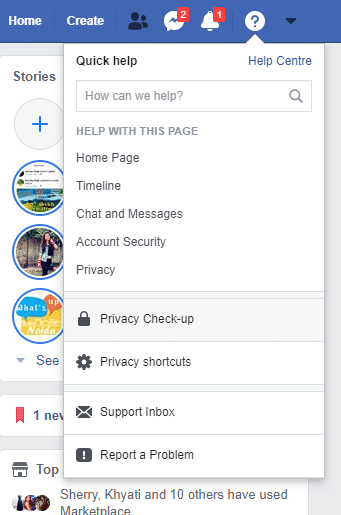
2.Click on question-mark icon on the top right corner of the window.
3.Select ‘Privacy check-up’.
The Privacy Check-up has three major settings: Posts, Profile, and Apps & Websites. Let’s review each of them one by one.
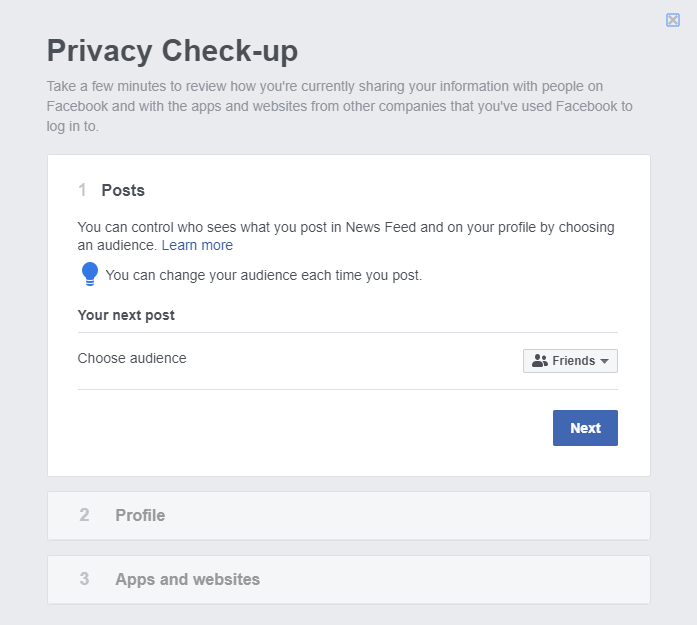
1.Posts
With this setting, you can choose the audience for anything you post on Facebook. Your posts appear on your profile timeline and in other people (Friends) news feed, so you can decide who is able to see your posts.
Click on the drop-down menu to select one of the available options like Public, Friends, Friends except, Specific Friends or Only me.
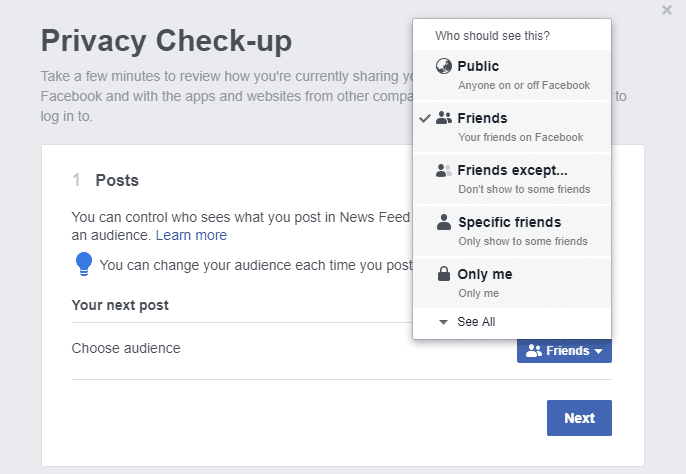
For most of you, the ‘Public’ setting is not recommended as you wouldn’t want anyone to reach out to your personal posts and photos. You can, therefore, choose to set ‘Friends’ as your audience, wherein, only the people on your friend list can see your posts. Alternatively, you can choose ‘Friends except’ if you want to share your posts with most of your friends while leaving out a few or you can choose ‘Specific friends’ if you want to share your posts with a limited number of your friends.
Note that once you set your audience, that setting will be applicable to all your future posts unless you change it again. Also, each of your posts may have a different audience.
2.Profile
Once you are done with the Posts setting, click on Next to move on to Profile settings.
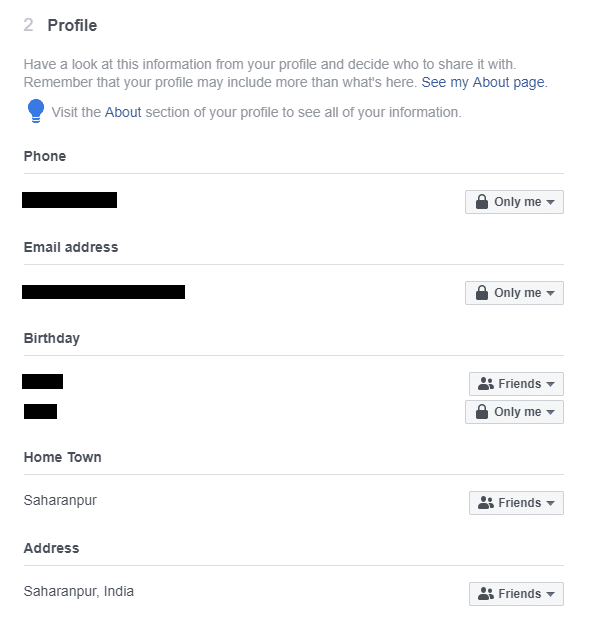
Just like Posts, Profile section allows you to decide who can see your personal or profile details like your phone number, email address, birthday, hometown, address, work, education, etc. Your phone number and email address are recommended to be set ‘Only me’ as you wouldn’t want any random people knowing such information about you.
For your birthday, the day and month may have a different setting than the year. This is because exposing your exact date of birth may sacrifice the privacy but you would still want your friends to know it’s your birthday. So you could set day and month as ‘Friends’ and year as ‘Only me’.
For all other details, you can decide what privacy level you require and set accordingly.
3.Apps and websites
This last section handles which apps and websites can access your information and their visibility on Facebook. There may be many apps that you may have logged in to using your Facebook account. Now these apps have certain permissions and access to some of your information.
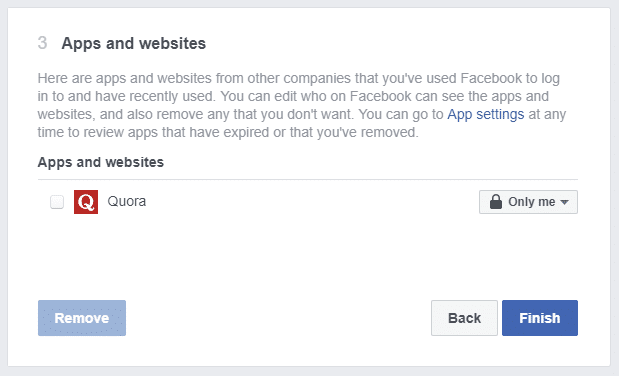
For the apps that you no longer use, it is recommended that you remove them. To remove an app, select the checkbox against that app and click on ‘Remove’ button at the bottom to remove one or more selected apps.
Click on the ‘Finish’ button to complete the Privacy Check-Up.
Note that the Privacy Check-Up takes you through only the very basic privacy settings. There are a lot of detailed privacy options available that you may want to reset. These are available in the privacy settings and are discussed below.
Privacy Settings
Through the ‘Settings’ of your Facebook account, you can set all the detailed and specific privacy options. To access settings,
1.Login to your Facebook account on the desktop.
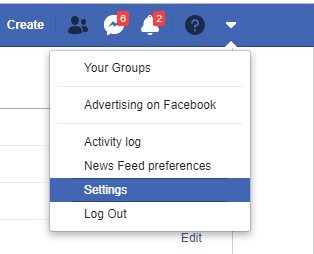
2.Click on the down-pointing arrow at the top rightmost corner of the page.
3.Click on Settings.
In the left pane, you will see different sections that will help you adjust privacy settings for each section individually, like Privacy, Timeline, and tagging, Blocking, etc.
1.Privacy
Select ‘Privacy’ from the left pane to access advanced privacy options.
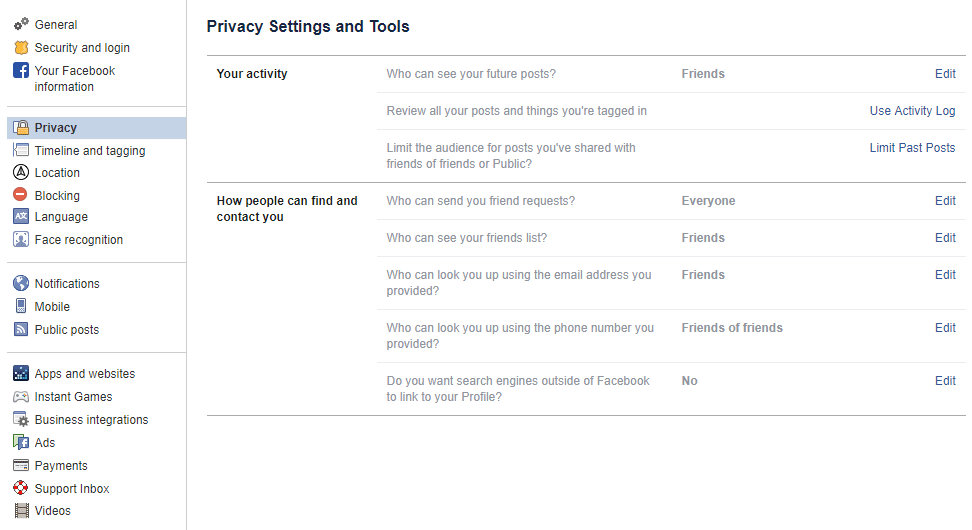
YOUR ACTIVITY
Who can see your future posts?
This one is the same as the Posts section of Privacy Check-Up. Here you can set the audience for your future posts.
Review all your posts and things you’re tagged in
This section will take you to Activity Log where you can see Posts (your posts on others’ timeline), Posts you’re tagged in, Other people’s posts to your timeline. These are available on the left pane. You can review each of the posts and decide to delete or hide them.
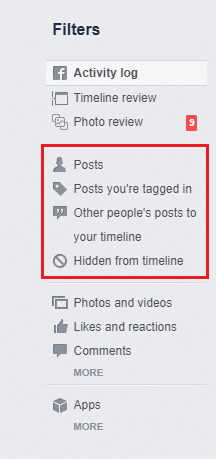
Note that you can delete your posts on others’ timeline by clicking on the edit icon.
For the posts you’re tagged in, you can either remove the tag or simply hide the posts from your timeline.
For others’ posts to your own timeline, you can delete them or hide them from your timeline.
Limit the audience for posts you’ve shared with Friends of Friends or Public
This option allows you to quickly limit the audience for ALL your old posts to ‘Friends’, whether they were ‘Friends of friends’ or ‘Public’. However, those tagged in the post and their friends will still be able to see the post.
HOW PEOPLE CAN FIND AND CONTACT YOU
Who can send you friend requests?
You can choose between Public and Friends of friends.
Who can see your friends list?
You can choose between Public, Friends, Only me and Custom, depending upon your preference.
Who can look you up using the email address you provided? Or who can you look you up with the phone number you provided?
These settings allow you to restrict who can look you up using your email address or phone number. You can choose between Everyone, Friends, or Friends of Friends for both of these cases.
Do you want other search engines outside of Facebook to link to your timeline?
If you ever Google yourself, it is likely that your Facebook profile appears among the top search results. So basically, turning this setting off will prevent your profile from appearing on other search engines.
However, this setting, even when turned on, may not bother you much. This is because for those not on Facebook, even if you have this setting turned on and your profile appears as a search result on some other search engine, they will only be able to view very specific information which Facebook keeps public always, like your name, profile picture, etc.
Anyone on Facebook and logged in to their account can access your profile information which you have set “Public”from some other search engine and this information is anyways available through their Facebook search itself.
2.Timeline and tagging
This section allows you to control what appears on your timeline, who sees what and who can tag you in posts, etc.
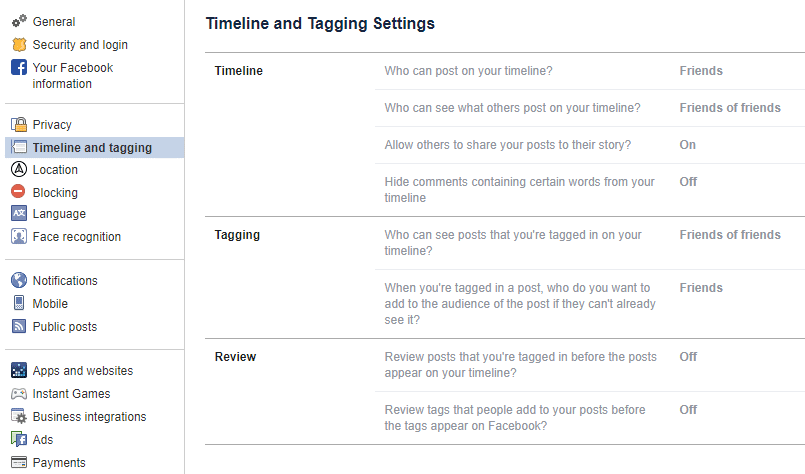
TIMELINE
Who can post on your timeline?
You can basically choose if your friends can also post on your timeline or if only you are able to post on your timeline.
Who can see what others post on your timeline?
You can choose between Everyone, Friends of Friends, Friends, Only Me or Custom as the audience for others’ posts on your timeline.
Allow others to share your posts to their story?
When this is enabled, your public posts can be shared by anyone to their story or if you tag someone, they can share it to their story.
Hide comments containing certain words from the timeline
This is one is a recent and very useful setting if you want to hide comments containing certain abusive or unacceptable words or phrases of your choice. Simply type the word that you do not want to appear and click on Add button. You can even upload a CSV file if you want. You can also add emojis to this list. The only thing to be noted here is that person who has posted the comment containing such words and their friends will still be able to see it.
TAGGING
Who can see posts that you are tagged in on your timeline?
Again, you can choose between Everyone, Friends of Friends, Friends, Only Me or Custom as the audience for posts that you are tagged in on your timeline.
When you’re tagged in a post, who do you want to add to the audience if they aren’t already in it?
Whenever someone tags you in a post, that post is visible to the audience selected by that person for that post. However, if you want to add some or all of your friends to the audience, you can. Note that if you set it to ‘Only me’ and post’s original audience is set as ‘Friends’, then your mutual friends are obviously in the audience and will not be removed.
REVIEW
Under this section, you can stop posts that you are tagged in or what others post on your timeline from appearing on your timeline before you review them yourself. You can turn this setting on or off accordingly.
3.Blocking
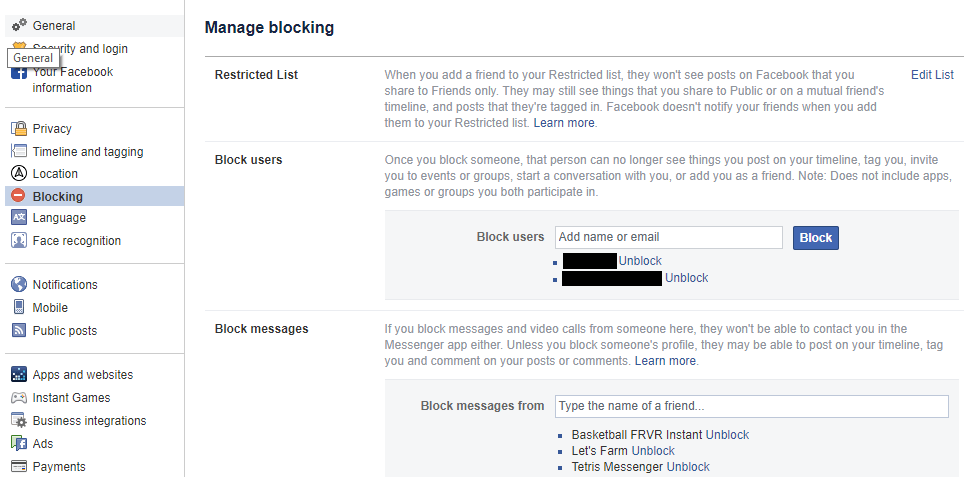
RESTRICTED LIST
Contains friends who you do not want to see the posts for which you’ve set the audience as Friends. They will, however, be able to see your Public posts or those you share to a mutual friend’s timeline. The good part is that they won’t be notified when you add them to the restricted list.
BLOCK USERS
This list allows you to completely block certain users from seeing posts on your timeline, tagging you or message you.
BLOCK MESSAGES
If you want to block someone from messaging you, you can add them to this list. They will however be able to see posts on your timeline, tag you, etc.
BLOCK APP INVITES and BLOCK EVENT INVITATIONS
Use these to block those annoying friends who keep on bugging you with invitations. You can also block apps and pages using BLOCK APPS and BLOCK PAGES.
4.Apps and websites
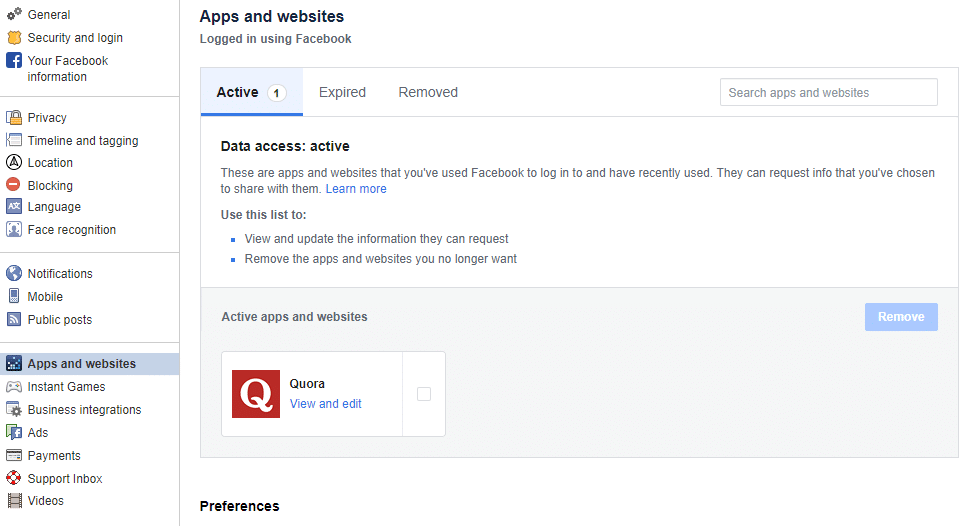
While you can remove apps that you’ve logged in to using Facebook in the Privacy Check-Up, here you will find detailed information about app permissions and what information they can access from your profile. Click on any app to see or change what an app can access and who can see that you’re using it.
5.Public posts

Here you can set who can follow you. You can either select Public or Friends. You can also choose who can like, comment or share your public posts or public profile info, etc.
6.Ads
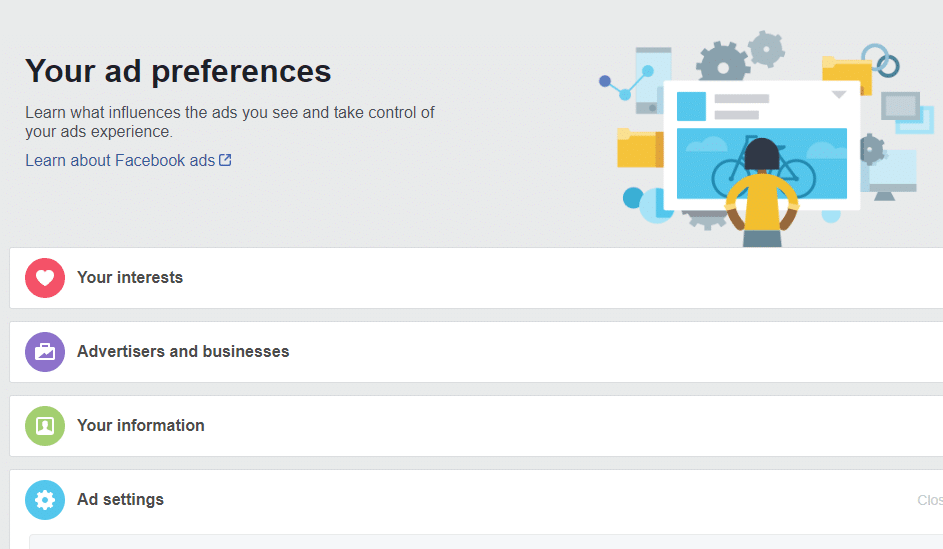
Advertisers collect your profile data in order to reach you. ‘Your information’ section allows you to add or remove certain fields that influence the ads targeted to you.
Further, under Ad preferences, you can allow or reject ads based on data from partners, Ads based on your activity on Facebook Company Products that you see elsewhere, and Ads that include your social action.
Recommended:
So this was all about Facebook’s Privacy Settings. Additionally, these settings will save your data from leaking out to the unwanted audience but the security of your account password is even more important. You must always use strong and unpredictable passwords. You can also use two-step authentication for the same.