- in Windows 10 by Admin
Exclude Files and Folders in Windows 10’s Quick Access

Windows’ Quick Access is a quick and easy way
to gain dynamic access to the files and folders that are most important to you
on your Windows machine. It’s such a small feature, but it’s one that Windows
just wouldn’t be the same without.
WIndows isn’t perfect, though. As it’s
learning the files and folders that you access the most, there may be a few
that you don’t want to be displayed in a menu that’s so prominent in Windows
Explorer. If so, there are ways around that.
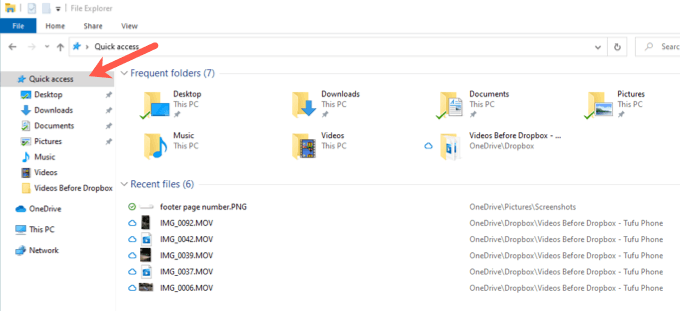
In this article, let’s talk about a few of the ways you can customize your Windows 10 Quick Access menu so that you get the most out of it. By default, here’s what it looks like in Windows 10:
How to Enable or Disable
Files/Folders in Quick Access
One customization option for Quick Access in
Windows 10 is the ability to disable displaying recently used files and/or
folders. Disabling both of these will render Quick Access useless unless you’ve
specifically pinned files or folders to Quick Access, so keep that in mind.
To do so, navigate to File Explorer Options in your Control Panel. You can do this by opening explorer, clicking on the View tab and then clicking on the Options drop down. Here, click on Change folder and search options.

The following window will pop up. Towards the
bottom, you will see two checkboxes that allow you to toggle showing recent
files and/or folders on and off. Bear in mind that this does not mimic the
functionality of Windows 10’s Recent Items. Only items that have seen repeated
use over time will display in Quick Access.
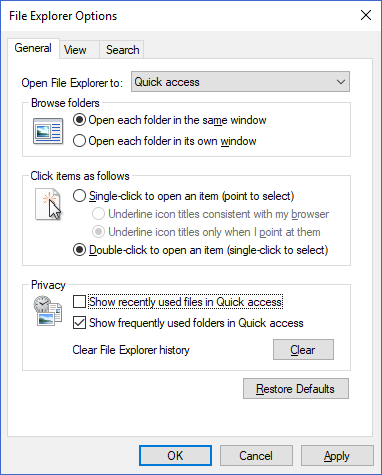
Go ahead and uncheck Show recently used files in Quick Access and Show frequently used folders in Quick Access. You also have the option of clearing your File Explorer history. This will effectively give you a clean slate in Quick Access so that more recent and relevant items can start to appear.
How to Exclude Individual
Files/Folders in Quick Access
If you have a certain file or folder showing
up in your Quick Access that you don’t want to appear, excluding it is a very
simple process.
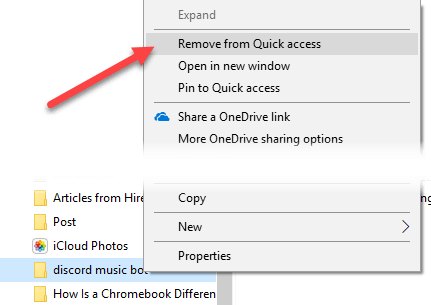
All you have to do is right-click on the file or folder and select Remove from Quick Access or Unpin from Quick Access.
If you ever want to allow any files or folders to appear again, use the Clear button from File Explorer Options (shown in the previous section).
How to Remove Quick Access
Entirely
If you’ve decided that Quick Access just isn’t for you and you want to get rid of it entirely, this is possible through some simple registry editing. However, before you ever make any changes, remember to back up your Windows registry.
First, press the Windows key + R to bring up the Run prompt. In the field, type in “regedit” and press Enter.

On this window, in the folder tree to the left, navigate to the following registry key:
HKEY_LOCAL_MACHINESOFTWAREMicrosoftWindowsCurrentVersionExplorer
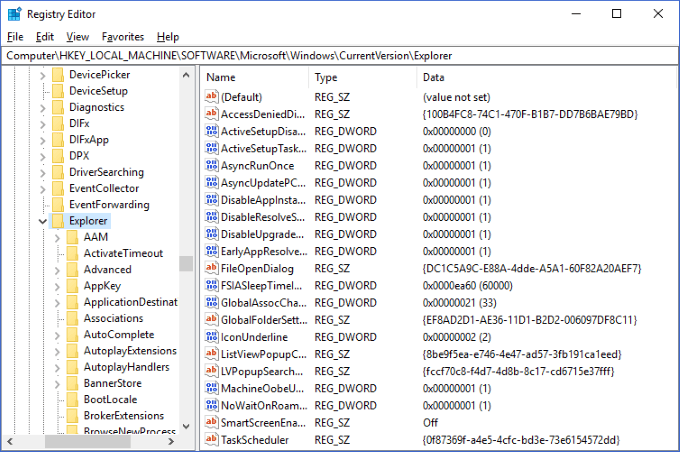
Right-click on an empty portion of the pane to
the right and select DWORD (32-bit)
Value from the New menu.
Change the value’s name to “HubMode” and give it a value of 1.

Now, if you bring up Windows Explorer, you
should see that the Quick Access menu is no longer present on the left side. If
you still see it, you may need to restart Windows Explorer or your computer
altogether.
If you want to reverse this at any time, all
you have to do is delete the value you just created.
Quick Access is one of the most useful
features in Windows 10’s file manager, and taking control of it can seriously
improve your everyday PC productivity. With the tips above, we hope you’ve
learned how to make Quick Access fit your needs!