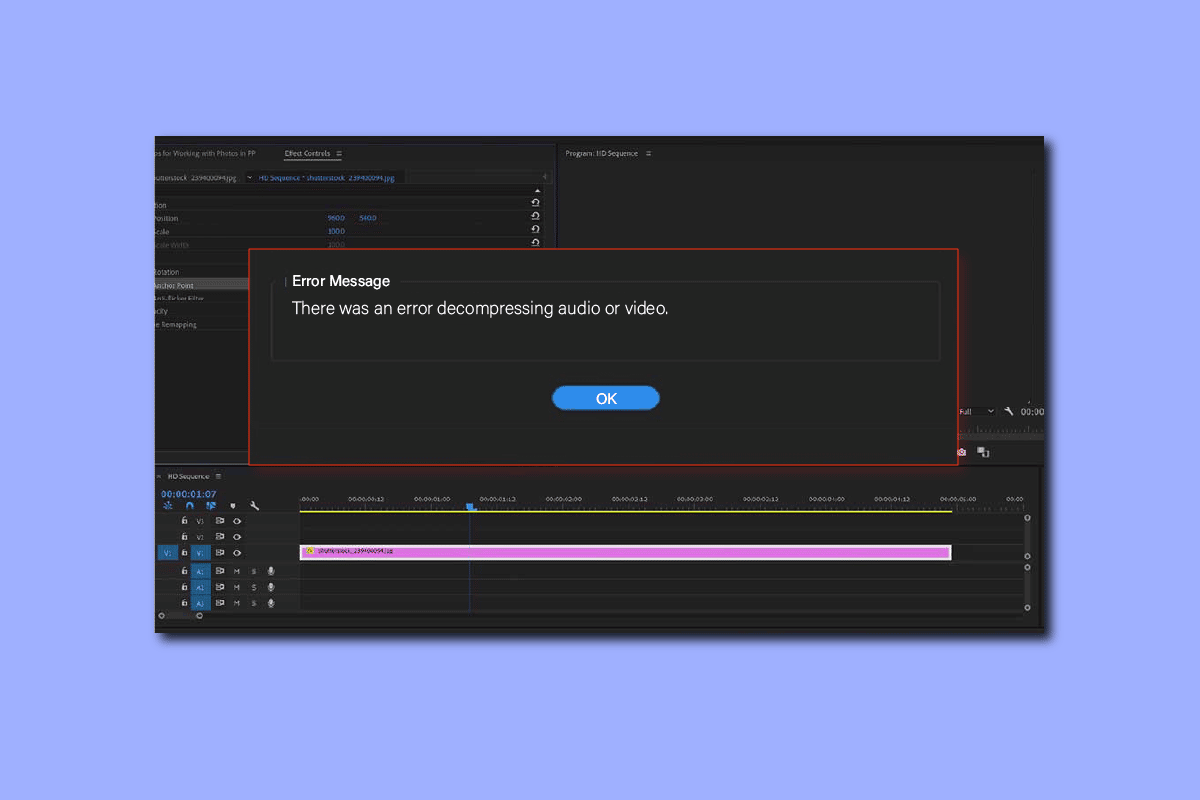
Fix Premiere Pro There Was an Error Decompressing Audio or Video

Many users often come across an error decompressing audio or video files on the Adobe Premiere Pro program. This error is generally caused by an unsupported file format of the media. Users can have trouble loading or producing media files due to this error which appears with a message stating there was an error decompressing audio or video files. In this guide, we will discuss reasons and methods to resolve error decompressing audio or video mp3 files.
How to Fix Premiere Pro There Was an Error Decompressing Audio or Video
There can be multiple reasons for this error. Some of the possible reasons are listed below.
- Issues caused by incorrect audio or video file format
- Error due to improper file extension
- Issues caused due to excess Adobe Premiere Pro cache files
- Errors due to improper naming of the cache folders
- Improper location of the cache files
- Errors caused by bugs and other errors with the Adobe Premiere Pro program
In the following guide, we will discuss methods to resolve there was an error decompressing audio or video files on the Adobe Premiere Pro program.
Method 1: Ensure Correct File Format
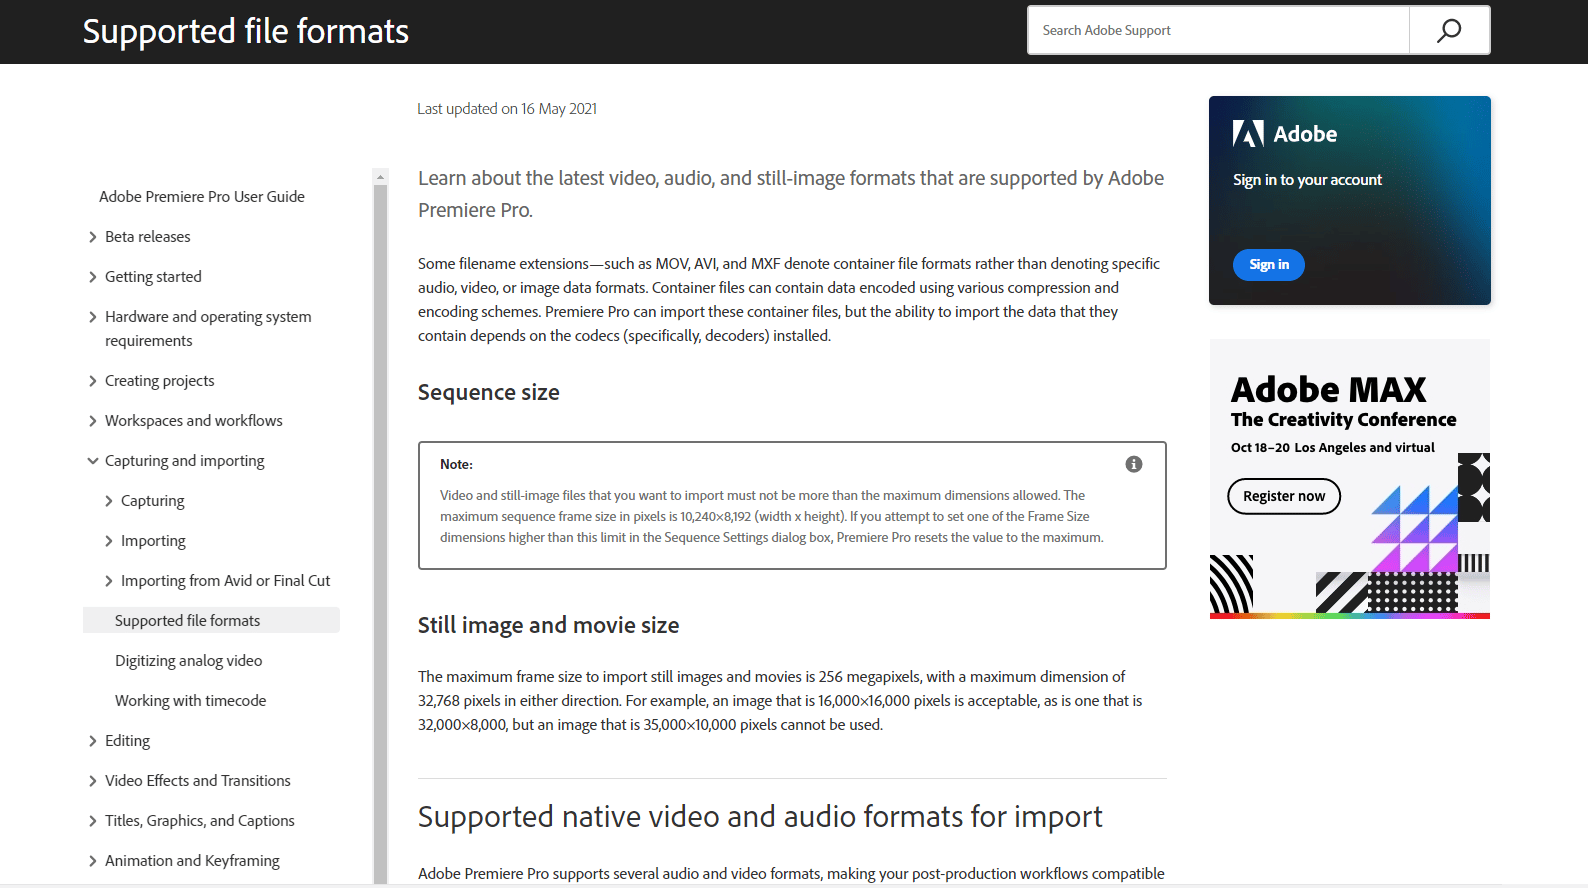
If you are receiving an error message stating there was an error decompressing audio or video file on Adobe Premiere Pro. The first thing that you can do to fix the error is to check the file format for your audio or video file. Generally, Adobe Premiere Pro supports most audio and video formats. However, sometimes your file may have a file format that is not compatible with the Premiere Pro program. You can check the list of the supported file formats for Adobe Premiere Pro from the supported file format page. Error decompressing audio or video mp3 can occur if your audio or video files are in a format that is not supported by Premiere Pro. In this case, consider changing it to a supported format. You can use programs such as Adobe Media Encoder or Adobe Audition to change the file format. Try and use MP3 or WAV as these two are the most hassle-free audio format in adobe.
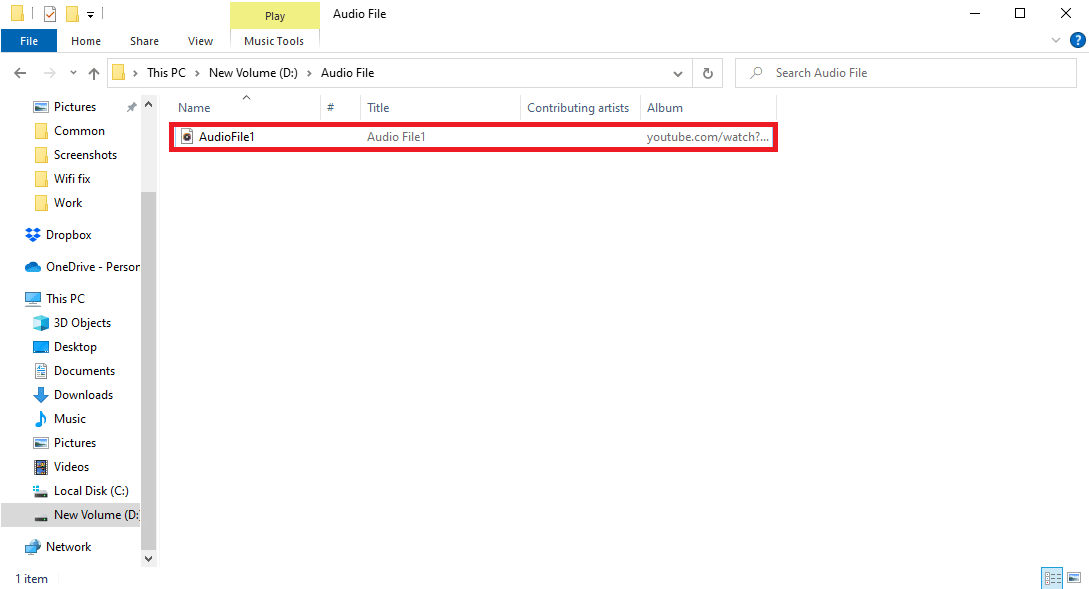
Method 2: Rename File Extension from .MP3 to .WAV
Many users found that renaming the file extension from .mp3 to .wav fixed the issue for them. To make changes by renaming the file format you don’t need a different program. You can fix this issue from the Adobe Premiere app itself.
1. Press the Windows + E keys simultaneously to open File Explorer.
2. Navigate to the .mp3 file that is causing the issue.
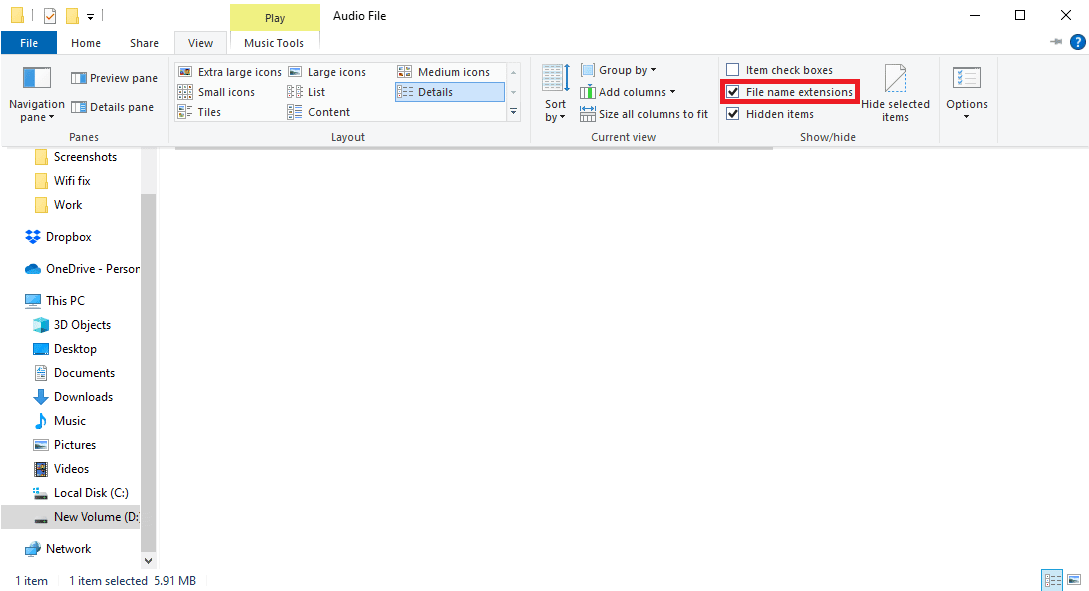
3. Click on the View tab from the menu options.
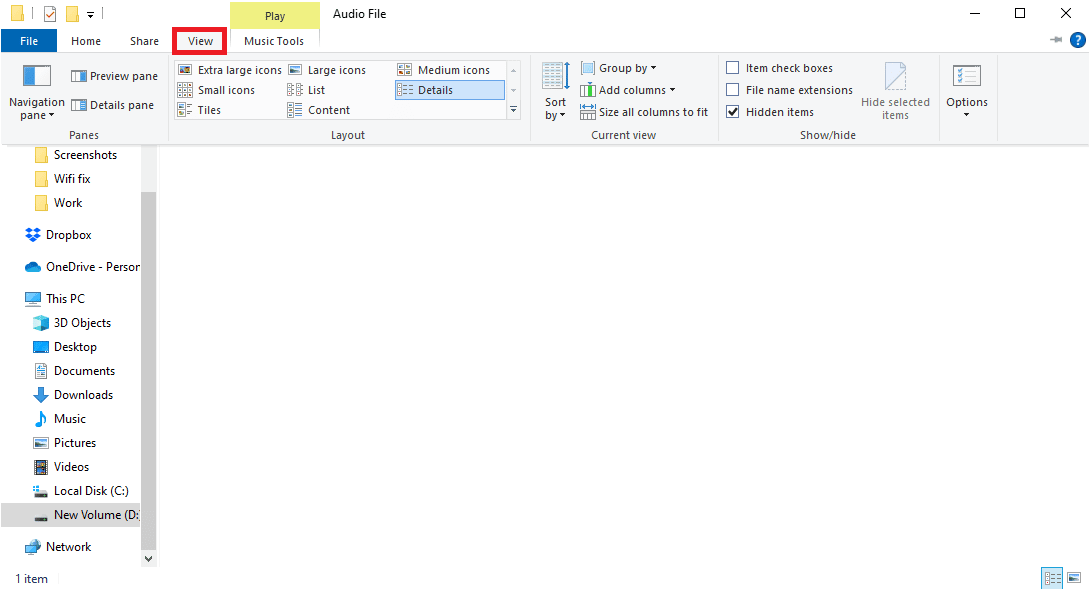
4. Here, check the box for File name extensions.
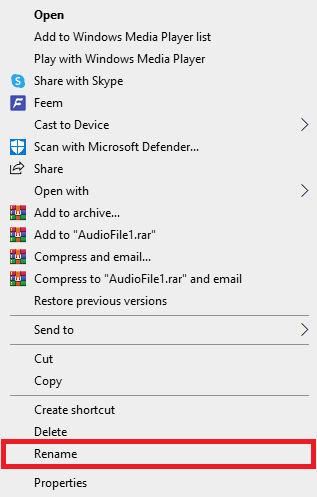
5. Now, right-click on the file and select the Rename option.
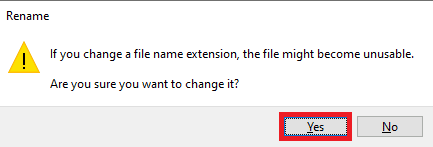
6. Finally, rename the .mp3 with the .wav file and press the Enter key and confirm the changes by clicking on Yes.
Also Read: How Do I Fix Accelerated Renderer Error
Method 3: Clear Cache Files
Sometimes error decompressing audio or video issue can be caused by the excess cache memory in the Adobe Premiere Pro program. Many users were able to fix there was an error decompressing audio or video issues by simply clearing the cache files for the Premiere Pro program.
1. Launch the Adobe Premium Pro app.
2. Here, click on the Edit tab and then click on Preferences.
3. Now, locate and click on the Media Cache…
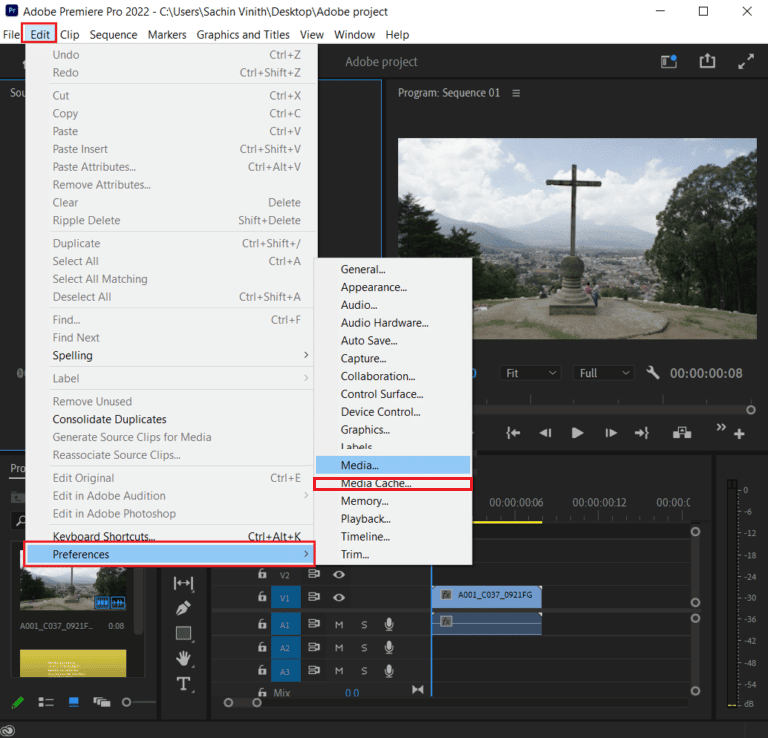
4. Then, click on Delete beside Remove Media Cache Files.
5. Now from the available options either click on Delete all media cache files or delete unused media cache files and then click OK.
6. Finally, restart the Adobe Premiere Pro program to see if the issue has been resolved.
Method 4: Rename Media Cache Folder
Many users also reported that renaming the Media Cache Folder for Premiere Pro resolved the issue for them. Follow the steps below
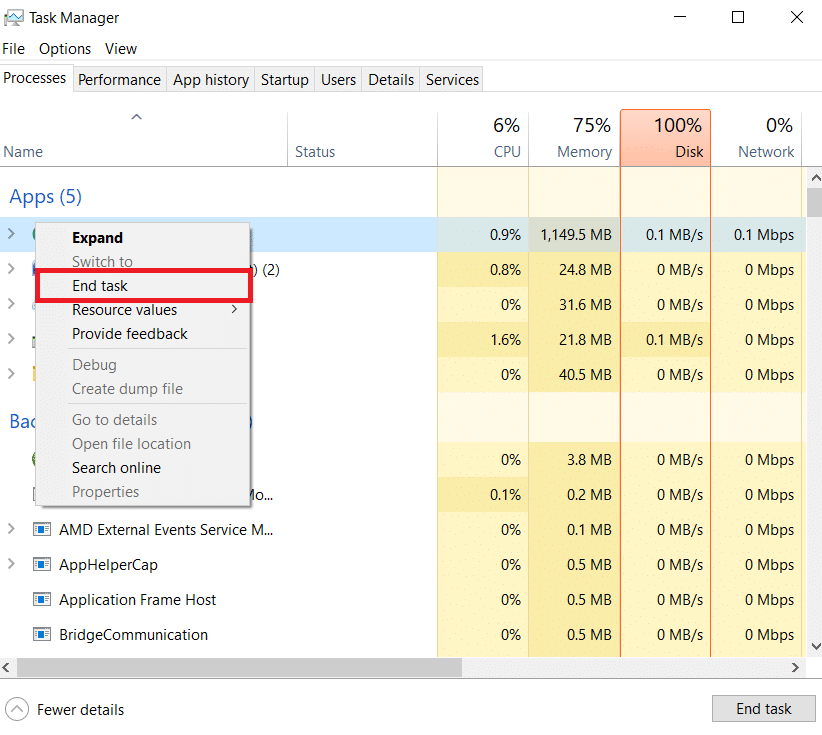
1. Close all the Adobe programs running on your computer. Follow our guide to end task in Windows 10.
2. Hit the Windows + E keys together to open File Explorer.
3. Navigate to the following default location path.
C:UsersDefaultAppDataRoamingAdobeCommon
Note: Change the Default text with your PC name in the above path.
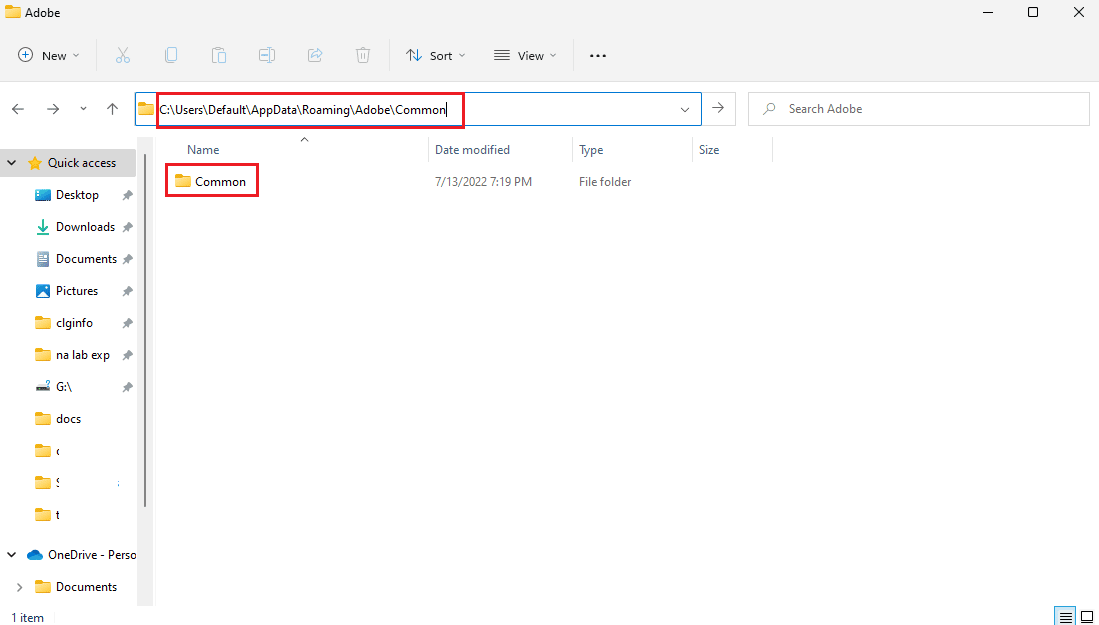
4. Locate the Cache folders here.
5. Rename the folders to Media Cache Files_OLD and Media Cache_OLD respectively.
6. Now, restart the Adobe Premiere Pro app.
Also Read: How to Disable Adobe AcroTray.exe at Startup
Method 5: Move Media Files to Different Folder
If renaming the cache folder does not resolve error decompressing audio or video issue for you. You can try to fix error decompressing audio or video issues by moving the Media Files to a different location on your computer. You can move these files to a location of your choice. However, it is recommended to move them to a location that is easily accessible to you.
1. Navigate to the Adobe > Common folder as shown in Method 4.
2. Click on the cache folders and press the Ctrl + X keys simultaneously to use the cut command.
3. Go to a location where you want to move the cache files and press Ctrl + V keys together to paste.
If this does not resolve error decompressing audio or video mp3 issue try the next method.
Also Read: Fix Adobe Software You Are Using Is Not Genuine Error
Method 6: Reinstall Adobe Premiere Pro
If none of the previously mentioned methods works and you continue to have the same issue. You can try to reinstall the Adobe Premiere Pro program on your computer. Reinstalling would require you to uninstall the already installed program. This method will reset all the changes made by you on the program and you can start with Premier Pro with a new start.
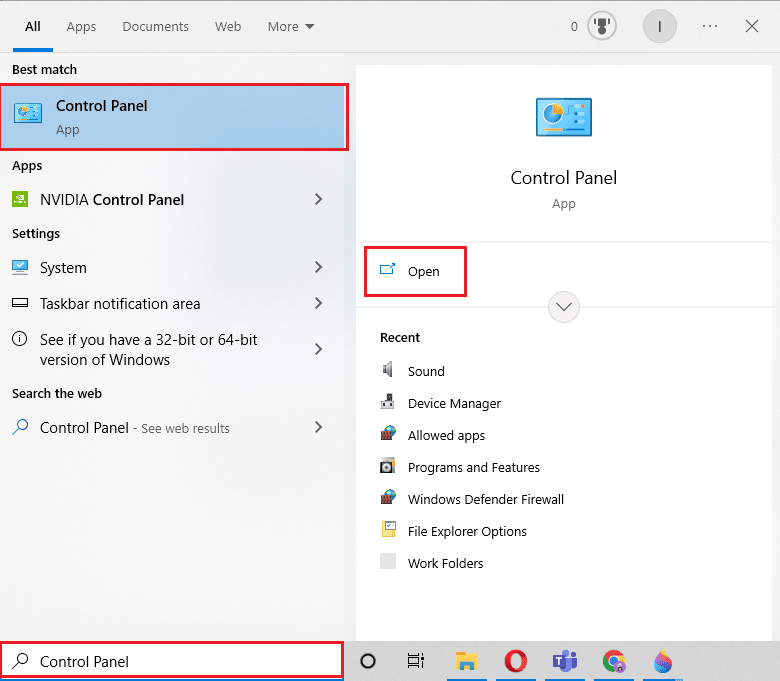
1. Hit the Windows key, type Control Panel and click on Open.
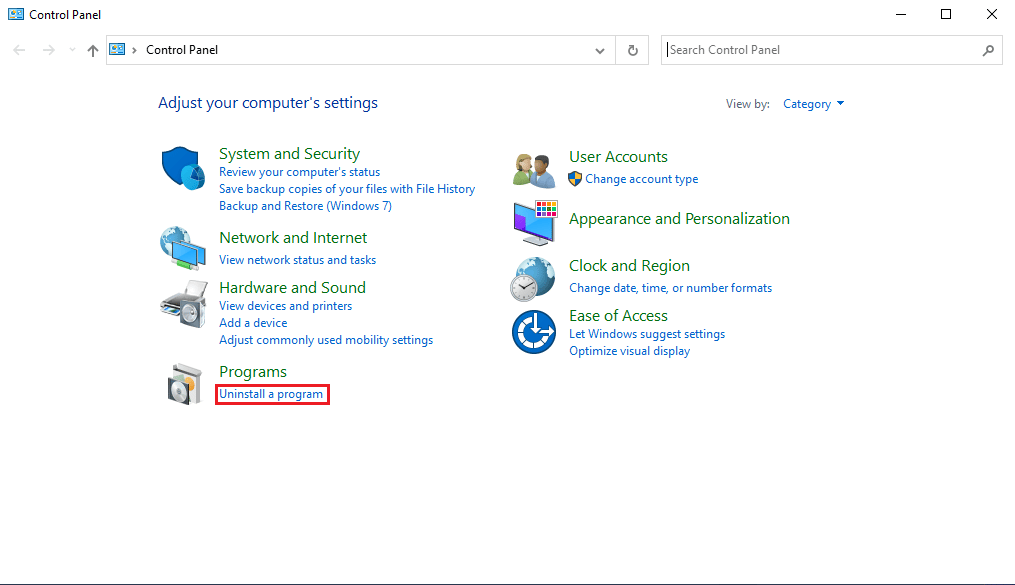
2. Set View by > Category, then click on Uninstall a program option under Programs.
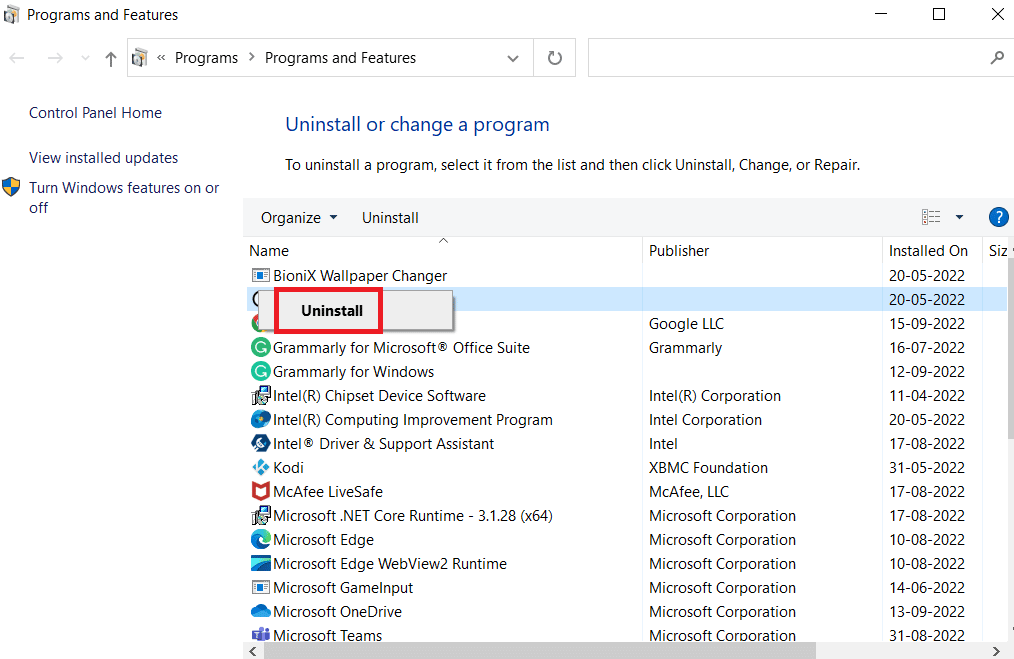
3. Now, locate Adobe Premiere Pro and right-click on it and select Uninstall.
4. Follow the on-screen instructions to complete the uninstallation process and reboot the PC.
5. Then, visit the Adobe Premiere Pro website, download, and install your product.

Frequently Asked Questions (FAQs)
Q1. Where can I use Premiere Pro?
Ans. The Adobe Premiere Pro program can be used in editing audio and video files and producing high-quality videos and audio files.
Q2. Do I need to buy Adobe Premiere Pro?
Ans. Yes, you will have to buy Adobe Premiere Pro from the official Adobe website. However, users can also use a free trial version of the program.
Q3. How can I fix Adobe Premiere Pro errors?
Ans. You can try to fix the Adobe Premiere Pro error by using multiple methods. Some of the common methods include clearing the cache files for the program and changing the file format.
Recommended:
We hope this guide was helpful to you and you were able to fix there was an error decompressing audio or video issue with your program. Let us know which method worked for you. If you have any suggestions for us let us know in the comment section below.