How to Move Windows 10 Apps to Another Drive

One of the most useful features of Windows 10 is, it lets you move the installed Windows Apps to another drive or a USB drive. The feature is beneficial for users who want to save disk space as some of the large apps such as games can take a large chunk of their C: drive, and to avoid this scenario Windows 10 users can change the default installation directory for new apps, or if the application is already installed, they can move them to another drive.
While the above feature was not available to the earlier version of Windows but with the introduction of Windows 10 users are quite happy with the number of features it has. So without wasting any more time, let’s see How to Move Windows 10 Apps to Another Drive with the help of below-listed steps.
How to Move Windows 10 Apps to Another Drive
Make sure to create a restore point just in case something goes wrong.
Note: You won’t be able to move an app or program that came preinstalled with Windows 10.
1. Press Windows Key + I to open Settings then click Apps.
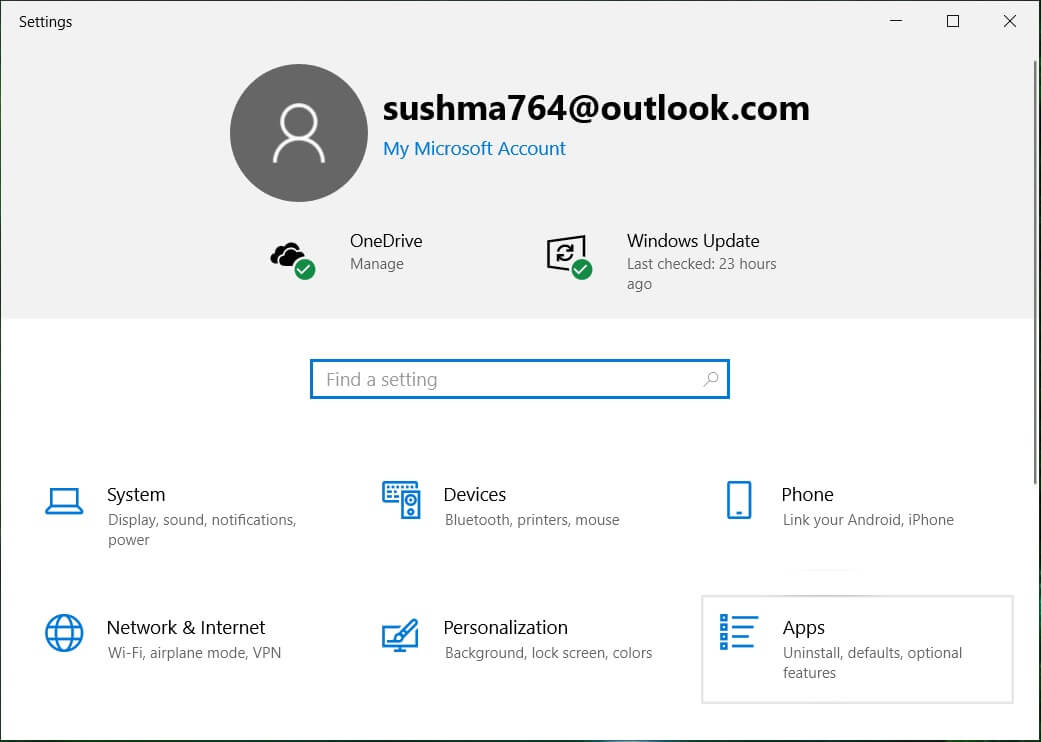
Note: If you have recently installed the latest creators update, you need to click on Apps instead of System.
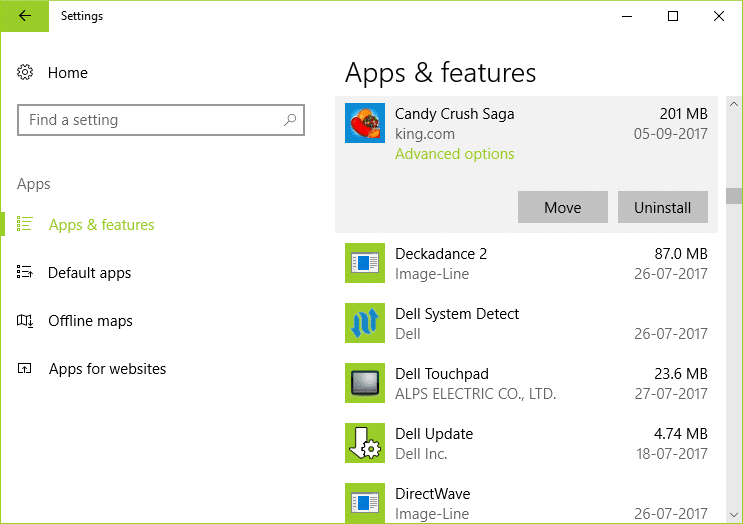
2. From the left-hand menu, select Apps & features.
3. Now, in the right window under Apps & features, you will see the size and name of all the installed apps on your system.

4. To move a particular app to another drive, click on that particular app and then click on the Move button.
Note: When you click on an app or program preinstalled with Windows 10, you will only see Modify and Uninstall option. Aso, you won’t be able to move a desktop application using this method.
5. Now, from the pop-up window, select a drive from the drop-down where you want to move this application and click Move.
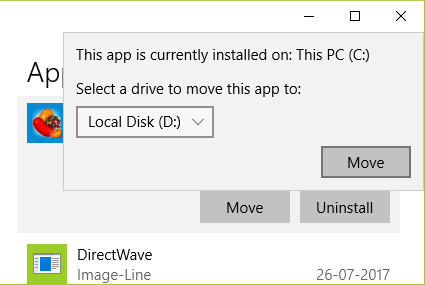
6. Wait for the above process complete as it generally depends on the size of the application.
Change the default location of where the new apps will save to:
1. Press Windows Key + I to open Settings then click System.

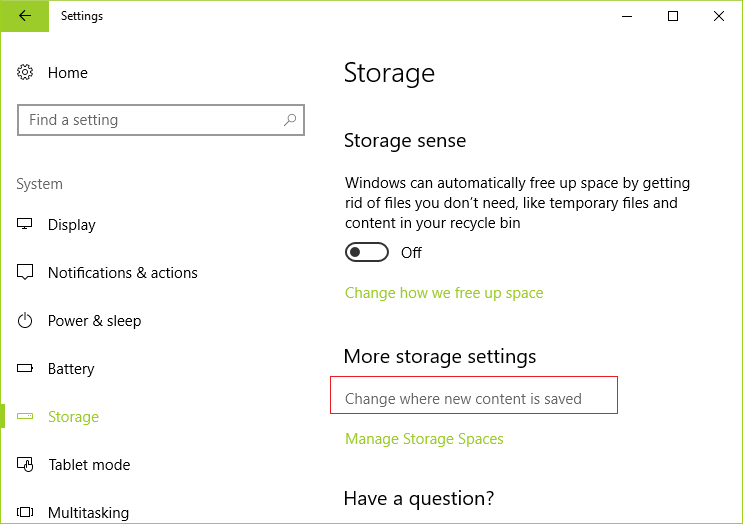
2. From the left-hand window, select Storage.
3. Now click on Change where the new content is saved in the right window.
4. Under “New apps will save to” drop-down select another drive, and that’s it.
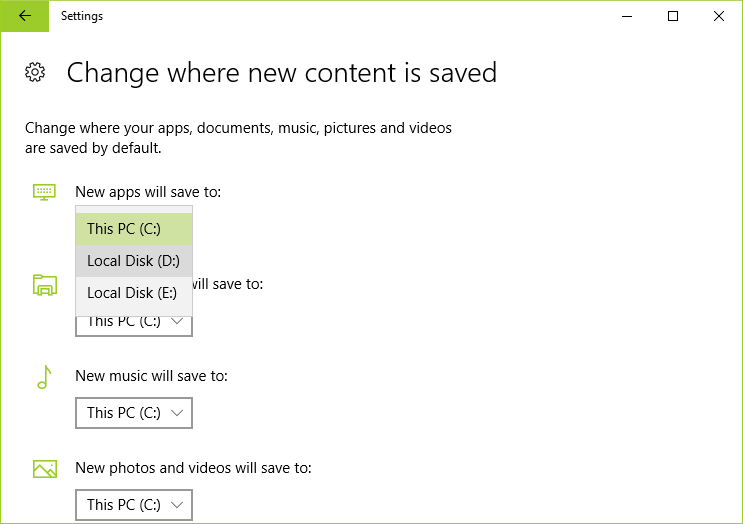
5. Whenever you install a new app, it will be saved to the above drive rather than C: drive.
Recommended:
That’s it you have successfully learned How to Move Windows 10 Apps to Another Drive, but if you still have any questions regarding this article then feel free to ask them in the comment’s section.