How to Remove or Hide Drive Letter in Windows 10
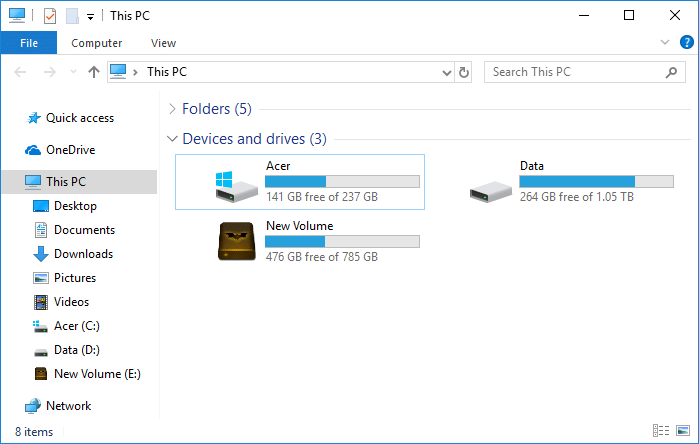
Whenever you connect an external drive such as external hard disk or USB pen drive, Windows automatically assigns a drive letter to the connected drive. The process of assigning a drive letter is quite simple as Windows progresses through the alphabet from A to Z to assign the available drive letters to the connected device. But there are some letters which are exceptions such as A & B are reserved for floppy drives, whereas the drive letter C can only be used for the drive which has Windows installed on it. Anyway, without wasting any time, let’s see How to Remove or Hide Drive Letter in Windows 10 with the help of the below-listed tutorial.

How to Remove or Hide Drive Letter in Windows 10
Make sure to create a restore point just in case something goes wrong.
Method 1: How to Remove Drive Letter in Disk Management
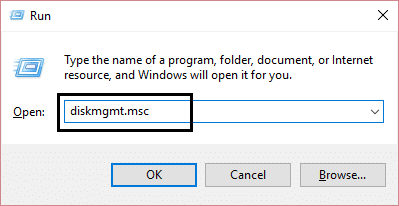
1. Press Windows Key + R then type diskmgmt.msc and hit Enter to open Disk Management.
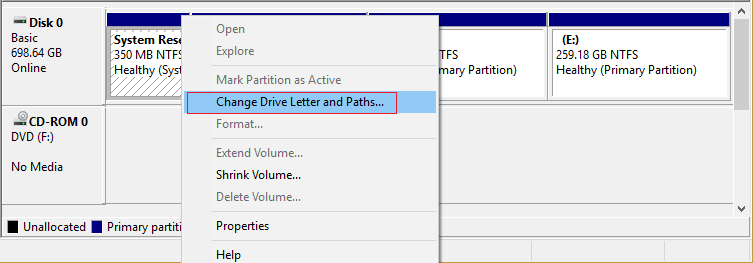
2. Right-click on the drive for which you want to remove the drive letter and select Change Drive Letter and Paths.
3. Select the drive letter for the particular drive and click on Remove button.
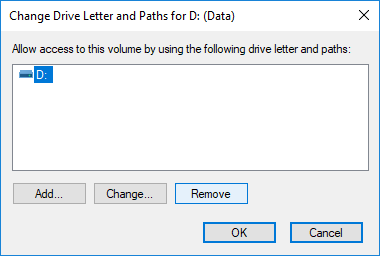
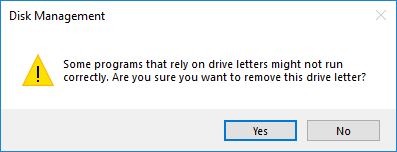
4. Click Yes to confirm your actions, then close everything.
Method 2: How to Hide Drive Letters in File Explorer
1. Press Windows Key + E to open File Explorer then select this PC from the left-hand window.
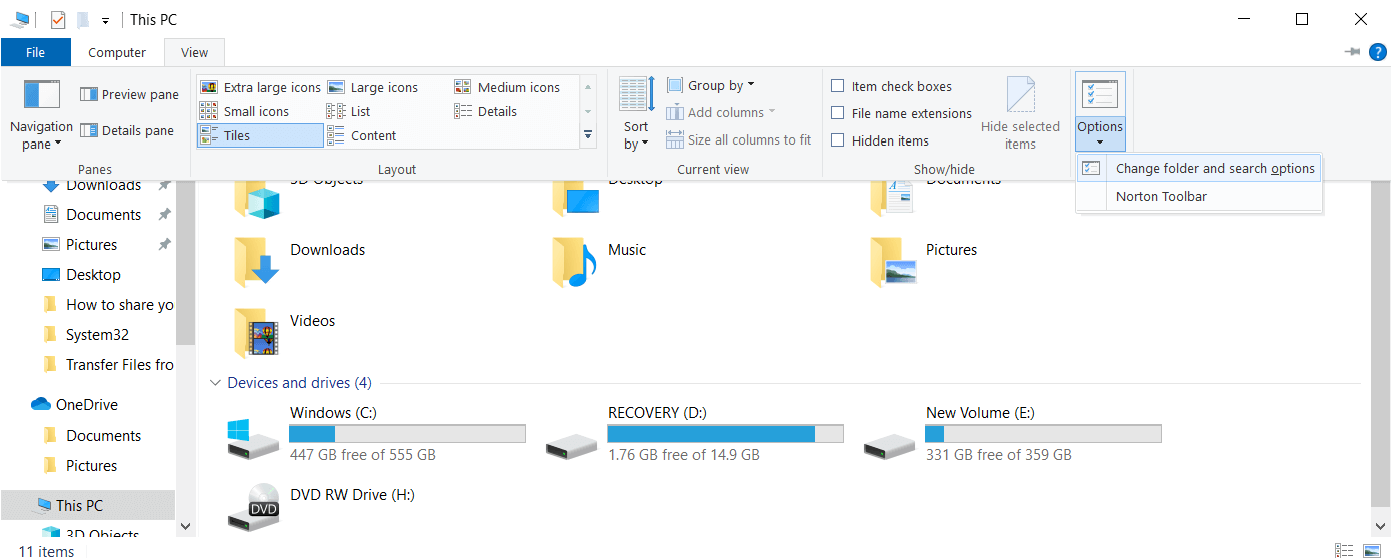
2. Now from the ribbon menu, click on View, then click on Options.
3. Next, switch to the View tab then uncheck “Show drive letter“.
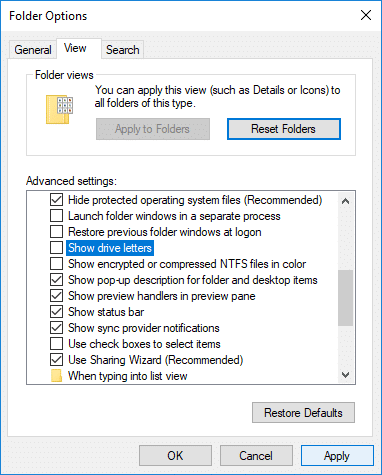
4. Click Apply, followed by OK.
Method 3: How to Remove Drive Letter in Command Prompt
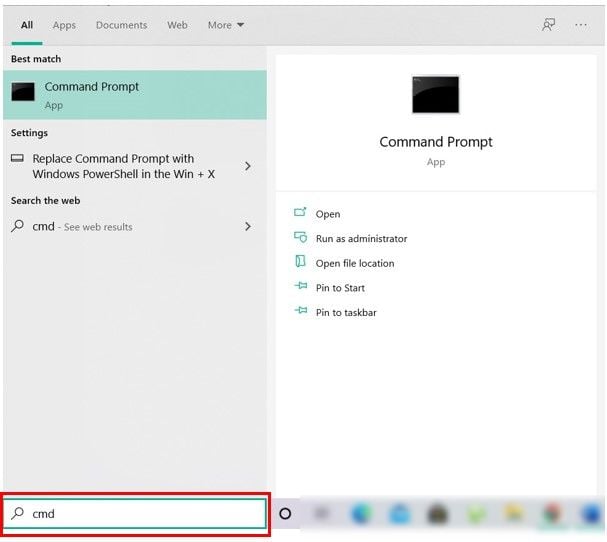
1. Open Command Prompt. The user can perform this step by searching for ‘cmd’ and then press Enter.
2. Type the following command into cmd and hit Enter after each one:
diskpart
list volume (Note down the number of the volume for which you want to change the drive letter for)
select volume # (Replace the # with the number which you noted above)
remove letter=drive_letter (Replace drive_letter with actual drive letter which you want to use for example: remove letter=H)
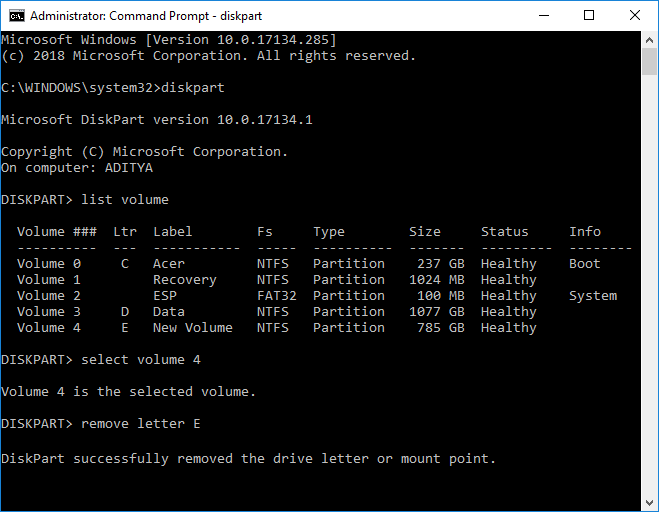
3. Once finished, you can close the command prompt.
Method 4: How to Hide Drive Letters using Registry Editor
1. Press Windows Key + R then type regedit and hit Enter to open Registry Editor.

2. Navigate to the following registry key:
HKEY_CURRENT_USERSOFTWAREMicrosoftWindowsCurrentVersionExplorer
3. Right-click on Explorer then select New > DWORD (32-bit) Value and name this DWORD as ShowDriveLettersFirst.
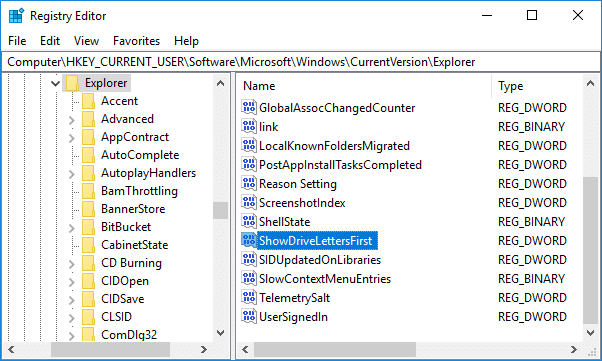
4. Double-click on the ShowDriveLettersFirst DWORD and change its value according to:
0 = Show drive letters
2 = Hide drive letters
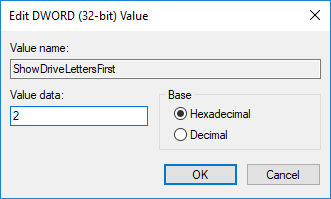
5. Click OK then close the Registry Editor.
Recommended:
That’s it you have successfully learned How to Remove or Hide Drive Letter in Windows 10 but if you still have any queries regarding this tutorial then feel free to ask them in the comment’s section.