How to Downgrade from Windows 11 to Windows 10

Windows 11 got all the bells and whistles for a tech enthusiast interested in installing it and playing around for a while. Although, the lack of proper driver support and hiccups in its delivery system makes it tough to love. Windows 10 on the other hand, is what a stable, go-to operating system should look & function like. It has been a while since Windows 10 was released and it has matured quite well. Just before the release of Windows 11, Windows 10 was running on around 80% of all the computers active worldwide. While Windows 10 is now receiving only annual updates, it still makes a good OS for daily use. Today we are going to explore how to roll back from Windows 11 to Windows 10 in case you are facing issues with the former.
How to Downgrade/Roll Back from Windows 11 to Windows 10
Windows 11 is still evolving and becoming more stable as we speak. But to be considered as a daily driver, we have to say that Windows 11 is still in its infancy. There are two ways using which you can downgrade Windows 11 to Windows 10. It is worth noting that this option is only available to those who upgraded Windows 11 quite recently as Windows deletes the old installation files 10 days after the upgrade.
Method 1: Using Windows Recovery Settings
If you have just recently installed Windows 11, and it has not been more than 10 days, then you can roll back to Windows 10 through Recovery Settings. Following these steps will help you to roll back Windows 10 from Windows 11 without losing your files or most of your settings. However, you might need to reinstall your apps. You can upgrade to Windows 11 at a later date when the operating system gains more stability.
1. Press Windows + I keys together to open Settings.
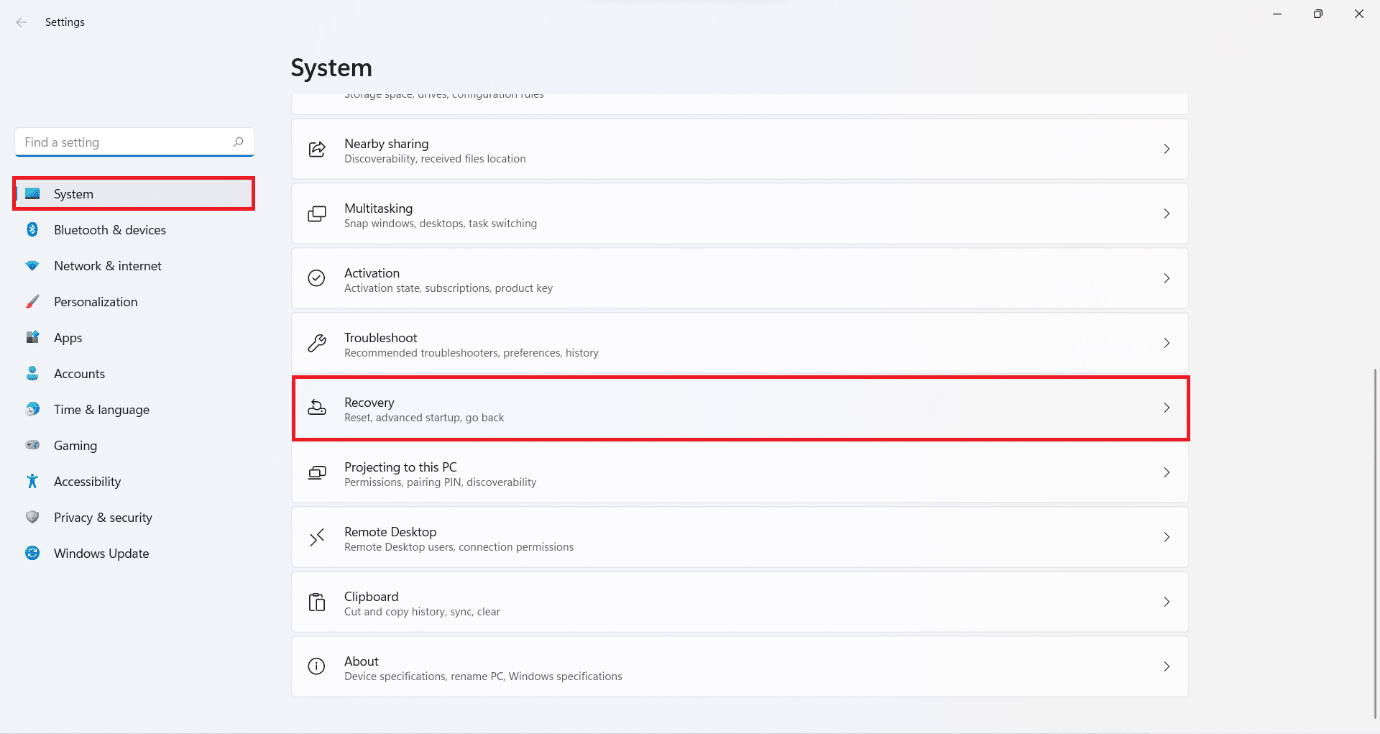
2. In the System section, scroll through and click on Recovery, as shown.
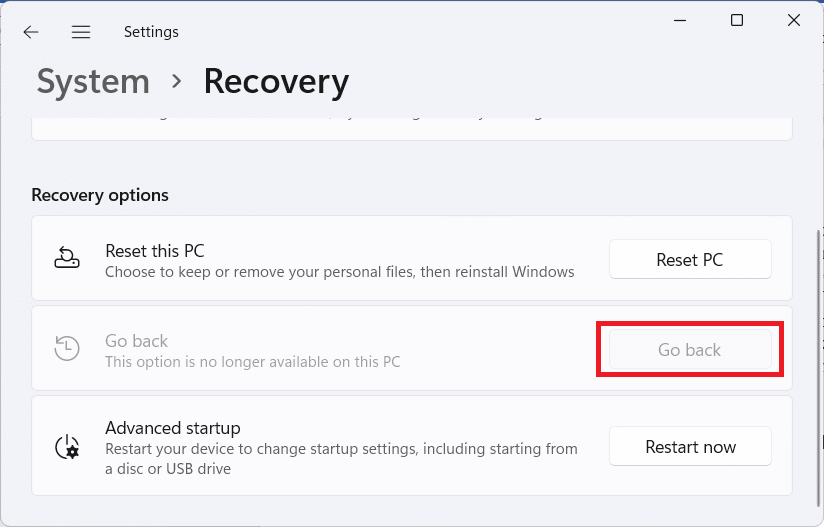
3. Click on the Go Back button for Previous version of Windows option under Recovery options as depicted below.
Note: The button is greyed out because system upgrade duration has crossed the 10-day mark.
4. In the Go back to the earlier build dialog box, select the reason for the rollback and click on Next.
5. Click on No, thanks in the next screen asking if you would like to Check for updates? or not.
6. Click on Next.
7. Click on the Go back to earlier build button.
Also Read: How to Block Windows 11 Update Using GPO
Method 2: Using Windows Installation Media Tool
If you are already past the 10-day limit, you can still downgrade to Windows 10 but at the cost of your files & data. You can use Windows 10 installation media tool to perform a rollback but you need to do it by clearing your drives. Hence, it is advised to make a full data backup for your files before performing the following steps:
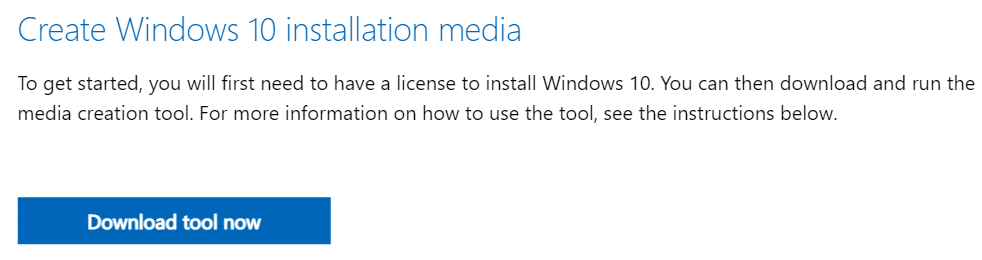
1. Download the Windows 10 installation media tool.
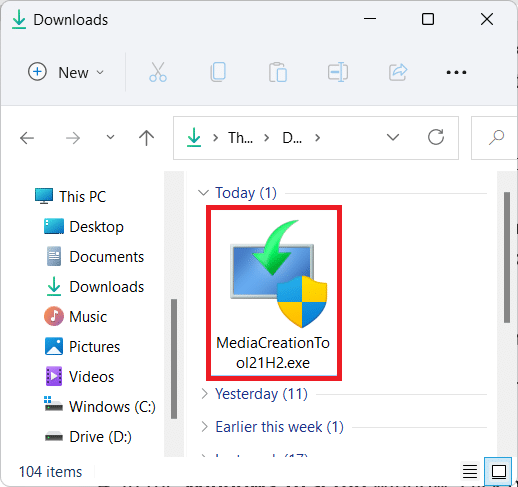
2. Then, press Windows + E keys together to open File Explorer and open the downloaded .exe file.
3. Click on Yes in the User Account Control prompt.
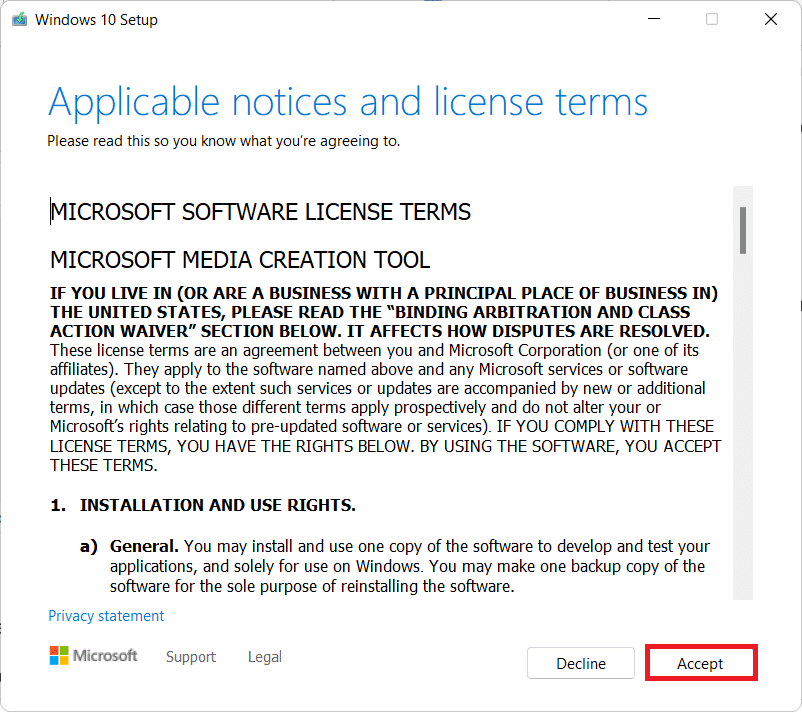
4. In the Windows 10 Setup window, click on Accept to accept the Applicable notices and license terms, as shown.
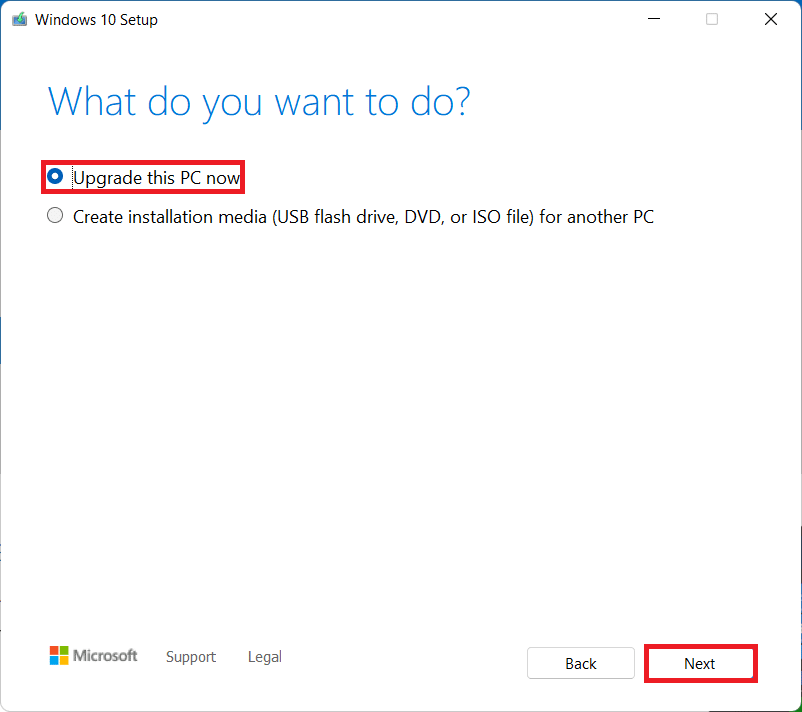
5. Here, select the Upgrade this PC now option and click on the Next button, as depicted below.
6. Let the tool download the latest version of Windows 10 and click on Next. Then, click on Accept.
7. Now in the next screen for Choose what to keep, select Nothing, and click on Next.
8. Finally, click on Install to begin the installation of Windows 10 OS.
Recommended:
We hope this article helped you out in understanding how to downgrade/roll back from Windows 11 to Windows 10. We would love to hear from you in the comment section below regarding your suggestions and queries.