Setup couldn’t start properly. Please reboot your PC and run set up again [SOLVED]

Fix Setup couldn’t start properly. Please reboot your PC and run set up again: If you are facing the error “Setup couldn’t start properly” while updating or upgrading to Windows 10 then this is caused because of corrupt Windows Installation files from the previous Window are still on your system and it’s conflicting with the update/upgrade process. As the error says ‘reboot your PC and try running the setup again’ but even rebooting your system doesn’t help and the error keeps on coming in a loop, so you have no option but to look for external help. But don’t worry that’s what troubleshooter is here for, so continue reading and you will find how to fix this issue easily.
It doesn’t matter which method you choose to upgrade to Windows 10 such as using Media Creation Tool, Windows DVD or Bootable image you will always receive the error “Setup couldn’t start properly, Please reboot your PC and run set up again.” In order to fix this issue, you need to delete Windows.old folder which contains files from your previous Windows installation which might be conflicting with the upgrade process and that’s it, you won’t see the error next time you try to upgrade. So let’s see how to fix this error with the below-listed troubleshooting steps.
Setup couldn’t start properly. Please reboot your PC and run set up again [SOLVED]
Make sure to create a restore point just in case something goes wrong.
Method 1: Run Disk Cleanup and Error Checking
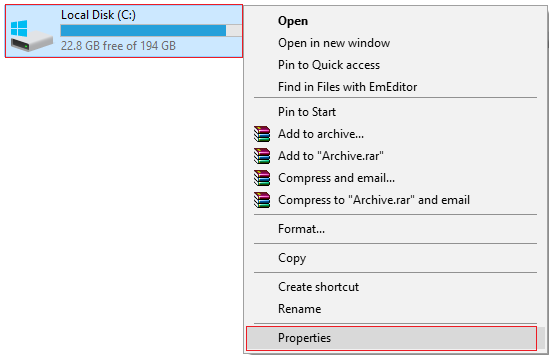
1.Go to This PC or My PC and right click on the C: drive to select Properties.
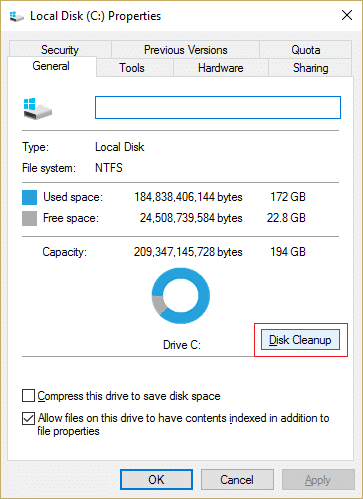
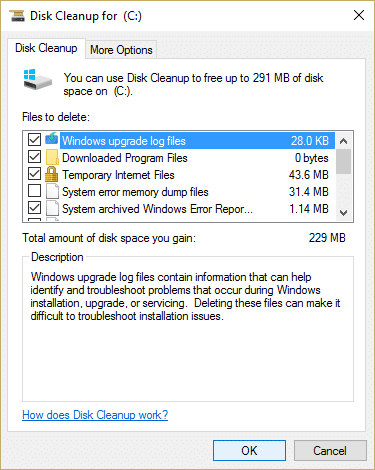
3.Now from the Properties window click on Disk Cleanup under capacity.
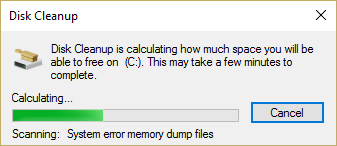
4.It will take some time in order to calculate how much space Disk Cleanup will be able to free.
5.Now click Clean up system files in the bottom under Description.
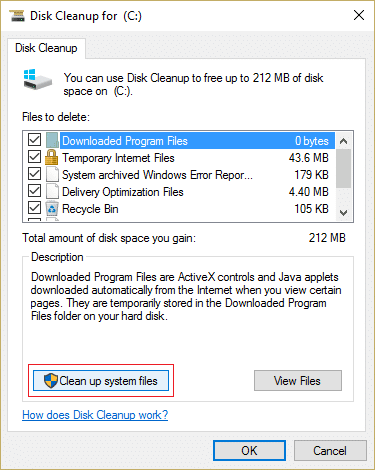
6.In the next window that opens make sure to select everything under Files to delete and then click OK to run Disk Cleanup. Note: We are looking for “Previous Windows Installation(s)” and “Temporary Windows Installation files” if available, make sure they are checked.
7.Let the Disk Cleanup complete and then again go the properties windows and select Tools tab.
5.Next, click on Check under Error checking.
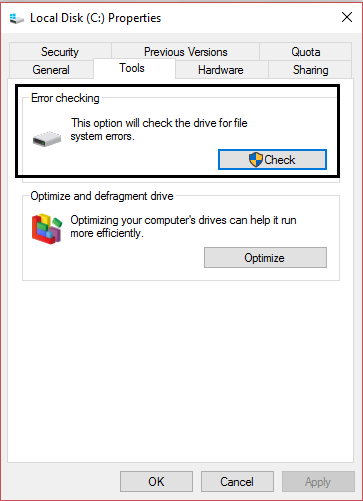
6.Follow the on-screen instruction to finish error checking.
7.Restart your PC to save changes. Again try to run setup and this may be able to Fix Setup couldn’t start properly error.
Method 2: Boot your PC into Safe Mode
1.Press Windows Key + R then type msconfig and hit Enter to open System Configuration.

2.Switch to boot tab and check mark Safe Boot option.
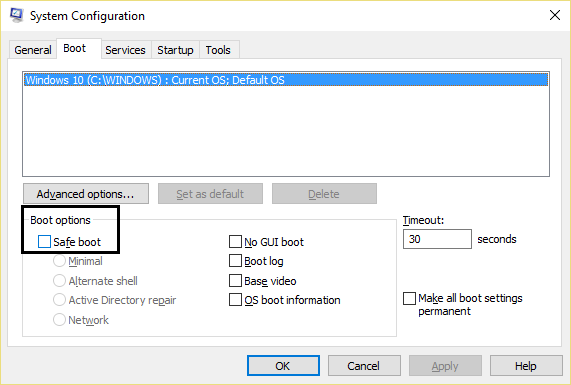
3.Click Apply followed by OK.
4.Restart your PC and system will boot into Safe Mode automatically.
5.Open File Explorer and click View > Options.
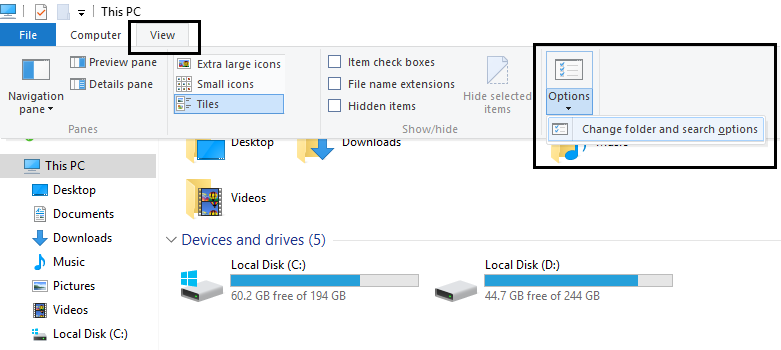
6.Switch to the View tab and check mark “Show hidden files, folders, and drives.“
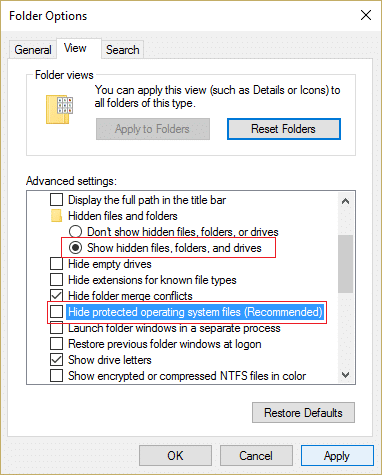
7.Next, make sure to uncheck “Hide protect operating system files (Recommended).“
8.Click Apply followed by OK.
9.Navigate to Windows folder by pressing Windows Key + R then type C:Windows and hit Enter.
10.Locate the following folders and permanently delete them (Shift + Delete):
$Windows.~BT (Windows Backup Files)
$Windows.~WS (Windows Server Files)
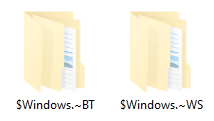
Note: You may not able to delete the above folders then simply rename them.
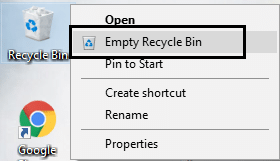
11.Next, go back to the C: drive and make sure to delete the Windows.old folder.
12.Next, if you have normally delete these folders then make sure to empty recycle bin.
13.Again open System Configuration and uncheck Safe Boot option.
14.Reboot your PC to save changes and again try to update/upgrade your Windows.
15.Now download the Media Creation Tool once again and proceed with the installation process.
Method 3: Run Setup.exe directly
1.Make sure to run the upgrade process, let is fail once.
2.After that make sure you can view hidden files if not then repeat the previous step.
3.Now navigate to the following folder: C:ESDsetup.exe
4.Double click on setup.exe to run and continue with the update/upgrade process without any problems. This seems to Fix Setup couldn’t start properly error.
Method 4: Run Startup/Automatic Repair
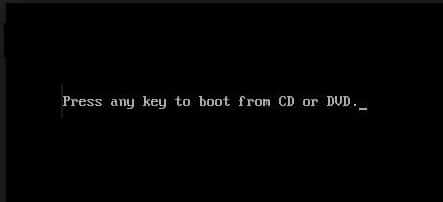
1.Insert the Windows 10 bootable installation DVD and restart your PC.
2.When prompted to Press any key to boot from CD or DVD, press any key to continue.
3.Select your language preferences, and click Next. Click Repair your computer in the bottom-left.

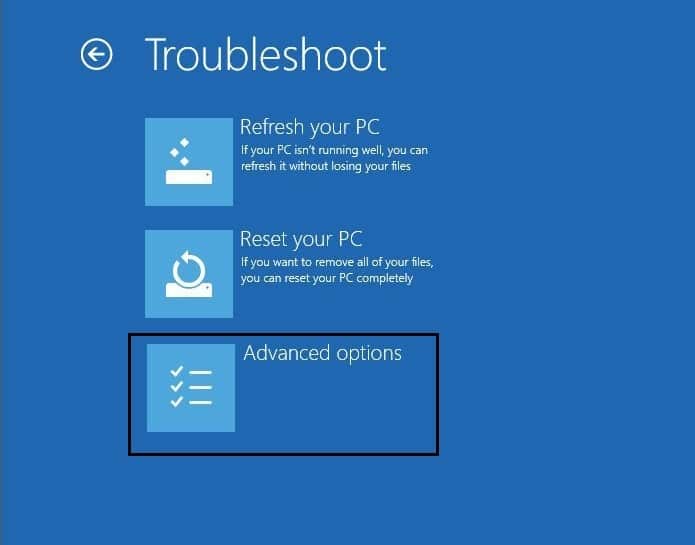
4.On choose an option screen, click Troubleshoot.

5.On Troubleshoot screen, click Advanced option.
6.On the Advanced options screen, click Automatic Repair or Startup Repair.
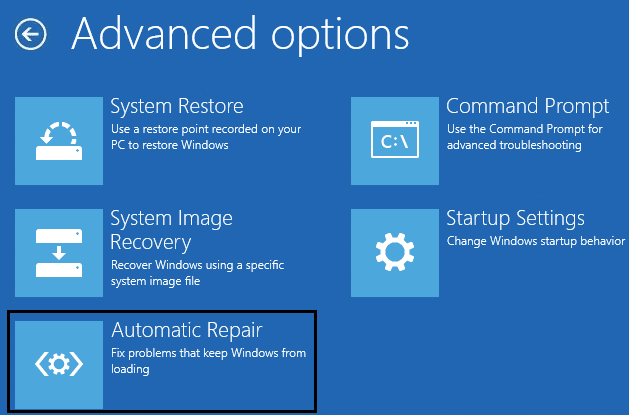
7.Wait til the Windows Automatic/Startup Repairs complete.
8.Restart and you have successfully Fix Setup couldn’t start properly error.
Also, read How to fix Automatic Repair couldn’t repair your PC.
Recommended for you:
That’s it you have successfully Fix Setup couldn’t start properly. Please reboot your PC and run set up again if you still have any queries regarding this post feel free to ask them in the comment’s section.