3 Ways to Enable or Disable Hibernation on Windows 10

Have you ever needed to step away from your computer for an indefinite period but didn’t want to shut it down? This could be for various reasons; maybe you have some work that you wish to get right back into post your lunch break or your PC boots on like a snail. The sleep mode in Windows OS lets you do just that, but what if I told you there’s a better power-saving feature than the usual sleep mode?
Hibernation mode is a power option that lets Windows users exploit the features of both a complete system shut down and the sleep mode. Just like Sleep, users can configure when they want their systems to go under Hibernation, and if they wish, the feature can be entirely disabled, too (although keeping it active does make for a better overall experience).
In this article, we will be explaining the difference between sleep and hibernation modes, and also show you how to enable or disable hibernation on Windows 10.
What is Hibernation?
Hibernation is a power-saving state primarily made for laptops, although it is available on certain computers as well. It differs from Sleep in terms of power usage and where your currently open (before you left your System); files are saved.
The sleep mode is activated by default when you leave your computer without shutting it down. In the sleep state, the screen is turned off, and all the foreground processes (files and applications) are saved in the memory (RAM). This allows the System to be in a low-power state but still be running. You can get back to work by a single click of the keyboard or by simply moving your mouse. The screen boots on within a few seconds, and all your files & applications will be in the same state as they were when you left.
Hibernation, pretty much like Sleep, also saves the state of your files & applications and is activated after your System has been under Sleep for a prolonged period. Unlike Sleep, which stores files in the RAM and therefore requires a constant power supply, Hibernation doesn’t require any power (like when your System is shut down). This is made possible by storing the current state of the files in the hard drive instead of the temporary memory.
When in an extended sleep, your computer automatically transfers the state of your files to the hard disk drive and switches to Hibernation. As the files have been moved to the hard drive, the System will take a little extra time to boot on than required by Sleep. Although, the boot on time is still faster than booting your computer after a complete shutdown.
Hibernation is particularly useful when the user doesn’t want to lose the state of his/her files but also won’t have the opportunity to charge the laptop for some time.
As obvious, saving the state of your files requires reserving some amount of memory and this amount is occupied by a system file (hiberfil.sys). The reserved amount is roughly equal to 75% of the System’s RAM. For example, if your System has 8 GB of RAM installed, the hibernation system file will take up almost 6 GB of your hard disk storage.
Before we move on to enabling Hibernation, we will need to check if the computer has the hiberfil.sys file. If absent, the computer can not go under Hibernation (PCs with InstantGo do not have the hibernation power option).
To check if your computer can hibernate, follow the below steps:
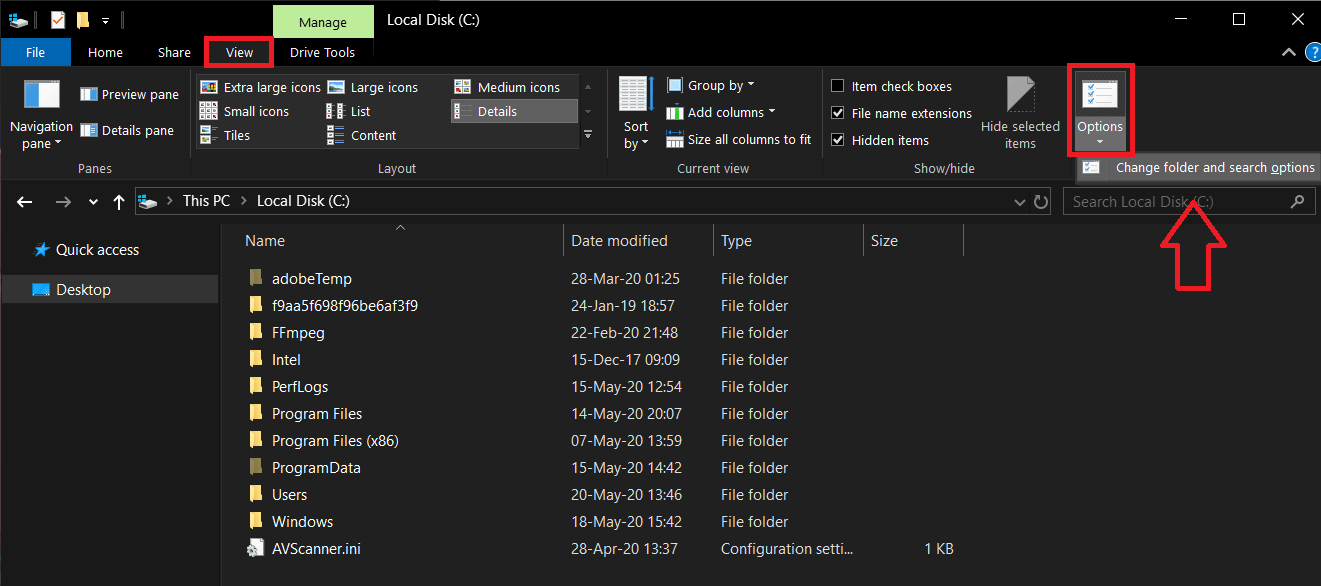
1. Launch File Explorer by double-clicking on its icon on the desktop or pressing the keyboard shortcut Windows Key + E. Click on Local Drive (C:) to open C Drive.
2. Switch to the View tab and click on Options at the end of the ribbon. Select ‘Change folder and search options’.
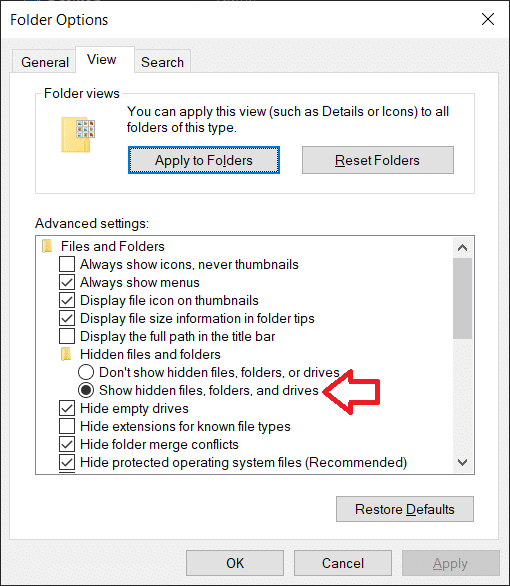
3. Again, switch to the View tab of the Folder Options window.
4. Double click on Hidden files and folders to open a sub-menu and enable Show hidden files, folders, or drives.
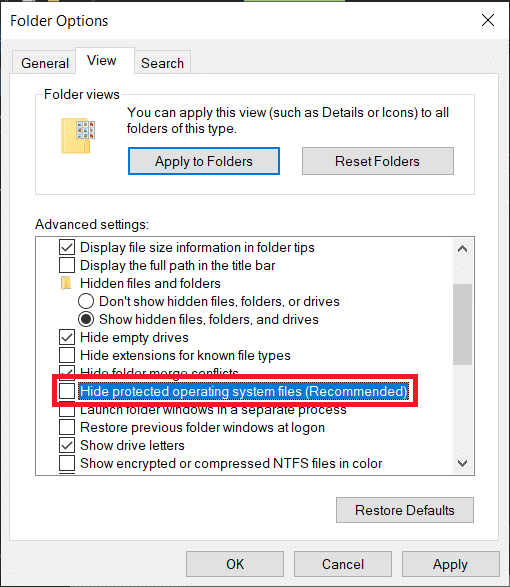
5. Uncheck/untick the box next to ‘Hide protected operating system files (Recommended).’ A warning message will appear when you try to untick the option. Click on Yes to confirm your action.
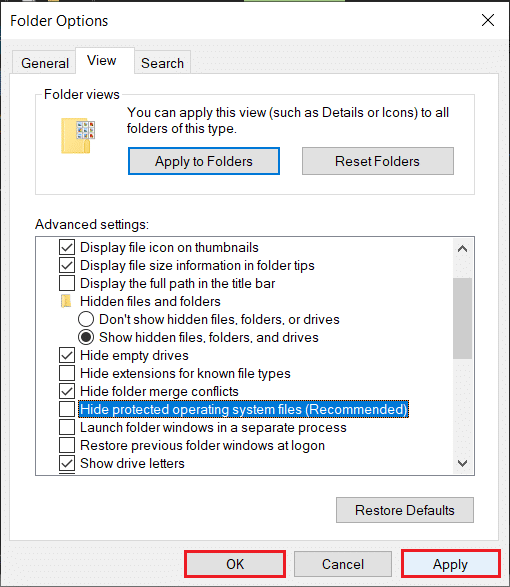
6. Click on Apply and then OK to save changes.
7. The Hibernation file (hiberfil.sys), if present, can be found at the root of the C drive. This means your computer is eligible for hibernation.

How to Enable or Disable Hibernation on Windows 10?
Enabling or disabling Hibernation is quite easy, and either action can be achieved in a couple of minutes. There are also multiple methods via which one can enable or disable Hibernation. The easiest one is executing a single command in an elevated command prompt while other methods include editing Windows Registry Editor or accessing advanced power options.
Method 1: Enable or Disable Hibernation using Command Prompt
As mentioned, this is the easiest way to enable or disable Hibernation on Windows 10 and, therefore, should be the first method you try.
1. Open Command Prompt as an administrator using any of the listed methods.
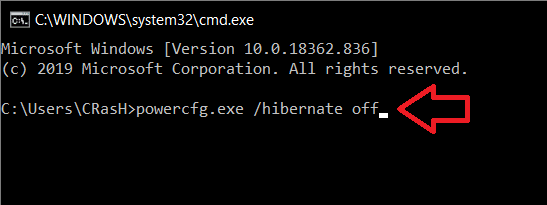
2. To enable Hibernation, type powercfg.exe /hibernate on, and press enter.
To disable Hibernation, type powercfg.exe /hibernate off and press enter.
Both the commands do not return any output, so to check if the command you entered was executed properly, you will need to head back to the C drive and look for the hiberfil.sys file (Steps are mentioned earlier). If you find the hiberfil.sys, it implies you were successful in enabling Hibernation. On the other hand, if the file is absent, Hibernation has been disabled.
Method 2: Enable or Disable Hibernation Via Registry Editor
The second method has the user editing the HibernateEnabled entry in the Registry Editor. Be careful when following this method as Registry Editor is an extremely powerful tool, and any accidental mishap can lead to a whole other set of problems.
1. Open Windows Registry Editor using any of the following methods
a. Open Run Command by pressing Windows Key + R, type regedit and press enter.
b. Press Windows Key + S, type regedit or registry editor, and click on Open when the search returns.

2. From the left panel of the registry editor window, expand HKEY_LOCAL_MACHINE by double-clicking on it or by clicking on the arrow to its left.
3. Under HKEY_LOCAL_MACHINE, double-click on SYSTEM to expand.
4. Now, expand CurrentControlSet.
Follow the same pattern and navigate to Control/Power.
The final location indicated in the address bar should be:
HKEY_LOCAL_MACHINESYSTEMCurrentControlSetControlPower
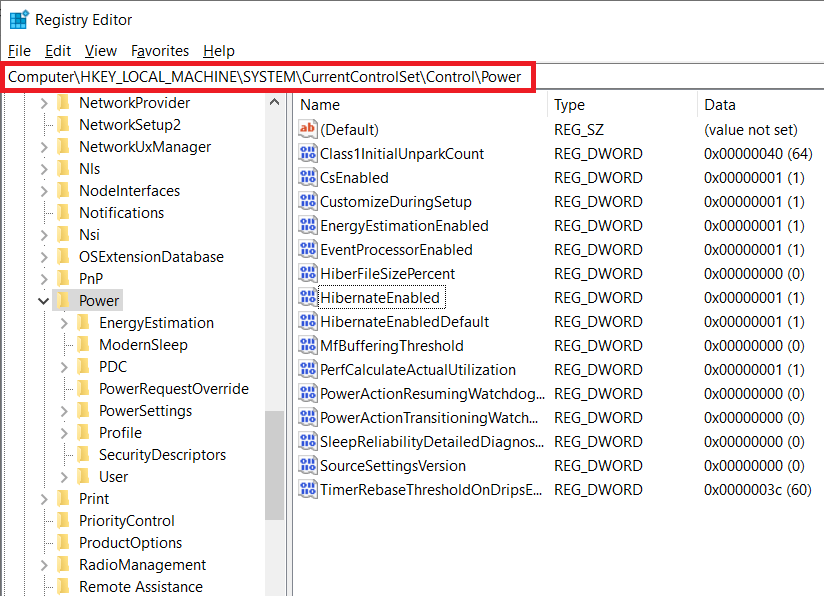
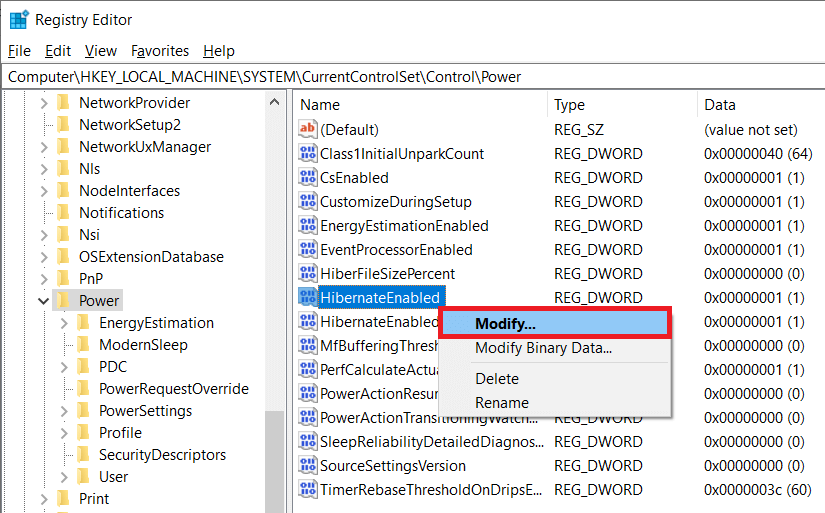
5. In the right-hand panel, double click on HibernateEnabled or right-click on it and select Modify.
6. To enable Hibernation, type 1 in the text box under Value Data.
To disable Hibernation, type 0 in the text box under Value Data.
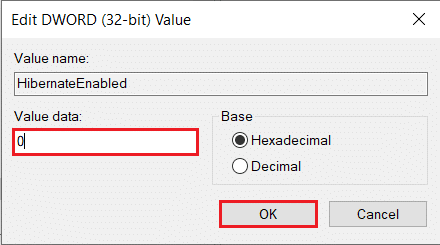
7. Click on the OK button, exit registry editor, and restart your computer.
Again, head back to the C drive and look for the hiberfil.sys to ensure if you were successful in enabling or disabling Hibernation.
Also Read: Disable Windows Pagefile and Hibernation To Free Up Space
Method 3: Enable or Disable Hibernation Via Advanced Power Options
The final method will have the user enable or disable Hibernation through the Advanced Power Options window. Here, users can also set the time frame after which they want their system to go under Hibernation. Like the previous methods, this one is also quite simple.
1. Open Advanced Power Options by any of the two methods
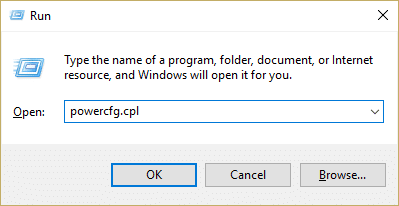
a. Open Run command, type powercfg.cpl, and press enter.
b. Open Windows Settings (Windows Key + I) and click on System. Under Power & Sleep settings, click on Additional power settings.
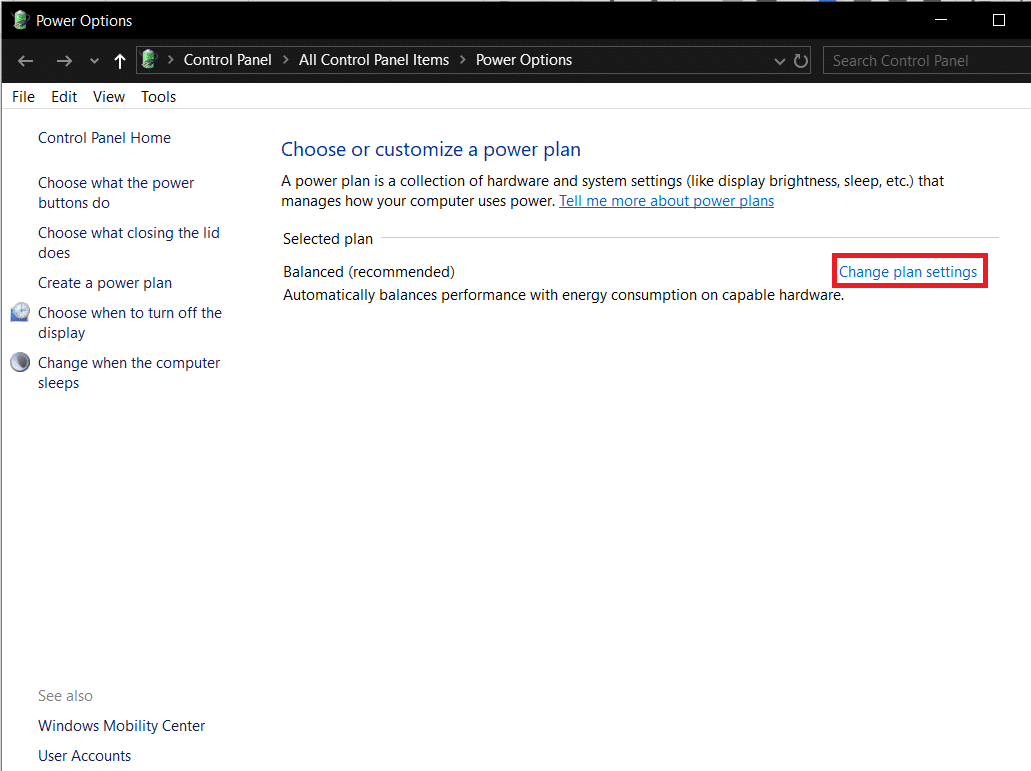
2. In the Power Options window, click on Change plan settings (highlighted in blue) under the Selected plan section.
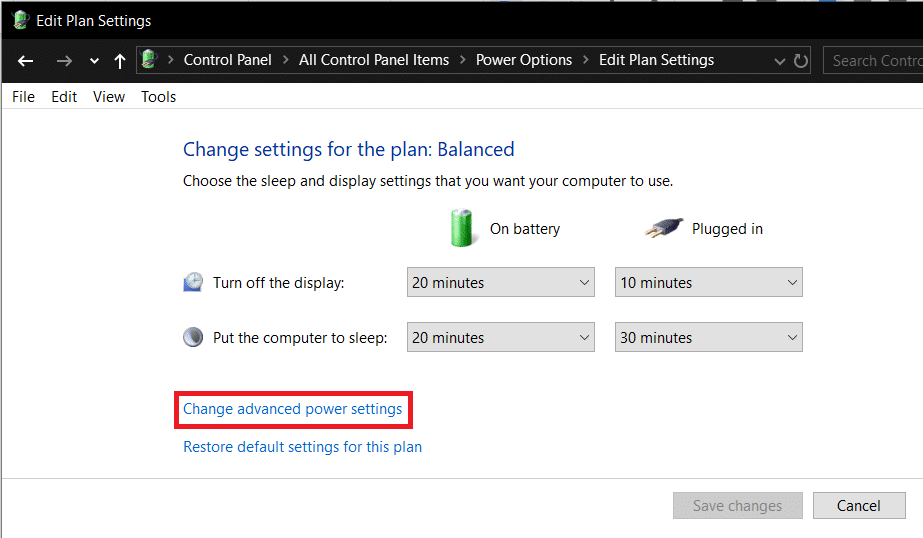
3. Click on Change advanced power settings in the following Edit Plan Settings window.
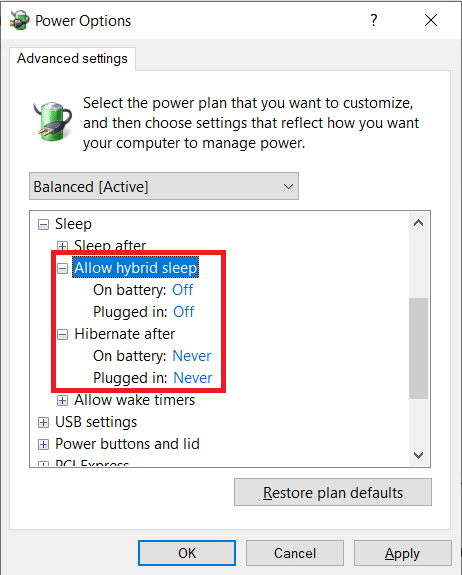
4. Expand Sleep by clicking on the plus to its left or by double-clicking on the label.
5. Double-click on Hibernate after and set the Settings (Minutes) to how many minutes you would like your System to sit idle for before going into Hibernation.
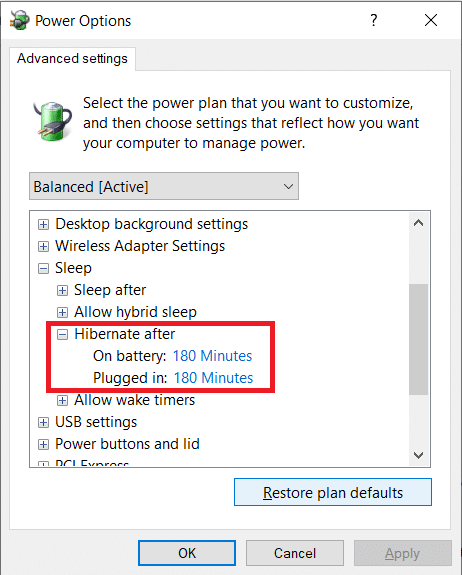
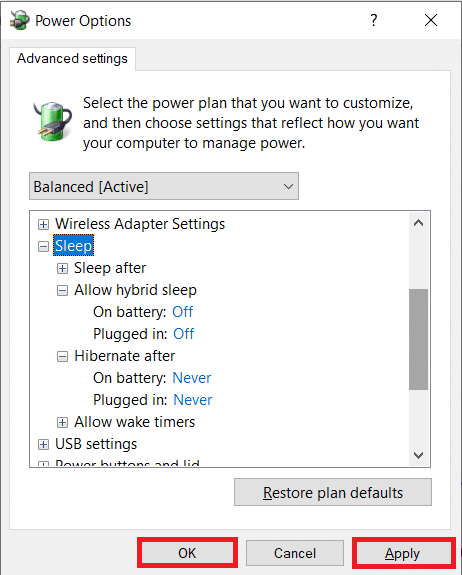
To disable Hibernation, set the Settings (Minute) to Never and under Allow hybrid sleep, change the setting to Off.
6. Click on Apply, followed by OK to save the changes you made.
Recommended:
We hope you were successful in enabling or disabling Hibernation on Windows 10. Also, let us know which one of the three above methods did the trick for you.