How to Replace Color in GIMP

GIMP is comparable to Photoshop and is used by most photographers for picture editing. Colors in a photograph are crucial because they may alter the overall appearance of the image. There are various reasons why a user would wish to update or replace the colors in their photographs. When it comes to modifying or replacing colors in GIMP, it includes a plethora of choices that may be employed for this purpose. There are several methods to change the colors of your image in GIMP, as with many other features. In this article, we’ll go over some of the fundamental ways to modify and replace color in GIMP.
How to Replace Color in GIMP
GIMP stands for GNU Image Manipulation Program. It is an open-source free image editor. Here, we have listed all possible methods to change colors in GIMP.
Method 1: Use Bucket Fill Tool
Although no tool in GIMP can execute this operation automatically, you may achieve it by combining the available tools. The bucket tool is frequently used to add/change the color of a region in a picture. The bucket tool will only function with solid colors and will not work with patterns. Follow the steps below to replace color in GIMP:
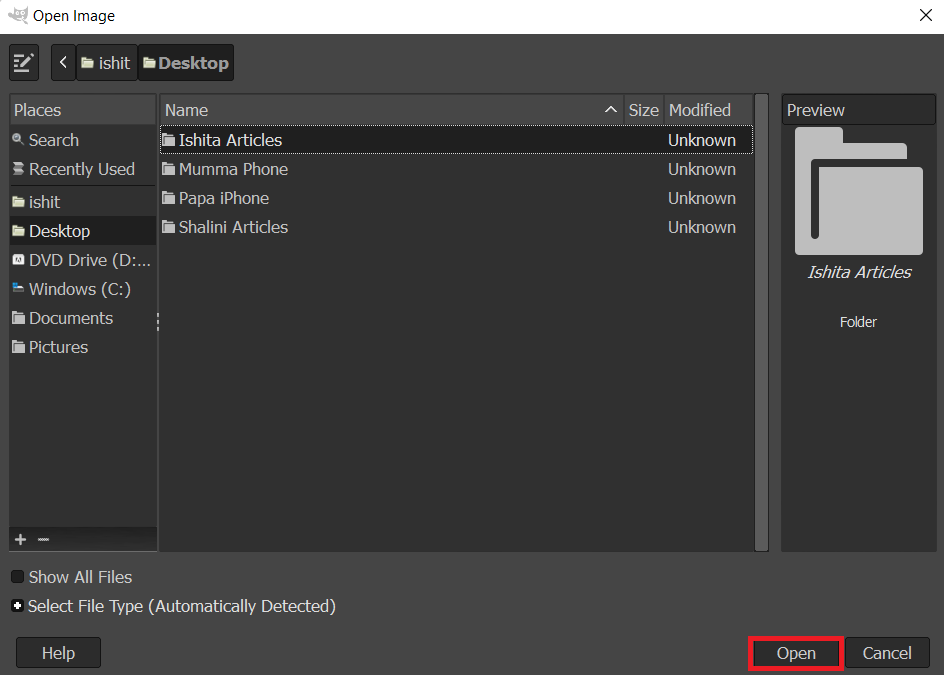
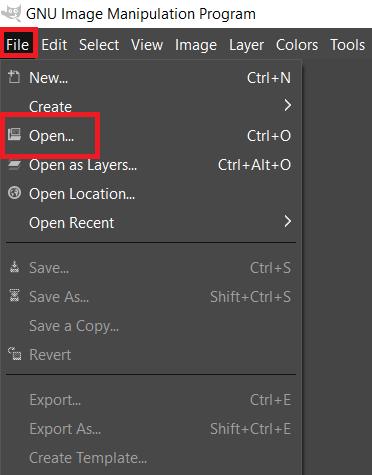
1. Open your GIMP application and pick the Open option from the File menu.

2. Find the image file and click on open to open your image file.
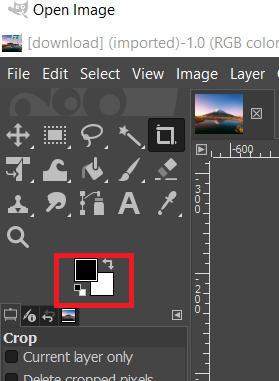
3. Select a color to add by clicking on the active foreground color on the left side.
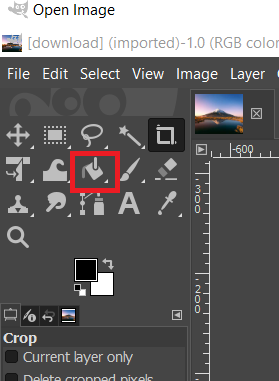
4. To convert the solid color to the foreground color, use the bucket fill tool and click on the solid color.
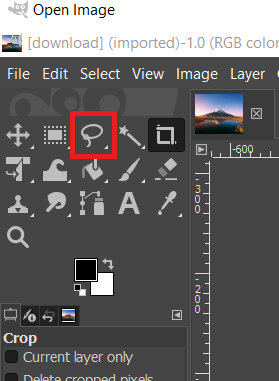
5. You may also choose one of the zones with the Select tool and then fill it with color with the Bucket tool.
6. You may also use the select tool before creating another layer.
This will change the color of your image; you may always undo this by hitting CTRL + X keys simultaneously.
Hence, this is how you can change Colors in GIMP using the Bucket fill tool.
Also Read: How to Change Highlight Color in Adobe Acrobat Reader
Method 2: Use Color Balance and Colorize
The color balancing tool is used to change the color balance of an image-specified region or layer. Colorize is another comparable tool that can assist with adjusting the image hue/saturation and luminance. These two tools are used to swiftly change the colors of an image in a few stages. To alter the color of the picture, follow the instructions below to replace color in GIMP:
1. Open your GIMP application and click the Open option from the File menu.

2. Find the image file and click on open to open your image file.

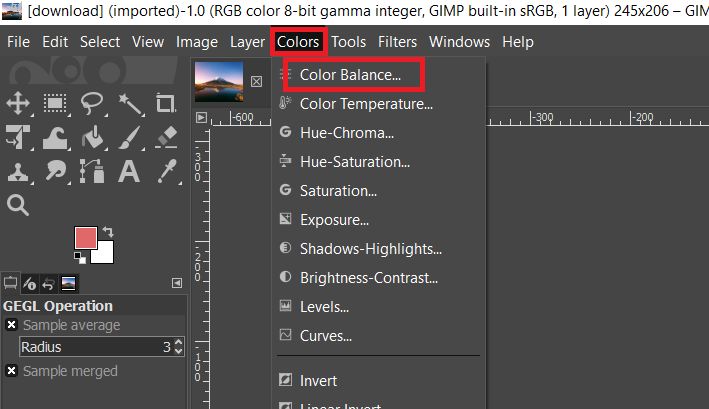
3. Select the Colors menu from the menu bar, then the Color Balance option from the list.
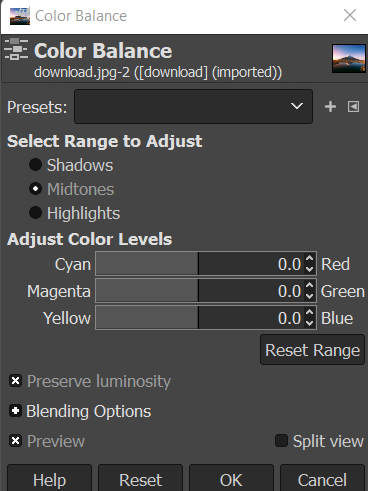
4. You may modify the color of the image by adjusting the Adjust color levels bars.
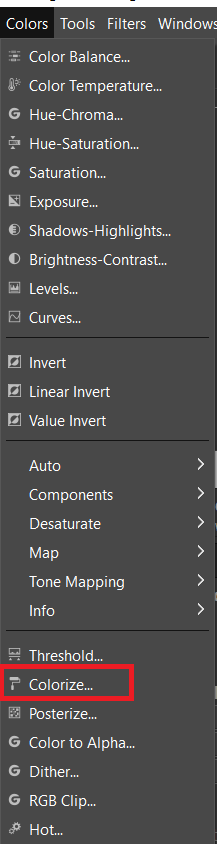
5. Go to the Colors tab in the menu bar and select the Colorize… option to change the color scheme. You may select a color and then adjust the bars to apply that color with many possibilities.
6. Also, use one of the Select tools to select the color-changing region to apply these color selections to a single item.
Note: Before attempting to choose the area/object, you may alternatively build a new layer of the original image.

7. Select one of the choices shown above to alter the color of a specific region.
8. When you’re finished, you can either continue working on the image or save it by going to the File menu and selecting the Export option.
Also Read: How to Convert Image to Grayscale Paint
Method 3: Use Color Exchange Option
This approach is used to change the color of solid color pixels from one to another. It will mostly transform all pixels of one color into another. If the image contains pixels that differ from the color you select, it will not alter those pixels to another color. To try it out, follow the instructions below to replace color GIMP:
Note: Make sure the pixels you’re modifying are all the same color. This is more appropriate for the image’s solid colors.
1. Open your GIMP application and pick the Open option from the File menu.
2. Find the image file and click on open to open your image file.

3. Select Colors from the menu bar, then Map, and lastly Color Exchange from the menu bar.
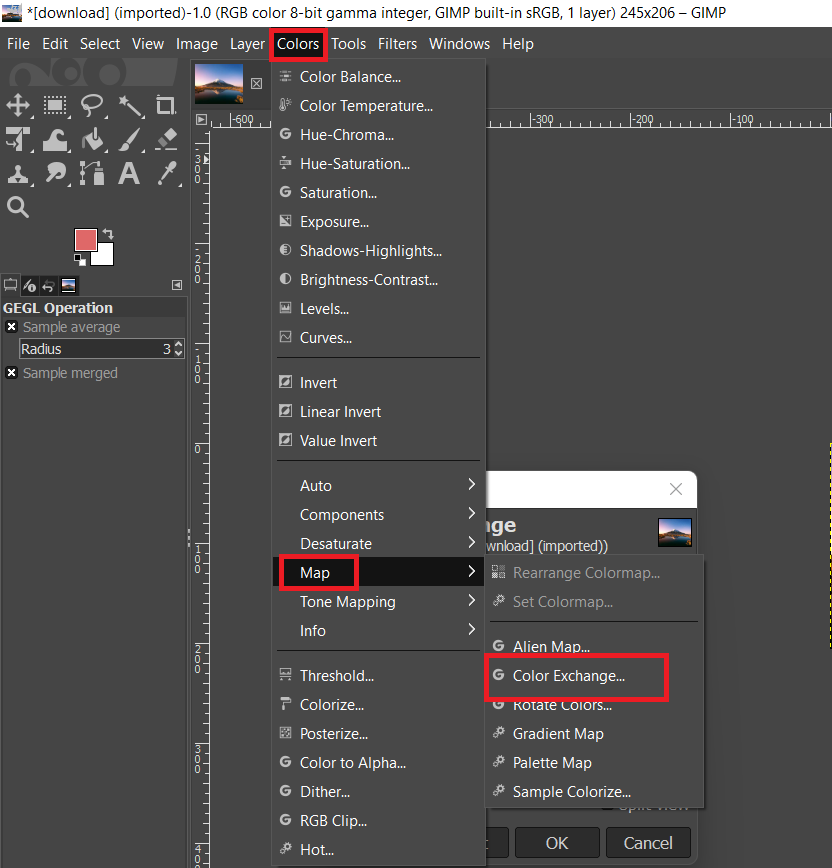
Note: Make sure the RGB option is chosen in the Image menu Mode choice.
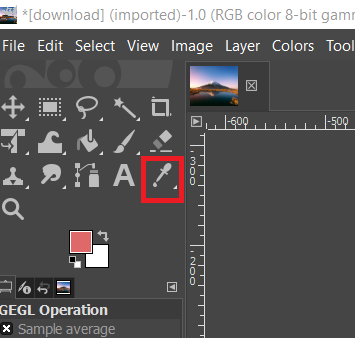
4. Change the colors in the From Color and To Color fields to the colors you want to replace. You may also use the Pick Color tool to select a specific color on the picture.
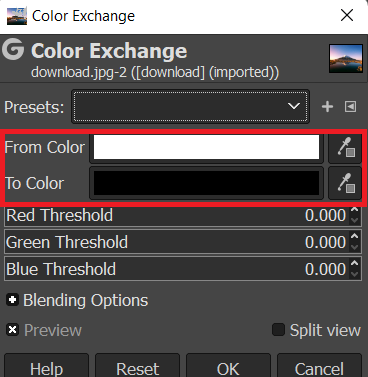
5. When you’re through swapping colors, click the OK button to save your changes.
Also Read: How to Photoshop Convert to RGB
Method 4: Use Hue-Chroma Filter
This isn’t always the greatest technique for every image to change Colors in GIMP, but here’s the quickest way in GIMP to transform one hue into another:
1. With the Select by Color tool, select all the pixels that have the color you want to change.
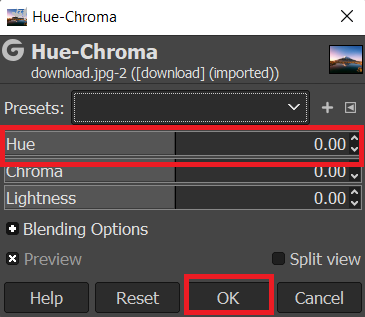
2. From the Colors menu, choose the Hue/Chroma filter.
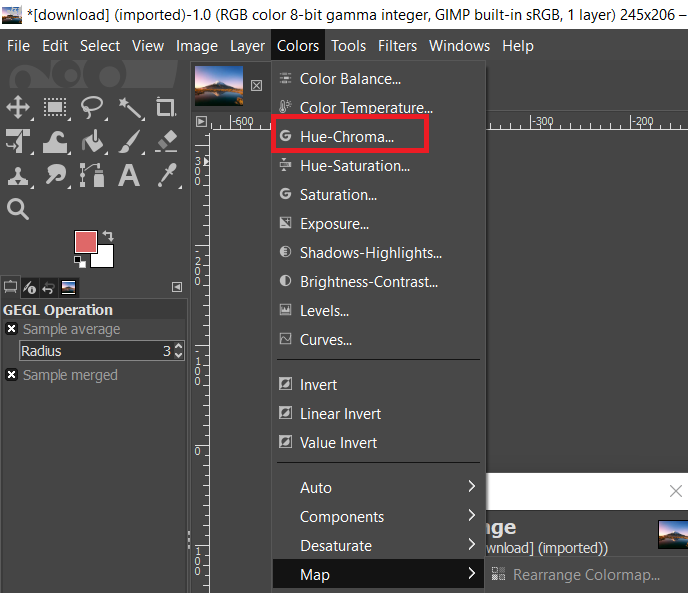
3. Adjust the Hue slider until you’re pleased with the results, and then click OK.
Recommended:
We hope you found this information useful and that you were able to replace color GIMP. Please let us know which technique was the most beneficial for you. Please use the form below if you have any queries or comments.