Windows Cannot Connect to the Printer [SOLVED]
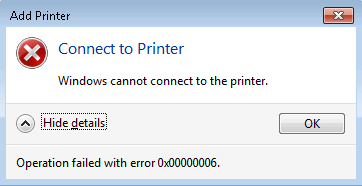
Fix Windows Cannot Connect to the Printer: If you are connected to a local network which shares a printer, it may be possible you may receive the error message “Windows cannot connect to the printer. Operation failed with error 0x000000XX” while trying to add the shared printer to your computer using Add Printer feature. This issue occurs because, after the printer is installed, Windows 10 or Windows 7 incorrectly looks for the Mscms.dll file in a subfolder different than the windowssystem32 subfolder.

Now there is alreadya Microsoft hotfix for this issue but it doesn’t seem to work for many users. So without wasting any time let’s see how to actually Fix Windows Cannot Connect to the Printer on Windows 10 with the below-listed troubleshooting guide.
Note: You could try the Microsoft hotfix first, just in case if this work for you then you will save a lot of time.
Windows Cannot Connect to the Printer [SOLVED]
Make sure to create a restore point just in case something goes wrong.
Method 1: Copy the mscms.dll
1.Navigate to the following folder: C:Windowssystem32
2.Find the mscms.dll in the above directory and right-click then select copy.
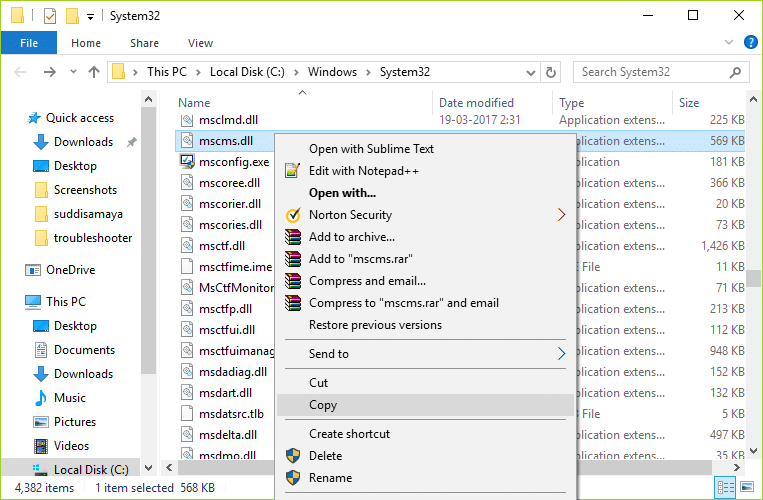
3.Now paste the above file in the following location according to your PC architecture:
C:windowssystem32spooldriversx643 (For 64-bit)
C:windowssystem32spooldriversw32x863 (For 32-bit)
4.Reboot your PC to save changes and again try to connect to the remote printer again.
This should help you Fix Windows Cannot Connect to the Printer issue, if not then continue.
Method 2: Create A New Local Port
1.Press Windows Key + X then select Control Panel.

2.Now click Hardware and Sound then click on Devices and Printers.

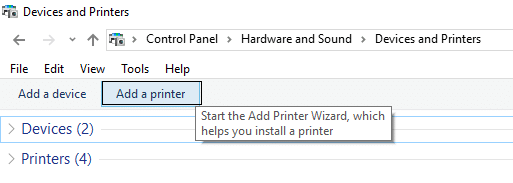
3.Click Add a printer from the top menu.
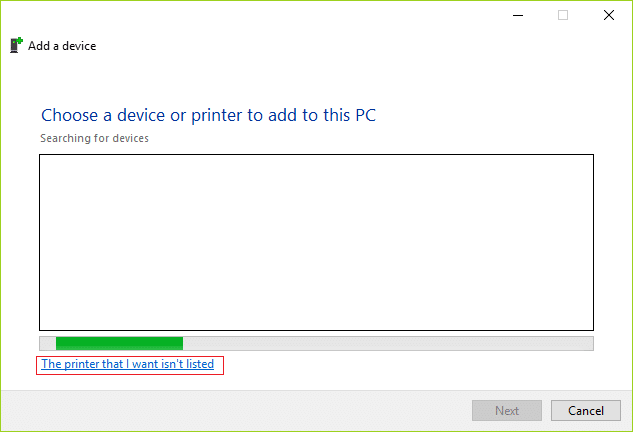
4.If you don’t see you printer listed click the link which says “The printer that I want isn’t listed.“
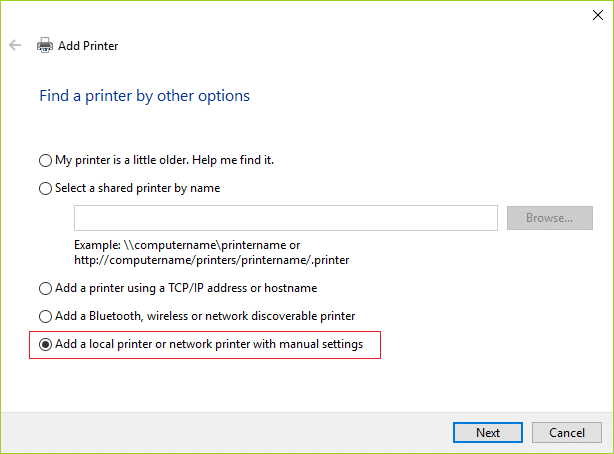
5.From the next screen select “Add a local printer or network printer with manual settings” and click Next.
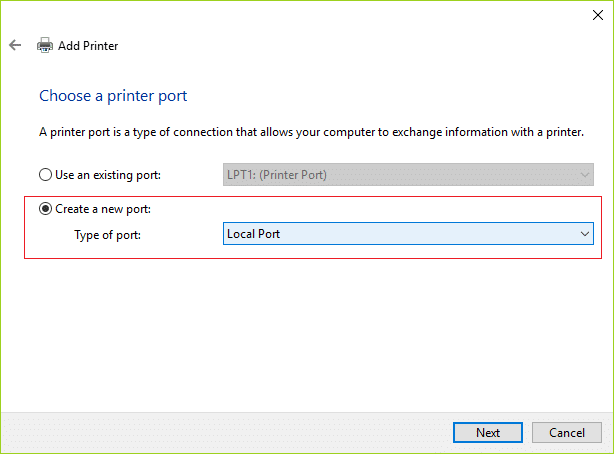
6.Select Create a new port and then from type of port drop-down select Local Port and then click Next.
7.Type the printer’s address in Printers port name field in the following format:
IP address or the Computer NamePrinters Name
For example 192.168.1.120HP LaserJet Pro M1136

8.Now click OK and then click Next.
9.Follow on-screen instructions to finish the process.
Method 3: Restart Print Spooler Service
1.Press Windows Key + R then type services.msc and hit Enter.

2.Find Print Spooler service in the list and double-click on it.
3.Make sure the Startup type is set to Automatic and the service is running, then click on Stop and then again click on start in order to restart the service.
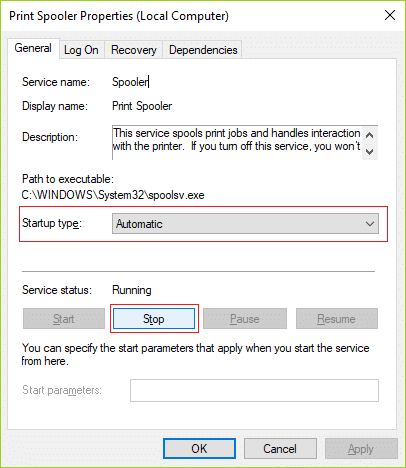
4.Click Apply followed by OK.
5.After that, again try to add the printer and see if the you’re able to Fix Windows Cannot Connect to the Printer issue.
Method 4: Delete Incompatible Printer Drivers
1.Press Windows key + R then type printmanagement.msc and hit Enter.
2.From the left pane, click All Drivers.
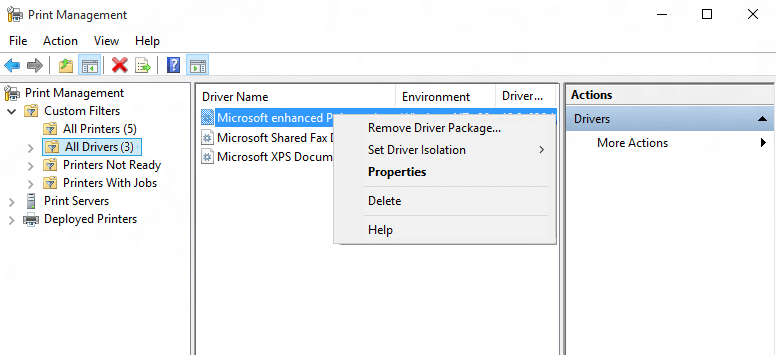
3.Now in the right window pane, right-click on the printer driver and click Delete.
4.If you see more than one printer driver names, repeat the above steps.
5.Again try to add the printer and install its drivers. See if you are able to Fix Windows Cannot Connect to the Printer issue, if not then continue with the next method.
Method 5: Registry Fix
1.First, you need to stop Printer Spooler service (Refer to method 3).
2.Press Windows Key + R then type regedit and hit Enter to open Registry Editor.

3.Navigate to the following registry key:
HKEY_LOCAL_MACHINESOFTWAREMicrosoftWindows NTCurrentVersionPrintProvidersClient Side Rendering Print Provider
4.Now right-click on Client Side Rendering Print Provider and select Delete.
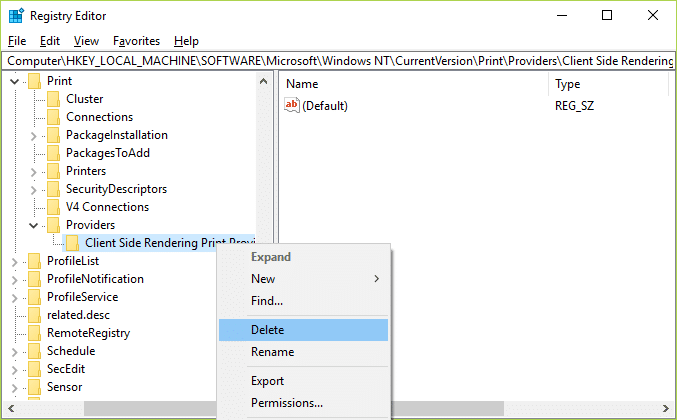
5.Now again start Printer Spooler service and reboot your PC to save changes.
Recommended for you:
That’s it you have successfully Fix Windows Cannot Connect to the Printer issue but if you still have any questions regarding this article then feel free to ask them in comment’s section.