Windows 10 is the latest edition to Microsoft Operating System, but it’s definitely not bug-free and once such issue is Brightness control not working after upgrading to Windows 10. In fact, Display related issues are very common on Windows 10 which is why users are very frustrated with Microsoft as they are not releasing patches to fix the problems instead users have to rely on these tutorials to fix their issue.

Although I am not saying that you should not use these tutorials, Microsoft should also take some responsibility and fix the users problem as support is provided when you buy some product. Anyway, this problem’s main cause is outdated or corrupted graphic driver, but it could also be because you haven’t installed a graphics driver on your Windows 10 PC. So without wasting any time let’s see how to actually fix the brightness not working issue in Windows 10 with the below-listed troubleshooting steps.
Windows 10 Brightness Settings Not Working [SOLVED]
Make sure to create a restore point just in case something goes wrong.
Method 1: Enable Generic PnP Monitor
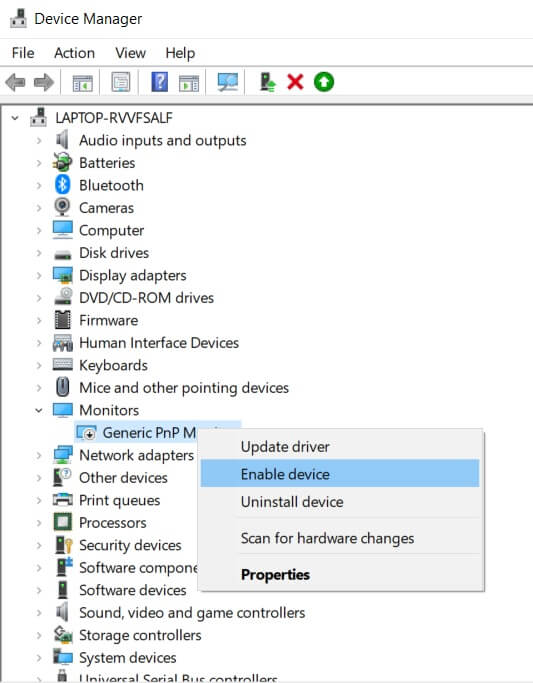
1. Press Windows Key + R then type devmgmt.msc and hit Enter to open Device Manager.
![devmgmt.msc device manager | Windows 10 Brightness Settings Not Working [SOLVED]](https://lbsite.org/wp-content/uploads/2023/01/devmgmt.msc-device-manager.png)
2.Next, expand Monitors and right-click on Generic PnP Monitor and select Enable.
3. Reboot your PC and again try to change your system brightness settings.
This seems to Fix Windows 10 Brightness Settings Not Working issue in 90% of cases but if you’re still not able to change brightness settings, then continue with the next method.
Method 2: Update Generic PnP Monitor Drivers
1. Press Windows Key + R then type devmgmt.msc and hit Enter to open Device Manager.
2.Next, expand Monitors and right-click on Generic PnP Monitor and select Update Driver Software.

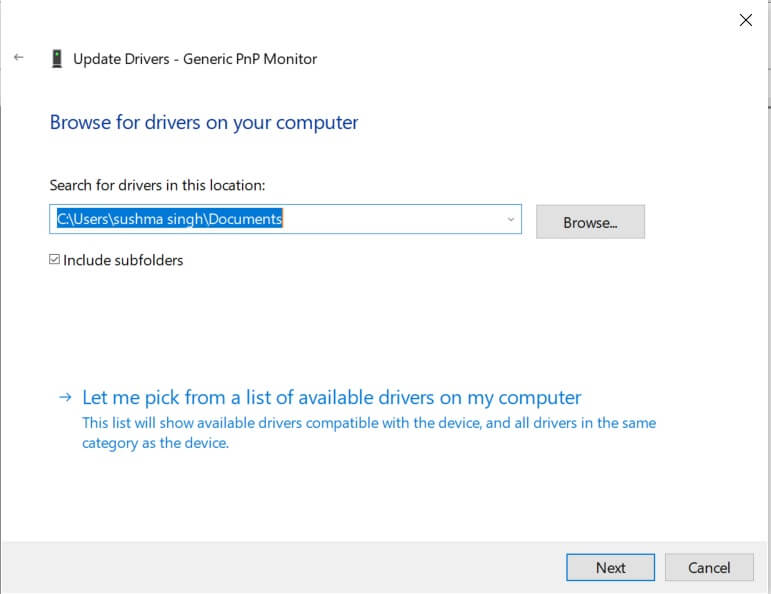
3. Click “Browse my computer for driver software.”
![Click Browse my computer for driver software | Windows 10 Brightness Settings Not Working [SOLVED]](https://lbsite.org/wp-content/uploads/2023/01/Click-Browse-my-computer-for-driver-software.jpg)
4. Then click on “Let me pick from a list of device drivers on my computer.“
5. Select Generic PnP Monitor and click Next.
![select Generic PnP Monitor from the list and click Next | Windows 10 Brightness Settings Not Working [SOLVED]](https://lbsite.org/wp-content/uploads/2023/01/select-Generic-PnP-Monitor-from-the-list-and-click-Next.png)
6. Again try to change brightness settings.
Method 3: Update Integrated Graphics Driver
1. Press Windows Key + R then type devmgmt.msc, and press enters to open Device Manager.
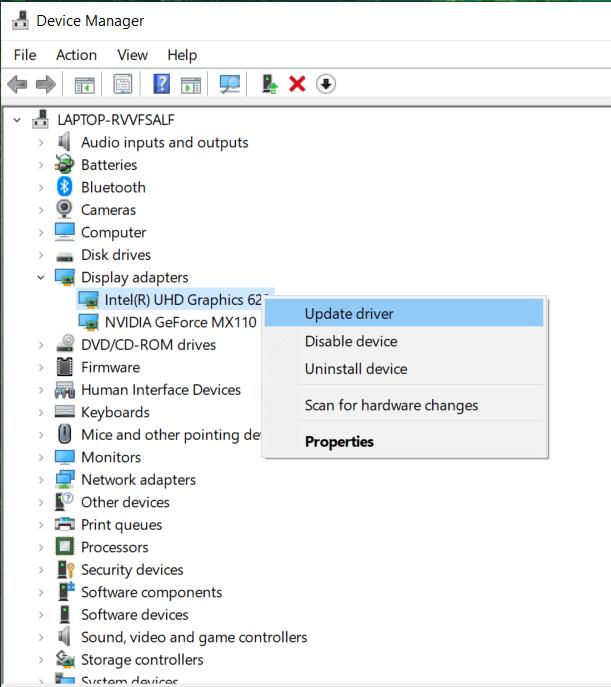
2. Expand the Display adapter and right-click on your Graphic Card Driver, then select “Update Driver Software.”
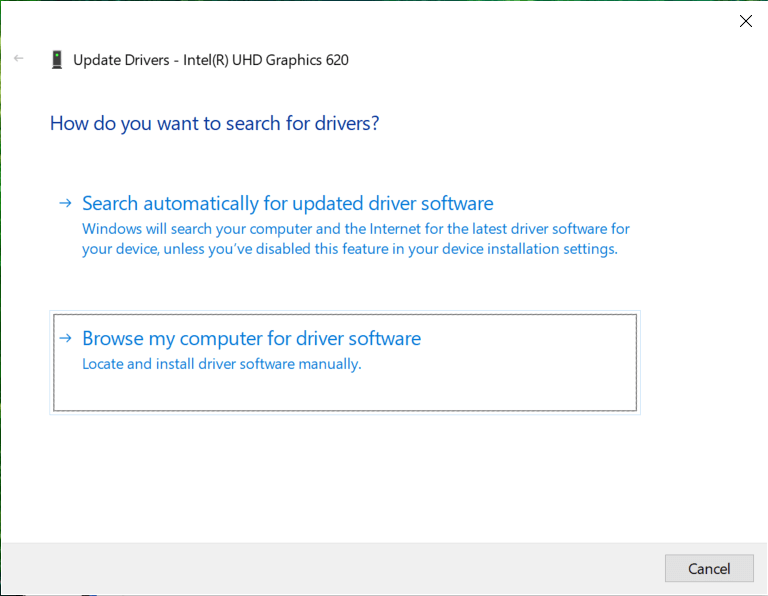
3. Then select “Search automatically for updated driver software.”
![Select Search automatically for updated driver software | Windows 10 Brightness Settings Not Working [SOLVED]](https://lbsite.org/wp-content/uploads/2023/01/Select-Search-automatically-for-updated-driver-software.jpg)
4. If there were not update found, then again right-click on your Display adapter and select Update Driver Software.
5. But this time, choose “Browse my computer for driver software.”
6. On the next screen select “Let me pick from a list of device drivers on my computer.“
![let me pick from a list of device drivers on my computer | Windows 10 Brightness Settings Not Working [SOLVED]](https://lbsite.org/wp-content/uploads/2023/01/let-me-pick-from-a-list-of-device-drivers-on-my-computer.png)
7. Next, select Microsoft Basic Display Adapter and click Next.
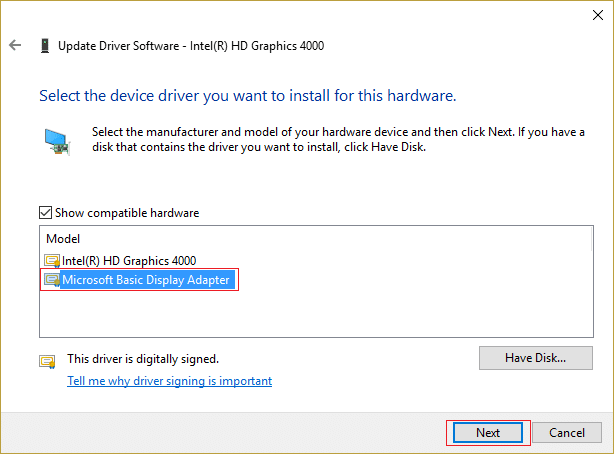
8. Let the above process finish and then reboot your PC. This should Fix Windows 10 Brightness Settings Not Working issue but if not then continue.
Method 4: Update NVIDIA or AMD Graphic Card Driver
1. Press Windows Key + R then type devmgmt.msc and hit enter to open Device Manager.
2.Next, expand Display adapters and right-click on your Nvidia Graphic Card and select Enable.
![right-click on your Nvidia Graphic Card and select Enable | Windows 10 Brightness Settings Not Working [SOLVED]](https://lbsite.org/wp-content/uploads/2023/01/right-click-on-your-Nvidia-Graphic-Card-and-select-Enable.png)
3. Once, you have done this again, right-click on your graphic card and select “Update Driver Software.”

4. Select “Search automatically for updated driver software” and let it finish the process.

5. If the above step was able to fix your problem then very good, if not then continue.
6. Again select “Update Driver Software“ but this time on the next screen select “Browse my computer for driver software.”
![browse my computer for driver software | Windows 10 Brightness Settings Not Working [SOLVED]](https://lbsite.org/wp-content/uploads/2023/01/browse-my-computer-for-driver-software.png)
7. Now select “Let me pick from a list of device drivers on my computer.”
8. Finally, select the compatible driver from the list for your Nvidia Graphic Card and click Next.
![NVIDIA GeForce GT 650M | Windows 10 Brightness Settings Not Working [SOLVED]](https://lbsite.org/wp-content/uploads/2023/01/NVIDIA-GeForce-GT-650M.png)
9. Let the above process finish and restart your PC to save changes. After updating the Graphic card, you may be able to Fix Windows 10 Brightness Settings Not Working problem.
Method 5: Update your Drivers from NIVIDA website
1. First of all, you should know what graphics hardware you have, i.e. which Nvidia graphic card you have, don’t worry if you don’t know about it as it can be easily find.
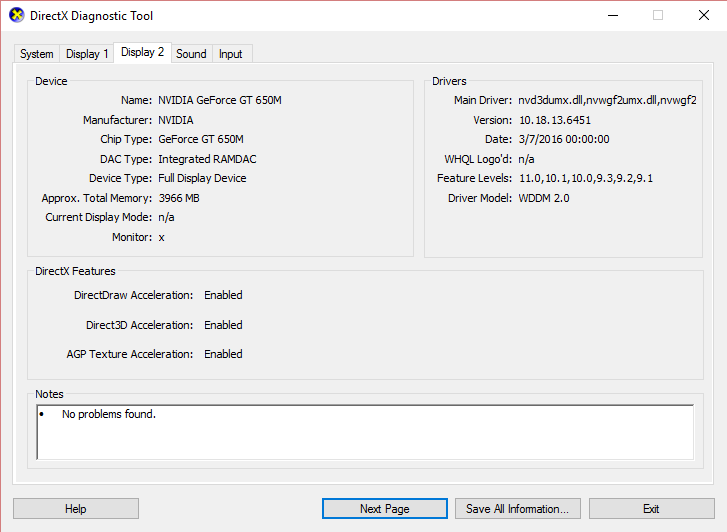
2. Press Windows Key + R and in the dialog box type dxdiag and hit enter.

3. After that search for the display tab (there will be two display tabs one for the integrated graphic card and another one will be of Nvidia’s) click on the Display tab and find out your graphic card.
4. Now go to the Nvidia driver download website and enter the product details which we find out.
5. Search your drivers after inputting the information, click Agree and download the drivers.
![NVIDIA driver downloads | Windows 10 Brightness Settings Not Working [SOLVED]](https://lbsite.org/wp-content/uploads/2023/01/NVIDIA-driver-downloads.png)
6. After successful download, install the driver, and you have successfully updated your Nvidia drivers manually. This installation will take some time, but you will have successfully updated your driver after that.
Recommended:
That’s it you have successfully Fix Windows 10 Brightness Settings Not Working issue if you still have any queries regarding this post feel free to ask them in the comment’s section.