Right Click using the Keyboard in Windows 10

The problem often arises when you don’t have a mouse of trackball around you or your laptop’s touchpad is not working, but you desperately need to use the mouse. If you have faced such rare conditions or planning to take proactive measures to prevent yourself from such a scenario, you are in the right place. This tutorial will give you some of the most popular useful keyboard shortcuts so that you can use the computer without a mouse or other pointing device.
Right Click using the Keyboard in Windows
So how will you manage your PC without a mouse? The fundamental thing you can do is use the ATL + TAB key combination. ALT + TAB will help you switch between all the opened programs & Again, by pressing the ALT key on your keyboard, you can focus on the menu options (such as File, Edit, View, etc.) of your currently running program. You can also implement the arrow keys for switching between the menus (left to right and vice versa) and push the Enter button on your keyboard for performing the “left click” on an item.
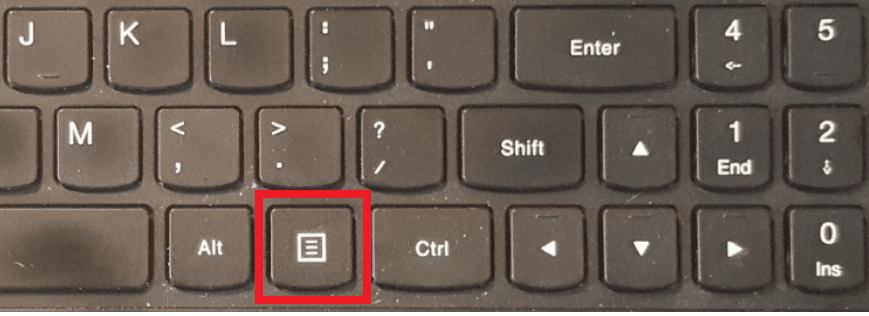
But what if you are required to right-click in a music file or on any other file for viewing its properties? There are 2 shortcut keys in your keyboard for performing right-click on any selected file or item. Either you hold down SHIFT + F10 or press the document key to carry out right-click using the keyboard in Windows 10.
Some other handy keyboard shortcuts can help you when you do not have a mouse or other pointing device near you.
- CTRL + ESC: For opening the Start menu (after that you can use the Arrow keys for selecting any item from the tray)
- ALT + DOWN ARROW: For opening a drop-down list box
- ALT + F4: For closing the current program window (Pressing this multiple times will close all of the opened applications)
- ALT + ENTER: For opening the properties for the selected object
- ALT + SPACEBAR: For bringing up the shortcut menu for the current application
- WIN + HOME: For clearing all but the active window
- WIN + SPACE: For making transparent the windows so you can see through to the desktop
- WIN + UP-ARROW: Maximize the active window
- WIN + T: For focusing and scrolling through items on the taskbar
- WIN + B: For focusing on the System Tray icons
The Mouse Keys
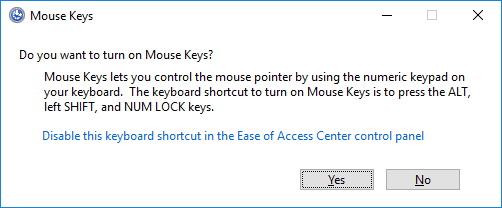
This feature is available with Windows, allowing users to move the mouse pointer with the numeric keypad on your keyboard; sounds pretty amazing, right! Yes, so to activate this feature, you have to enable the “Mouse keys” option. The shortcut key for doing this is ALT + left SHIFT + Num-Lock. You will see a popup dialog box appear asking you to enable Mouse Keys. Once you enable this feature, the number 4 key is used for moving the mouse left; similarly, 6 for the right movement, 8 and 2 are up and down respectively. The number keys 7, 9, 1, and 3 helps you to move diagonally.
For performing a normal left-click through this “Mouse Keys” feature, you have to press the forward slash key (/) first followed by the number 5 key. Similarly, for performing a right-click through this “Mouse Keys” feature, you have to press the minus key (-) first followed by the number 5 key. For the ‘double-click’, you have to press the forward slash and then the plus (+) key (make sure you don’t have to press and hold the first key before pressing the second one).
It is to be noted that all the key combination mentioned above will work with numeric keypad only which resides on the right side of your keyboard. It will also work if you use an external USB keyboard having numeric keys on the right side of your keyboard.
Recommended:
That’s it you have successfully learned How to Click Right using the Keyboard in Windows 10 but if you still have any questions regarding this tutorial then feel free to ask them in the comment’s section.