How to enable legacy advanced boot option in Windows 10

One of the main issues with Windows 10 is that you can’t access Safe mode in case of emergency; in other words, Microsoft has by default disabled the legacy advanced boot option in Windows 10. Next, you need to enter the safe mode you need to enable the legacy advanced boot option in Windows 10.
In the earlier version of Microsoft Windows like Windows XP, Vista, and 7, it was quite easy to access safe mode by just pressing F8 or Shift+F8 repeatedly, but in Windows 10, Windows 8 & Windows 8.1 advanced boot menu is OFF. With an advanced boot menu enabled in Windows 10, you can easily access the boot menu by pressing the F8 key. Moreover, you can Change Windows 10 Boot Logo as you wish.. Moreover, you can Change Windows 10 Boot Logo as you wish..
Note: It is advised to enable the legacy advanced boot menu beforehand in Windows 10 as in the case of boot failure, you could easily log on to Windows safe mode using the advanced boot menu.
How to enable legacy advanced boot option in Windows 10
1. Restart your Windows 10.
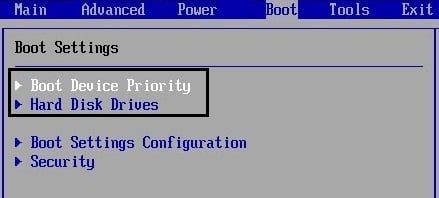
2. As the system restarts, enter into BIOS setup and configure your PC to boot from CD/DVD.
3. Insert your Windows 10 installation or recovery media into your CD/DVD drive.
4. When prompted to Press any key to boot from CD or DVD, press any key to continue.

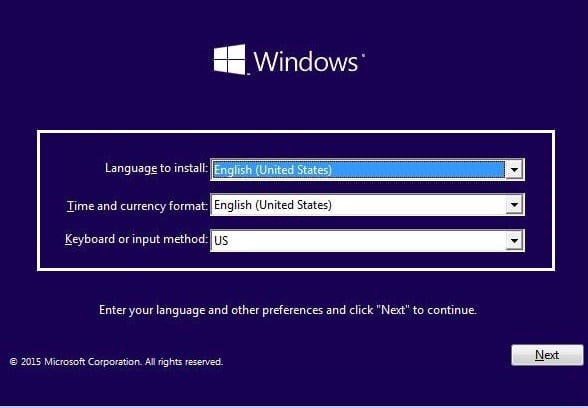
5. Select your language preferences, and click Next. Click Repair your computer in the bottom-left.
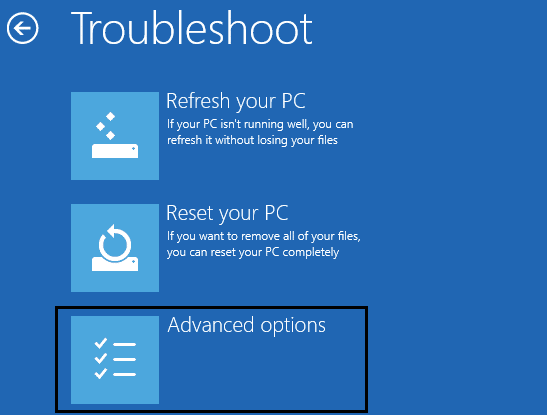
6. On the Choose an option screen, choose Troubleshoot.

7. On the Troubleshoot screen, choose Advanced options.
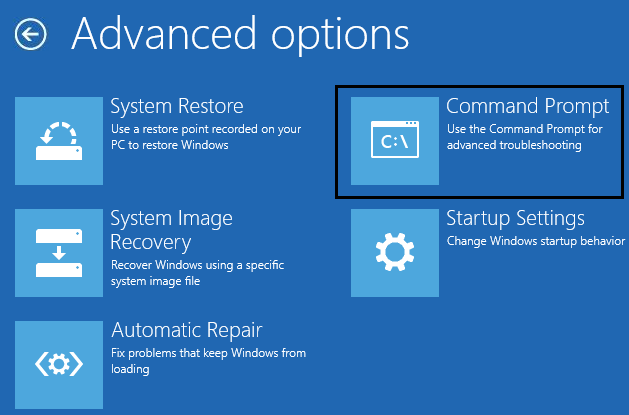
8. On the Advanced options screen, choose Command Prompt.
9. When the Command Prompt(CMD) opens, type C: and hit enter.
10. Now type the following command:
BCDEDIT /SET {DEFAULT} BOOTMENUPOLICY LEGACY
11. And hit enter to Enable Legacy Advanced Boot Menu.

12. Once the command is executed successfully, type the EXIT command to close the Command Prompt window.
13. On choose on the options screen, click Continue to restart your PC.
14. When PC restarts, repeatedly press F8 or Shift+F8 before the windows logo shows up to open the advanced boot menu.
Recommended:
That’s it; you have successfully learned how to enable the legacy advanced boot option in Windows 10, but if you still have any queries regarding this post, feel free to ask them in the comment section.