4 Ways to Format an External Hard Drive to FAT32

The way files and data are stored, indexed on a hard drive, and retrieved back to the user is far more complex than you might think. A file system controls how the above tasks (storing, indexing, and retrieving) are performed. A few file systems you might be aware of include FAT, exFAT, NTFS, etc.
Each of these systems has its own advantages and disadvantages. The FAT32 system in particular has universal support and works on almost all operating systems available for personal computers.
Therefore, formatting a hard drive to FAT32 can make it accessible and thus can be used across platforms and in various devices. Today, we will go over a couple of methods on how to format your hard drive to the FAT32 system.
What is a File Allocation Table (FAT) system and FAT32?
The File Allocation Table (FAT) system itself is widely used for USB drives, flash memory cards, floppy disks, super floppies, memory cards and external hard drives that are supported by digital cameras, camcorders, PDAs, media players, or mobile phones with an exception of Compact Disc (CD) and Digital Versatile Disc (DVD). The FAT system has been an eminent type of file system for the past three decades and has been responsible for how and where data is stored, assessed, and managed over that time frame.
What is FAT32 in particular you ask?
Introduced in 1996 by Microsoft and Caldera, FAT32 is the 32-bit version of the File Allocation Table system. It overcame the volume size limit of FAT16 and supports more number of possible clusters while reusing most of the existing code. The values of the clusters are represented by 32-bit numbers, out of which 28 bits hold the cluster number. FAT32 is widely used for dealing with files less than 4GB. It is a useful format for solid-state memory cards and a convenient way to share data between operating systems and specifically focuses on drives with 512-byte sectors.
4 Ways to Format an External Hard Drive to FAT32
There are a couple of methods via which you can format a hard drive to FAT32. The list includes running a few commands in the command prompt or powershell, using third-party applications like FAT32 Format and EaseUS.
Method 1: Format hard drive to FAT32 using Command Prompt
1. Plugin and make sure the hard disk/USB drive is connected properly to your system.
2. Open file explorer (Windows key + E) and note the corresponding drive letter of the hard drive that needs to be formatted.
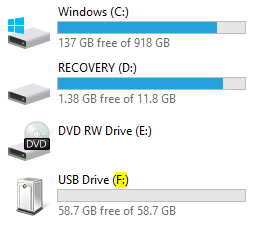
Note: In the above screenshot, the drive letter for the connected “USB Drive” is “F” and the drive “Recovery” is “D”.
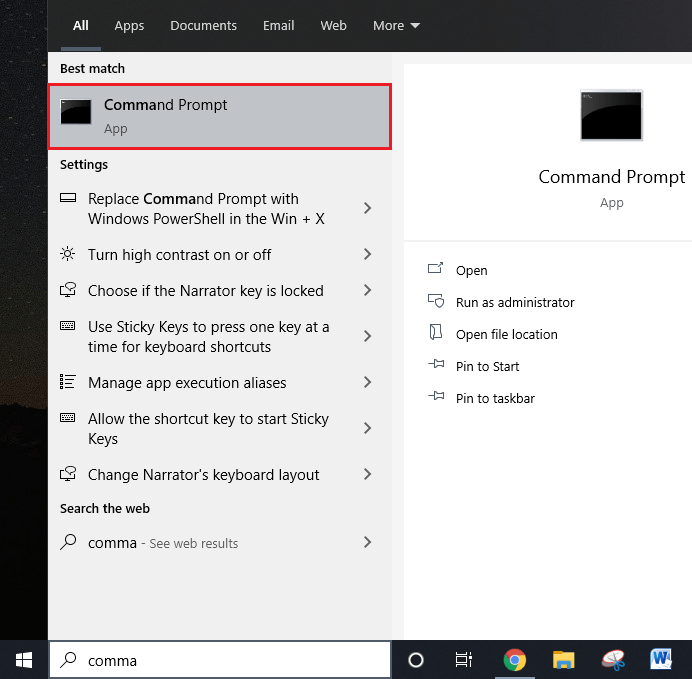
3. Click on the search bar or press “Windows + S” on your keyboard and type “Command Prompt”.
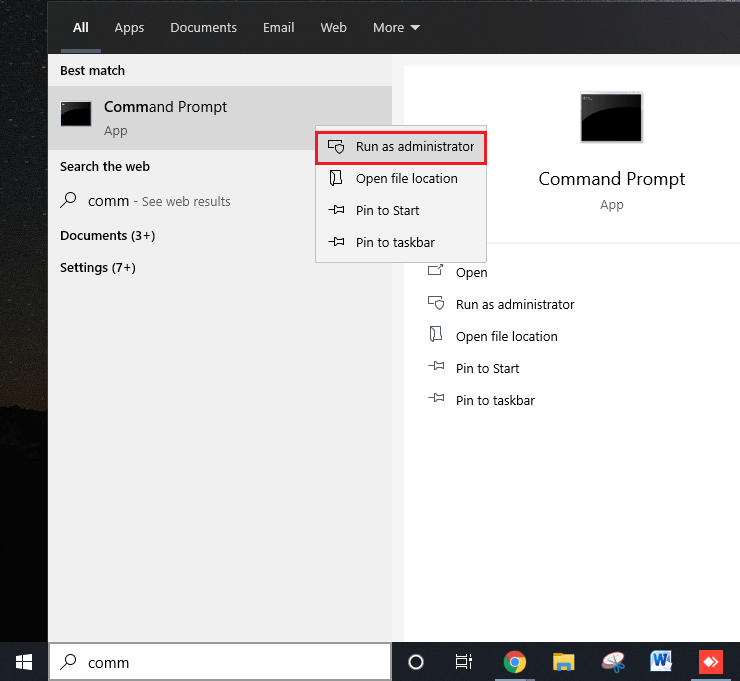
4. Right-click on the “Command Prompt” option to open the drop-down menu and select “Run as administrator”.
Note: A User Account Control pop-up asking permission to allow Command Prompt to make changes to the system will appear, click on Yes to grant permission.
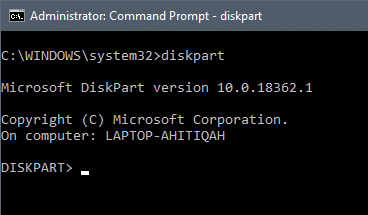
5. Once Command Prompt has launched as an administrator, type diskpart in the command line and press enter to run. The diskpart function lets you format your drives.
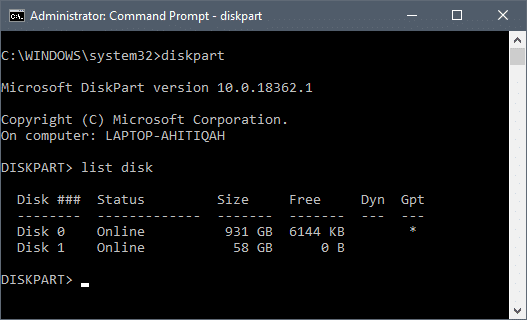
6. Next, type the command “list disk” and press enter. This will list out all the available hard drives on the system including their sizes with other additional information.
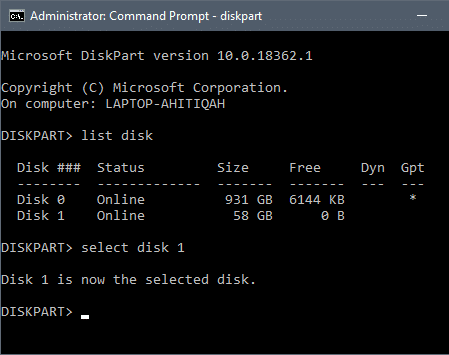
7. Type “select disk X” at the end replacing “X” with the drive number and press the enter key on your keyboard to select the disk.
A confirmation message reading ‘Disk X is now the selected disk’ will be displayed.
8. Type the following line in the command prompt and press Enter after each line to format your drive to FAT32.
create partition primary
select partition 1
active
format fs=fat32
assign
exit
Using the command prompt to format a drive to FAT32 is one of the most straightforward methods, however, many users have reported multiple errors in following the procedure. If you too experience errors or any hardships while following the procedure then better try the alternate methods listed below.
Method 2: Format Hard Drive to FAT32 Using PowerShell
PowerShell is pretty similar to Command Prompt as both use the same syntax tools. This method lets you format a drive of storage capacity more than 32GB.
It is a comparatively simpler method but takes longer to complete the format process (it took me an hour and a half to format a 64GB drive) and you might not even understand if formatting worked or not until the very end.
1. Just as in the previous method, make sure the hard drive is connected properly into your system and note the alphabet assigned to the drive (The alphabet next to the drive name).
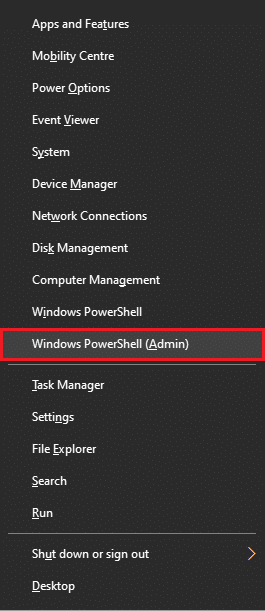
2. Go back to your desktop screen and press “Windows + X” on your keyboard to access the Power User menu. This will open up a panel of various items on the left side of the screen. (You can also open the menu by right-clicking on the start button.)
Find “Windows PowerShell (Admin)” in the menu and select it to give administrative privileges to PowerShell.
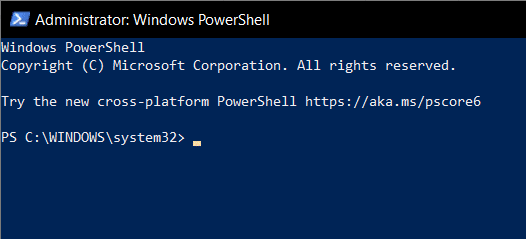
3. Once you grant the necessary permissions, a dark blue prompt will be launched on the screen called “Administrator Windows PowerShell”.
4. In the PowerShell window, type or copy and paste the following command and press enter:
format /FS:FAT32 X:
Note: Remember to replace the letter “X” with the drive letter corresponding to your drive that needs to be formatted (“format /FS:FAT32 F:” in this case).
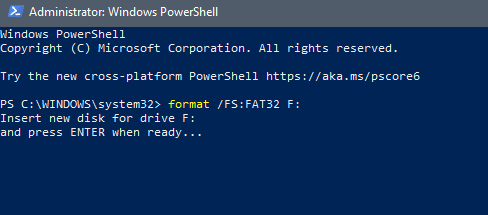
5. A confirmation message asking you to “press Enter when ready…” will be displayed in the PowerShell window.
6. The formatting process will begin as soon as you hit the Enter key, so be sure about it as this is your last chance to cancel.
7. Double-check the drive letter and press Enter to format the hard drive to FAT32.
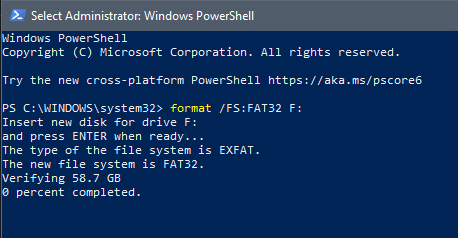
You can know the status of the formatting process by looking at the last line of the command as it starts from zero and gradually increases. Once it reaches one hundred the formatting process is complete and you are good to go. The duration of the process might vary depending on your system and the space in the external hard drive, so patience is the key.
Also Read: How to Convert GPT Disk to MBR Disk in Windows 10
Method 3: Using a third-party GUI software like “FAT32 Format”
This is the easiest and the quickest method to format to FAT32 but it requires using a third-party application. “FAT32 Format” is a basic portable GUI app that does not need to be installed on your system. It is best for someone who doesn’t want to run a dozen commands and it is super quick. (Took me barely a minute to format a 64GB drive)
1. Again, connect the hard drive that requires formatting and note the corresponding drive letter.
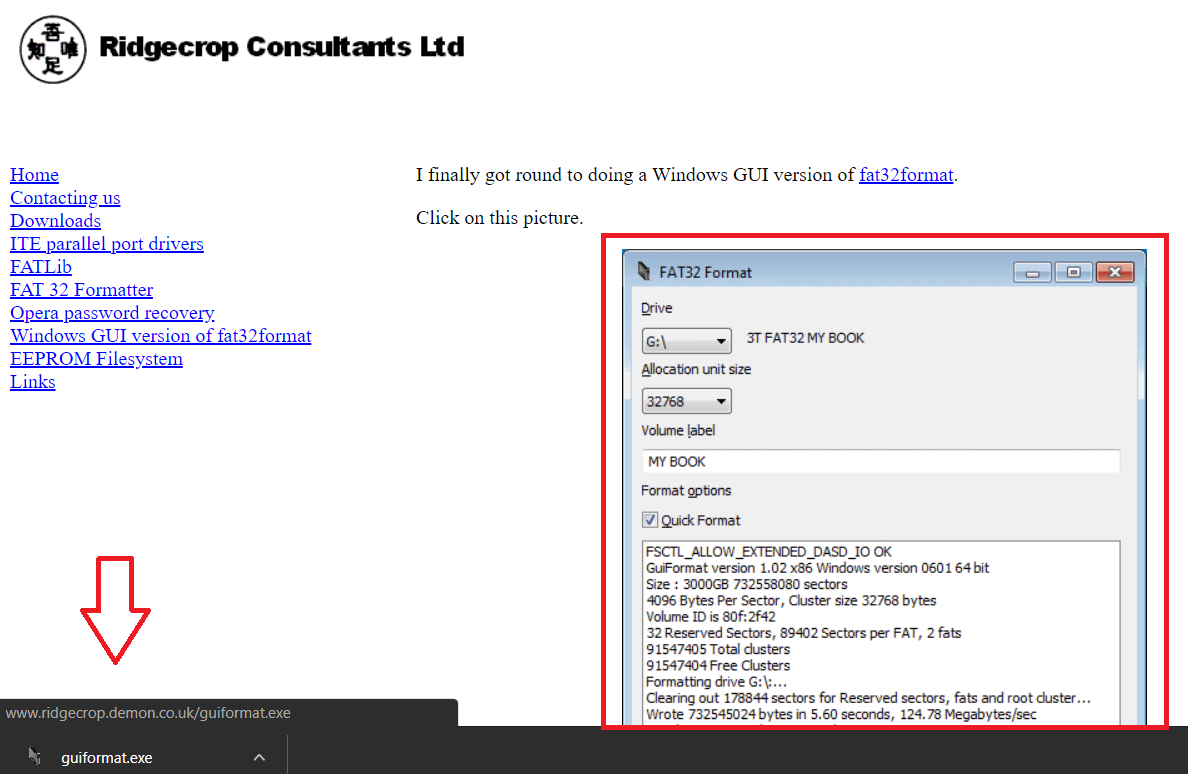
2. Download the third-party software on your computer. You can do that by following this link FAT32 Format. Click on the screenshot/picture on the web page to start downloading the application file.
3. Once the downloading process is complete, it will appear at the bottom of your browser window; click on the downloaded file to run. An administrator prompt will pop up asking for your permission to allow the app to make changes to your device. Select the “Yes” option to move forward.
4. Following that the “FAT32 Format” application window will open up on your screen.
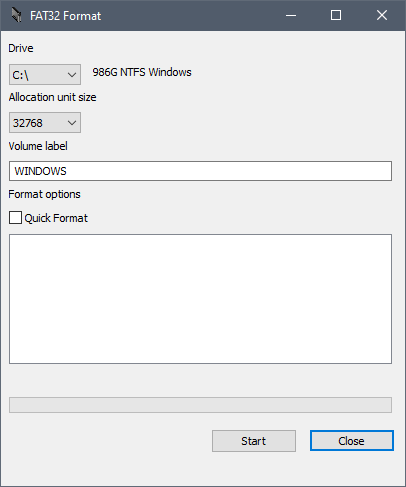
5. Before you press “Start”, click on the down arrow right below the “Drive” label and choose the correct drive letter corresponding to the one that needs to be formatted.
![]()
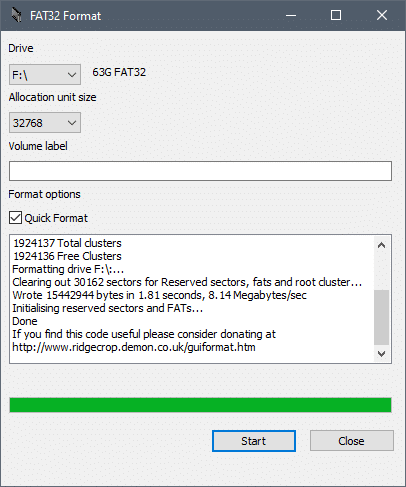
6. Make sure the “Quick Format” box below Format options is ticked.
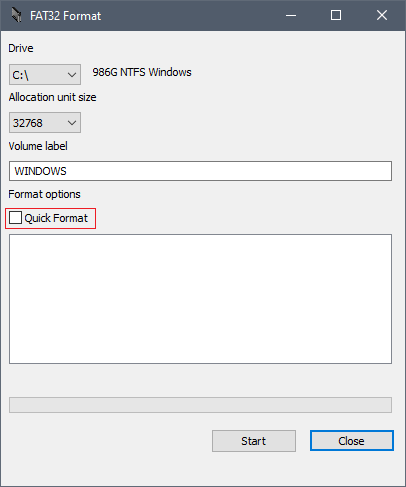
7. Let the Allocation unit size remain as default and click on the “Start” button.
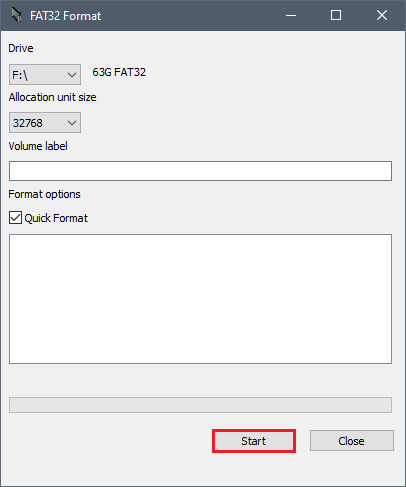
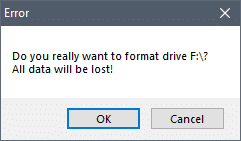
8. Once “Start” is pressed, another pop-up window arrives to warn you about the loss of data that is about to ensue and this is the last and final chance for you to cancel this process. Once you are sure, press “OK” to continue.
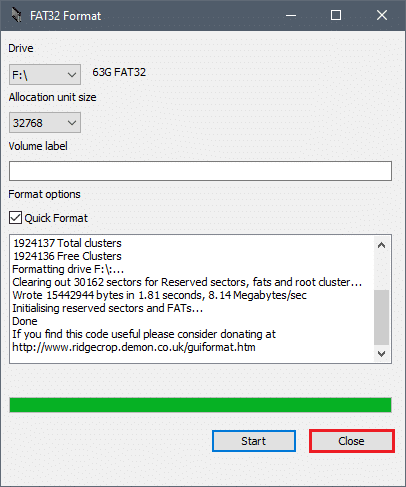
9. Once the confirmation is sent, the formatting process begins and the bright green bar travels from left to right within a couple of minutes. The formatting process, as obvious, will be complete when the bar is at 100, i.e, at the rightmost position.
10. Finally, press “Close” to exit the application and you are good to go.
Also Read: 6 Free Disk Partition Software For Windows 10
Method 4: Format External Hard Drive to FAT32 using EaseUS
EaseUS is an application that lets you not only format hard drives to the required formats but also delete, clone, and create partitions. Being a third-party software you will need to download it from their website and install it on your personal computer.
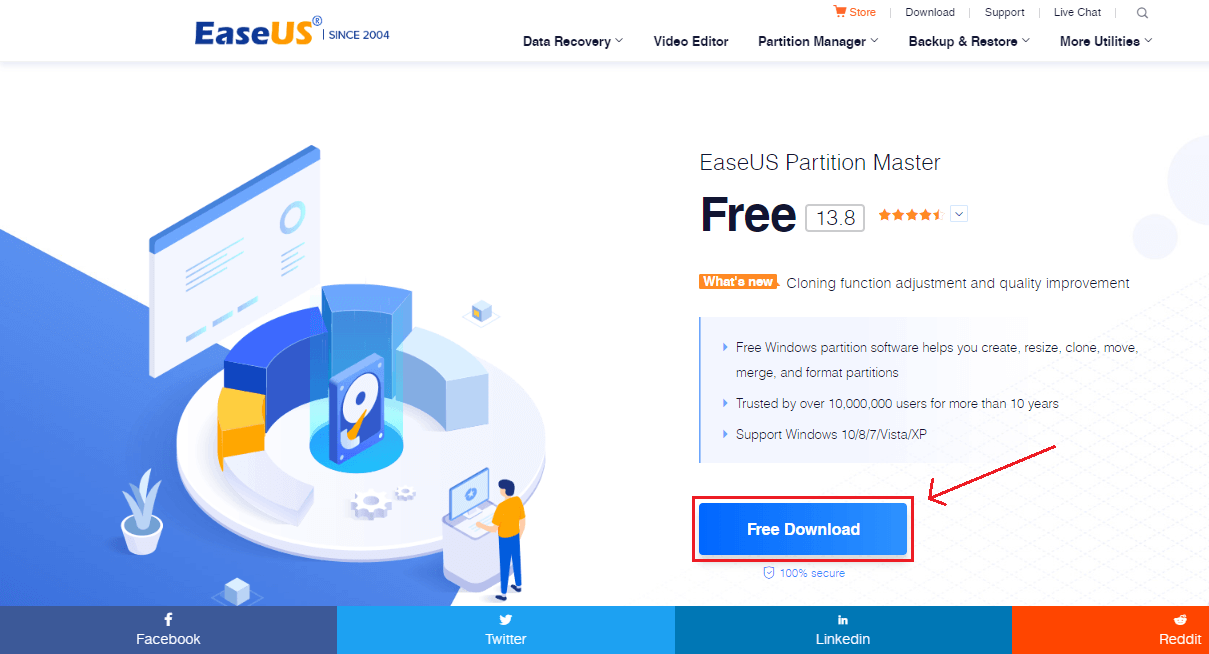
1. Start the software downloading process by opening this link Free partition manager software to resize partitions in your preferred web browser, clicking on the “Free Download” button and completing the on-screen instructions that follow.
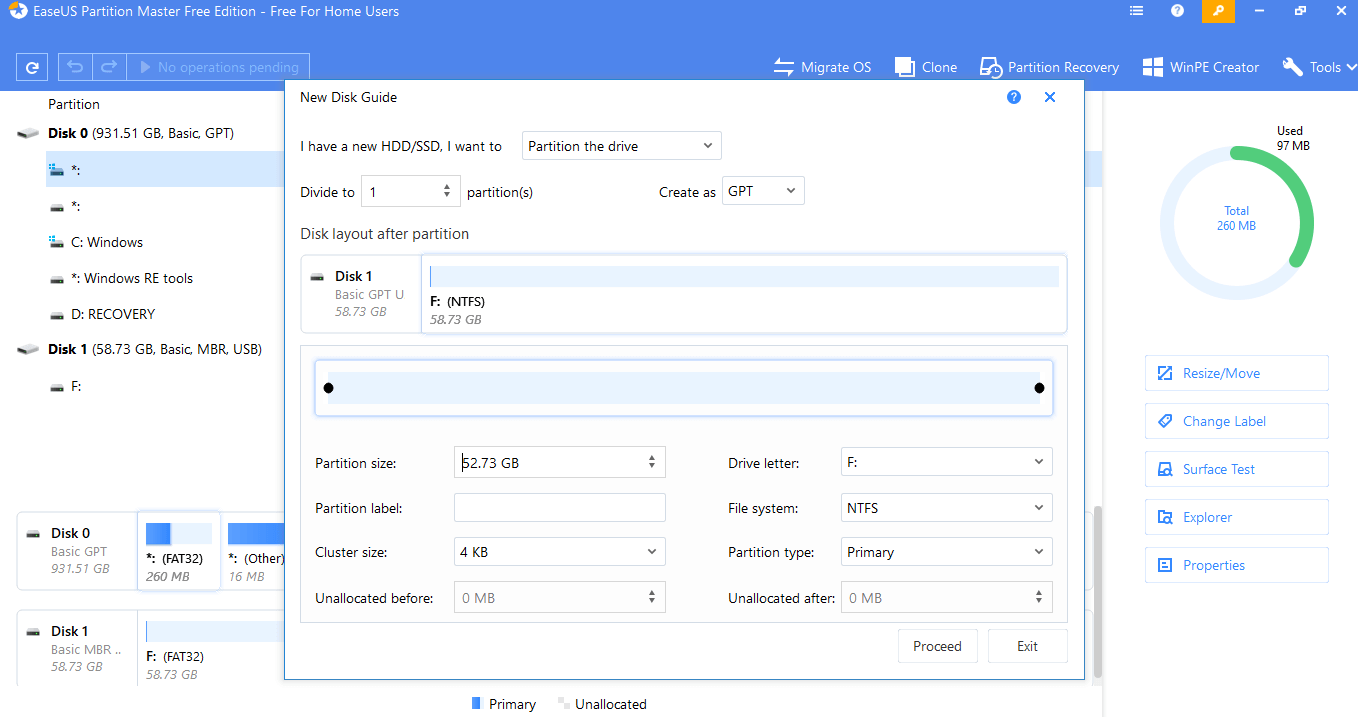
2. Once downloaded and installed, a new disk guide will open up, exit that to open the main menu.
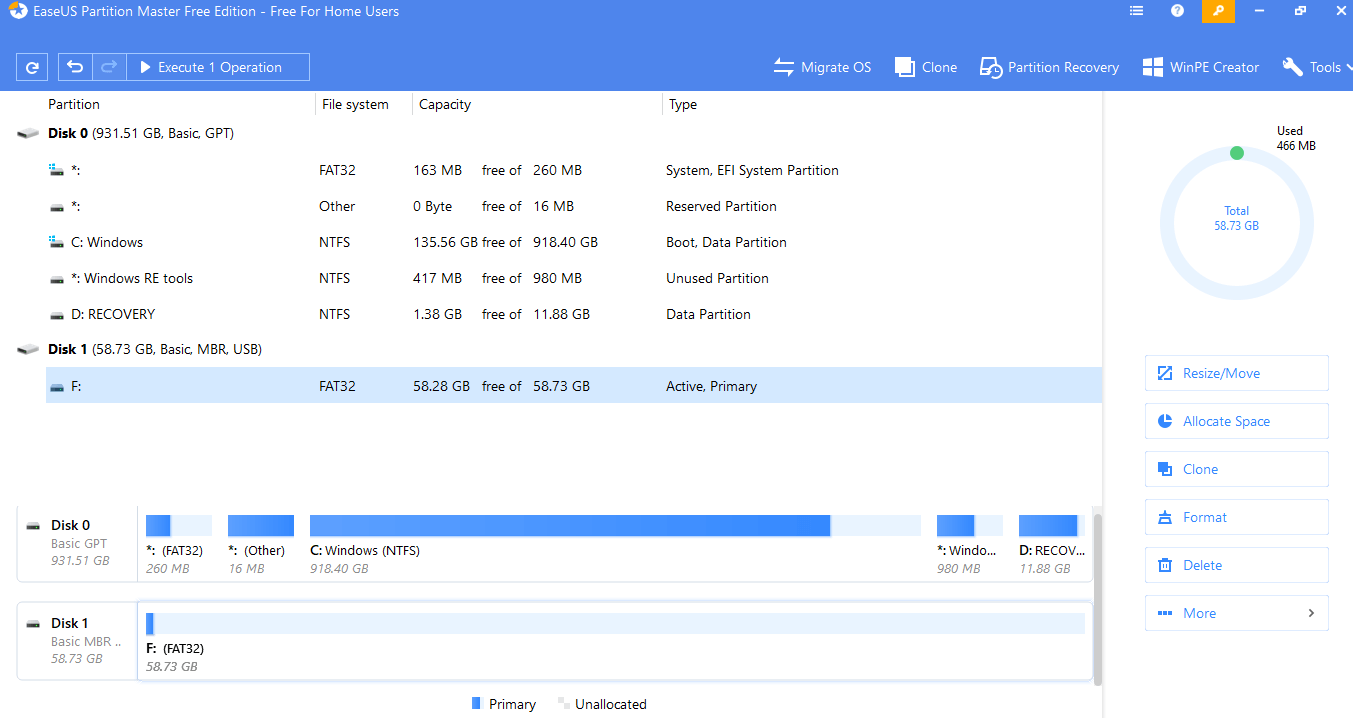
3. In the main menu, select the disk that you want formatted and right-click on it.
For example, here “Disk 1 > F:” is the hard drive that needs to be formatted.
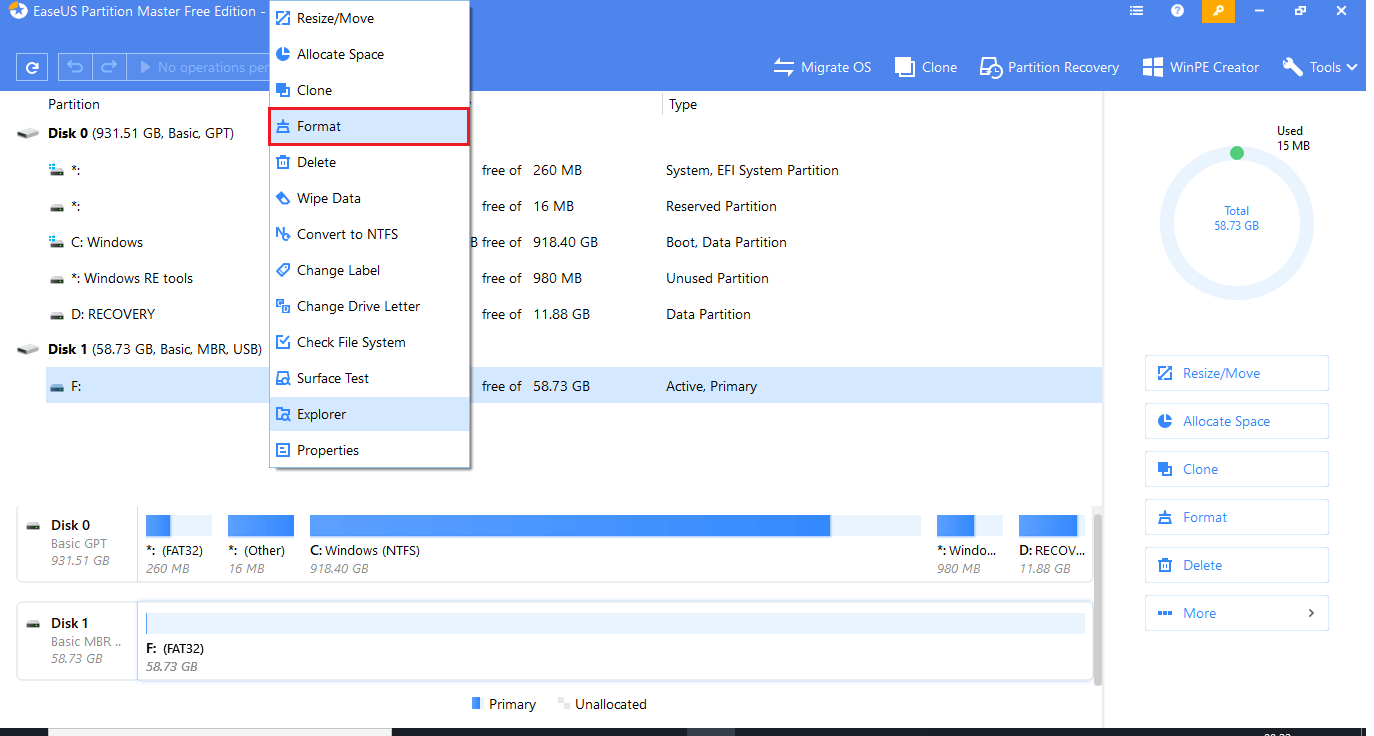
4. Right-click opens up a pop-up menu of various actions that could be performed. From the list, select the “Format” option.
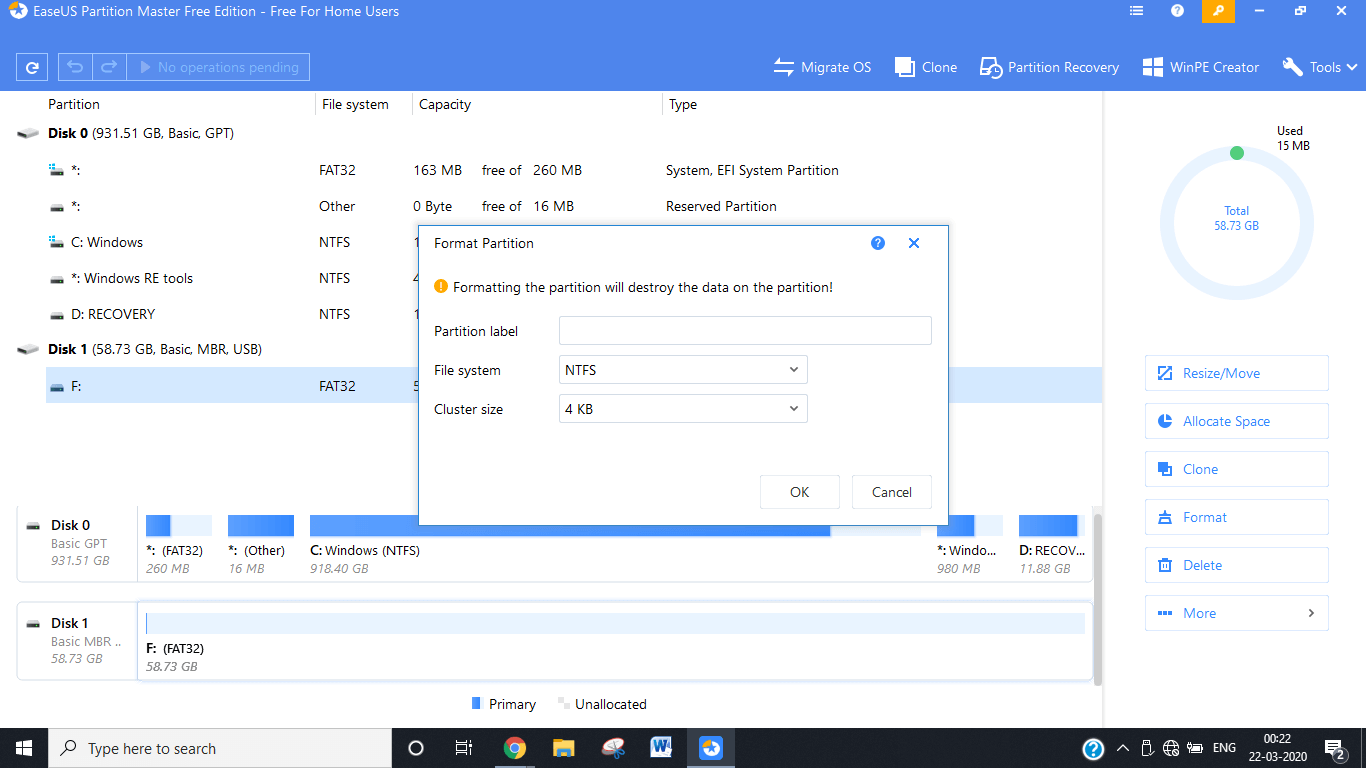
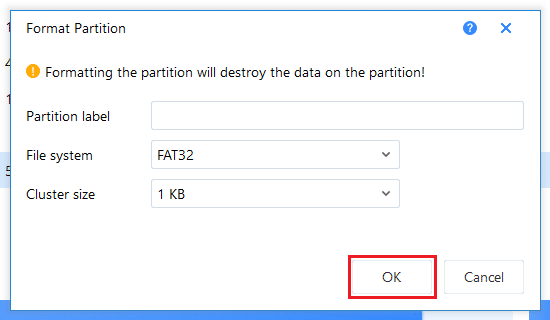
5. Selecting the format option will launch a “Format Partition” window with options to select File System and Cluster size.
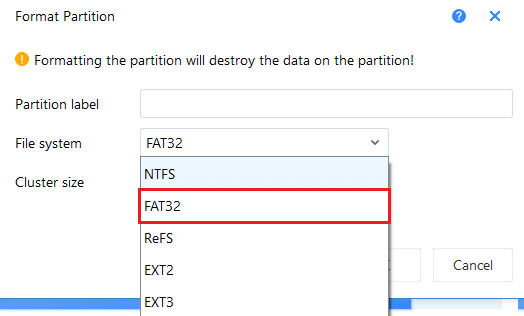
6. Tap on the arrow next to the “File System” label to open a menu of available file systems. Select “FAT32” from the list of available options.
7. Leave the “Cluster Size” as it is and press “OK”.
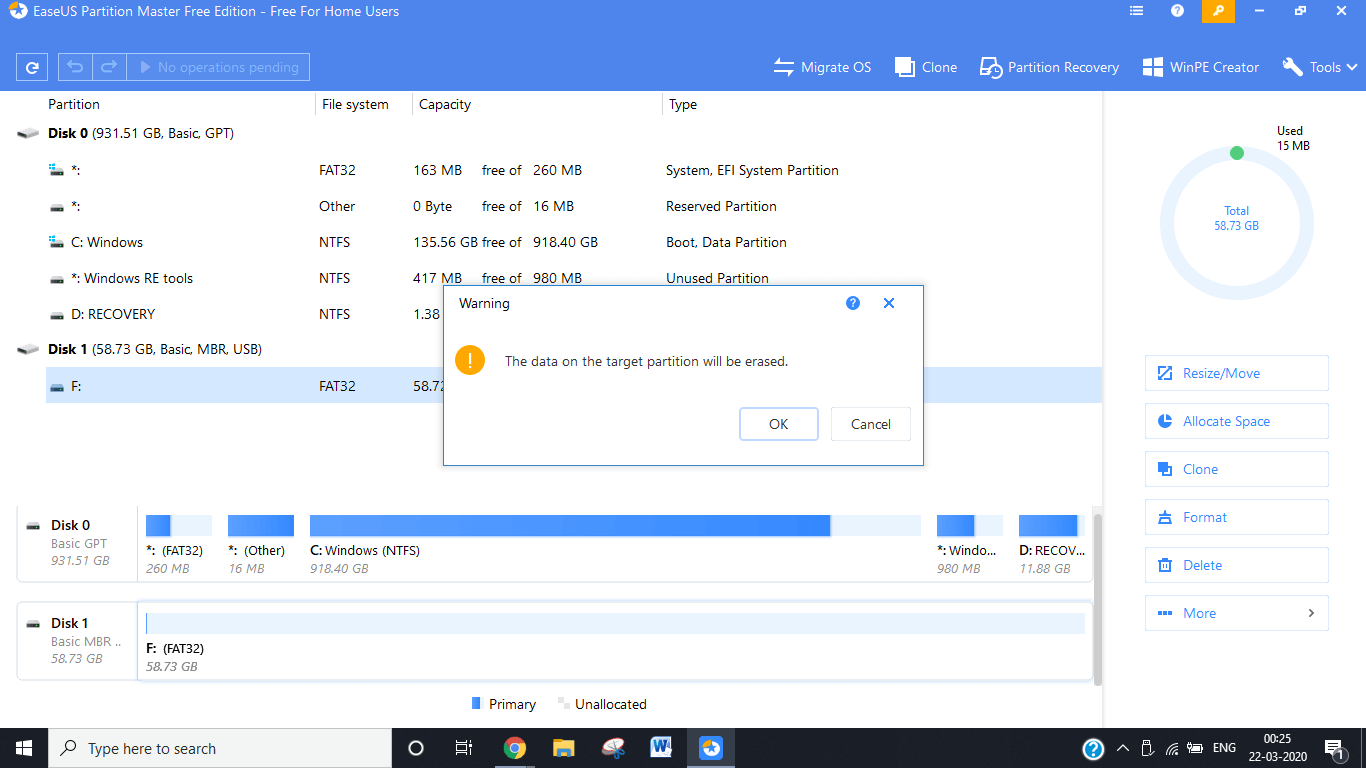
8. A pop-up will appear to warn you about your data being permanently erased. Press “OK” to continue and you will be back in the main menu.
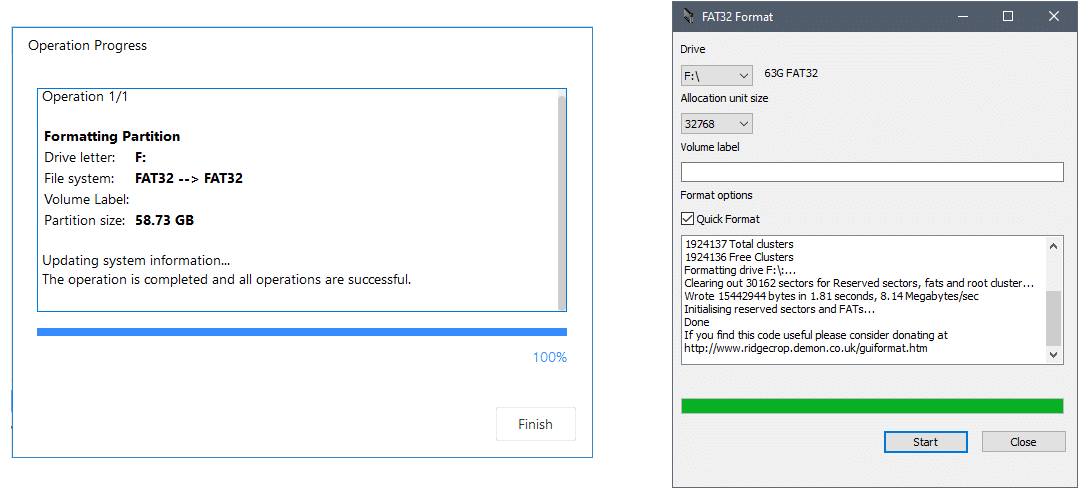
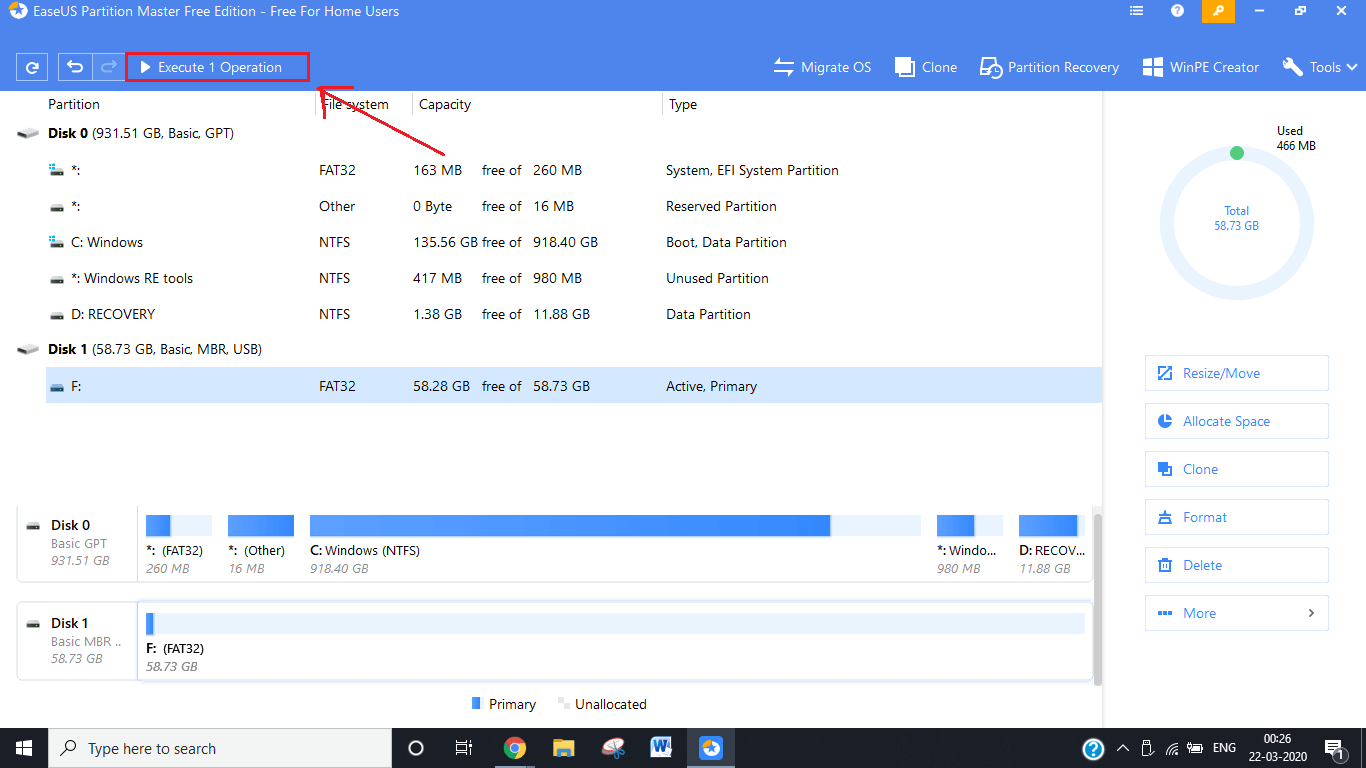
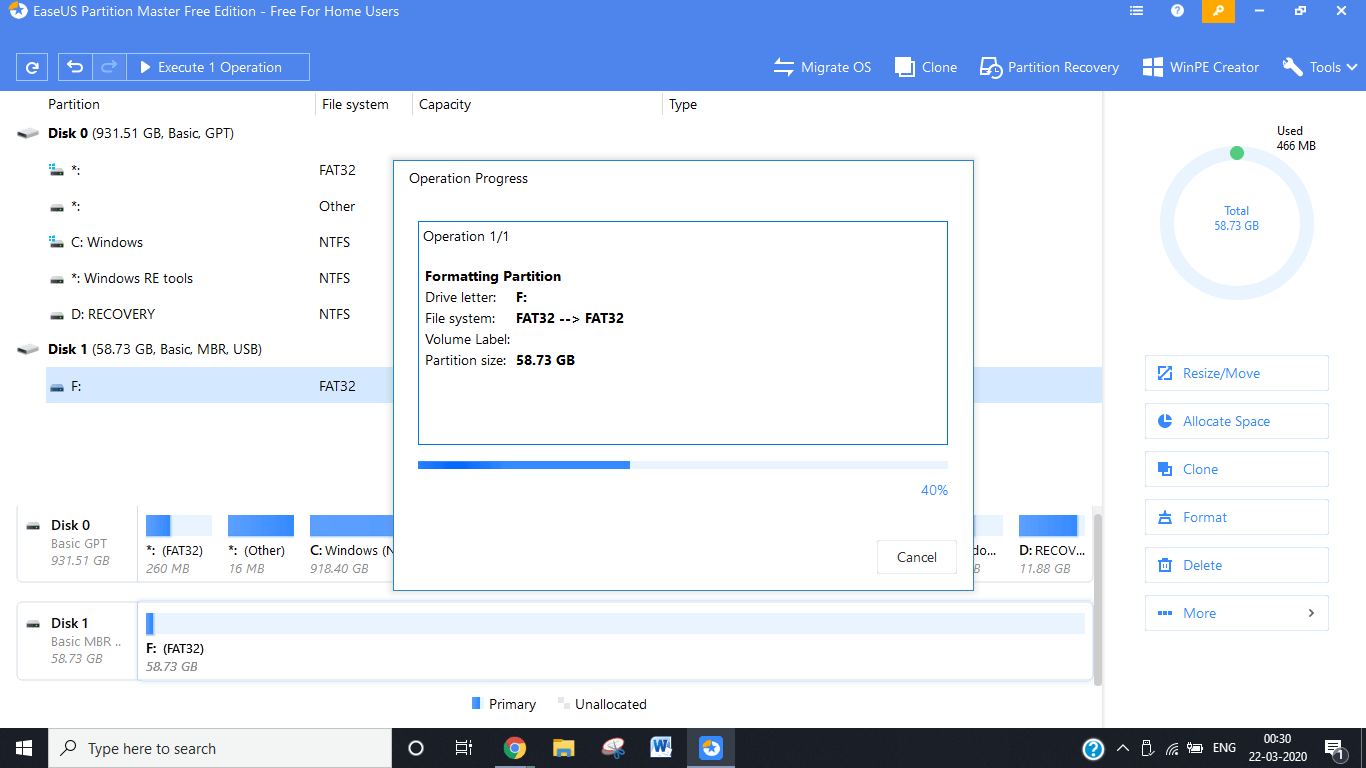
9. In the main menu, look at the top left corner for an option that reads “Execute 1 Operation” and click on it.
10. It opens a tab listing all the pending operations. Read and double-check before you press “Apply”.
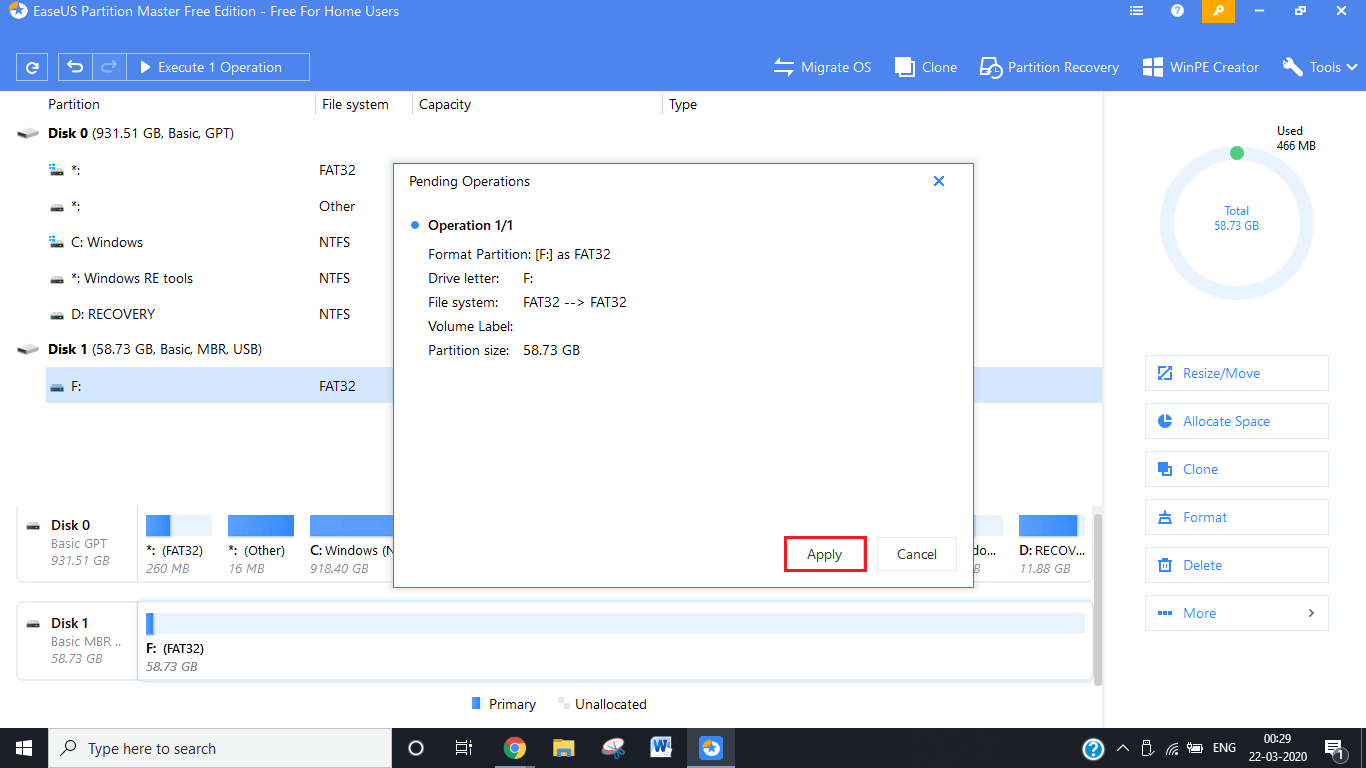
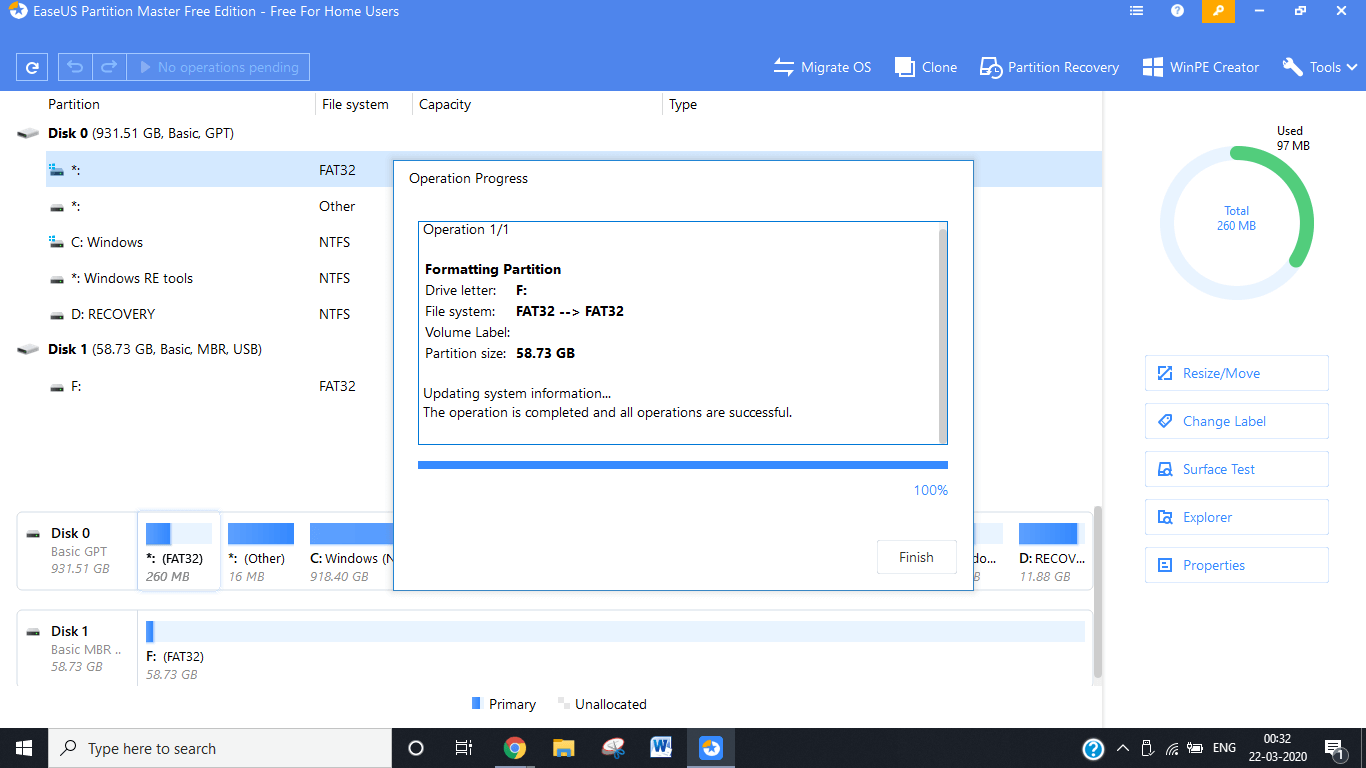
11. Patiently wait till the blue bar hits 100%. It shouldn’t take a long time. (Took me 2 minutes to format a 64GB disk)
12. Once EaseUS is done formatting your hard drive, press “Finish” and close the application.
Recommended:
We hope the above methods helped you format your external hard drive to the FAT32 system. While the FAT32 system has universal support, it is considered archaic and out of date by many users. The file system has thus now been replaced by newer and more versatile systems like NTFS.