Wondering what dedicated VRAM (Video RAM) is? How much VRAM is required in Windows 10? Can you increase the dedicated VRAM in Windows 10? If you are looking for answers to these questions then you have come to the right place, here’s a complete guide.
Have you been experiencing an increased dosage of frustration due to laggy games, stuttery video playback, while using video editors or during any other task that involves high-resolution graphics? While the primary cause may be outdated or inferior hardware, there’s another important factor apart from RAM, processor, and GPU that governs how smoothly graphics-intensive tasks run.
Video RAM or VRAM is a special type RAM that works in coordination with the graphics processing unit in your computer to render graphics and an increase or decrease in its size can dramatically affect the performance of the GPU itself.
How to Increase Dedicated VRAM (Video RAM) in Windows 10
In this article, we will go over a couple of methods to increase the amount of dedicated VRAM on our systems.
What is Dedicated VRAM & How much do you really need?
Video RAM or VRAM, as mentioned earlier, is a special type of RAM specific to your graphic card. Every time a graphics-intensive task is being run, the graphic card calls upon the VRAM to load the next frames/pixels/information to be displayed. The VRAM, therefore, stores all the information required by the GPU including game textures, lighting effects, next frame of a 4K video, anti-aliasing, etc.
You may be wondering why the GPU requires its own unique VRAM and doesn’t utilize the main RAM? Since VRAM is a chip found on the graphics card itself, the GPU can access it much faster compared to the main RAM and thus display/render graphics without any lag. The speed of access to the next set of information/graphics is particularly important in games as a single second of delay/lag can deprive you of your chicken dinner.
The relation between GPU and VRAM is analogous to the relation between your computer processor and RAM.
As for how much VRAM do you need? It depends.
It depends on what you intend to do on your system. Play games like solitaire, the occasional candy crush saga with some light media? If that’s the case then 256MB of VRAM should be more than enough. However, if you intend to play graphics-intensive games like PUBG or Fortnite on high graphics settings then you will require a lot more VRAM.
Another factor that governs how much VRAM is required is your monitor’s resolution. As mentioned earlier, VRAM stores the images/pixels that are to be displayed and are currently being displayed by the GPU. Higher-resolution converts to a greater number of pixels and thus, the VRAM needs to be sufficiently large to hold these many numbers of pixels.
As a rule of thumb, use the below table to identify how much VRAM you can set based on your RAM.
| RAM | Recommended VRAM |
| 2 GB | 256MB |
| 4 GB | 512MB |
| 8 GB or more | 1024MB or more |
How to check the amount of dedicated VRAM on your system?
Before we increase the amount of dedicated VRAM on our personal computers, let’s check how much of it is actually there. Follow the below step by step guide to do so:
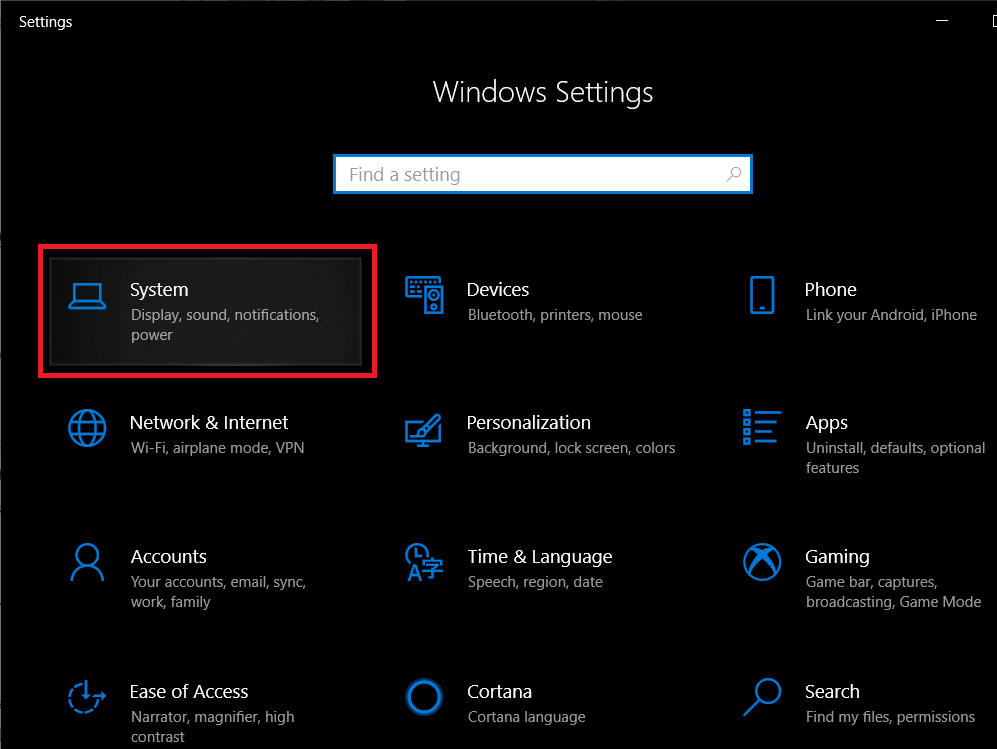
1. Open Windows Settings by any of the following methods.
- Press Windows key + X and select Settings from the power user menu.
- Simply click on the search bar, type Settings, and click on Open.
- Press Windows key + I to directly open Settings.
2. In here, click on System (the first option in the grid).
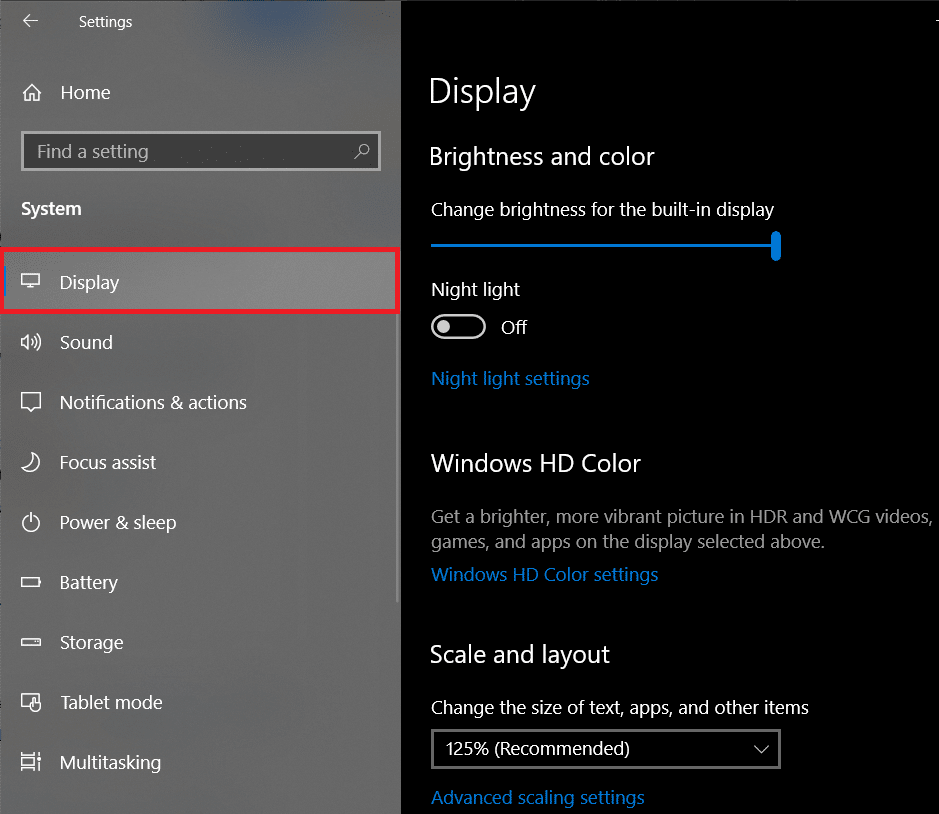
3. On the left sidebar, there will be a list of various sub-settings. By default, display settings will be open but if for some reason it isn’t, click on Display to access Display settings.
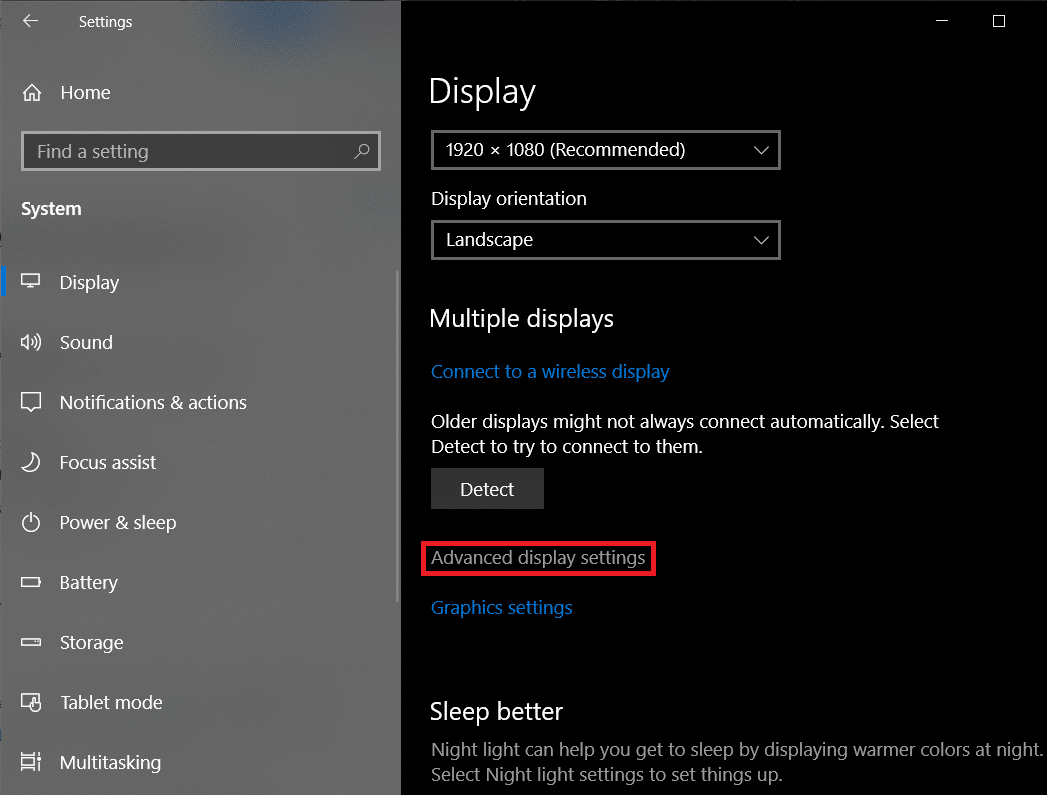
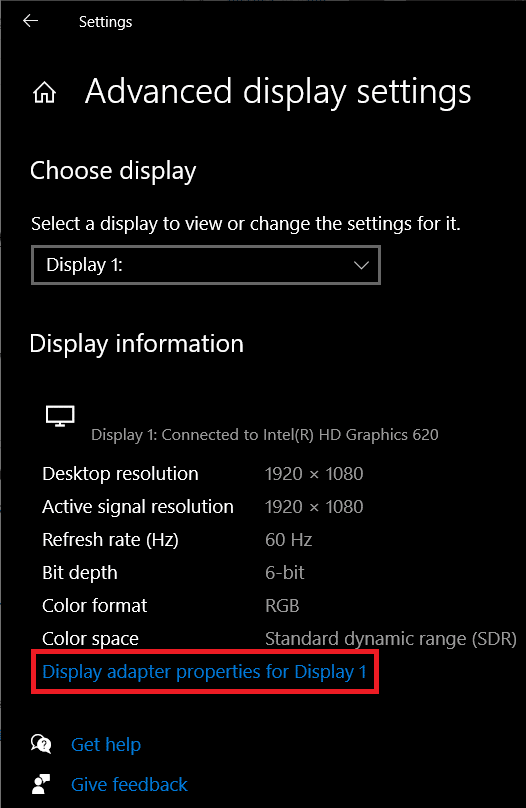
4. All display-related settings will be present on the right side of the window. Scroll down to find Advanced display settings and click on the same.
5. In the next window, click on Display adapter properties for Display 1.
6. A pop-up displaying various graphics card/adapter related information like Chip Type, DAC Type, Adapter String, etc. will be displayed.
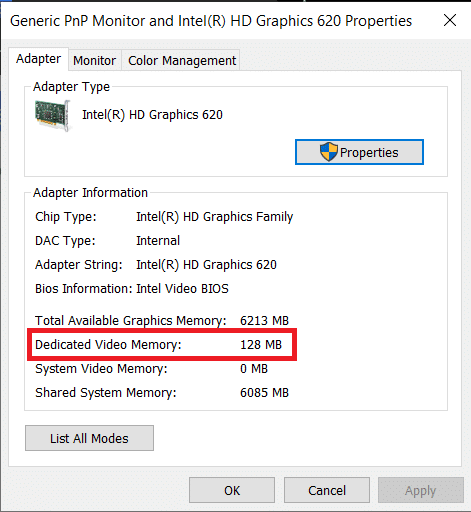
The amount of Dedicated Video Memory will also be displayed in the same window.
As you can see in the above screenshot, the window is displaying the VRAM for the integrated graphics card in the computer (Intel HD Graphics). However, most computers have a dedicated graphics card which only kicks in when it is called upon and the above window only shows the VRAM of the active GPU.
So, activate your dedicated GPU by performing some graphics-intensive tasks like playing a game, playing 4K videos, etc. and then follow the above steps again to check the VRAM of your dedicated GPU.
Also Read: Manage Virtual Memory (Pagefile) In Windows 10
3 Ways to Increase Dedicated VRAM in Windows 10
If you are experiencing frequent performance drops, low frame rates, texture glitches and are using an integrated graphics card then you might want to consider installing a dedicated graphics card with enough VRAM suitable for your needs.
However, the above option is viable only for PC users and not laptops. Laptop users can instead try the below-mentioned methods to give a slight bump to their dedicated VRAM.
Method 1: Increase VRAM via BIOS
Updating the amount of VRAM through the BIOS menu is the first and the recommended method as it has a good chance of success. However, the following method may not work for everyone as certain motherboard manufacturers do not allow a user to manually adjust VRAM.
1. Restart your computer and access the BIOS settings on the next bootup.
The process of entering BIOS is subjective to each individual motherboard manufacturer. To find the method specific to your computer/manufacture, simply google ‘How to enter BIOS on your computer brand name + computer model ?’
Most BIOS menus can be accessed by repeatedly pressing F2, F5, F8, or Del key while the system is starting.
2. Once you are in the BIOS menu, look for anything along the lines of Graphics Settings, Video Settings, or VGA Share Memory Size.
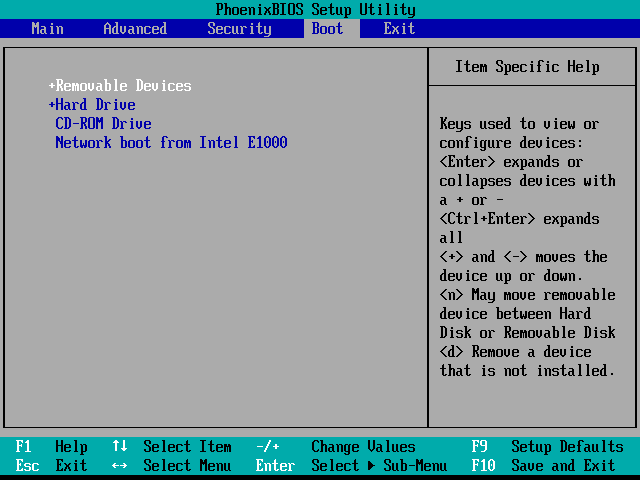
If you do not see any of the above options, locate Advanced Settings/options and click to open. Look for the above-mentioned settings in here.
3. Scan for Pre-allocated VRAM and increase it to a value that works for you. The available options usually include 32M, 64M, 128M, 256M, and 512M.
By default, the VRAM for most GPUs is set at 64M or 128M. So, increase the value to either 256M or 512M.
4. Save the changes you just made and restart your system.
Once your system has booted back up, follow the guide mentioned in the article earlier to check if the method worked and we were able to increase the amount of VRAM.
Method 2: Increase Dedicated VRAM Using Windows Registry Editor
The amount of VRAM reported for an integrated graphics card by the Adapter properties window doesn’t really matter as the integrated graphics card automatically adjusts to use the system RAM based on the demand. The value reported by Adapter properties is merely to fool games and other tasks whenever they check how much VRAM is available.
Using the windows registry editor, one can trick games into thinking that there is much more VRAM available then there actually is. To fake a VRAM increase on your integrated graphics card, follow the below steps:
1. Open registry editor by either launching the run command (Windows key + R), typing regedit and pressing enter or by clicking on the start button, searching for Registry Editor and clicking on Open.

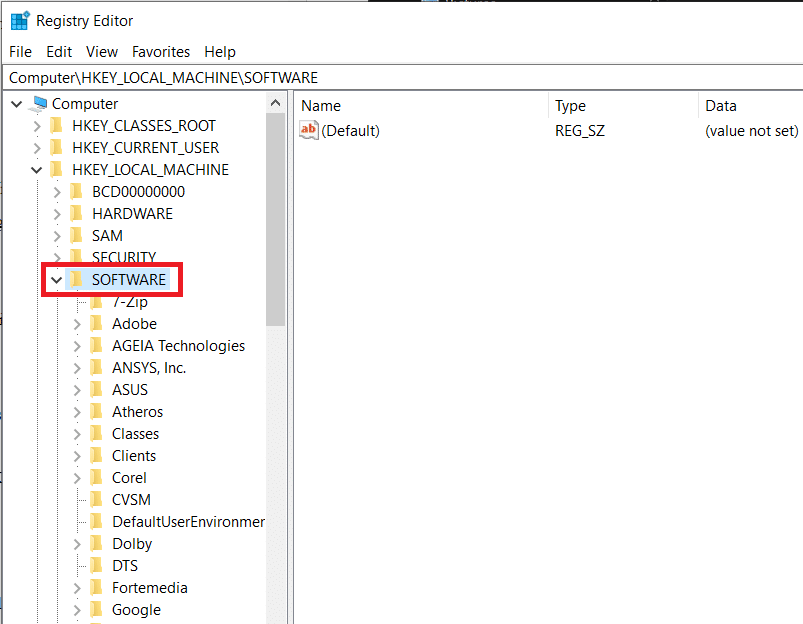
2. Expand HKEY_LOCAL_MACHINE (can be found on the left-side panel) by clicking on the arrow next to the label or by double-clicking.
![]()
3. In HKEY_LOCAL_MACHINE, locate Software and expand the same.
4. Look for Intel and right-click on the folder. Select New and then Key.
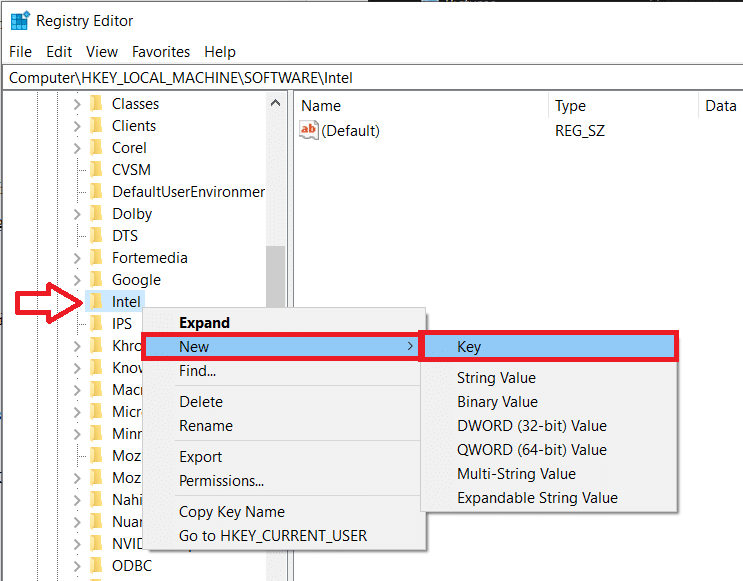
5. This will create a new folder. Name the folder GMM.
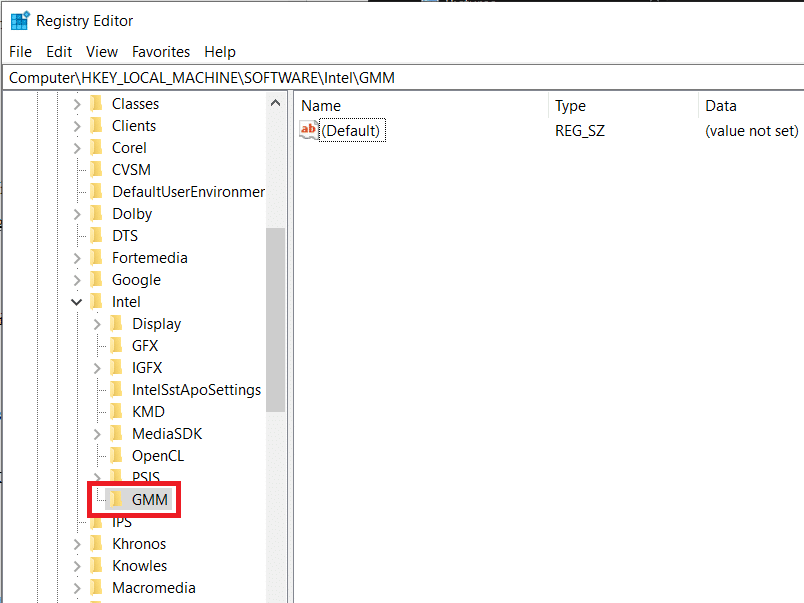
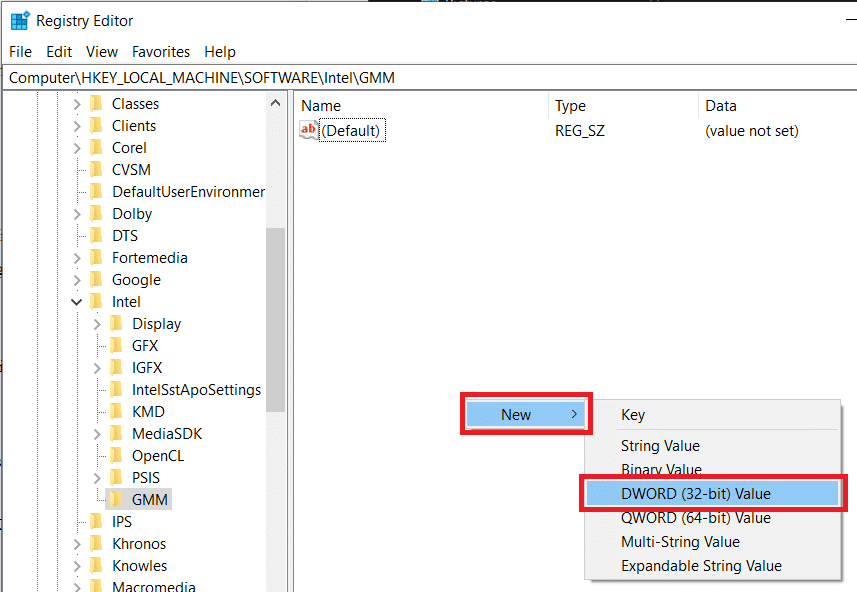
6. Select the GMM folder by clicking on it. Now, while the GMM folder is selected, move your mouse pointer to the right pane and right-click on the empty/negative area.
Select New followed by DWORD (32-bit) Value.
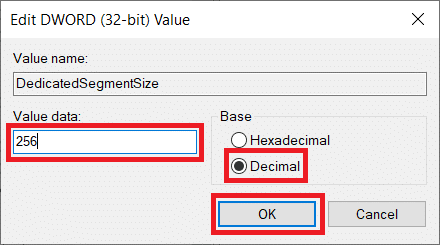
7. Rename the DWORD you just created to DedicatedSegmentSize.
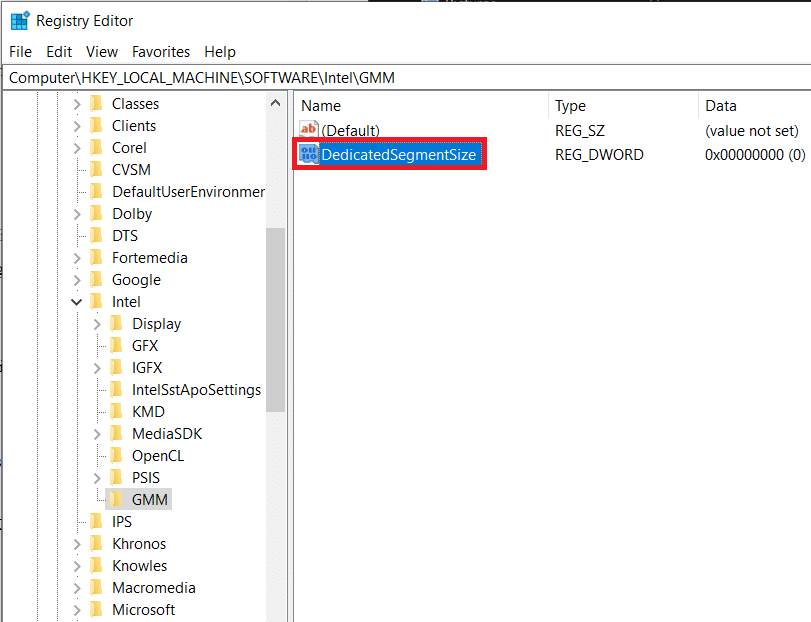
8. Right-click on DedicatedSegmentSize and select Modify (or just double-click on DedicatedSegmentSize) to edit the DWORD value.
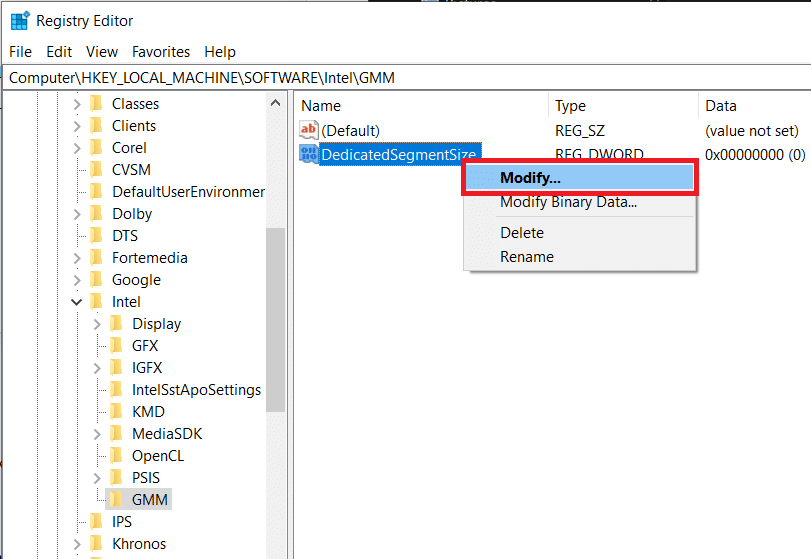
9. First, change the Base to Decimal and inside the text box below Value data, type a value between 0 to 512.
Note: Do not exceed the Value data over 512.
Click on OK.
10. Restart your computer and check Adapter Properties to verify if VRAM has been increased.
Method 3: Increase Dedicated VRAM via System Settings
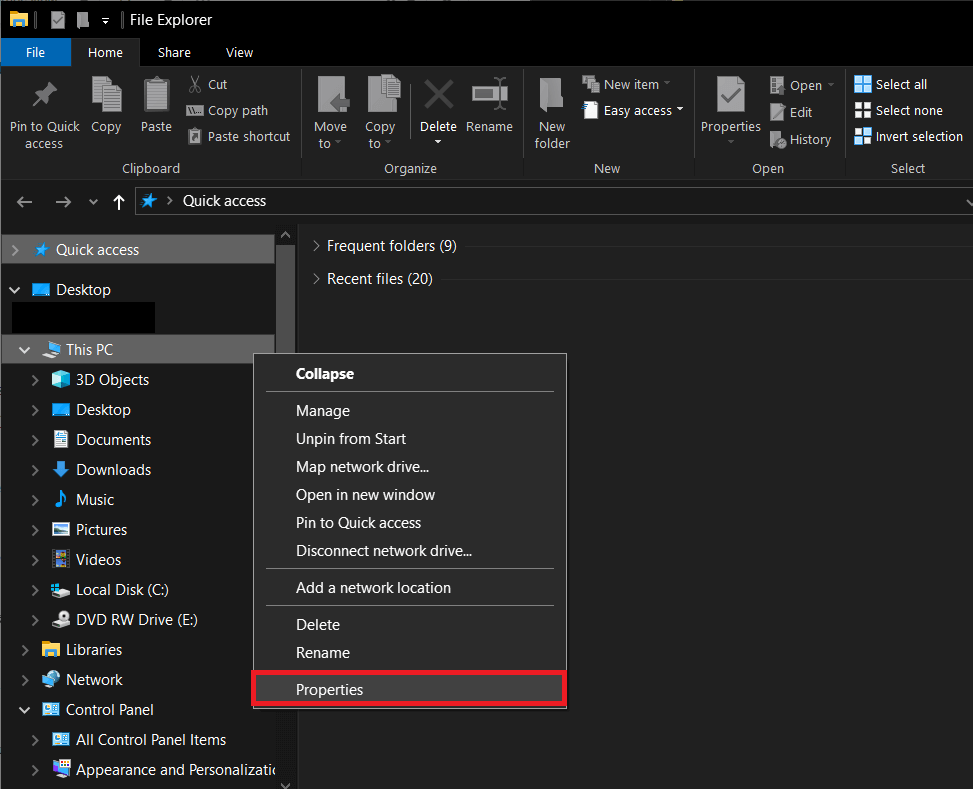
1. Open File Explorer by pressing Windows key + E on your keyboard or by double-clicking on the explorer icon on your desktop.
2. Right-click on This PC and select Properties.
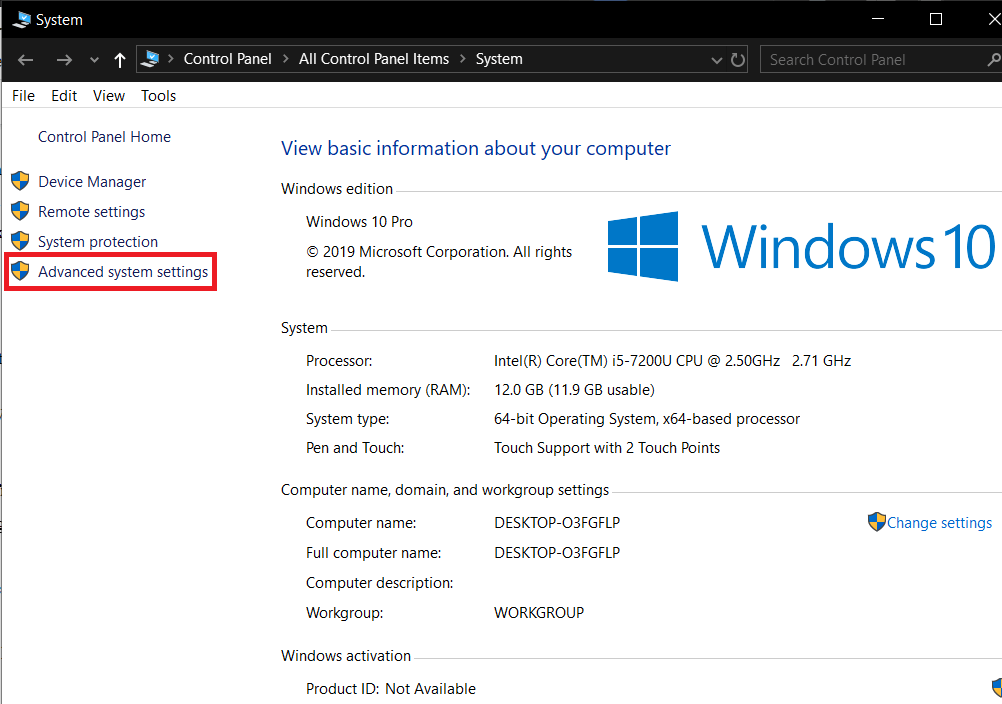
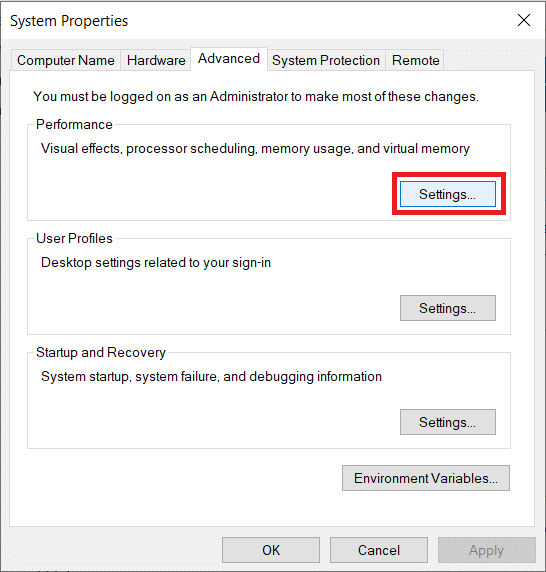
3. On the left side of the following window, click on Advanced System Settings.
4. Now, click on the Settings button under the Performance label.
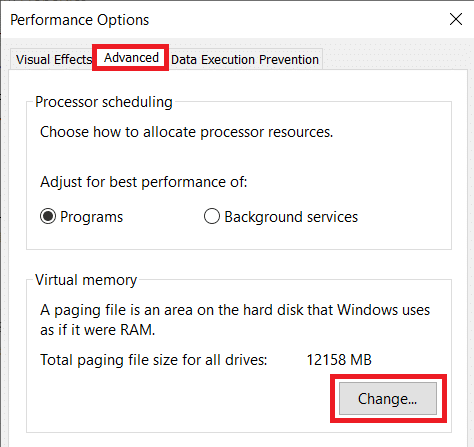
5. Switch to the Advanced tab and click on Change.
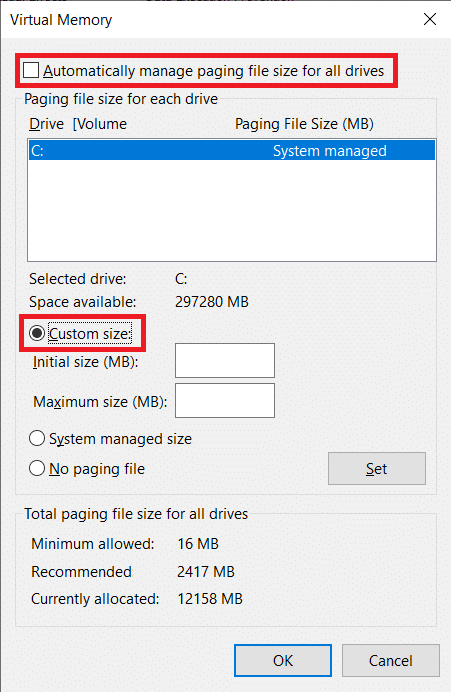
6. Uncheck the box next to Automatically manage paging file size for all drives, select C drive and enable Custom size by clicking on the radio button next to it.
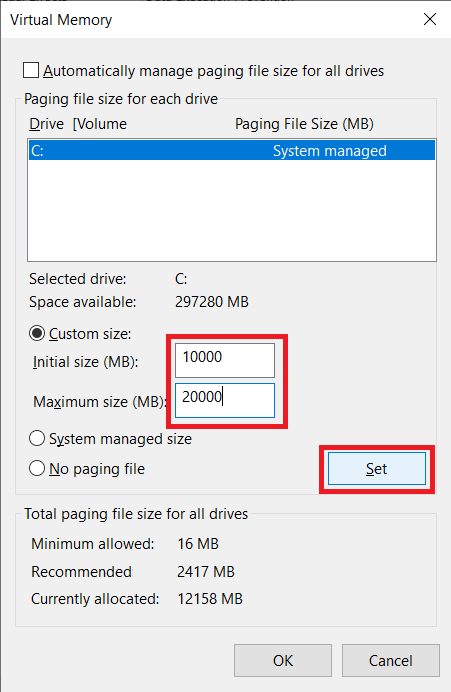
7. Finally, set the Initial size (MB) to 10000 and Maximum size (MB) to 20000. Click on the Set button to finalize all the changes we made.
Also Read: How to Make Background Transparent in MS Paint
Increase Dedicated VRAM in Windows 10 via the Registry Editor or through BIOS will only get you so far. If you are in need of more than just a slight bump, consider buying & installing a dedicated graphics card with appropriate VRAM or increasing the amount of RAM on your personal computer!