Google Docs is a powerful word processing application in the Google productivity suite. It affords real-time collaboration between editors as well as different options for sharing documents. Because the documents are in the cloud and associated with a Google account, users and owners of Google Docs can access them at any computer. The files are stored online and can be accessed from anywhere and any device. It allows you to share your file online so that several people can work on a single document simultaneously. There are no more backup issues as it automatically saves your documents.
Additionally, a revision history is kept, allowing editors to access any version of the document and keeps a log of which edits were made by whom. Lastly, Google Docs can be converted to different formats (such as Microsoft Word or PDF) and you can also edit Microsoft Word documents.
The Docs Editors help Overview of Google Docs, Sheets, and Google Slides outlines Google Docs as:
- Upload a Word document and convert it to a Google document.
- Format your documents by adjusting margins, spacing, fonts, and colors – and all such stuff.
- You can share your document or invite other people to collaborate on a document with you, giving them edit, comment, or view access
- Using Google Docs, you can collaborate online in real-time. That is, multiple users can edit your document at the same time.
- It is also possible to view your document’s revision history. You can go back to any previous version of your document.
- Download a Google document to your desktop in various formats.
- You can translate a document into some other language.
- You can attach your documents to an email and send them to other people.
Many people use images in their documents as they make the document informative and attractive. So, let’s see how to rotate an image in Google Docs on your PC or Laptop.
4 Ways to Rotate an Image in Google Docs
Method 1: Rotating an Image using the handle
1. First, add an image to Google Docs by Insert > Image. You can upload an image from your device, or else you can choose any of the other options available.
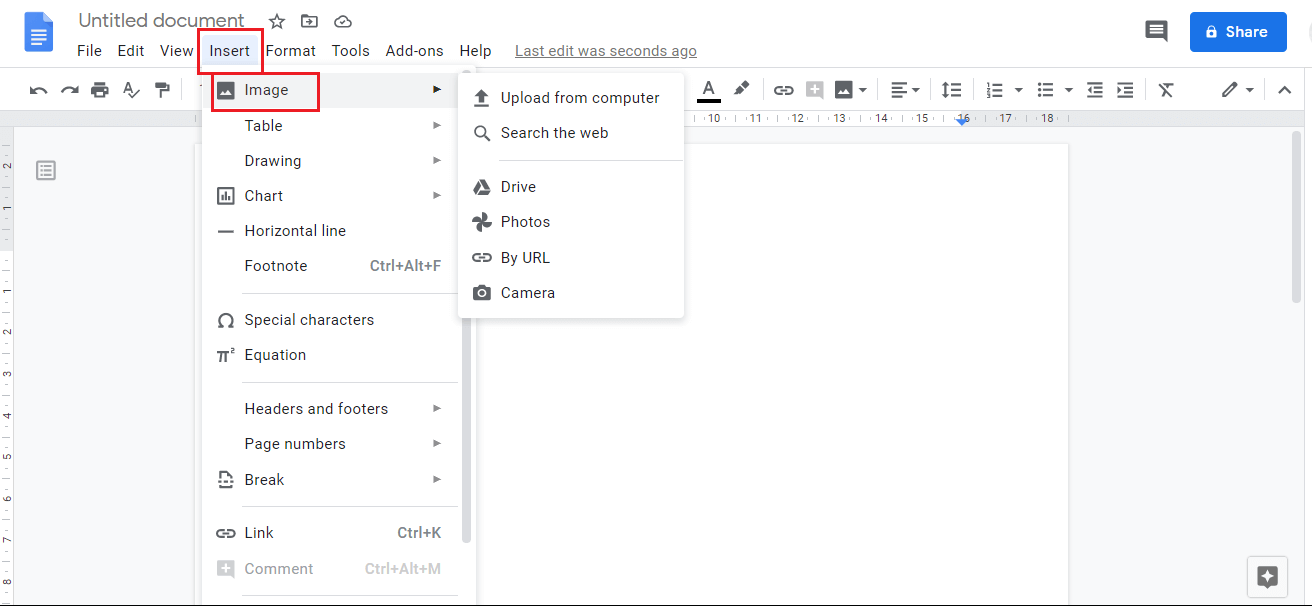
2. You can also add an image by clicking on the Image icon located on the panel of Google Docs.
![]()
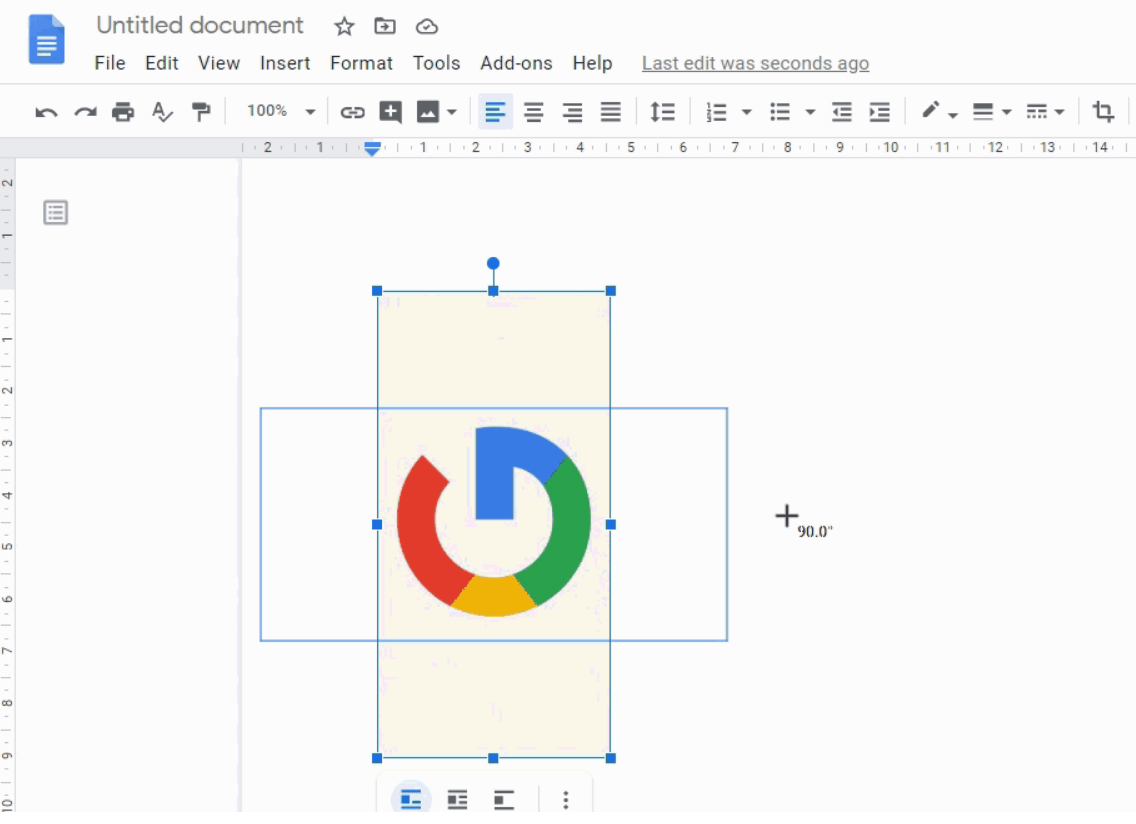
3. Once you have added the image, click on that image.
4. Keep your cursor over the Rotate Handle (the small circle highlighted in the screenshot).
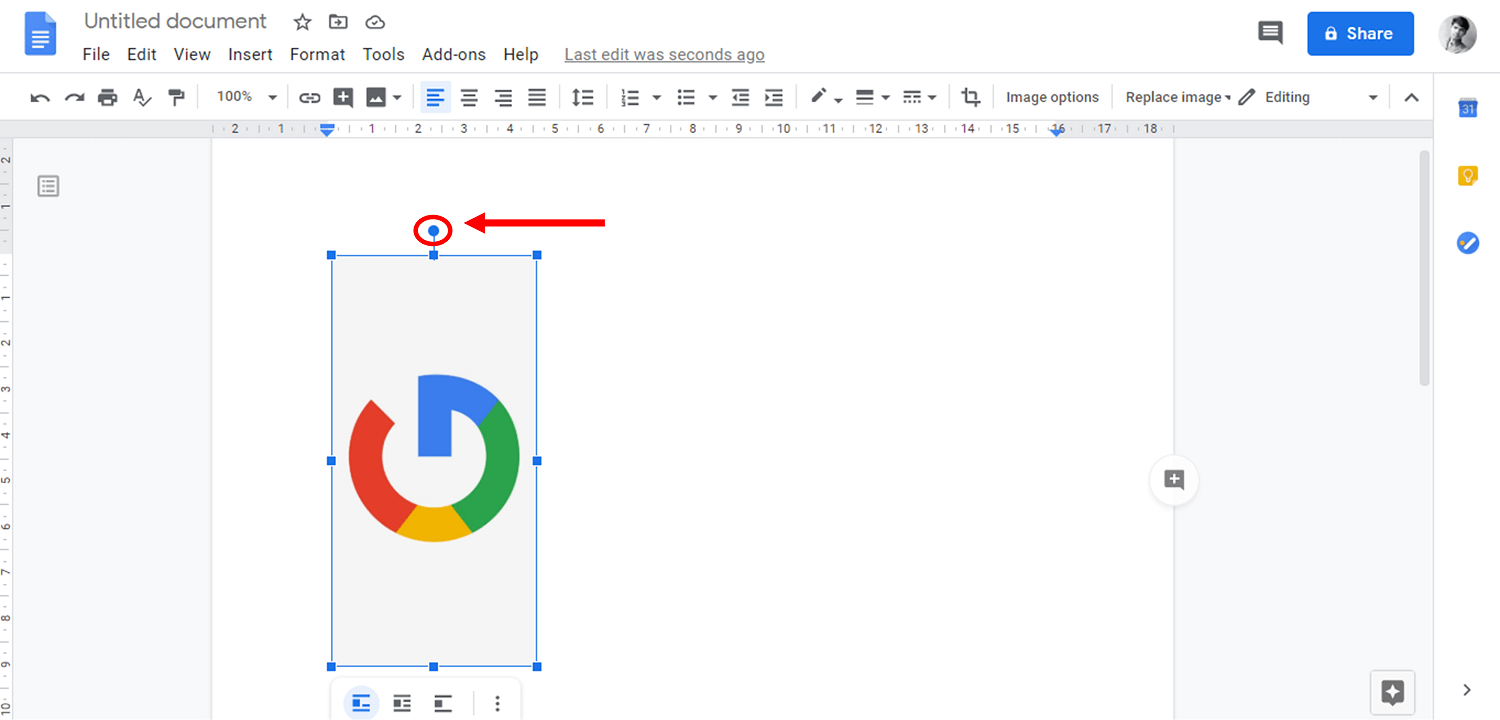
5. The cursor will change to a plus symbol. Click and hold the Rotate Handle and drag your mouse.
6. You can see your image rotating. Use this handle to turn your pictures in Docs.
Great! You can rotate any image in Google Docs using the rotation handle.
Method 2: Rotate the Image using Image Options
1. After you insert your image, click on your image. From the Format menu, Choose Image > Image Options.
2. You can also open Image Options from the panel.
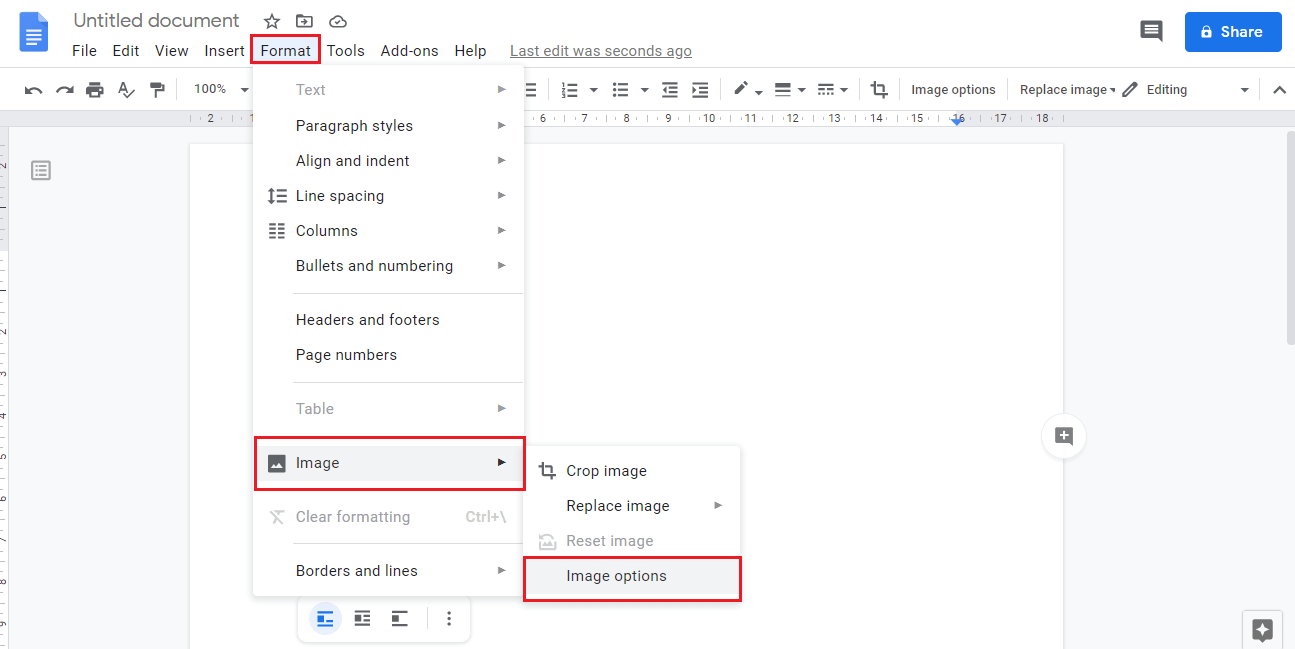
3. When you click on your image, some options would appear at the bottom of the image. Click on the three-dotted menu icon, and then choose All image Options.
4. Alternatively, you can right-click on the image and choose Image Options.
5. The image options would show up on the right side of your document.
6. Adjust the angle by providing a value manually or click on the rotation icon.
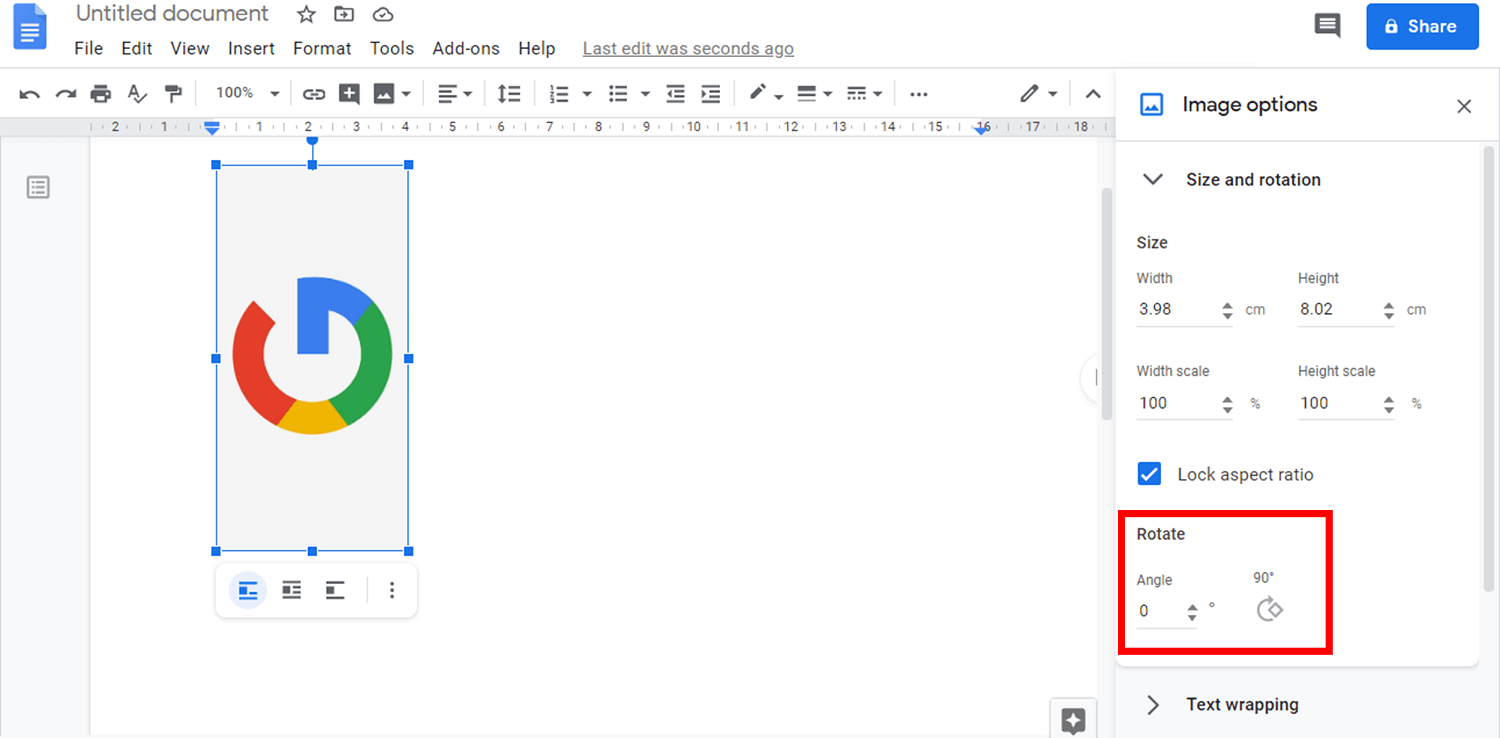
This is how you can easily rotate the image to any desired angle in Google Docs.
Also Read: How to Strikethrough Text In Google Docs
Method 3: Include the Image as a drawing
You can include your image as a Drawing in your document to rotate the picture.
1. First, click on the Insert menu and hover your mouse over Drawing. Choose the New option.
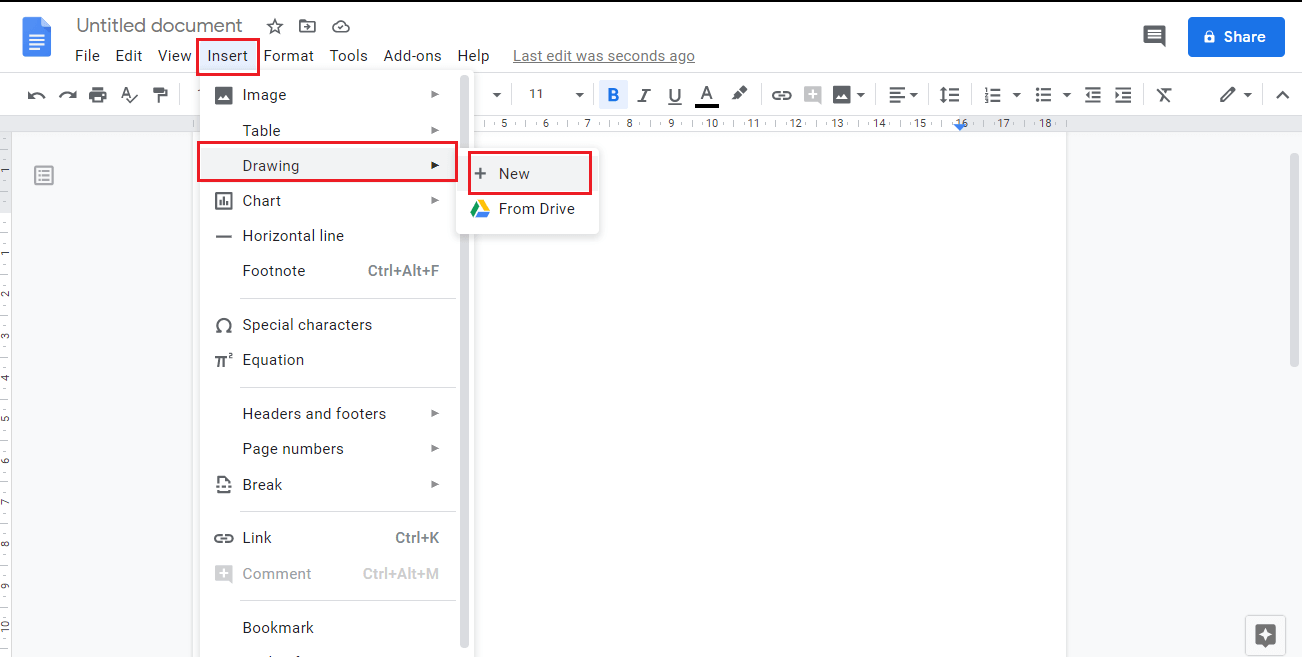
2. A pop-up window named Drawing will appear on your screen. Add your image to the drawing panel by clicking on the Image icon.
![]()
3. You can use the Rotation Handle to rotate the image. Else, go to Actions> Rotate.
4. Choose the type of rotation you required from the list of options.

5. You can also right-click your picture and choose Rotate.
6. Once you’re able to rotate the image using the above step, choose Save and close from the top-right corner of the Drawing window.
Method 4: Image Rotation in Google Docs App
If you want to rotate an image in the Google Docs application on your smartphone device, you can do it using the Print Layout option.
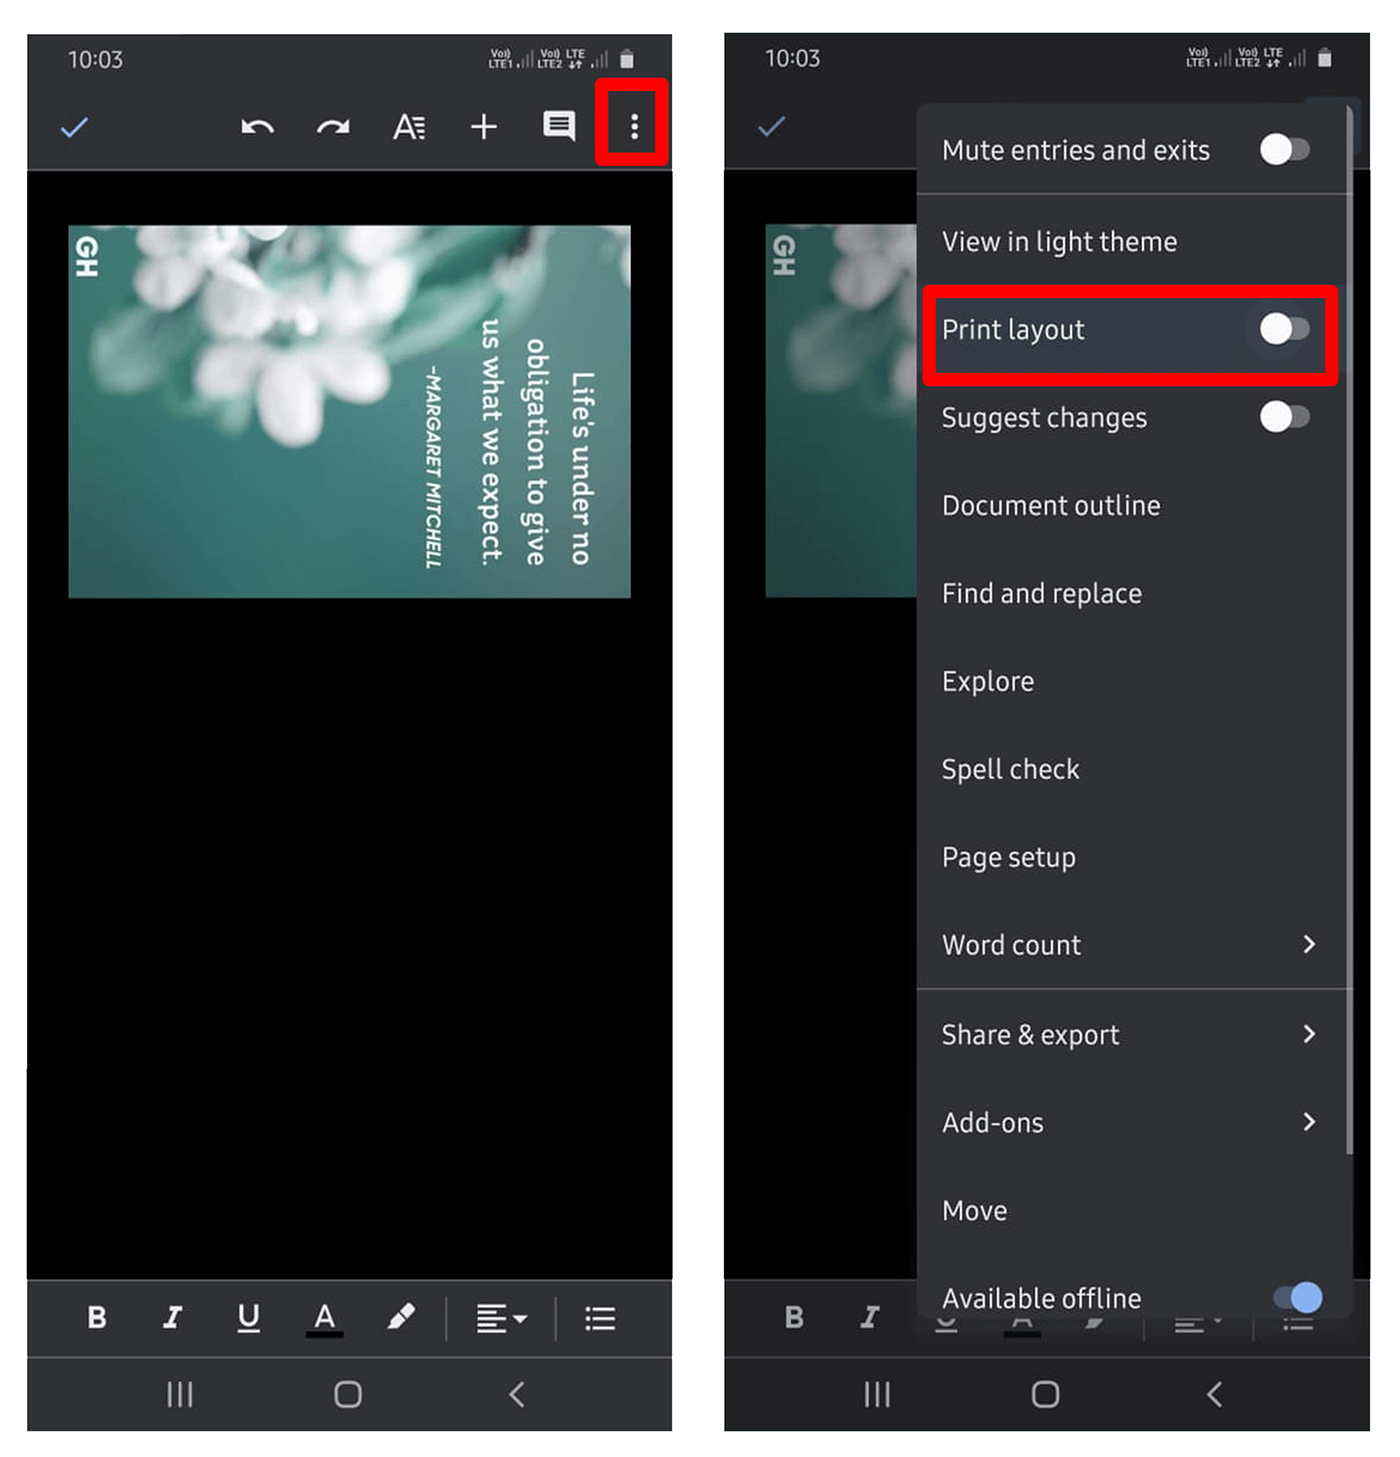
1. Open Google Docs on your smartphone and add your image. Choose the More icon (three dots) from the top-right corner of the application screen.
2. Toggle-on the Print Layout option.
3. Click on your picture and the rotation handle would appear. You can use it to adjust the rotation of your picture.
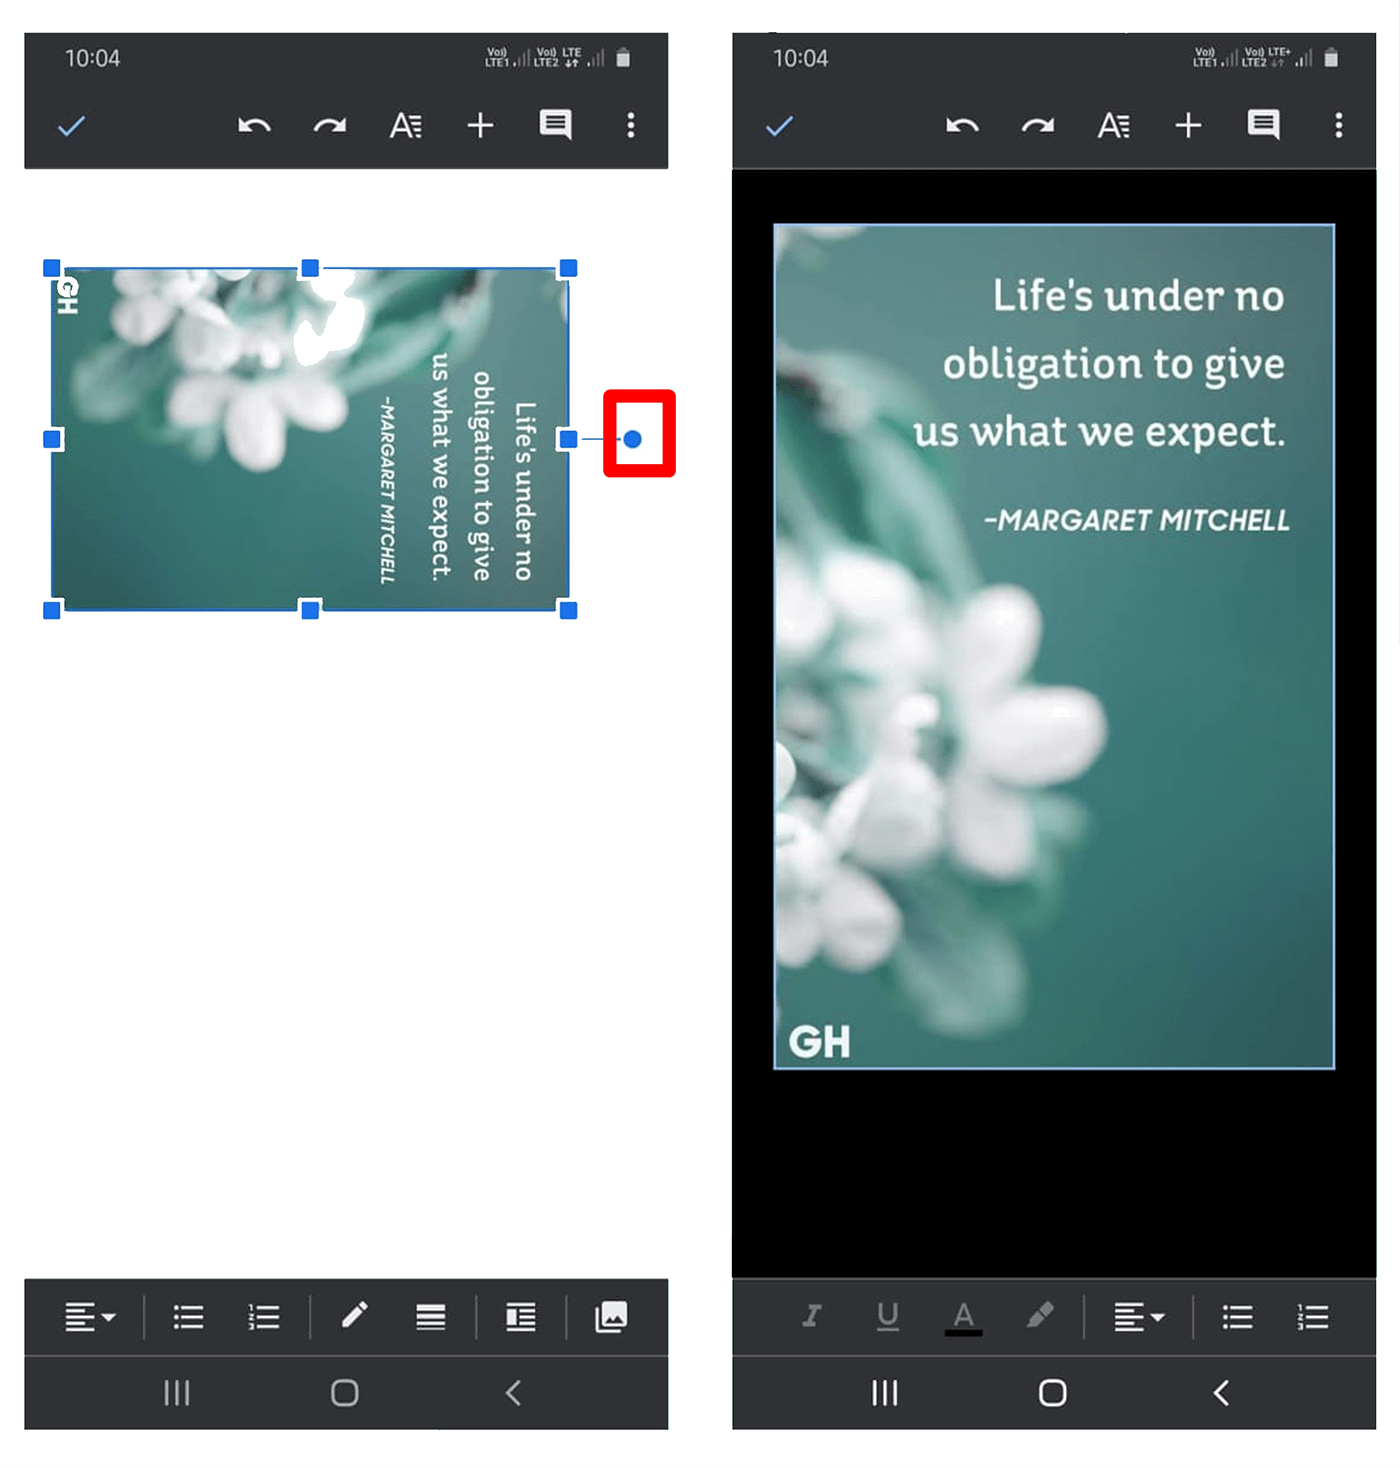
4. After you have rotated your picture, turn off the Print Layout option.
Kudos! You’ve rotated your picture using Google Docs on your smartphone.
Recommended:
I hope this article was helpful and you were able to Rotate Image In Google Docs. So, if this was helpful then please share this article with your colleagues and friends who uses Google Docs.